Tidehunter Guide by bOne7
Artist: Perfect World
  • Guide Navigation
  • HOME
  • ABOUT
  • DRAFTING
  • SKILLS & BUILDS
  • ITEMS & BUILDS
  • EARLY GAME
  • MID & LATE GAME
Author:
bOne7 & Co.
Date: 01/2019
Tags:
text
Tidehunter
Mechanics
Tactics
Analysis

Welcome

Welcome to bOne7's Book of the Tidehunter, a hero guide part of the Book of Dota series!

Here you will find all the information you need to learn to play Tide on a high level – from drafting and builds to the optimal playstyle in different lanes and situations. We hope you’ll enjoy this guide and find it useful!

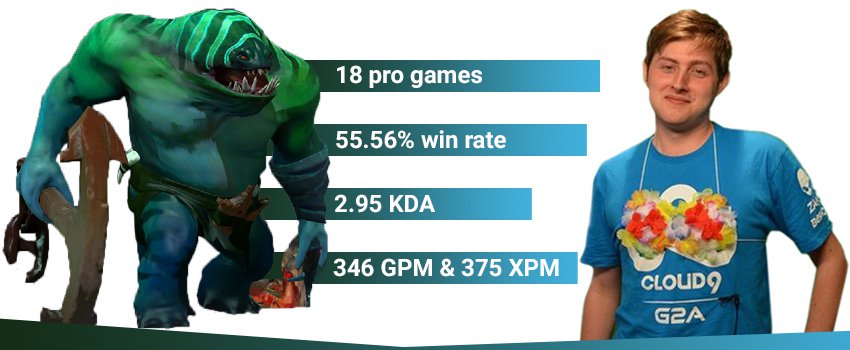
bone7 tide stats
TL;DR:

Draft: Pick him against melee cores and supports and avoid lanes that deal a lot of magical damage. Use him in 5-man strategies – he is not tactically versatile, usually with Tide you want to force 5v5 fights whenever you have Ravage and take objectives and map control out of them.

Early Game: You would usually put him in the offlane against an enemy melee carry. If you give him a support, he will be able to apply a lot of pressure and slow down the development of the enemy core. Against weaker lanes, he can do that even on his own. He is weakest in lane against ranged heroes with lots of magical damage harass.

Mid & Late Game: Use Anchor Smash and Kraken Shell to push out the waves and farm the jungle and get to important utility items for your team. The tankier you are, the more aggressive you will be able to farm and the more you will be able to push out the lanes, taking away map control from your opponents. Try to take 5-man fights with Ravage in key areas (e.g. around Roshan, when Pushing) and use successful fights to take objectives and secure the victory.

Authors

Pittner "bOne7" Armand
Endorsement & Info

bOne7 is a professional Dota 2 player playing primarily in the offlane position.

He rose to fame by being part of the legendary C9 lineup that made the most 2nd place tournament runs in premier events in the history of Dota. A TI veteran, bOne7 is without a doubt one of the most creative players out there and a great guy to learn from.

Nikolay "CTOMAHEH1" Kalchev
Info & Editing

CTOMAHEH1 started his pro career as a support in Basically Unknown together with Mind Control. Since then he has consistently been playing on the European T2 scene, most recently on Unchained Esports. 

His highest placement on the EU ladder is top 100 - he plays all roles (mainly support), which is untypical for high-ranking players and shows his great versatility and understanding of the game.

Toon "Jeten" Casteele
Writing

An IT dev by day, a Dota enthusiast by night.

Toon is not a stranger to writing Dota guides - he has a whole series of them in r/Dota2! He has a very versatile hero pool and loves watching and analyzing pro games.

Kyril "MrNiceGuy" Kotashev
PM & Editing

Esports and gaming enthusiast since forever and founder of DotaHaven.

Has been playing Dota since 2005 (5.84). An Ancient I player in Dota 2.

In with the tide.

Leviathan, the Tidehunter, is a melee strength hero with great survivability and an ultimate that can change the tides of a game. Ravage is very powerful, but one thing that truly distinguishes Tide from other heroes with great team fight ultimates is his reliability. The dispel mechanic of Kraken Shell means it’s almost impossible for enemies to lock you down and kill you before you are able to use Ravage. Moreover, the huge AoE means it’s quite hard to miss it, making Tide one of the best picks to guarantee team fight dominance for your lineup.

Tide Loadout
Stats
Level 1
Level 15
Level 25
STR
22
High
68,2
Medium
101
Very High
AGI
15
Low
36
Low
51
Low
INT
16
Low
40
Low
57
Low
Attack
47-53
Medium
93-99
High
126-132
High
Armor
2.4
Medium
5.76
Low
8.16
Low
Resistance
26
Medium
30
Medium
32
Medium
HP
695
Very High
1734
Very High
2477
Very High
MP
267
Low
543
Low
747
Low
MS
302
High
305
High
307
Medium
STRENGTHS

MAJOR

Tanky:
Thanks to Kraken Shell, Tidehunter is very hard to both disable and damage. This makes him a strong laner and as mentioned allows him to use his Ravage reliably in fights.

Dominates team fights:
Tidehunter’s ultimate, Ravage, has a huge Area of Effect, damages, and disables enemies for a long time. Its only downside is its long CD.

Roshan fights:
Tide is great in Rosh fights for three reasons: he can reduce the armor of Rosh, he can tank him and most importantly he can secure a fight around the pit where it would be impossible to avoid the Ravage.

MINOR

Great laner against melee heroes:
Anchor Smash is a very cheap source of harassment that also applies a damage reduction debuff and makes it very hard for your opponent to contest last hits. The reason it’s much better against melee heroes is Anchor Smash’s short range.

Great wave/jungle camp clear:
Given that Kraken Shell can block almost all of the damage that comes from creeps (even Ancients) and Anchor Smash does Physical damage in an Area of Effect around him, he’s great at safely clearing big creep waves or stacks. This also accelerates his farming speed.

WEAKNESSES

MAJOR

Can easily be ignored when Ravage is down:
If his ultimate is already used in a fight, Tidehunter is easy to ignore because he is a tanky hero with a low damage output. If enemies manage to time their BKBs and other defensive mechanisms to avoid your Ravage, it will be difficult for you to have a game-changing impact in the fight. Moreover, Tide has to get close to hit people with Anchor Smash and can be kited.

MINOR

Tactically inflexible:
Tide’s biggest strength (dominating team fights) determines his playstyle to a large degree. He will search for team-fights with his team when Ravage is up and he will farm when it’s down. This could allow your opponents to counter him tactically – usually by actively avoiding team fights and split-pushing.

Doesn’t hit towers:
Sure, you can help your team tank up under the tower and you can buy utility items, which help your team push. But on your own, you don’t do tower damage, which means you cannot push (or split-push) without the help of damage-dealing allies.

Replays

VGJ.Storm vs Optic Gaming, The International 2018 NA Qualifiers

Match ID: 3969656979
Replay:

In this game, Tide is played by Sneyking with great success. Notice his item build – he invests in Pipe to counter the enemy spell damage and then goes for Heaven’s Halberd to counter the enemy Huskar. He never buys Blink – he decides it’s more important for him to play the role of a frontline tank for his two ranged damage dealers. Moreover, his team has Clock to start fights and Tide can save his Ravage for counter-initiating instead of initiating. It’s also worth noting that the enemy team also has a 5-man lineup and they are unlikely to try to avoid fights – the game is going to get decided by 5-man clashes, and investing in more items that give raw power instead of mobility makes sense.

Drafting

Tidehunter is a solid choice as an offlaner in any game but fits certain line-ups more than others. He is not the most versatile hero, so if you want to leave your draft open you should probably pick him a bit later into the draft. Picking him late will also allow you to use him to counter enemy melee cores and supports once they’ve been picked – picking him early means your opponents will pick heroes that deal with him better in the lane.

One of the biggest reasons to draft Tidehunter is for his huge 5-man presence. Although it has a long cooldown, his ultimate can easily win team fights and net your team a great advantage. Moreover, he is a relatively fast farmer that can invest a lot of gold in team utility items that make your team fights stronger.

This requires your team to be good at the 5-man Dota playstyle. Heroes that can follow-up damage wise in a team fight are essential. Moreover, your allies should also be able to push towers or take Roshan fast enough after a won fight because Tide doesn’t provide enough damage on his own.

Position 3 Offlane:

Thanks to Kraken Shell and Anchor Smash, Tidehunter is an almost impossible hero to kick out of lane. Given some levels, he becomes even harder to kill. With the help of a single support, he can pressure the enemy farmer tremendously. If he is playing against melee heroes, he can even handle the lane on his own.

Synergy

Good friends to have are:

Heroes with team fight damage:  Gyrocopter, Disruptor, Sand King, Medusa, Leshrac, Ancient Apparition, Shadow Fiend

Gyro
Disruptor Portrait
Sand King
Medusa
Leshrac
Ancient Apparition Portrait
Shadow Fiend Portrait
Ravage + follow-up damage = won team fights

Tide provides a lot of AoE control. In order to secure your team fights, you will also need good AoE damage.

Backline heroes: Sniper, Lina, Drow, Weaver, Zeus

Sniper
Lina
Drow Ranger
Weaver
Zeus Portrait
It’s easy for your ranged damage dealers to stand behind Tide and deal damage.

Tide is a great frontline tank and makes it very difficult for the enemy team to reach your team’s squishier damage dealers and supports. If the enemy team reaches them, you can always use Ravage to save them. He also buys utility items that make his squishier teammates a bit tankier.

5-man Pushers: DP, DK, Leshrac, Pugna, Shadow Shaman

Death prophet
Dragon knight
Leshrac
Pugna
Shadow Shaman
Draft Tide in lineups strong at 5-man Dota and pushing.

Tide is great at securing team fight victories, but he needs another hero to secure the objectives for him. The heroes above are just an example – the overall lineup is more important than the individual heroes.

Counters

Strong Against:

Melee Carries:  Spectre, PL, WK, PA, Void

Spectre Portrait
Phantom Lancer
Wraith King
Phantom Assassin
Faceless Void Portrait
Make sure to lane him against your opponent’s melee farmer.

Anchor Smash is a nightmare for melee cores in the lane. It is a great source of harass and it makes last-hitting or fighting back very hard. Melee carries which need to get as much farm in the lane as possible and don’t have good magic damage sources are the most vulnerable.

Pick-off heroes:  Storm Spirit, Nyx Assassin, Spirit Breaker, Slardar, PA

Storm spirit
Nyx
Spirit breaker
Slardar Portrait
Tide counters their playstyle and is very hard to pick-off himself.

Tide is a 5-man Dota hero and with him, in the draft, his team usually moves as a whole unit, which makes picking heroes off hard. Even if his teammates get initiated upon, Ravage is a great counter-initiation tool. Tide himself is almost impossible to kill before he uses Ravage because of the dispel of Kraken Shell.

Illusions:  Phantom Lancer, Chaos Knight

Phantom Lancer
Chaos Knight
Tide is a counter to heroes that rely on mass units to have an impact in team fights.

Krakken Shell + Anchor Smash make you almost immortal versus mass units. Ravage is also amazing because they cannot be protected by BKB and it is guaranteed to lower their fight impact.

Tide can also be good against most other heroes that use units (Meepo, Lycan, BM). The catch is that he is great against them in team fight, but if they start split-pushing (which they usually do), he is terrible at catching them, which reduces his win rate against them.

Weak Against:

Split-Pushers: Lone Druid, Arc Warden, Brood, Meepo, NP, Lycan, Anti-Mage

Lone Druid
Arc warden
Broodmother Portrait
Meepo
Nature's Prophet Portrait
Lycan
Anti mage
Good in the lane against mass units, weak mid-late against split-push.

Tide is strong against some of these heroes in the lane because of his Kraken Shell and Anchor Smash (those skills counter their units) but becomes weak against them later on because of his playstyle. In the mid and late game, they start avoiding direct 5-man fights and they start split-pushing, which makes him helpless – blowing your Ravage for a single gank is not the most efficient use of the spell, especially if the lanes are pushed into your base and you cannot take an objective out of it.

Against such lineups you want make use of your good start, get Crimson (and/or other utility items) and threaten their high ground together with your team ASAP. You need to push before they can start split-pushing effectively. If the game goes late, Aghanim’s might be a good choice to help you out-push the waves.

Good saves and sustain: Chen, IO, Oracle

Chen
IO Wisp
Oracle Portrait
Tide struggles against heroes that can out-last his Ravage.

These heroes can negate most of what Ravage did, saving their allies. Once Ravage is blown and your team hasn’t been able to secure a kill, the enemy team can reinitiate with a lot higher chances of winning the fight because without Ravage your impact is lower.

Chen and Io can also be a big problem because Io can help his cores split-push, while Chen can split-push with his units.

Strong laners: Ursa, Monkey King, Sky, Shadow Shaman

Ursa Portrait
Monkey king
Skywrath Mage Portrait
Shadow Shaman
Try to avoid laning against those heroes.

One of Tide’s strengths is pressuring his lane opponents thanks to Kraken Shell and Anchor Smash. The heroes above are not affected by those two mechanisms too much – Ursa and MK deal very high damage with their passives, Sky spams magical nukes and SS has a high-damage ranged attack coupled with a magical nuke. This means they will be able to zone Tide out and he will have to play more passively, even jungle. This is a bad situation to be in with Tide because he will not be able to create a lot of space for his allies early on. His opponents will be free to pressure his carries more often, which can result in multiple lost lanes.

Skills

Gush
Kraken Shell
Anchor Smash
Ravage

Summons a gush of water to damage an enemy unit, reducing their movement speed and armor. Lasts 4 seconds.

STATS

Cast Animation: 0.3+0.6

Cast Range: 700

Damage: 110/160/210/260

Armor Reduction: 4/5/6/7

Move Speed Slow: 40%

Duration: 4

CD: 12

Mana: 90/100/110/120

Aghanim's Scepter

Gush becomes an AOE wave that travels forward to its maximum range (although at a slower speed than the non-Aghs projectile). It makes it a great skill to anti-push and clear waves together with Anchor Smash.

Gush

Info:

Gush is a good single target nuke that gives a lot of utility –slow and armor reduction. Its main problem is that it is quite mana intensive for Tide, who has a small mana pool and another active skill that he wants to spam in the lane. That’s why early on it is used mostly for kill attempts – the slow is very significant and the armor reduction will help your allies focus the target down with right-clicks.

Use it before Anchor Smash in kill attempts, because Anchor deals physical damage and makes good use of the armor reduction. 


Thickens Tidehunter's hide to passively block a portion of any incoming physical attack damage. The hide also removes negative status effects if the damage taken crosses a threshold. Does not stack with items that provide Damage Block.

STATS

Damage Block Proc Chance: 100%

Damage Block: 12/24/36/48

Damage Threshold: 600/550/500/450

Threshold Reset Timer: 6

Kraken Shell

Mechanics:

  • Gives 100% block chance on enemy attacks.
  • Does not stack with other types of damage block.
  • Applies a strong dispel every time you take a total of 600/550/500/450 damage.
  • The threshold for dispel applies to all player based damage after removal, but without calculating in damage block.

Use:

You can freely tank entire creep waves and stacked neutral camps without taking almost any damage with higher levels in the spell. It helps you to feel confident when front-lining: thanks to the strong dispel when enemies focus you, you can still reliably cast Ravage regardless of the disables they throw at you.

Be very careful of the break mechanic (Silver Edge), because it can disable your passive and get you killed without using Ravage if you play over-confidently. Undispellable silences and disables are also something you should be playing around (Doom, Fiend’s Grip, etc.).

The fact that Stout doesn’t stack with Kraken doesn’t necessarily make it a forbidden item – if you e.g. plan to get a fast Crimson for your team, then you can get Stout and delay any levels in Kraken for later on in the game. In any other case, however, you want to start the game without Stout and invest at least two levels in Kraken, simply because it is stronger than Stout.

Tidehunter swings his mighty anchor to attack and deal bonus damage to nearby enemies and reduce their attack damage.

STATS

Cast Animation: 0.4+0.3

Radius: 375

Attack Damage Bonus: 45/90/135/180

Attack Damage Reduction: 30%/40%/50%/60%

Duration: 6

CD: 7/6/5/4

Anchor Smash

Mechanics:

  • Affects Ancient creeps, but not Roshan.
  • Reduces base (white) damage, not bonus damage
  • Triggers attack modifiers
  • It does physical damage, so it synergizes with armor reduction (like from Gush)

Use:

Anchor Smash is your most versatile skill early on.

Harass: it is cheap and it deals decent damage. More importantly, the damage reduction means that enemies cannot easily fight-back. If they start trading hits they will lose the exchange. The obvious drawback is its low range. It is much stronger against melee heroes – ranged heroes can kite you and avoid getting hit.

Farm: it is very cheap in terms of mana, which makes it spammable. It is your main tool for clearing creep waves and stacks. Moreover, it makes it much easier for you to contest last-hits because enemies will have significantly lower damage.

Stack the jungle, preferably even Ancient creeps, and use this skill to accelerate your farm. Hit Anchor Smash on all units and you can safely take down big stacks without taking any damage thanks to the damage reduction and damage block from Kraken Shell.

Tips:

Use the threat of Anchor Smash harass in lane by doing an animation cancel (use the STOP command halfway your cast animation) when close to the enemy hero to keep them out of range for last hits. This works especially well against melee cores because they don’t want to have their damage reduced while last hitting but they have to get close to the creep wave to get farm.

Slams the ground, causing tentacles to erupt in all directions, damaging and stunning all nearby enemy units.

STATS

Cast Animation: 0.3+0.57

Max Effect Radius: 1250

Effect Width: 250

Damage: 200/300/400

Stun Duration: 2.4/2.6/2.8

CD: 150

Mana: 150/225/325

Ravage

Mechanics:

  • Moves away from Tidehunter in a 1250 radius at a speed of 725.
  • The hit radius of the tentacles is 250 units. Meaning units right next to Tidehunter will immediately be hit. That makes it a good idea to blink right next to your primary stun target.

Use:

Once you get to level 6 don’t be afraid to use this on a single enemy core (when you have allies with enough damage to secure the kill). Don’t try to save it for big team fights, as they are unlikely to happen soon enough.

Later in the game, pressure the enemy when you have Ravage ready. Don’t be afraid to force a fight and hold the threat of Ravage until you can hit multiple heroes. The spell is best for counter-initiation when the fight has already started because this way your allies will be able to use the stun time most efficiently. Moreover, Kraken Shell makes it extremely unlikely that you will die before being able to cast it.

Using it for initiation is also possible, but you need to make sure your allies can follow-up right away. The stun is not very long, which means that it can easily go to waste if your allies cannot reach the enemy heroes in time.

Tips:

  1. Ravage as close as possible to enemy heroes with instant escapes or magic immunity to give them very little time to react. If you don’t have Blink, it might be a good idea to try to wait-out their BKBs if possible and use Ravage afterward.
  2. In case the enemy team has a Rubick, make sure to cast Anchor Smash or Gush right after Ravage.

Skill Builds

Which skill you get on lvl 1 depends on the situation.

  • You usually want to get Anchor Smash because it is best at securing last hits, especially against melee opponents.
  • You go for Gush if you are playing in a dual or trilane – the slow and armor reduction will help your allies deal a lot of damage to your opponents with attacks.
  • Going for a level in Kraken is also possible if you are alone in the lane and you are facing ranged heroes that are going to harass you a lot with attacks.


Standard Build
Anchor Smash
1
Kraken Shell
2
Kraken Shell
3
Gush
4
Anchor Smash
5
Ravage
6
Anchor Smash
7
Anchor Smash
8
Kraken Shell
9
Talent Icon
10
Kraken Shell
11
Ravage
12
Gush
13
Gush
14
Talent Icon
15
Gush
16
Ravage
18
Talent Icon
20
Talent Icon
25
very hard to kill past level 3; great in the lane against melee heroes; good farming speed;
Less single target damage due to low levels in Gush;

Prioritizing Anchor Smash first will at the same time maximize the amount of harass you can output and the number of last hits you can take in the lane. It also helps greatly to take down stacked camps, which is very useful to have if you get zoned out of the lane.

At level 2, Kraken Shell blocks 24 damage and most Ancient creeps do around 60 damage. Given that Anchor Smash reduces their damage by 60% at level 4. This means that they will do very little damage to you. This is why 2 points in Kraken Shell and is enough to take even ancient stacks. Getting two fast levels in Kraken will also make you extremely hard to zone out in the lane.

A value point in Gush is valuable for kill attempts because of the slow (which is constant on all levels) and the armor reduction. Because you get most of the utility and because it is relatively mana intensive, you usually don’t get more levels into Gush.

Talents

+250 Damage

25

25% CD Reduction

-5 Gush Armor

20

+30 Kraken Shell Damage Block

+25% Anchor Smash Damage Reduction

15

+40% XP Gain

+100 Gush Damage

10

+25 Movement Speed

Lvl10Both talents are decent but not too significant: the MS is good if you don’t intend to get a fast Dagger because it will boost slightly your mobility. The Gush damage is good for kill attempts and very strong if you intend to buy Aghanim’s.

Lvl15: Your later talents aren’t that game-breaking, so getting the huge experience gain is not that important as well. The damage reduction is the usual choice unless you are playing against cores that don’t buy a lot of stat items (the reduction doesn’t work on bonus damage).

Lvl20: In a lot of cases you’ll want the extra damage block just to be extra survivable, but the added armor reduction on Gush can definitely be the right pick in games where your cores deal high single target physical DPS.

Lvl25: 25% cooldown reduction on Ravage is significant. Moreover, Tide buys a lot of active utility items and this talent reduces their CD as well. It’s never the wrong talent to take, but 250 damage shouldn’t be underestimated. If you feel like you are often in range to hit people and control on its own doesn’t win you the fight, this talent can have a big impact. Combined with the armor reduction talent and an item like AC you will start dealing very significant right-click DPS.

Item Builds

As is the case with most utility cores, Tide has a very versatile and situational item build. You usually need to decide which items to get and in what order based on the heroes against you. You usually want to invest in items that make yourself and your allies tankier, so that you can force fights with your allies sooner rather than later.

Blink Dagger has been a core item for Tide for many years, but it is also not a default buy. You usually want to have it after at least one or two tankiness items that allow you to force fights more easily. Skipping it altogether is also possible (but unusual) if you have other initiators in your team and you simply want to stay in the frontline to abuse your tankiness.

Standard Utility Build

The standard Tidehunter build is geared towards his 2 main strengths: his survivability and Ravage. Because of this in this example, you get a quick Hood to boost your survivability and start playing aggressively and a Blink afterward to be able to enter fights at the right time with Ravage.

This build order, however, is not set in stone. Hood is a great item on Tide versus a magic damage and a common choice because he has decent right-click protection, but if you are facing little magic damage you can go for alternative survivability items like Greaves or even Crimson, whichever will benefit your team more.

When to get your Blink is also situational – if your team is snowballing and you are playing as a frontline tank, you can delay the Blink in favor of additional tankiness items. If you need to hit a great Ravage to win team fights, however, it’s a safer option to get Blink right after your first survivability item.

Your typical late game choices are Shivas’s for the armor and mana pool, Refresher to double the impact of your Ravage and Octarine to decrease the CD of your Ravage and to make you even harder to bring down.

Starting items
Tangoes
Tangoes
Healing_Salve_icon
Mango
Mango
Mango
Early Game
Magic wand
Boots of Speed
Vladmir's Offering
Arcane Boots
Hood
Mid Game
Blink_Dagger_icon
Pipe
Guardian Greaves
Late game
Shiva's_Guard_icon
Refresher orb
Octarine_Core_icon
Tangoes
Tangoes
Healing_Salve_icon
Mango
Mango
Mango

Mango(es): Now that Mango gives you some HP regeneration, buying a couple of these not only helps you keep your Anchor Smash spam up, it also sustains you. Great item for almost any offlaner.

Magic wand

Magic Stick: Kraken protects you from right-click harass, Stick is a solution against spell harass.

Boots of Speed
Vladmir's Offering

Vlads is a standard early game item because the AoE attacks of Anchor Smash heal you for a significant amount. The stats and mana regen are also nice and the aura is great for 5-man Dota: your preferred playstyle.

Arcane Boots

Arcane Boots: You need to keep up your Anchor Smash spam for harassing and farming. Arcane Boots help you do this and keep your teammates’ mana up when you push lanes and force a team fight.

Hood

Hood: since your Kraken Shell + Anchor Smash protect you fairly well from physical damage, usually to make yourself very hard to kill you need Hood – it’s the best source of protection against magical nukes.

Blink_Dagger_icon

Blink Dagger: The item simply allows you to get into perfect position for Ravage. If you need to initiate with Ravage, Blink is a must. If you have other frontline heroes, Blink will also allow you to enter the fight just at the right time and counter-initiate with your ultimate. If you act as a frontline hero yourself, however, and your team has other sources of initiation, you can delay Blink. Holding onto your Ravage for later into the fight is a viable strategy and you don’t need Blink to do this – you need survivability.

Pipe

Pipe of Insight: It’s a logical built-up from Hood to make your teammates tankier in fights.

Guardian Greaves

Guardian Greaves: The logical follow up to Arcane Boots for a tanky team fighting offlane hero. Greaves give you some good stats and a great aura. On top of that, you get an active that gives a burst HP and mana restore for your entire team as well as a second dispel. 

Shiva's_Guard_icon

Shiva’s Guard: Makes your Blink-Ravage initiation stronger, makes you tankier against physical damage and gives you the required mana pool to invest into a Refresher Orb.

Refresher orb

Refresher Orb: Refreshes Guardian Greaves and Pipe of Insight, but obviously, you mainly get this for the double Ravage which, at this point, can win games on the spot. Keep an eye on your mana pool when you have this though and don’t forget to use Greaves or Arcane Boots twice to make sure you can cast Ravage twice.

Octarine_Core_icon

Octarine Core: Really good late game item for Tide, decreasing not only Ravege CD but all your other spells too, also synergizes really well with your 25% CD Reduction on 25lvl.

Other Items

Early & Mid:
Stout Shield
Soul_Ring_icon
Phase boots
Helm of the Dominator
Solar Crest Icon
Blade Mail
Crimson Guard
Mid & Late Game:
Aghanim's_Scepter_icon
Lotus Orb
Assault_Cuirass_icon
Desolator Icon
Daedalus
Stout Shield

Stout Shield: Stout doesn’t stack with Kraken shell, and for this reason it is rarely bought on Tide. If you intend to go for a fast Crimson build, however, you can choose to get Stout as a starting item and to delay investing points in Kraken a few levels.

Soul_Ring_icon

Soul Ring: An alternative source of Mana Sustain to Arcanes. It should be combined with some source of HP sustain like Dominator or Crimson.

Phase boots

Phase Boots: great if you want to play more aggressively. The MS helps you to get in position for an Anchor Smash easier and the armor makes you even tankier against right-clicks.

Helm of the Dominator

Dominator: Extra regen is useful especially if you go for Soul Ring. The creep helps you play more aggressively, push-out and dominate your lane.

Solar Crest Icon

Solar Crest: The evasion makes you almost impossible to bring down with right-clicks. It’s a great item to have if you are going to stay on the frontlines and push. The active skill also synergizes offensively with Gush and Anchor Smash (which deals physical damage) as well as with your lvl25 DMG talent.

Blade Mail

Blade Mail: If you are getting focused down and kited Blade Mail is a great way to keep yourself alive.

Crimson Guard

Crimson Guard: It’s a counter-intuitive item on Tide because of Kraken, but it is the best team utility item against physical damage dealers. If you are going for Crimson early on you get Stout Shield and skip the early levels in Kraken Shell in favor of more levels in Anchor and Gush (it’s also possible to get Kraken as usual and invest in Crimson Later on).

Aghanim's_Scepter_icon

Aghanim’s Scepter: If you’re lacking ways to push out waves and are forced to defend your base, Agh’s is probably the best item choice. Gush in an Area of Effect can help tremendously to give your team some breathing room. Try to anticipate when you need to buy this so you can adjust your talents and build. Usually, you want to have both Soul Ring and Arcanes before Agh’s to be able to spam Gush very often once you get it.

Lotus Orb

Lotus Orb: You are a frontline hero and Lotus makes you hard to focus down with single target spells. This is especially valuable if you are facing dangerous abilities which are undispellable by Kraken like Doom, Lasso or Fiend’s Grip. Lotus is also great for dispelling powerful disable from your damage-dealing cores.

Assault_Cuirass_icon

Assault Cuirass: Buy only in very long games when your team lacks enough damage and you want to get your lvl25 DMG talent. The attack speed and armor reduction (in combination with your Gush armor reduction) will make you a very serious physical damage dealer and a strong tower-hitter.

Desolator Icon

Deso: the armor reduction from Gush, Solar Chrest and Desolator make your Anchor Smash hits devastating. The bonus damage is applied to your Anchor Smash hit.

Daedalus

Daedalus: only bought if you've invested heavily into armor reduction and you want to make your Anchor Smash devastating. The bonus damage and crit chance are applied to your Anchor Smash hit. You could get ridiculous crits with your lvl25 talent.

Early Game

Tide 350px

Thanks to Anchor and Kraken Tide is one of the hardest heroes to kick out of the lane. Use this to your advantage and apply as much pressure as possible to your lane opponents. This will be easy to do if you have a support, but it is possible to do on your own as well, especially if you are facing melee heroes. Even if you don’t stomp your lane, you should at least be able to draw a lot of attention to yourself.


Tide’s laning phase is very reliant on the lane matchup. If he faces melee farmers and supports that deal low damage, he will be able to stomp his lane. If he faces ranged opponents with plenty of magical damage harass and nukes, however, he will have a difficult time. 


Try to dodge such lanes and find the favorable matchup to be able to get a good start. A good laning stage will not only slow down the development of the enemy carry, but it will give you fast team utility items that you can use to apply further pressure and take objectives with your teammates.

If you see that you are losing your lane you can resort to stacking and jungling. Note, however, that using your tanky utility hero to passively farm the jungle instead of applying pressure is a bad situation to be in and it will make the game difficult for your teammates.

Priorities

Pressure your lane opponents if you can and punish melee cores.
Get farm and levels.
Ask teammates to stack the jungle for you. If you get zoned out of lane (which is a bad situation for Tide), you can resort to jungling and stacking for yourself.
Farming:

Use Anchor Smash to secure last hits – not only with the damage of the spell but with the damage reduction. If you hit your lane opponent he/she will have a difficult time contesting last hits, which means you should be able to easily take them (and even deny).

If you are doing well in the lane you should stay there for as long as possible and constantly apply pressure. If you are getting zoned out, however, you can resort to stacking and jungling to get yourself back in the game.

If allies stack the Ancient Camp, once you have two levels in Kraken and a couple of levels in Anchor Smash, you will be able to take the stack on your own, giving yourself a big boost in farm.

Harassing & Kill Potential:

Your main goal is to pressure your lane opponents, especially if you are facing a melee farmer.

If your movement speed is higher than that of the enemy heroes, you can harass fairly easily with Anchor Smash. This will not only deal damage, but it will make contesting last hits hard for the enemy core. Make sure you have enough HP and mana sustain to keep playing aggressively – mangoes and salves are your friends.

Sometimes in more difficult lanes, it might be worth it to play more passively in the first few levels in order not to burn your regen fully and get zoned out. Once you get e.g. lvl3 with two levels in Kraken and one in Smash, you will be much harder to zone out even by ranged supports and you can increase your level of aggression.

Gush is a dangerous spell especially if you have a support with you in the lane. The slow and armor reduction can help the two of you stick to a squishy target and finish it off with attacks and Anchor Smash (which deal increased physical damage). Don’t use Gush too freely, however, because you might run out of mana.

At lvl 6 with Ravage your kill potential increases further. Team fights are not likely to happen this early on, so try to use your ultimate to secure a kill, usually with the help of a damage-dealing ally.

Timings:

  1. In the first few minutes, you usually play a bit more carefully in order to get to lvl3. If you have a support with you, you can afford to play more aggressively.
  2. After you get a couple of levels, start pressuring your lane opponent as much as possible. Get farm at the same time to ensure you get your utility items as fast as possible.
  3. If you win your lane and your lane opponents leave, you can start pushing-out the waves and farming the jungle. Constantly apply pressure to the tower.
  4. If you are losing your lane you should try to change that ASAP. Call for help from your supports or try to steal the enemy creep wave and bring it to a safe location (usually behind your tower). Your last resort is to go into the jungle to catch up a bit in farm.
  5. Once you get your first items, group with your allies, force a fight with Ravage and take objectives.

Video Example:

A game from the International 2018 NA Qualifiers between VGJ.Storm and Optic Gaming. Tidehunter played by VGJ.Storm.Sneyking.

3969656979

Starting items are Tango’s (x2), Observer Ward (pooled), 2 Mangoes, Gauntlets of Strength and a Healing Salve.

-1:00 – Tidehunter places a ward behind the enemy Tier 1 tower that gives vision on both the lane and jungle. This will give him a lot of info early on about who exactly he is up against and who is rotating in and out.

-0:10 – Given that no one was spotted on this ward, they decide to contest the top bounty rune, rightfully so because there are no enemies there and they trade 2 for 2 on the runes.

0:20 – Using their aggressive ward, Tidehunter and Jakiro decide to harass the enemy Axe early on to keep him from getting levels and playing aggressively. Afterward, Tidehunter teleports out to go bottom lane against Visage, who at this point is solo. Axe does the exact same thing though and swaps with Visage, giving Optic the lane they wanted. Tidehunter is good against melee heroes, but Axe is possibly even better.

1:30 – Tidehunter right clicks Axe to draw creep towards him. This allows him to safely last hit these creeps under the tower, away from his own creeps that can work against him thanks to Axe’s Counter Helix.

1:40 – Having no trouble tanking creeps under his own tower, Tidehunter uses Anchor Smash to both harass Axe and secure some last hits. After clearing the wave and Mirana teleporting bottom to go up against Axe, Tidehunter teleports back to the top lane to once again try to get the lane matchup they want. He buys his Boots of Speed in the meantime. Once teleported, he picks up a value point in Gush to run down the enemy Visage with some harass together with Jakiro.

3:25 – After taking significant harass from the enemy Visage and Naga Siren, Tidehunter knows he’s close to triggering the Kraken Shell purge. He turns together with the Jakiro onto the Visage and seemingly narrowly gets a kill onto him. The power of Kraken Shell really comes into effect here together with Anchor Smash, causing Tidehunter to take next to no damage from the Naga in the end and then getting a second kill onto her.

4:00 – Raindrops are bought to avoid being burst-down by Visage and also to give some mana regeneration to Tidehunter after having spent the Mangoes. He teleports back bottom and switches with the Mirana again, anticipating the enemy team also switching up the lanes again. Ring of Regen is picked up, with Soul Ring being completed shortly after (as a preference over Arcane Boots).

6:30 – After trading some harass between Jakiro, Naga, and Tidehunter, the enemy Rubick and Axe also rotate in, turning the 2v2 into a 4v2 and get a quick kill on Jakiro as a consequence. Thanks to the Soul Ring and Raindrops though, Tidehunter proves to be a really tough kill and he survives. Tidehunter gets to level 6 and immediately starts to be a lot more aggressive, looking for a Ravage kill. They find one shortly after, underneath the enemy tower. A Magic Stick is picked up, which is a great item in a game against heroes with spammable skills like Visage and Naga.

9:10 – Headdress is delivered to Tidehunter, working on Helm of the Dominator, which will make him even tankier and give him a creep to help push out lanes and fight. Under the cover of Moonlight Shadow, he rotates towards middle, knowing that Ravage is soon coming off cooldown.

9:35 – Tidehunter gets spotted hiding near the middle tower and goes back top to show himself shortly and snatch both Bounty Runes.

10:10 – In a perfect example of how you don’t want to save up Ravage early on, Rubick gets punished for coming too far forward by an unexpected Ravage. Shortly after, Tidehunter draws focus away from Jakiro to help him escape narrowly against Visage.

12:40 – Tidehunter picks up Arcane Boots and goes to look for another Ravage opportunity that will also net them a tower in mid, or just take the tower with the mere threat of this ultimate. At this point, his team wants to start grouping up around him and the laning phase is pretty much over.

Mid & Late Game

Tide Immortal

In the mid and late game, Ravage dictates the pace of the game.


Try to force fights when you have it and take objectives out of them. The more tankiness items and levels you have, the easier this will be to do because you will be able to act like a frontline hero. You don’t necessarily have to initiate with Ravage – simply holding onto it will make your opponents hesitant because they know that you can always use it to turn the fight.


Use Anchor Smash to farm and push-out waves so that when you do use Ravage, it’s at a place where you can immediately transition into an objective, being a tower, Roshan or Barracks.

Apply pressure with Ravage, force fights and claim objectives:
Push out creep waves with Anchor Smash and farm-up:
Keep your teammates safe in fights with your utility items and even Ravage to counter-initiate:
Initiate ganks with Ravage if you have too, but bear in mind this is:
Comeback Potential:

There are two ways to play Tide. The first and ideal one is as a frontline tank. You stay in front of your allies, hit towers and wait for the fight to start. With enough utility and tankiness items you are the most unfavorable hero to initiate on and you will often be able to take objectives and win fights with Ravage.

If you are under-farmed and under-leveled, however, staying at the front will usually be too risky. The playstyle you want to adopt is that of a counter-initiator. Stay hidden and get into the fight just at the right time to turn it around with a perfectly-timed Ravage. Hopefully, you will buy enough time for your damage dealing cores to kill their targets. The biggest advantage of Ravage is that its range is so big that back-line supports get caught in it as well and as a result, they cannot help their cores immediately even if they have defensive items.

Make sure you push out waves as much as possible, however (even buy Aghanim’s if you need to, especially against pushing lineups). If you are winning fights only outside of your base when all lanes are pushed-in, you will have big problems transitioning a won team fight with Ravage into an objective and map control. This is a big problem because Ravage has a huge CD and you want to make the most out of it every time you use it.

Team Fights:

Your execution in team fights is dictated largely by the two playstyles that we described above. In short, you should:

  1. Stay in front of your allies and try to force fights by e.g. pushing. You will be a very unfavorable target to focus because of your items & Kraken Shell (and even the DMG reduction from Anchor). Make it difficult for the enemy team to reach your allies, and once they try to do it use a well-timed Ravage to win the fight.
  2. Stay out of vision and wait for your opponents to collapse on your teammates. Counter-initiate with Ravage to turn the fight and keep your allies alive with your items.

Those two choices are the same when you are 5-man pushing with your team. You can either stay in front, hit the tower and act as a barrier between the enemy team and your teammates, or wait for a good counter-initiation moment. 

Above you can see how two Ravages (with Refresher) set up two devastating team fight combos with ET's Earth Splitter on the left side and Jakiro's Ice Path and Macropyre on the right. This helps his team effortlessly win a 4v5 fight and defend their base.

Split-Pushing & Farming:

Anchor Smash can help push out creep waves well and Kraken Shell’s hard dispel makes you very hard to gank. Once you get to the tower though, there’s not much you can do but walk past it and try to cut the creep wave because of your low tower damage.

Nonetheless, doing this is dangerous. Even though you are very tanky, if you get caught by multiple enemies you will die. Usually, you want to push out waves with Anchor (and possibly Gush if you have Agh’s) very quickly and rejoin your team to be there in case a fight breaks out.

Farming with Tide is fairly straightforward – you push-out the wave and go into the jungle to farm camps with Anchor. 

Ganking:

Earlier on,  using Ravage to gank is great, but later on, you would prefer to save it for a fight. Using it on a single enemy will only be worth it if it is an important enemy core and your waves are pushed-out so that you can take an objective. Using Ravage to gank an enemy split-pusher when your waves are pushed-in will likely result in no objectives and it will give your enemies a big window to play more aggressively because they know you don’t have Ravage.