Windranger Guide by LeBron
Artist: Valve
Author:
LeBron & Co.
Date: 01/2019
Tags:
text
Windranger
Builds
Tactics
Analysis

Welcome

Welcome to LeBron's Book of the Windranger, a hero guide part of the Book of Dota series!

Here you will find all the information you need to learn to play Wind on a high level – from drafting and builds to the optimal playstyle in different lanes and situations. We hope you’ll enjoy this guide and find it useful!

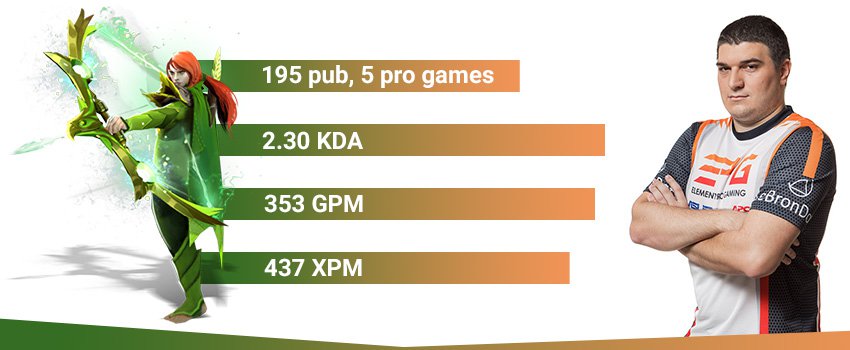
Lebron WInd Stats
TL;DR:

Draft: WR is extremely flexible, which means you can use her in various strategies. You shouldn’t be afraid to pick her up early in the draft not only because she is hard to counter, but also because you don’t give away valuable information about your strategy.

As a core ideally you should go to a lane where you can get farm. As a support you should stick to the carry which needs babysitting the most.

Early Game: As a core you should focus on your own resource development in order to reach your core items and higher levels faster. In the later laning stage you can start pushing out the wave and either farming the jungle or even better – pushing the tower with your ultimate.

As a support you should focus on babysitting (harassing & zoning-out), pulling and stacking.

Mid & Late Game: You usually want to stay close to your team, win fights and use your ultimate’s push potential to claim objectives. Your flexibility, however, makes other play styles just as viable – you can gank or split-push and anti-push.

As a support you should stick with your team and use Shackleshot and Powershot as much as possible in fights. Anti-pushing with Powershot is your main concern. Nonetheless, if you can find some farm you can start dealing damage in the late game.

Authors

Nikola "LeBronDota" Popović
Endorsement & Info

LeBron is a professional Dota player currently playing support for EPG.

He rose to fame after finishing first in a season of the Faceit Pro League - a very impressive feat for a support player. Later he found success in various pro teams, including EPG and Na'Vi.

Nikolay "CTOMAHEH1" Kalchev
Info & Editing

CTOMAHEH1 started his pro career as a support in Basically Unknown together with Mind Control. Since then he has consistently been playing on the European T2 scene, most recently on Unchained Esports. 

His highest placement on the EU ladder is top 100 - he plays all roles (mainly support), which is untypical for high-ranking players and shows his great versatility and understanding of the game.

Kyril "MrNiceGuy" Kotashev
PM, Writing & Editing

Esports and gaming enthusiast since forever and founder of Dotahaven.

Has been playing Dota since 2005 (5.84). An Ancient I player in Dota 2.

I run like the wind

Windranger is without question one of the most versatile heroes in the game: she has damage and utility; she is good in the early and late game; she is a flexible laner and has carry potential. On the whole, she is one of the few heroes in Dota that can adapt and be useful in any kind of strat/position, which makes playing her very fun and diverse and in addition makes her quite hard to counter.

Because of WR’s versatility, she doesn’t really have a usual role. Nonetheless, her most common positions are as a solo mid (to use her laning and carry potential) or offlane (to free up easier lanes for other farmers). The support position is less popular nowadays. Nonetheless, the hero is still a viable support if that is your preferred position in the game.

Windranger Loadout
Stats
Level 1
Level 15
Level 25
STR
17
Very Low
56
Medium
84
High
AGI
17
Medium
36
Low
50
Low
INT
18
High
54
High
80
High
Attack
44-56
Medium
80-92
Low
106-118
Low
Armor
1.72
Low
4.856
Very Low
7.096
Very Low
Resistance
26
Medium
28
Medium
30
Medium
HP
506
Very Low
1211
Medium
1715
Medium
MP
345
High
885
High
1275
High
MS
297
Medium
300
Medium
302
Medium
STRENGTHS

MAJOR

DPS: With Aghanim’s and damage items, Focus Fire allows her to deal some of the highest single target DPS in the game. Moreover, she has a potent AoE nuke for early game damage.

Disable: Shackleshot is an extremely powerful stun – disabling two heroes for nearly 4 seconds is game breaking, and it is on low CD.

Versatility: WR is one of the most flexible heroes in Dota. She could literally be played in any position in any lane and because of this could fit various strategies.

MINOR

Anti-push: Powershot is an AoE nuke with an extremely long range, which makes it ideal for safe anti-pushing.

Mobility & Survivability: Windrun is great for chasing (not only gives MS but also slows) or running away from danger. It also gives 100% evasion temporarily, which makes it quite a good survivability tool against physical attacks.

Attack Animation: WR has high attack range, good base damage, and a decently fast attack projectile. Her attack makes WR good at last hitting, passive harass and it increases her carry potential.

WEAKNESSES

MAJOR

Squishiness: WR is an extremely squishy hero and because of this, she relies heavily on Windrun and good positioning for staying alive. This makes her extremely vulnerable to silences, long duration disables or powerful slows. Moreover, Windrun only helps against physical attacks, which makes the hero weak against spell nuke damage.

MINOR

Skill shot intensive: WR’s Shackle and Powershot are both skill shots. Landing a good Shackle is very hard in practice, which makes the control that the hero brings to fights unreliable. Of course, the more you practice the more often you will land you skill shots.

Replays

Fnatic vs TNC.Predator, The International 2018

MATCH ID 3970454002
Replay

DJ plays an absolutely flawless game on a support WR. He finishes the game with a stat of 9-0-6 and deals the second highest hero damage after his mid laner – Abed’s TA.

DJ starts the game in the offlane where he supports Universe’s Axe. The two of them pressure heavily the enemy carry MK and manage to out-farm him and even kill him during the laning stage. This secures a very fast Dagger for the Axe, which makes life almost impossible for the enemy MK who finishes the game with a score of 1-4-1.

A great replay to watch if you want to learn how to play support WR in the offlane.

Immortals vs Optic, The International 2018 Qualifiers

MATCH ID 3971470160
Replay

Velo has an impressive performance on a core offlane WR and contributes significantly to his teams upset victory over Optic Gaming. He finishes the game with a score of 19-5-19 and deals the second highest hero damage on his team behind his QoP.

The replay is great to watch if you want to learn how to play core WR in the super late game and have a very high impact. It’s worth mentioning that Immortals managed to win the game on the 59th minute versus Spectre, who is the hardest carry in the game but also a great hero versus ranged damage dealers like QoP or WR because of Haunt.

Drafting

Because of her versatility, Windranger fits well in most games of Dota regardless of the drafts. She doesn’t need specific allies to do what she does best and she isn’t hard countered by a lot of heroes.

WR is picked in competitive Dota in different positions for different reasons. As a core, she is most often played as a mid laner to provide her with enough farm to quickly reach her carry potential.

As a support she is usually picked for her laning presence, good control in fights and anti-push capabilities.

Position 1 or 2 Windranger

When played as a carry Windranger most often goes to the mid lane because:

  • She is good at last hitting and can out-farm her opponent: good attack animation and a nuke to help in taking last hits.
  • She is good at rune control. The ability to out-push the wave with Powershot and her mobility allows her to easily contest runes.
  • WR is survivable thanks to Windrun and is a hard mid laner to gank in the early game.
  • She is good at harassing – she has long attack range for passive harass, a long-range nuke for active harass and Windrun to avoid incoming passive harass.

Alternatively, she can go in the safe lane. Because of her independence and laning strength, she doesn’t need babysitting. Your supports will be free to rotate, farm the jungle or help out other lanes.

Weaver

Weaver: Weaver is by definition a similar hero to WR. He is a mobile single target damage dealer that scales well into the late game. Weaver is more mobile and survivable than WR and could be played more aggressively, but needs more items to reach as high levels of single target DPS and doesn’t have access to any nuke damage.

Position 3 Windranger

WR is a viable offlaner even though she is quite squishy. First, Windrun gives her mobility and a lot of survivability against physical attacks. Moreover, Windrun and her good attack allow her to exchange passive harass favorably. If she is getting zoned out, she can take some last hits with the help of her extremely long range Powershot.

She is very strong against lanes with weak kill potential because she is hard to zone out, but she struggles against lanes that can easily latch onto a target and nuke it down.

A utility WR would usually opt to go for a faster Blink Dagger to increase the impact of her Shackleshot. Moreover, picking up other utility items for your team is also a possibility.

P.S. Being in the offlane doesn’t necessarily mean you are playing a utility WR. You can pick a carry WR and still send her to the offlane if you expect her to be able to get farm there, especially when she has a support to help her.

Puck Portrait

Puck: During the laning stage, an offlane Puck resembles an offlane WR – both heroes can out-push the wave, farm and harass with their AoE nuke. Both heroes are elusive and mobile. Moreover, both heroes have a similar weakness – they are squishy and easily killed by heroes that can latch onto them. After the laning stage, however, the two heroes are significantly different. WR is a ranged semi-carry and damage dealer, while Puck is a great initiator/counter initiator and ganker. Consequently, you can pick Puck to substitute WR in the lane, but you cannot pick her to substitute WR in the mid and late game.

Position 4 or 5 Windranger

Windranger is a decent lane support because of her potential to harass. She usually plays the role of a babysitter – zoning out the enemy heroes and providing space for her carry to find farm. If needed, she can provide some control (stun from Shackle and slow from Windrun) and nuke damage (Powershot) for kill attempts, but as a whole, she is not a good ganker. She needs at least some levels into these spells to maximize their efficiency and her stun is not very reliable.

After the laning stage, a support WR’s main job is to anti-push with Powershot and to provide control in team fights with Shackle. Becoming a semi-carry in the late game is possible if she has some farm.

Synergy

Good friends to have are:

Front-line heroes with control: Tide, Axe, DK, Tusk, Centaur

Tidehunter Portrait
Axe Portrait
Dragon knight
Tusk
Centaur
It is much easier playing WR if you have tanks with control on your team.

Since WR’s biggest problem is getting focused in fights, she loves heroes that can draw the enemy attention and control the team-fight.

Equally importantly, reliable disables (especially AoE disables) are very useful for setting up Shackleshot. The disable could allow WR to get at the right angle and chain-stun. In this context, Natures Prophet deserves a mention (even though he is not a frontline hero), simply because Sprout is the best setup for a single hero Shackle.

Counters

Strong Against:

Man-fight Heroes: Ursa, PA, TA, Huskar

Ursa Portrait
Phantom Assassin
Templar Assassin
Huskar Portrait
A core WR is a powerful anti-carry that can win most man-fights.

A core WR is quite good against man-fight carries because of two reasons:
1. Windrun allows her to stand her ground against such right-click heroes before they get MKB.
2. Focus Fire gives her an extremely high DPS output, which means that she can actually win DPS races very convincingly.

If the heroes in question don’t have a hard disable – even better.

Melee heroes susceptible to kiting: Ursa, Sven, WK, Naix

Ursa Portrait
Sven
Wraith King
Lifestealer Portrait
Picking WR against a team of heroes that need to be in melee range to have an impact is a good idea because she is extremely good at kiting.

WR is quite good at keeping her distance – long-range attack, very long range nuke and a mobility spell. Moreover, she has a potent disable that is much easier to use on heroes with predictable movement (melee carries usually run straight for their target).

Weak Against:

Bad Focus Fire targets:

Centaur

Centaur returns damage for every attack, which makes Focus Fire more likely to kill you than him if he is fat enough.

Axe Portrait

Axe: Focus fire triggers Counter Helix. This in itself isn’t the biggest problem in the world, but Axe’s Blink + Call initiation could easily lead to your death.

Spectre Portrait

Spectre builds tanky items (unlike you), Dispersion returns a lot of the Focus Fire damage back and thanks to Haunt, Spect is hard to kite.

Bristle Portrait

Bristleback can simply turn his back to you. With Vanguard or Crimson your fast but low-damage attacks will deal extremely low damage to him. Later on even if you are able to take him down, the constant Quill Spray could kill you faster than you kill him.

Silences: Puck, Drow, DP, Silencer

Puck Portrait
Drow Ranger
Death prophet
Silencer
It is difficult playing WR against a team of reliable silences and you may have to alter your item choice to deal with this problem.

WR’s survivability is very reliant on Windrun (and to a lesser degree on Shackle) and if she gets silenced in a bad position she could die very easily. Instant silences are most dangerous.

Heroes good at latching to a target: Lion, Bane, Shadow Demon, Rasta

Lion
Bane Portrait
Shadow Demon Portrait
You are a squishy but mobile hero and as every character that falls into this category, it is difficult to play against quick and long-lasting disables.

If you get disabled in the middle of the fight you can very easily die to nukes before the disable ends. Long range disables (or heroes with mobility and instant disables) are most dangerous. Multiple disables could also be a problem in the laning stage especially if you are in a 1v2 situation.

Skills

Windranger Shackleshot
Windranger Powershot
Windranger Windrun
Windranger Focus Fire

Shackles the target to an enemy unit or tree in a line directly behind it. If no unit or tree is present, the stun duration is reduced to 0.75.

STATS

Cast Animation: 0.15+0.45

Cast Range: 800

Shackle Search Range: 575

Shackle Search Angle: 46

Max Shackle Targets: 2

Success Stun Duration: 2/2.6/3.2/3.8

Fail Stun Duration: 0.75

CD: 18/16/14/12

Mana: 70/85/100/115

Shackleshot

Mechanics:

  • After hitting the target, the projectile searches for enemy units or trees within 26° at the opposite side of the target;
  • Shackleshot always prioritizes units over trees;
  • It latches based on the cast location, not the position of WR when the projectile hits;
  • If one of the units/trees dies or the stun gets dispelled form them, the stun persists on the other unit;
  • Can latch on units in the Fog or invisible units;

Uses and tips:

Shackle is the hardest skill to use correctly on WR’s skillset. The reason is that in order to be successful you need to hit a small timing window when your hero and two enemy units (or a unit and a tree) are roughly standing on one line. Practice will help you notice such situations.

Be patient: Throwing the Shackle for a mini-stun is typically useless. It is better to wait for an opportunity to use the stun when you think it would latch. In team fights, you ideally want to stun two heroes, but in most other cases managing to stun your primary target is enough.

Adjust the angle of your hero: If you see two enemies close to each other, make sure you reposition your hero so that she is in a straight line with them and fire your Shackleshot afterward. Mobility items are very helpful in such situations (Blink Dagger, Force Staff), but you can do it just by walking or by using Windrun.

Watch for units in front of your target, not just behind: If enemy heroes see you, they will try to protect themselves from Shackleshot. Most players would make sure they are not standing directly between a tree/allied unit and your hero. Often, however, players will disregard allied creeps in front of them. This gives you the opportunity to target a creep and latch to a hero – this tactic is most useful in the early game, during the laning stage.

Predict enemy movement: Often the movement of heroes is predictable (trying to get a last hit, converging for a kill, etc.). As with all skill shots you need to use this to your advantage in order to land successful Shackles.
E.g.: The enemy team stunned one of your allies and wants to kill him. They have one melee right-clicker and a ranged one. You know they are going to make use of the stun to auto attack your ally. This will put them in a good position for a Shackle – one behind the other. Since you know this you try to get in position even before they start hitting, which will allow you to use Shackle right away, even save your ally.

Windranger charges her bow for up to 1 second for a single powerful shot, which deals more damage the longer it is charged. The arrow damages enemies and destroys trees along its path. For each enemy that Powershot hits, its damage is reduced by 20%.

STATS

Cast Animation: 0+0

Cast Range: 2600

Travel Distance: 2600

Damage Radius: 125

Max Channel Time: 1

Maximum Damage: 150/250/350/450

Damage Reduction per Unit Hit: 20%

CD: 12/11/10/9

Mana: 90/100/110/120

Powershot

Mechanics:

  • The projectile gives 400 range flying vision, which lingers for 3.34 seconds; combined with the long range, this makes PS a great scouting tool;
  • The projectile destroys trees within 75 radius, allowing you to create new paths in the tree line;
  • The channeling sound effect is heard only by your allies;
  • The initial projectile speed is 3000, but it gets reduced by 10% for each enemy hit; this is important to consider only if you are trying to hit a long-range PS through the enemy creep wave;
  • The projectile animation speed doesn’t reflect this change; it always seems to fly with 3k units per second;
  • Each 0.01 second of channel increases the damage by 1%, reaching 100% at 1.0 sec;

Use for damage:

The most common use of Powershot is that of a normal AoE nuke. In fact, in the early game it is your primary source of nuke damage and consequently – kill potential.

Use the range: PS is very useful to finish kills after enemies have gotten out of your attack range. This is especially true in the mid/late game since you wouldn’t want to channel Powershot at close range – you would want to hit with attacks. The drawback of this use of PS is that it is predictable and easier to dodge.

Use setup: There is always a possibility that your target will juke your Powershot. Therefore, the most reliable way to land it is to channel while the target is stunned. You can set up for yourself by using Shackleshot first and then a Powershot to ensure that you will deal the maximum damage. Of course, you can do the same with any stun.

Use short channel Powershot: If your target sees you channeling, it is likely to try to dodge. A low damage Powershot is better than a no damage Powershot, so the best thing to do in such situations is to cancel the channeling before your target exits the hit area.

Use for utility:

There are two aspects of utility Powershot gives you: Vision and tree-cutting.

The visual aspect is always useful for scouting (e.g. Rosh attempts). In the late game, it becomes more important than the damage, as your Focus Fire attacks deal way more DPS than PS.

The tree cutting aspect is most useful for juking. You can cast an instant Powershot while running (no need to channel as you are not using the damage) to cut through a line of trees and create a new path. Entering it will hide you in the fog and for a few seconds will make it harder for your opponents to kill you. Of course, they can still continue chasing you through the new path in the trees.

Creating such a path could also situationally be useful for ganking. You can preemptively cut a line in the trees and afterward use it to engage your enemies from an unexpected angle.

Aiming:

Like all skill shots, you need to predict the movement of your target in order to hit Powershot. The projectile speed is quite fast, so hitting a short-range PS is relatively easy (especially if you cancel your channeling). At long range, however, you need to aim more carefully:
The projectile takes about 1 second to reach max range and the channeling time of a full damage PS is also 1 second. This means that if you are firing a max range max damage PS, you need to aim at the location where your target will be in 2 seconds. The closer the target is, the lower the delay and the closer you need to aim to its current position.

Increases movement speed and adds evasion from all physical attacks, while slowing movement of nearby enemies.

STATS

Cast Animation: 0+0

Slow Radius: 325

Move Speed Bonus: 60%

Evasion: 100%

Move Speed Slow: 15%/20%/25%/30%

Invisibility Fade Time: 0

Duration: 3/4/5/6

CD: 15/14/13/12 

Mana: 50

Windrun

Mechanics:

  • Grants 100% evasion for its duration; fully countered by MKB;
  • Disjoints attack projectiles upon cast;
  • The slow debuff lingers for 2 seconds after the target is out of the slow area;
  • Cancels Windranger’s channeling spells upon cast;
  • It gives bonus MS, not max MS, which means you still get affected by powerful slows (e.g. Venomous Gale, Viper Strike);

Uses and tips:

Windrun is your primary mobility spell, which makes it a versatile one (level 20 talent makes it an amazing mobility spell):

Use it to escape: Windranger is a very fragile hero – you don’t want to get focused in fights. Windrun is your escape mechanism and you would very often have to use it to get out of harm’s way and reposition yourself to safety. Since it is your only mobility spell, it is very important not to get disabled during the WR duration. If you know you are going to get disabled it is far better to use Windrun after the disable ends, rather than before in order not to lose some of the duration (this is especially important in the early game when you have only 3 seconds of duration).
Of course, if you would need the evasion to survive during the disable, it is better to use it beforehand.

Use for the Evasion: The 100% evasion for up to 6 seconds allows you to easily stand your ground versus any right click hero without a MKB. This makes WR very good at exchanging harass during the early game and a powerful man-fight hero with items during the late game.

Use to chase: Windrun is extremely good for chasing targets because it not only increases your own MS but if you are close enough decreases the MS of any enemies within 300 radius. Consequently, when chasing it is a good idea to get close to your target first to apply the slow and continue attacking afterward. Be careful, however, as such aggressive use of Windrun might get you killed: it is your only escape mechanism and if you get jumped by enemies when it is on CD you are very likely to die.

Windranger channels the wind to gain 350 additional attack speed against a single enemy unit or structure, though with a reduction to her attack damage. Extra damage from secondary item effects is not reduced. Lasts 20 seconds.

STATS

Cast Animation: 0+0

Attack Speed Bonus: 350

Attack Damage Reduction: 50%/40%/30%

Duration: 20

CD: 70

Mana: 75/100/125

Aghanim's Scepter

Reduces cooldown, decreases damage reduction, and removes debuffs from item effects.

Focus Fire

Mechanics:

  • Casting Focus Fire also issues an attack order;
  • Damage from secondary item effects is not reduced: e.g. Maelstrom, MKB, Diffusal Blade;
  • Focus Fire doesn’t give max attack speed, it gives bonus attack speed; this means your AS could be reduced by powerful slows even during Focus Fire;
  • WR can switch the target she attacks without losing the buff on the Focus Fire target;
  • Casting Focus Fire on a new target will remove it from the old target if it hasn’t timed out;
  • Can be used on buildings, which makes WR a powerful pusher and split-pusher;
  • Could be used on Roshan, which makes WR a very good hero to quickly kill Rosh (remove the spell block first);
  • Focus Fire allows Windranger to move while attacking the Focus Fire target.

Uses and Tips:

Focus Fire is your primary DPS tool and the main reason WR scales very well into the late game. With items, it gives you one of the highest single target damage outputs in the game, which makes you a decent carry and a powerful nuker.

Use in the early game:  Even though without items and levels it is significantly weaker, it will still increase your physical DPS – it increases your AS more than it decreases your damage (this is true only if you utilize the AS by continuously attacking). If you are attempting a kill on a hero who is locked down by allies you can use Powershot and Focus Fire. Nonetheless, in the early game, Focus Fire is primarily useful for applying pressure to enemy towers.

Beware the CD: Without an Aghanim’s Focus Fire has quite a long CD. This means that in a single fight you will be able to use it once. Consequently, it is important to choose the right target to cast it on. It is a bad idea to waste it on an unimportant support hero that will easily die even without Focus Fire – save it for an important core that your team has trouble killing.

Shackle mechanics video example:

Biver uses his Glimmer Cape to hide and lands a perfect 2-man Shackle on the enemy Kunkka and Beast, who don’t expect it. It can easily be seen how the spell prioritizes heroes over trees, which helps a lot in fights near trees. The Shackle pretty much wins his team the fight – Biver deals quite a lot of damage with Focus Fire and when he is left on low HP disengages and lets his team finish what he started.

Skill Builds

Powershot is your first priority because it is your main source of damage in the early game: you use it for kill attempts, harassing and farming.

You want one value point in Windrun and Shackleshot – you need mobility and some control (the 1.5. stun duration on lvl1 is enough to channel your Powershot). Typically afterward you level up Shackleshot to increase the stun duration.

On lvl1 you want Windrun for the survivability it gives, but in a solo lane, you can start with Powershot for active harassing and to help in last-hitting.

You typically get your ultimate on lvl6, mainly to use it to pressure the tower in your lane or for kill attempts if your allies have decent lockdown. It is possible to get it a bit later in order to get faster levels in your Shackleshot, but more often than not having your ultimate will be more useful.

Standard Build
Late Focus Fire Build
Windranger Windrun
1
Windranger Powershot
2
Windranger Powershot
3
Windranger Shackleshot
4
Windranger Powershot
5
Windranger Focus Fire
6
Windranger Powershot
7
Windranger Shackleshot
8
Windranger Shackleshot
9
Talent Icon
10
Windranger Shackleshot
11
Windranger Focus Fire
12
Windranger Windrun
13
Windranger Windrun
14
Talent Icon
15
Windranger Windrun
16
Windranger Focus Fire
18
Talent Icon
20
Talent Icon
25
Pros: maximum damage output; some mobility and control;
Cons: neither maximum mobility nor maximum control;

The main drawback of this build is that you get a late point in Shackleshot and it remains on low level for a while, which means you don’t have good control in the early game. Moreover, the duration of Windrun is low for quite a while. Nonetheless, you get value from all of your skills, which makes it the most versatile build and rightfully the most common one.

Windranger Windrun
1
Windranger Powershot
2
Windranger Powershot
3
Windranger Shackleshot
4
Windranger Powershot
5
Windranger Shackleshot
6
Windranger Powershot
7
Windranger Shackleshot
8
Windranger Shackleshot
9
Talent Icon
10
Windranger Focus Fire
11
Windranger Focus Fire
12
Windranger Windrun
13
Windranger Windrun
14
Talent Icon
15
Windranger Windrun
16
Windranger Focus Fire
18
Talent Icon
20
Talent Icon
25
pros: very good control in the early game;
cons: DPS potential because of lack of Focus Fire;

The difference between this build and the standard one is that here you delay your ultimate in favor of Shackleshot. The reason to do this in the offlane is that you wouldn’t have a chance to pressure the enemy tower as you would in the mid or safe lane for quite a while. This makes more points into Shackleshot the more valuable option. Nonetheless, if you rotate somewhere in order to push with your team or if your allies have powerful lockdown you can still get Focus Fire faster, even in the offlane.

Investing more points into Windrun instead of Shackleshot is possible if you are having trouble surviving just with one point in it – more points in Windrun could help you survive long lasting disables. The drawback of this is that you would have worse control in fights.

Talents

30% CD Reduction
25
+20% Ministun Focus Fire
Windrun Grants Invisibility
20
+1 sec Shackleshot Duration

+125 Attack Range

15

+125 Power Shot Damage

+30% Windrun Slow
10
+1,75 Mana Regen

Lvl10: Mana Regen can be always useful for Windranger and you rarely use the  WR slow anyway.

Lvl15: If you are playing mid lane Windranger with Dragon Lance, the attack range might be very good for you. Otherwise Power Shot is great to speed up your farm and increase your nuke damage.

Lvl20: Invisibility for 6 sec is extremely good – it allows you to set up surprise stuns and get away out of bad situations. It is the more versatile choice.

Lvl25: CD reduction is amazing especially if you have some active items (Hex, Blink, Shiva) because it reduces not only your spells but your items too.

Item Builds

Windranger is relatively versatile in terms of items. You usually want to get some mobility items to help you land good Shackleshots and DPS items (ideally with procs) to increase the DPS of your ultimate. Nonetheless, if the game requires it you can get various utility items, you can do so. Your CD reduction talent makes active items very good in the late game.

Core Windranger Build

The starting items are more appropriate for an offlane WR. In the mid lane you would want a 2xNull opener to increase your damage for harassing and last-hitting.

You get your regular Phase Boots and you use the Iron Branches to assemble a Magic Wand for the extra stats and survivability. You get a Maelstrom to make your Focus Fire more powerful even without Aghanim’s and to increase your farming speed. Afterward you get your core Agh’s.

You get Dagger to make it easier to initiate targets with Shackle and finish them off with Focus Fire.

In this example your damage item of choice is Bloodthorn and later on you combine it with Nullifier to fully incapacitate your targets. You get BKB in-between, but this is situational: in some games you will need to get BKB earlier, in some you can entirely skip it.

The active items (Blink, Bloodthorn, BKB, Nullifier) benefit from your CD reduction talent a great deal. You can even opt to get a late game Hex in the place of Nullifier if you feel you need more lockdown rather than damage.

Starting items
Mango
Iron branch
Iron branch
Healing_Salve_icon
Tangoes
Early Game
Magic wand
Phase boots
Mid Game
Maelstorm
Aghanim's_Scepter_icon
Late Game
Blink_Dagger_icon
Bloodthorn_icon
Black King Bar
Nullifier
Mango
Iron branch
Iron branch
Healing_Salve_icon
Tangoes
Magic wand

Magic Wand: The burst heal is extremely useful for surviving in the middle of the fight and the burst mana gain could give you the needed mana to use your Windrun.

Phase boots

Phase Boots: Phase are the core boots for WR because they provide more mobility and damage, which is very useful for dominating the laning stage with her good attack animation. Moreover, the raw damage increase synergizes very well with Focus Fire.

Maelstorm

Maelstrom: The proc increases your farming speed and the fact that your ultimate doesn’t reduce the damage of secondary effects means that Maelstrom has great synergy with Focus Fire even on low levels. In the late game you can either replace it with a more efficient DPS item or upgrade it to Mjollnir if you are facing mass units or illusions.

Aghanim's_Scepter_icon

Aghanim’s Scepter: It makes your ultimate much better than it already is – the CD reduction is very significant and means you can use it more than once in a fight. The lower damage reduction (0 on lvl3 ultimate) is key for your insane DPS output and makes items like Daedalus, Desolator, and Bloodthorn really good on WR.

Blink_Dagger_icon

Blink Dagger: The easiest way to hit a two-man Shackle is with Blink Dagger, as it will instantly get you in the ideal position to do so.

Bloodthorn_icon

Bloodthorn: the crit increases your DPS a great deal, especially after you have Aghanim’s. The silence is ideal against mobile heroes and having Shackleshot + Silance is great against linkens heroes. It also helps against heroes with evasion. Last but not least, the buildup is god on WR as you can use the stats and mana regen of the Orchid components.

Black King Bar

BKB: Since you are very survivable against physical damage, BKB is a natural fit – it protects you from any kind of magical damage and from disables. If the enemies don’t have MKB’s or disables that go through spell immunity, with BKB you can afford to be much more offensive in fights.

Nullifier

Nullifier: has great synergy with Bloodthorn as it totally shuts down your target. The raw damage increase is also great after you have Aghanims. If you don’t go for Bloodthorn you should usually get an alternative DPS item like Daedalus.

Support Windranger Build

This build follows the same logic as the core WR build (you aim to deal very high damage in fights), but it is more cost-efficient and with more utility in mind, which makes it better for a support WR. 

Getting the Phase Boots will make your lane harass very strong, while the Urn will give you some needed utility and sustain. The Javelin afterwards increases the damage of your ultimate. Instead of completing the Maelstrom immediately, you go for a Dagger first to land Shackles easier. Afterwards you come back for the Maelstrom. Your late game options are open, but in this example you get a fast BKB followed by Agh’s and Daedalus. The BKB is needed for team-fights, while the Agh’s + crit combo will skyrocket your late game single target DPS.

Starting Items
Wind lace
Tangoes
Clarity
Healing_Salve_icon
Early Game
Boots of Speed
Magic wand
Phase boots
urnn
Mid Game
javelin
Blink_Dagger_icon
Maelstorm
Late Game
Black King Bar
Aghanim's_Scepter_icon
Daedalus
Wind lace
Tangoes
Clarity
Healing_Salve_icon
Boots of Speed
Magic wand

Magic Wand: The burst heal is extremely useful for surviving in the middle of the fight and the burst mana gain could give you the needed mana to use your Windrun.

Phase boots

Phase Boots: Phase are the core boots for WR because they provide more mobility and damage, which is very useful for dominating the laning stage with her good attack animation. Moreover, the raw damage increase synergizes very well with Focus Fire.

urnn

Urn: The STR is useful for surviving magical nuke damage in the early game, the mana regen is great for spamming your skills more often and the active gives you and your team a source of HP sustain.

javelin

Javelin: it’s the most cost efficient damage increase for your ultimate because it doesn’t reduce the proc damage. You can build Maelstrom or MKB out of it later on.

Blink_Dagger_icon

Blink Dagger: The easiest way to hit a two-man Shackle is with Blink Dagger, as it will instantly get you in the ideal position to do so.

Maelstorm

Maelstrom: The proc increases your farming speed and the fact that your ultimate doesn’t reduce the damage of secondary effects means that Maelstrom has great synergy with Focus Fire even on low levels. In the late game you can either replace it with a more efficient DPS item or upgrade it to Mjollnir if you are facing mass units or illusions.

Black King Bar

BKB: Since you are very survivable against physical damage, BKB is a natural fit – it protects you from any kind of magical damage and from disables. If the enemies don’t have MKB’s or disables that go through spell immunity, with BKB you can afford to be much more offensive in fights.

Aghanim's_Scepter_icon

Aghanim’s Scepter: It makes your ultimate much better than it already is – the CD reduction is very significant and means you can use it more than once in a fight. The lower damage reduction (0 on lvl3 ultimate) is key for your insane DPS output and makes items like Daedalus, Desolator, and Bloodthorn really good on WR.

Daedalus

Daedalus: a more cost-efficient alternative to Bloodthorn in terms of DPS. You can get it when you don’t really need the silence or the counter to evasion (for that purpose you can build MKB). 

Utility Windranger Build

Your main goal is to provide utility for your team, which means you wouldn’t fully realize the potential of Focus Fire.

In the early game, you get Arcanes and Urn of Shadows for mana (you also might want to upgrade it to Spirti Vessel if it`s a good game for it) and HP sustain for your team. This will also reduce your downtime (going back to base) a great deal. Afterward you go for Force Staff for the mobility, and later on, you increase it even further with Blink Dagger (in the end of the day your main task in team fights is to land a two-man Shackleshot). In the late game, you go for Scythe of Vyse for the extra control – with Blink-Hex you have an instant stun that you can follow up with Shackleshot. If you get to lvl25, your CD reduction talent will make the active items much stronger.

Of course, if your team needs more damage rather than disable you can go for a DPS choice instead of Hex. Something cost-effective like Maelstrom + Javelins into MKB could be a great choice.

Starting items
Wind lace
Tangoes
Clarity
Healing_Salve_icon
Faerie Fire
Early Game
Boots of Speed
Magic wand
Arcane Boots
Mid Game
urnn
Force staff
Late Game
Blink_Dagger_icon
Scythe of Vyse
Wind lace
Tangoes
Clarity
Healing_Salve_icon
Faerie Fire
Boots of Speed
Magic wand

Magic Wand: The burst heal is extremely useful for surviving in the middle of the fight and the burst mana gain could give you the needed mana to use your Windrun.

Arcane Boots

Arcane Boots: As a support WR the focus falls away from your right-click potential, which makes Arcane Boots a reasonable choice if your team needs them. They will give you the extra mana pool and sustain to cast more Powershots and Shackles.

urnn

Urn: The STR is useful for surviving magical nuke damage in the early game, the mana regen is great for spamming your skills more often and the active gives you and your team a source of HP sustain.

Force staff

Force Staff: The INT gives you mana pool and damage, but the most important aspect of the item is the mobility: it can be used for the regular purpose of saving yourself and allies, but it also could be used to reposition yourself for a two-man Shackleshot, which is your main contribution to a fight as a support.

Blink_Dagger_icon

Blink Dagger: The easiest way to hit a two-man Shackle is with Blink Dagger, as it will instantly get you in the ideal position to do so.

Scythe of Vyse

Scythe of Vyse: A very reliable source of disable, which when coupled with your huge nuke potential in the late game could make it very easy to pick-off single heroes, even if they are farmed.

Other Items

Early & Mid Game
Null talisman
Tranquil Boots
Spirit Vessel
Medallion
Solar Crest Icon
Glimmer Cape
Euls
Late Game
Desolator Icon
Linken's Sphere
Skadi
Monkey_King_Bar_icon
Mjollnir_icon
Null talisman

Null Talisman: Increases your damage and mana pool, which is very useful for last hitting and harassing.

Tranquil Boots

Tranquil Boots: If your team doesn’t need Arcanes, getting Tranquils will allow you to get back to base much less often as a support WR.

Spirit Vessel

Spirit Vessel: upgrading to Spirit Vessel is good only if you have high HP enemies against you or more importantly – heroes with powerful heals.

Medallion

Medallion of Courage: It mainly gives utility to your teammates, but the minus armor also synergizes very well with Focus Fire.

Solar Crest Icon

Solar Crest: Upgrading it to Crest is possible, but only if your allies need the evasion. You already have Windrun for that purpose for yourself.

Glimmer Cape

Glimmer Cape: Your defensive positioning in fights makes you a great Glimmer Cape carrier – you will most likely be in position to save your allies when they get initiated. Moreover, you are quite survivable against physical damage (thanks to Windrun), which is complemented by Glimmer protecting you from magical damage.

Euls

Eul’s Scepter: The mana sustain is extremely useful for spamming your spells (mainly Powershot). Moreover, the additional disable an MS help increase your survivability – bear in mind that you can use Eul’s on yourself to disables silences (this is extremely important versus mobile heroes with Orchid). The obvious drawback is that the item doesn’t increase your DPS a lot and it gives no HP at all, leaving you very squishy.

Desolator Icon

Desolator: Most of your damage is physical, which means that armor reduction will increase it even further. Desolator increases your pushing speed the most, so you can get it if you feel you need it e.g. to split-push faster.

Linken's Sphere

Linken’s Sphere: Your main concern in fights is not to get disabled and nuked down before you had a chance to use your Focus Fire on your opponents. The usual solution to this problem is BKB, but if they have single target disables that pierce the immunity (Fiends Grip, Roar, etc.), Linken’s is a good alternative.

Skadi

Eye of Skadi: If your opponents are not very mobile, Skadi will help you latch onto them and keep attacking with Focus Fire. Moreover, it will make you much tankier, which is very useful in team fights.

Monkey_King_Bar_icon

MKB: It’s the best solution against evasion and it builds up very well for WR: the Javelin is the most cost-efficient damage item on the hero thanks to Focus Fire.

Mjollnir_icon

Mjollnir: Upgrading your Maelstrom gives you little utility compared to most other heroes because you don’t need the AS bonus. Nonetheless, in the late game, it is important to get more value for your item slot – the active could be used on your front line hero and the AS is not totally wasted because you wouldn’t always have focus fire on your target.

Early Game

Windranger 350px

WR is a flexible laner that is very good at lane control (harassing, last hitting, pushing, even kill potential). Use those strengths to your advantage to get a good start.

Farming:

Long range, relatively high damage for a ranged hero, fast projectile – the attack of WR is one of the best ranged attacks in the game and because of it you should be able to last hit easily.

If you are having trouble taking last hits with attacks for any reason you always have access to a strong AoE nuke – Powershot. As any AoE nuke, you can use it to push out the wave, harass, etc. The very long range of this spell allows you to take last hits from a distance if you for some reason don’t want to approach the creep wave.

Harassing & Zoning Out:

Passive Harass:

Your attack is extremely good for harassing, besides taking last hits. Whenever enemy heroes come close to the creep wave there is no reason not to passively harass them. You will more often than not out-range them and you can deal significant damage over the course of the laning stage without much repercussion.

Windrun is extremely good when it comes to passive harass. First of all, it is a mobility spell and you can always use it to chase or disengage unwanted hit exchanges. More importantly, however, it gives you 100% evasion. This means that by using Windrun you are ensuring you will win the physical hit exchange even against heroes with more damage/armor than you.

You shouldn’t do this too frequently, however: it costs significant mana and more often than not it is more mana efficient to harass with Powershot. Moreover, Windrun is your main survivability tool: if you use it offensively to exchange harass and get caught out of position afterward you are very likely to pay with your life.

Active Harass:

Active harass with WR is quite straightforward: you have a long range AoE nuke. If you have the mana to sustain frequently using PS, it is a good idea to use it to last hit and harass (ideally both at the same time).

The difficult part is hitting your Powershot – when the enemy hero sees the channeling animation, he/she will try to dodge the projectile. Consequently, when harassing with PS you will often have to interrupt the animation to ensure the Powershot hits its target (better to do low damage harass than no damage harass).

Survival:

Shackleshot:

Theoretically, you could stun the enemy aggressors and run away from danger during the disable. More often than not, however, this is very difficult to do. Most enemies wouldn’t blindly run into a Shackleshot by walking in a line. Therefore, it is not a good idea to rely solely on your Shackleshot to keep you alive.

Windrun:

Windrun is your main survivability tool and the importance of the spell is amplified by the fact that you are extremely squishy. If you use WR offensively and misjudge the situation you are very likely to pay with your life.

Only use WR offensively when you are certain you are not out of position in case the enemies counter-initiate. In all other situations try to have it available to escape in case you need it.

Kill Potential:

Your kill potential in the early game comes from three major factors:

Damage from Powershot – if the enemy is disabled you can easily deal high nuke damage.

Damage from attacks – you have good physical DPS and in addition, you can use your mobility spell to keep up with enemies and finish them off with attacks (possibly with Focus Fire activated).

Control from Shackleshot – this is probably the most important point. With Shackleshot you can set up for your own Powershot or for the damage of your allies. The difficult part is actually successfully landing your Shackleshot: watch your angle of shooting and any units behind or in front of your target.

In fact, most kills as a WR in the early game come from surprisingly latching onto a squishy target with Shackleshot. Afterward you can immediately follow up with a max damage Powershot and finish the kill with attacks and if needed by chasing with Windrun.

Timings and Rotations:

Contrary to what some people believe Windranger is not a good hero for early game rotations – not even as a support or mid laner.

The reason is that the success of your rotations is usually very reliant on successfully landing your Shackleshot – this is a problem because Shackleshot is a hard skill to land and sometimes you might not even have a good opportunity to do so. If you fail at landing your stun and securing a kill, you have lost a lot of valuable time.

WR is a powerful lane control hero (both as a core and as a support) and during most of the early game, you should play her that way. Farm the lane, harass and zone out if possible the enemy laners, push out the waves and push the enemy tower with the help of Focus Fire.

Rotating with WR is a good idea only if you have a very good opportunity to do so – for example, you get a good ganking rune like Haste or the enemy team dives your towers and you can TP to counter-gank.

As a support WR, it is a good idea to rotate to protect your towers by anti-pushing with Powershot.

Core Windranger

Get as much farm and XP as possible
Use your harass potential to pressure your lane opponent, but don’t play overly aggressive
Pressure the enemy tower by pushing out the wave with Powershot and damaging the tower with Focus Fire.
Playstyle:

Your main concern is finding farm and levels. You are good at harassing and zoning out, but you shouldn’t be over aggressive. Harass from your own side of the creep wave and simply try to last hit and deny. Use Windrun offensively only when you know your opponent has made a mistake and you can punish it and get a kill.

Get your Bottle and make use of Powershot spam (to push out the wave and harass) for last hitting and controlling the rune in the mid lane.

Make a note which are the most dangerous heroes on the enemy team for you (usually gankers with long disables). Make sure you play defensively whenever they are missing. When they are visible and don’t present a danger your Windrun is most likely going to be enough to keep you alive.

After getting lvl6 you can start pressuring the tower. Make sure to do so each time your lane opponent is away from the lane. Powershot the creeps and Focus Fire the tower.

Kill attempts with Focus Fire are also possible – a successful Shackle into Powershot into Focus Fire and Windrun for chasing is enough to kill most squishy heroes. Nonetheless, don’t do risky moves (e.g. tower diving with Windrun) unless you are certain of your success.

Video Example:

A pub by Iceberg – one of the best CIS core players.

He is starting with Null Talisman so he can trade and get last hits with the very high damage that he has. Note how on level one when he starts to trade hits with SF, he uses immediately Windrun to mitigate the SF damage. Getting a Salve as quick as possible for the sustain and second Null talisman so he can contest the right click damage on SF is a smart choice.

He doesn’t take ultimate on lvl6 because he sees no kill potential on the lane, instead, he gets a point in Shackleshot.

As we said in this guide, he chooses not to rotate a lot. Instead, he pushes the wave with Power Shot, and farms the jungle and controls the runes in order to get his core items and reach his carry potential.

Offlane Windranger

Get resources and stay safe
Use your harass potential to occupy the enemy safe laners
Playstyle:

In the offlane, you are still a core WR and want to reach your carry potential, but at the same time you don’t have easy access to farm and need to play safely. Your lane opponents would largely determine your play style. If they have weak kill potential you can afford to play more aggressively. If they can latch onto you and deal high nuke damage, however, you need to be careful not to overextend.

Try to last hit from a distance and if possible harass the enemy carry with attacks. Be careful how you use Powershot – if the creep equilibrium is favorable for you, then it is not a good idea to push the wave with your nuke.

If the enemy support is trying to zone you out, you will more often than not be able to fight back. Use your good attack animation to exchange hits. If the support overextends you can even use Windrun to chase him down and finish a kill, but this move is risky because it will leave you without an escape mechanism and could allow the enemy carry to get a counter kill.

If your opponents are trying to push the tower use Powershot to make their job harder.

Support Windranger

Harass and zone out your lane opponents, create space for your carry to farm
Get resources by pulling and farming the jungle
Playstyle:

Your main goal in the lane is to create space for your carry to farm – to babysit him. To do this you can use your long range attack, Powershot and Windrun to harass and push back your lane opponents.

If you are not needed in the lane, the usual best way to use your time is to pull and get farm of your own, since you are relatively bad at rotations and you scale well with items.

If the situation allows it, you can use your Focus Fire to push the enemy towers and Powershot to protect your own.

Video Example, Early-Mid Game:

DJ plays a pos. 4 Windranger against VGJ.T.

With the laning stage over, notice how his team leaves him to farm the bot lane for a while - getting some items on a support WR will increase her damage output greatly and can help her transition into a 4th core. This is even more likely in this game because WR has Drow on her team and can benefit from her aura. This strategy from Fnatic allows him to get a fast Javelin, Blink and Maelstrom right after his Phase Boots.

His kill potential even only with Phase Boots as a DMG item is apparent right away - he provides the control and deals the majority of the damage on the Necro at min. 00:35 of the video, snipes the Zeus with a long-range Powershot and finishes-off Blood with another Powershot for a triple kill.

Mid & Late Game

windranger immortal 350px

In the mid and late game, a core WR plays mostly like a mobile flash-farming carry around the map and like a glass cannon in fights.  You can flash-farm and split-push and when you join fights you want to be safely positioned, providing damage and lockdown from a safe distance.


A support WR plays mostly like a defensive support (moving with the team, anti-pushing with Powershot), but if the situation allows it she can become a semi-carry by finding some farm.

Core Position Priorities
Flash-farm, split-push
Join fights or ganks, use your high damage output to nuke down enemies
Support Position Priorities
Stay with your team and provide lockdown in fights
Anti-push with Powershot
Whenever you have space and time – farm in order to reach your carry potential
Timings:

In terms of items a core WR has one very important timing:

Having Aghanim’s + a DPS item (e.g. Aghs + Daedalus) means your ultimate has almost reached its maximum potential and you need to use it. Agh’s + a DPS item means you have extremely high single target DPS and you are ready to kill enemies in ganks or fights. This is a peak timing for your hero and you need to use it – the later the game goes the tankier your opponents will become. Try to force fights with your team if you can and take some map control. If you cannot do that before having a BKB, play more defensively until you get that item as well.

In terms of levels, for a core, WR lvl18 (+Agh’s) is an important peak of power since your ultimate will stop reducing your damage. Usually, you hit this timing relatively close to the Agh’s + DPS item timing, which makes you even stronger at this point.

For a support WR these timings are unlikely to come until the very late game, so your main important timing is getting a mobility item + lvl4 in Shackleshot. This will allow you to disable multiple heroes in fights more reliably, making your presence in fights stronger.

Laning Outcome:

Bad laning stage:

You are a squishy hero and if you are under-leveled and under-farmed and especially if the enemy team has good heroes and items to counter you (mobility, disables, silences), it will be extremely easy to lose your life in fights. You shouldn’t allow this to happen – find farm in a safe position and don’t over-extend at least until you get your survivability item (usually Aghanim’s for tankiness). From then on you can afford to farm a bit more aggressively, but still not dying is your first priority.

Good laning stage:

A good laning stage means that you can farm a bit more offensively and will hit your item and level timings quite faster. It doesn’t change your general play style. You don’t want to be over-aggressive for no good reason, you want to farm your items and participate in fights or ganks only if your teammates initiate them.

If you are very hard to kill, split-pushing is always a good option.

Team Fights:

Positioning: You are a squishy hero with long range on all spells – your positioning is obvious. You need to stay behind your allies. You don’t want enemies to focus you. If you are able to stay out of reach of your opponents, after they use their important spells on your teammates you can usually deal tremendous amounts of damage in the fight.

The same rules apply for a support WR, with the difference that the most important aspect is not your Focus Fire but your Shackleshot. This allows you to position yourself even more defensively – you can simply Shackle and move back right away. You can always use Powershot from a big distance. You can go in again when your spells are off CD, like most spell caster supports.

Powershot: Powershot is a spammable spell and you should use it as often as possible unless you are killing somebody with Focus Fire. In the late game the damage becomes more insignificant, so you will mostly use it to scout before the start of the fight and to find long range pick-offs if your enemies are trying to disengage.

Shackleshot: Landing a good Shackleshot in the fight is your top priority if you are a support and still very important if you are a core WR. To do so try to be patient – don’t simply test your luck but try to find a good opportunity.

Bear in mind that Shackleshot has a relatively short CD, which means if you use it successfully at the beginning of the fight you are likely to be able to use it at least once again before the end.

Pasha displays the initiation potential of WR - he uses Blink into a two-man Shackleshot to start the fight very favorably for his team and focuses down the enemy Clinkz with Focus Fire. Once the Shackle is off-CD, he Blinks aggressively once again and manages to land another two-man Shackle to make sure his opponents don't stand a chance of defending.

Windrun: Windrun is the main CD you should worry about. It is your main survivability tool – if you waste the CD you are very vulnerable in fights.

More often than not you will have to use Windrun as a repositioning tool: if you are getting in danger (enemies are pushing forward) to run away or if your enemies are trying to retreat – to chase.

An alternative use would be for the 100% evasion – if an enemy carry right-clicks you, you should definitely use it in order to dodge the incoming damage. This could allow you to stand your ground and man-fight with Focus Fire, but this is a good idea only if you know the spell-caster in the enemy team aren’t going to focus you with disables and nukes.

Focus Fire: The most vital question is who to focus – even with Agh’s the CD will prevent you from easily using it on multiple people during the fight. If you use your ultimate on an unimportant support, you might not have your main source of damage when you most need it (e.g. to focus down an important core hero while it’s disabled). Typically you want to use Focus Fire to kill a tanky carry/semi-carry.

Pushing:

5-man pushing

Even though Focus Fire is ideal for taking down towers, you are a very fragile hero. If the enemy team is alive and ready to defend, you should position yourself defensively, ready to counter-initiate with Shackleshot.

If you have a very big resource lead, you can in some situations afford to stay in the front lines and Focus Fire the tower, e.g. in case your team has powerful counter-initiation and can keep you alive.

When pushing (especially high ground), it is a great idea to scout for the positioning of the enemy team with Powershot.

Split-Pushing

Powershot to clear creep waves, Focus Fire to bring down towers and Windrun to safely disengage – all in all, Windranger is a very good split-pusher. You should try to make use of that – whenever you see enemies on the map you should use the free space to push out a lane and possibly take a tower. Be very careful of mobile gankers with disables or silences – if you don’t see such heroes do not overextend.

Ganking:

Because of the unreliability of Shackleshot, WR is not a good gank initiator. Yet, she is quite decent at following-up the initiation of her allies – she has Focus Fire and Powershot for damage and Shackleshot to possibly stun-lock a target. Consequently, if your allies are going to gank, it is a good idea to stick with them and secure kills with Focus Fire. You can always get out of danger with Windrun if the enemies try to counter-gank.

Map Control:

You mainly use free space to flash-farm, you don’t create space as much – WR plays more like a carry than anything else.

If support, you mainly want to stick to your team (even though Windrun gives you some safety) and ward/deward to help in map control.

Powershot is an extremely powerful scouting skill because of the very long range and flying vision the projectile gives. Make sure to use it to safely scout Rosh attempts, Ancient stacks, etc.

Farming:

You are an INT hero, which means you have good mana pool and mana sustain. This allows you to spam your skills (mostly Powershot) to increase your GPM.

To get the most utility out of your Powershot for farming you need to use its range and the ability to cut down trees. While farming one camp you can use it at the right angle to hit your own camp and another one nearby. This will not only damage the creeps but also cut the trees to walk there quicker. You can also use this technique to stack two camps at a time (by firing the arrow at XX:53 through two camps).

You can use Windrun if you need to tank some creep hits, e.g. if you are taking Ancients or a stack.

If you have Aghanim’s, you can use your Focus Fire to kill the big creep from an Ancient camp.