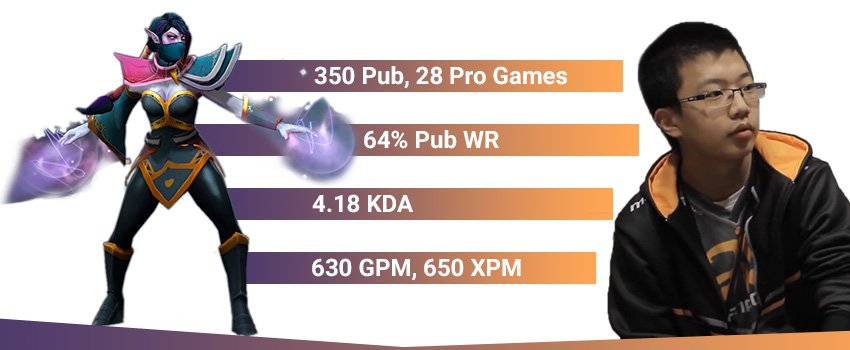
Templar Assassin Guide by Xcalibur
Artist: ChiZ
Author:
Xcalibur & Co.
Date: 01/2019
Tags:
text
Templar Assassin
Tactics
Analysis
Builds

Welcome

Welcome to Xcalibur's Book of the Templar Assassin, a hero guide part of the Book of Dota series!

Here you will find all the information you need to learn to play TA on a high level – from drafting and builds to the optimal playstyle in different lanes and situations. We hope you’ll enjoy this guide and find it useful!

Xcalibur TA Stats
TL;DR:

DraftPick TA in drafts where you will be able to fight and snowball in the mid game. Ideally pick her last, because you want to avoid certain terrible matchups in the mid lane.

Laning: Focus on last-hitting but in the same time harass with your spill damage. In the later laning stage push-out the wave and go to stack and farm the nearby jungle and ancient camps.

Mid & Late Game: Use your first core items (Deso, Blink) to start applying pressure to the enemy team – fight and claim objectives and map control. Try to secure Rosh and push the enemy base with Aegis and BKB as soon as possible. Going to the late game is not bad, but if possible you want to avoid it as you are not the best late game carry.

Authors

Steve "Xcalibur" Ye
Endorsement & Info

Xcalibur is one of the biggest pub-stars in the history of Dota - he has claimed the number 1 spot on the EU leaderboard numerous times and before the reset, he peaked at over 9 000 MMR.

His incredible success in pubs made him one of the hottest stand-ins in the pro scene and later on allowed him to play for major Dota teams like Fnatic.

Nikolay "CTOMAHEH1" Kalchev
Info & Editing

CTOMAHEH1 started his pro career as a support in Basically Unknown together with Mind Control. Since then he has consistently been playing on the European T2 scene, most recently on Unchained Esports. 

His highest placement on the EU ladder is top 100 - he plays all roles (mainly support), which is untypical for high-ranking players and shows his great versatility and understanding of the game.

Martin "BRING IT ON" Slavov
Writing & Info

Martin has lots of experience writing about Dota and he is no pushover in the actual game - a Divine III player, Martin plays mid and carry heroes on a very high level.

He has been playing Dota since Guinsoo's Dota Allstars (more than 12 years) and he loves thinking about new builds and strategies.

Kyril "MrNiceGuy" Kotashev
PM & Editing

Esports and gaming enthusiast since forever and founder of Dotahaven.

Has been playing Dota since 2005 (5.84). An Ancient I player in Dota 2.

My blades and my mind are as one.

TA is one of the strongest physical damage nukers in the game. Moreover, she is very survivable thanks to her Refraction and Meld, which allows for aggressive play from the start of the game. TA also provides good map control with the help of her Traps that give vision around the map. She is, however, quite vulnerable to heroes that counter her Refraction ability and enemies that can control her a lot in fights.

TA is usually played as a solo mid semi-carry that is expected to win the lane heavily in most situations. The early game gold and EXP advantage can allow her to snow-ball into the mid game, pressure the enemy team and take away map control both through vision and/or through ganking or forcing fights. 

Templar Loadout
Stats
Level 1
Level 15
Level 25
STR
19
Low
52
Medium
76
Medium
AGI
23
Very High
55
High
78
High
INT
20
Very High
48
Medium
68
Medium
Attack
53-59
High
85-91
Low
108-114
Low
Armor
5.6
Very High
12.04
Very High
16.64
Very High
Resistance
26
Medium
28
Medium
29
Medium
HP
542
Low
1146
Low
1578
Medium
MP
315
Medium
651
Medium
891
Medium
MS
314
Very High
320
Very High
325
Very High
STRENGHTS

MAJOR

Lane dominator: The Refraction ability of TA gives her both survivability and extra damage to out–last-hit her opponent in the lane. Moreover, Psi Blades help her harass enemies from a distance although she has very low range.

Survivable: Refraction provides the main portion of TA’s survivability. The spell allows TA to absorb any damage from 6 sources at maxed level. In addition, her Meld allows her to become invisible and so dodge projectiles and spells. Refraction also has a rather overpowered interaction with Blink Dagger which won’t go on cooldown as long as refraction is up. Thanks to that, she is hard to pick off even in the later stages of the game unless the enemy has great initiation.

Map control: The Traps of TA provide a good amount of map control since they give vision in a small area where they are placed. TA can, for instance, scout important locations such as the Roshan Pit, neutral camps or rune spots.  Furthermore, TA is a great ganker thanks to her burst damage and slows. As a result, she can create a lot of space from early on by rotating and killing heroes.

Item-independent damage dealer: Although TA scales well with items, she can deal quite a lot of damage even without much farm thanks to her Refraction and Meld abilities. The minus armor in combination with the extra damage of Refraction makes her a strong single target nuker that can burst heroes in team fights.

MINOR

A fast farmer with carry potential: TA can potentially hit several targets thanks to the Psi blades. This, combined with her extra damage and minus armor from Refraction and Meld allows her to quickly clear creep waves and jungle camps. It is worth noting that Refraction and Meld allow her to also kill Roshan quire quickly. She can also clear stacks, including ancients, very efficiently. With a good game, TA can farm about 10 creeps/minute, which puts her on part with fast farming cores like Luna, Medusa or Gyro for example.

Can cut waves: Thanks to the level 15 talent (+200 Psionic Trap Damage), TA can place traps on the lanes and use them to clear the enemy waves. This presents numerous advantages – more farm, protection from pushing, keeping the lanes pushed. 

WEAKNESSES

MAJOR

Heavily dependent on Refraction: Refraction is what defines TA – it is the spell that gives her the majority of her lane presence and the survivability that allows her to play aggressively in fights and nuke down targets. Because of this if the enemy team directly counters her Refraction she could struggle. Certain spells that deal a lot of damage instances in a short time period counter TA very efficiently, since they can take out her Refraction charges very quickly leaving her vulnerable.

Pretty much a melee hero: On the mid lane, TA is almost a melee hero and a melee hero without the advantage of the Stout Shield and Quelling Blade. That means she can be harassed by range heroes very effectively on the early levels. There’s also a high chance that a support will start in the mid lane to help his teammate just to ruin your early game as most people know what an unchecked TA could do.

Not very good in playing from behind:  Although TA can deal some damage without items, if she gets shut down in the laning stage, she wouldn’t be able to have a substantial impact in the game. TA is a momentum based hero and having a bad start will disallow her to build this needed momentum. Smarter enemies also know how to build against the hero - armor items or Heaven’s Halberd or Force Staffs, Glimmer Capes can make your game pretty hard if you don’t start well. 

MINOR

Inflexible laner: TA is a good hero in a 1v1 situation where she can both gain a lot of experience and use her skill set to dominate the lane. In dual lanes and trilanes, however, the hero is quite weak since she doesn’t have much synergy with any other hero and she needs the maximum amount of XP early on to build momentum. This makes her laning quite inflexible and predictable for the enemy team.

A lot of counters: Counters is maybe a strong word, but the number of heroes that can make your game uncomfortable makes TA hard to pick. You need to wait for 4th or 5th pick. We will talk about the uncomfortable heroes later.

Replays

EG vs Immortals, The International 2018 Qualifiers

MATCH ID 3971717222 

Replay

Immortals try to counter Sumail’s mid TA with a mid lane Jakiro. Despite this being a very hard lane for TA, Sumail manages to win it very convincingly. The key in this performance is that he wins the early harass exchanges thanks to his great use of Psi Blades. He constantly harasses the Jakiro without drawing creep aggro, while the Jakiro takes creep damage when he wants to fight back. Sumail also brings a lot of salves to make sure he stays on high HP to be able to maintain his aggressive posture. The harass exchanges leave the Jakiro without mana, which allows Sumail to use his Refraction and continue his aggression without fear that Dual Breath and Liquid Fire will remove the Refraction charges. Finally, even though TA has a big advantage in the lane, in the later laning stage when Jakiro’s spells become stronger Sumail pushes out the wave and farms the nearby jungle camps to accelerate his farm without spending unnecessary time mid. This incredibly smart play helps him leave the lane with a big advantage and snowball despite the bad matchup.

Mineski vs Execration, Dota 2 Asia Championships 2018

Match ID: 3720176854

Replay

A flawless performance from Moonn on TA against Execration. The replay is a perfect example of how TA’s laning stage is supposed to go – Moonn manages to get 74 (!) last hits on the 10th minute by farming the lane and the nearby camps, including the ancients. He secures an 11-minute Desolator and a 14-minute Blink Dagger, allowing him to snowball hard into the mid game, which is the main idea of the hero.

Mineski vs TNC Pro Team, Dota 2 Asia Championships 2018

Match ID: 3723158237

Replay

Another flawless performance on TA from Moonn, this time against TNC. Execration have an extremely aggressive draft designed to snowball from the lanes into the mid game, to take over the map and to secure an early victory. All cores of the team can fight and gank from very early on – QoP, TA, NS and Brew could even tower dive, especially when supported by WW, who can keep them alive if needed. The replay is a great laning example: Moonn has 62 creeps at the 10th minute and demonstrates how TA can easily farm the jungle camps close to the mid lane.

Drafting

TA is drafted for two main reasons:

First, you want to pick TA to dominate a lane and shut down the enemy hero.  To do this, however, you need to make sure that she is in a favorable lane matchup. This basically means you need to dodge lanes against heroes that directly counter TA (like Viper, Razor, etc.).

Second, TA is a strong hero in the early-mid game, since she can deal a lot of damage without a lot of farm. Moreover, since she usually dominates in the laning stage in terms of last hits and denies, the gained resource advantage allows her to pressure enemies even more by ganking and fighting early on. Apart from picking off heroes around the map, she is a very fast Roshan-killer thanks to her Meld, which gives her team a strong strategic advantage. Refraction is also a great thing to have in combination with Blink Dagger as it makes you pretty hard to gank without instant stuns.

The jungle stacks clearing potential of TA could also give you a huge early game boost. Minute 10 ancient stacks clearing has become a trademark of the hero.

TA, however, can’t really help the other lanes and if you don’t have the early lead you’d need to farm for the first 12-15 minutes to get a Blink Dagger or Desolator or both. That means you want to have strong lanes that don’t desperately need help from the mid laner.

Last but not least, TA does not fully depend on being successful in her early aggression (ganks or fights). She is by no means the best hard carry but her flash farming and semi-carry potential make her comfortable in more passive, farm-oriented games and allow her to contribute to late game fights.

Solo Mid Templar Assassin

TA needs a lot of experience to get higher levels in her spells. The higher level her Refraction is, the harder it will be for enemies to get through her Refraction charges. The Meld damage also increases significantly with levels and allow her to nuke down targets faster. Higher levels in Psi Blades helps her deal AoE damage and not get kited in fights as easily (because of the bonus range).

The higher levels in her spells early on (because of the solo XP) allow her to quickly get an upper hand against her opponent mid. Lower levels in Refraction make it much easier for enemies to harass and last hit against TA (since her Refraction charges and extra damage will be lower). Moreover, against multiple enemies, the effect of Refraction will be greatly reduced since a single auto-attack from each enemy will burn her Refraction charges relatively quickly. As a result of all that, TA is best played in a 1v1 match-up.

If TA is able to get a lot out of the 1v1 match-up (getting enough resources AND shutting down to a degree her lane opponent), it will be easy for her to be active around the map: gank, force fights and acquire map control in the early and mid game.

If you get counter-picked by heroes like Razor, Veno, etc. you might want to swap lanes with your carry if it’s a hero that can stay mid (maybe with a support) like Gyro for instance. TA needs a good game in order to be effective and if you get destroyed on the mid lane, it’s very hard to make a comeback. TA is not bad on the safe lane, being able to farm the jungle camps close to the lane and beats most offlaners. 

Substitutes:

There are not many heroes who can do what TA does, being able to farm fast and dominate a lane, however here are some heroes who have similar timings and still have a strong lane:

Clinkz Portrait

Clinkz - he is able to harass the enemy laner very effectively, not drawing the creeps’ agro with his Searing Arrows. He doesn’t farm that fast, but with a single damage item like Desolator or Orchid, he can be pretty scary around min 15 with his huge physical damage.

Queen of pain

QoP - a strong laner, able to farm fast and with a core item like Orchid or Veil of Discord, she’s able to contribute to fights or make solo kills. Her timing is also around the 10-15 minute mark. 

Ember Portrait

Ember Spirit – while he has a lot of bad matchups on the mid lane (almost like TA), Ember with a core item like Veil of Discord can fight in the early game with his high magic damage and his early-mid timing is also similar to TA’s. A big difference s that he falls off slightly in the mid-late game and is a terrible tower pusher.

Synergy

Generally, you want to pick heroes with TA that can boost her nuking potential either by increasing her damaging output (Auras, Minus armor etc.) or by providing good disable so that she can deal damage freely.

Good friends to have are:

Heroes with control: Bane, Tidehunter, VS, Earthshaker, Slardar, Beastmaster

Bane Portrait
Tidehunter Portrait
Venge
Earthshaker Portrait
Slardar Portrait
Beastmaster
Getting allies with disables together with TA can help her stick to her targets and burst them down.

Although TA has a slow (her Traps) it is often not sufficient to keep her targets locked down so that she can right-click freely. This is especially a big problem against mobile targets that have lots of escape mechanisms. If enemies can use their spells defensively, TA could easily get kited (due to her low attack range and low mobility) and so be unable to deal damage to these targets. Therefore getting heroes that can lock down enemies can help TA a lot to nuke them down in fights.

Heroes that buff TA’s damage: VS, Elder Titan, Tidehunter, Weaver, Slardar

Venge
Elder titan
Tidehunter Portrait
Weaver
Slardar Portrait
You can pick heroes that buff TA’s damage output to increase her nuking damage and secure a fast Roshan kill even quite early on in the game.

Heroes that lower enemies’ armor and/or increase the damage output of TA increase her nuking potential. Together with such allies, she can kill off targets much quicker. Heroes that reduce target’s armor also help her bring down Roshan very fast, which gives a strategic advantage to her team from the start of the game. 

Counters

Strong Against:

Squishy heroes with no escape mechanism: Zeus, Shadow Fiend, Invoker, Lina, Witch Doctor

Zeus Portrait
Shadow Fiend Portrait
Invoker
Lina
Witch Doctor

Since TA has a lot of physical damage she can burst down low HP heroes very easily. If your allies provide good disables, she can be a good pick against mobile heroes that are squishy since she can burst them down in the duration of a single disable. 

Weak Against:

Counters on the mid lane: Venomancer, Viper, Razor, Queen of Pain, Sniper

Venomancer
Viper
Razor
Queen of pain
Sniper

Those heroes can pretty much destroy you by harassing you with abilities that are good against Refraction or just melee heroes in general. Highly advisable not to pick TA against those as they’re hard to deal with later in the game as well unless you’re having a really good game.

Supports who can help the mid lane: Bane, Jakiro, Winter Wyvern, Shadow Shaman, Ogre

Bane Portrait
Jakiro Portrait
Winter Wyvern Portrait
Shadow Shaman
Ogre Magi Portrait

As we mentioned, TA is pretty bad against dual lanes and those heroes can zone you easily and turn the lane in favor of the enemy mid laner. The bad part is that you’re a melee hero (at least on the lane) and even if someone comes to help you, it won’t be as effective as 2 range heroes harassing 1 melee. In those games, you might need to hit the jungle. 

Heroes with illusions or summons: Visage, Naga Siren, Terrorblade, Phantom Lancer, Chen, Enchantress

Visage
Naga siren
Terrorblade
Phantom Lancer
Chen
Enchantress

TA is a weak hero against illusions and summons for two reasons. First, she doesn’t have a good AoE to deal with multiple units apart from the Psi blades splash which is hard to pull off in fights. Second, illusions and summons can quickly remove her Refraction charges in fights (since she takes damage from multiple instances) and so make her vulnerable. 

Heroes with high armor: Gyro, Luna, Phantom Lancer, Sven, Terrorblade, Lich

Gyro
Luna
Phantom Lancer
Sven
Terrorblade
Lich

Unless you have the advantage, those heroes can be hard to deal with as they maintain high armor even against the Meld/Desolator armor reduction. Lich is also pretty annoying due to his Frost Armor slowing you and providing bonus armor to everybody on his team. Mentioning Winter Wyvern here because he can save teammates by blocking any physical damage with Cold Embrace. 

Heroes with a lot of lock-down, especially through BKB: Bane, SD, BM, Axe

Bane Portrait
Shadow Demon Portrait
Beastmaster
Axe Portrait
Picking TA against a heavy-lockdown line-up can be a bad decision since TA will hardly be able to stick to her targets.

TA doesn’t have a lot of mobility and has low range. Therefore, she needs to be able to stay close to her targets to deal damage. If she gets constantly disabled she won’t be able to deal damage in fights.

Skills

Templar assassin refraction
Templar assassin meld
Templar assassin Psy blades
Psionic Trap

Templar Assassin becomes highly elusive, avoiding damage and gaining a bonus to her damage. The damage and avoidance effects are separate, and have a limited number of instances.

STATS

Cast Animation: 0+0

Number of Instances: 3/4/5/6

Attack Damage Bonus: 20/40/60/80

Duration: 17

CD: 17

Mana: 100

Refraction

Refraction is a unique spell and is what defines TA’s play style. The spell can be treated as two separate spells – the ability provides an offensive and a defensive bonus.

Defensive Use

The defensive Refraction charges work as a shield – each charge absorbs 100% of the incoming damage from a single source and this consumes the charge. What this means is that you absorb ALL the damage thrown at you but you do so just for a number of instances. Each damage instance that deals less than 5 damage will be completely ignored by the spell (won’t get blocked and won’t consume a charge).  For example, although Dark Seer’s Ion Shell deals 30 damage at level 1, it deals it every 0.1 seconds or 3 damage per 0.1 seconds. As a result, the damage instances won’t remove Refraction charges but TA will take full damage instead.  Level 3 Ion Shell, however, will trigger Refraction charges since the spell deals 70 damage or 7 damage each 0.1 second.

Because of the duration and the CD of the spell is the same (17 seconds), the most efficient way to use it is to pre-cast it before you actually need it. This way when you burn through the charges you will have the spell ready again and you wouldn’t have a period in which you are vulnerable without the spell.

Offensive Use

The offensive Refraction gives TA bonus damage for a number of attacks for a duration of 17 seconds. For example, at max level, you can attack 6 times with the extra damage from Refraction. Your subsequent attacks won’t have any bonus damage until the spell is refreshed and you use it again.

You do not lose a charge when you attack your own creeps. That means you can harass the enemy hero or last hit creeps by hitting your own creeps and splashing damage to the desired target.

The Refraction damage is raw bonus damage, which means it works with life steal and critical hits. Nonetheless, buffs like Empower or a DD rune don’t affect the Refraction bonus damage.

Last but not least, the offensive charge is consumed upon dealing the damage. This means that if you miss an attack a charge wouldn’t be consumed. Moreover, if an attack projectile is flying and you activate Refraction before it hits, when it hits it will consume a charge but won’t do the bonus damage.

Templar Assassin conceals herself, becoming invisible as long as she remains still. If Meld's invisibility is broken by attacking an enemy, Lanaya will deal bonus damage to the enemy and reduce their armor for 10 seconds.

STATS

Cast Animation: 0+0.53

Fade Time: 0

Damage: 50/100/150/200

Armor Reduction: 2/4/6/8

Debuff Duration: 10

Invis Duration: Permanent

CD: 6

Mana: 50

Meld

Meld works in two ways:

First, whenever used, TA becomes invisible as long as you remain in the same spot. If you move, you will become visible again. The fade time of the spell is almost instant, lower than 0.01 seconds. This means that whenever you hit the button you will become invisible fast enough to easily dodge attacks and certain projectiles even from a small distance if your reactions are fast enough. Most AoE damage spells will affect TA while she is invisible. However, AoE stuns like Slardar’s Crush and silences like Silencer’s ultimate won’t break the invisibility. Only abilities that change the positioning of the hero like Invoker’s Tornado will break the invisibility.

Second, if you attack an enemy while invisible, your attack will have an added bonus damage and will also reduce the armor of the target. Since TA has small attack range hitting a target while you are in Meld requires that the target is very close to you. If you first move (and so break the invisibility) and then attack the target neither bonus damage nor minus armor will be applied. Meld has, therefore, an important interaction with TA’s Psi Blades spell. Since Psi Blades increase the attack range, the Meld – attack will be much easier to pull off.

It is important to bear in mind that the physical damage of the spell counts as a separate instance. This means that it cannot life steal, crit or get reduced/buffed by Enfeeble/Empower. Moreover, the Meld bonus damage is NOT spilled by the Psi Blades effect.

The minus armor debuff is applied before the damage and because of this amplifies the damage of the actual Meld hit. The debuff is applied first, then the Meld damage and then TA’s actual attack damage (with or without Refraction).

Templar Assassin's psi blades slice through the attacked unit, splitting and damaging enemy units directly behind it, while gaining bonus attack range.

STATS

Spill Range: 590/630/670/710

Spill Width: 75

Attack Range Bonus: 60/120/180/240

Attack Damage Spilled: 100%

Movement Speed Slow: 0

Slow Duration: 0

Psi Blades

The spell increases TA’s attack range and allows her to damage units that are in a line with her attacks. This means that if two units are standing within a certain range to each other, you can attack both targets. To illustrate how this works, imagine you are shooting a target with a bullet – the bullet will go through the first target in a straight line and will hit the second target, provided you are shooting from the right angle.

Consider also that the spilled damage has a small area of effect, which means that if you are attacking creeps or heroes standing very close to each other, you don’t need to aim at an angle to hit all the targets in the small area. You need to bear in mind that TA’s position is checked as the projectile hits the target, not as it is launched. In practice this means that with high levels in Psi Blades you shouldn’t move away in a random direction right as you attack – you need to stick to the angle while the projectile is flying.

The spilled damage is pure. This is a very important part of the game – if you have the choice, you always want to attack the lowest armor target possible and spill the damage to the others. For instance, if you slow someone on the mid lane, you can hit a creep instead and spill higher damage on the hero before finishing them off. Or if you have a Void who used Chronosphere on several targets, you can adjust more easily to hit more targets with higher damage. This is a hard thing to execute, but it’s the beauty of the hero - an ability that is hard to master but looks awesome when you do it.

It is also important to note that Psi Blades don’t do spill damage when attacking illusions (despite the visual effect). This is why you always want to attack a hero or a creep in order to spill damage on the illusions as well. In addition, the spill damage cannot hit buildings or wards.

Templar Assassin places mystical traps that invisibly monitor enemy movement. When sprung at her command, they exert a slowing influence of 30% in the area. Traps charge up to slow 60% after 4 seconds. Deals bonus damage when fully charged.

STATS

Cast Animation: 0.3+0

Cast Range: 2000

Maximum Traps: 5/8/11

Trap Fade Time: 2

Trap Duration: Permanent

CD: 11/8/5

Mana: 15

Psionic Trap

Psionic Trap allows TA to place a trap on the ground within 2000 range. The Trap itself has 100 hit points and is invisible, i.e. can’t be seen by enemies without detection. It takes the trap two seconds to turn invisible (fade time) when you cast it, so if you use it near opponents they could kill it off before it turns invisible.

The spell gives vision in a small radius, which allows TA to scout areas such as the Rune spots or Roshan. It’s also very nice to trap the enemy jungle camps so you can know where the enemies are farming and eventually gank them.   

The slow starts at 30% and increases by 0.75% in 0.1-second intervals, reaching a maximum of 60%.

As of 7.07 the traps also deal damage when fully charged at 4 seconds –250/300/350 damage dealt in portions every second. This is also increased by the level 15 talent which makes the total damage 450/500/550. The important part here is that level 2 trap with the talent is enough to clear out entire creep waves. That means you can use it to farm more or cut the enemy waves while they’re pushing, leaving them without a creep wave to attack your towers/base. So once you reach level 15, you always want to have traps on the lanes.

Another useful use of the traps is to stack ancients. Here’s what you need to do:

  • The traps need to be fully charged in order to deal damage
  • Since the traps slow and the damage starts 1 second after triggering, you need to trigger them ~2 seconds before the usual stack timing – that means around x:51s
  • TA needs to be within 1900 range of the trap in order for the neutrals to agro her

Skill Builds

TA’s skill build is very flexible with the condition that you always max Refraction first. You want this skill maxed as soon as possible to have more Refraction charges and so deal more damage and have higher survivability. Higher levels in Meld give you more burst damage, while higher levels in Psi Blades increase your range and make it easier to harass.  Usually, you want to max Meld after 1 or two levels in Psi blades since Meld scales better with levels and increases your kill potential.

You always want to get your ultimate at lvl 6 to start providing map control and vision around the map. Moreover, it is your only disable and if you want to gank early on getting a skill point is quite important.  

Meld before Psi Blades build
Templar assassin refraction
1
Templar assassin Psy blades
2
Templar assassin refraction
3
Templar assassin Psy blades
4
Templar assassin refraction
5
Psionic Trap
6
Templar assassin refraction
7
Templar assassin meld
8
Templar assassin meld
9
Talent Icon
10
Templar assassin meld
11
Templar assassin meld
12
Templar assassin Psy blades
13
Psionic Trap
14
Talent Icon
15
Templar assassin Psy blades
16
Psionic Trap
18
Talent Icon
20
Talent Icon
25
Pros: longer range for easier last hits and farming;
Cons: no invisibility until lvl 8;

Depending on your matchup you can level up either Refraction or Psi Blades at level 1. Refraction allows you to get an almost 100% deny on your range creeps which is a huge deal. Psi Blades are good for pushing the wave – some heroes (like Storm or Puck) will try to push your wave at level 1 and force a double wave to come to your tower. Autoattacking with Psi Blades is how your counter that.

Getting 2 levels in Psi Blades and maxing your Refraction is the standard build for TA. We do that for several reasons – 2 points in Psi Blades is the sweet spot of the skill as it allows you to last hit/harass better on the lane and it’s needed for ancient stacks clearing. Clearing ancients with 1 point of Psi Blades is a real pain.

Depending on how the game goes, you can max Meld after having 2 points in Psi Blades in order to be effective in early fights. If you feel that you won’t have opportunities to fight early, however, you can just max Refraction/Psi Blades at lvl 9 without leveling Meld in order to maximize your farm.

Leveling of traps might be delayed a bit to lvl 14 as it’s not scaling that well and becomes strong with the talent at lvl 15.

You can also get a point in Meld early on to dodge skills like Shadow Strike (QoP), Viper Strike (Viper), etc. However, please note that the enemy will most likely have a Sentry Ward on mid and getting even 1 point in Meld slows down your Psi Blades lvl 2 which could be a huge deal for your laning. This is why the Refraction + Psi Blades until lvl 6 is the most effective build in almost every case game.

Talents

+4 Refraction Instances
25

1.5s Meld Hit Bash

-4 Meld Armor Reduction

20

Meld Dispels

+200 Psionic Traps Damage
15
+7 Armor
+3 Prionic Traps
10
+25 Attack Speed

Level 10: The attack speed it pretty good for farming and fighting early on, so we’ll go with that.

Level 15: As we already mentioned, +200 traps damage allows you to clear entire creep waves with a single trap, which gives an advantage in various aspects.

Level 20: Dispel if you’re playing against heroes like Bounty, Treant, Slardar, Ember, etc. Otherwise the -4 armor reduction.

Level 25: The Refraction instances are a great defensive talent if you're not playing versus direct Refraction counters. Tanking 4 more hits by the enemy carry is significant. If you need additional control to kill your targets, however, the Meld Bash is superior. It works great with your Blink as you can bash your target almost instantly.

Standard Build

The item choices for TA revolve around two main things – damage and mobility. The reason is that you want to be able to chase down enemies and burst them down with the help of your armor reduction and already high physical DPS.

Your starting items are pretty standard – you want a branch so you can eat a tango with double duration as you’re easy to harass on the early levels. You bring healing salve with the first earned gold – also standard. Multiple Wraith Bands and Treads + Blight Stone give you the needed stats to fight early on before your core items. Get Clarities to sustain your mana if needed. Bottle is a viable item mid if you think you need more sustain.

The goal is to get your core Deso + Dagger as fast as possible and to start applying pressure to your enemies. Pike + BKB comes after and ideally at this point you want to close the game. If it goes late your options are open, but Bloodthorn and Butterfly are the standard as they increase your kill potential and carry potential further.

Starting items
Wraith Band
Iron branch
Pulled Tango
Pulled Tango
Early Game
Wraith Band
Boots of Speed
Wraith Band
Power treads
Magic wand
Blight Stone
Mid game
Desolator Icon
Blink_Dagger_icon
Black King Bar
Late game
Hurricane Pike
Bloodthorn_icon
Butterfly
Wraith Band
Iron branch
Pulled Tango
Pulled Tango
Wraith Band
Boots of Speed
Wraith Band
Power treads

 Power Threads provide you with additional stats for survivability/mana and additional damage for last-hitting reliably even without Refraction.

Magic wand
Blight Stone

Blight Stone– the damage boost is not that significant, although it’s good for the ancients clearing. Stick/Magic Wand is good is almost every game, just buy the Stick early and upgrade it before Power Threads.

Desolator Icon

Desolator: the item synergizes well with TA’s Meld since it also reduces the target’s armor. Deso also costs 3500 gold, which generally makes it the most cost-effective DPS item for the early/mid game. The armor reduction on buildings is also useful since it makes TA better at pushing.

Blink_Dagger_icon

Blink Dagger: the perfect item to complement TA’s nuking potential since it gives the hero a repositioning ability that allows TA to quickly close the distance between herself and a target and so burst it down fast. The item is especially potent in ganking and picking off squishy targets in fights that usually stay behind enemy lines. Blink also won’t be put on cooldown while Refraction is up which allows you to escape almost every attempt for a gank if the enemy has no instant disable.

Black King Bar

Black King Bar: TA deals a lot of damage and has low range so she needs to stay close to her targets. Moreover, she needs to be able to attack her targets continuously in order to deal damage in fights (unlike other heroes that can use a spell or two and nuke down a target). Therefore, magic immunity is crucial for her to reach her fighting potential. It is also worth noting that while you are spell immune it will be harder for your opponents to remove your Refraction charges as they will have to use only physical attacks to do so – this makes you even more survivable.

Hurricane Pike

Dragon Lance: gives very useful stats for TA but more importantly increases her otherwise short attack range. This synergizes well with Meld Strike and makes the skill a bit easier to use in fights. The upgrade to Hurricane Pike provides a nice mobility skill that allows you to close the gap between you and the enemy or if the enemy has a hero that is better than you at close range (like Slark for example) – you can push him away and hit from a distance. 

Bloodthorn_icon

Bloodthorn: pretty expensive but if you already have Orchid, you can go for it as DPS boosting item. The silence from Bloodthorn also gives you True Strike, however, it is countered by BKB later on of course.

Butterfly

Butterfly: being an agility hero, TA benefits from Butterfly a lot and the evasion is great against right clicking heroes. The item increases TA’s overall DPS in fights but doesn’t give her the nuking potential like Daedalus. Because of this, the item is usually bought in the very late game as a well-round offensive and defensive item. The active that the item gives is also useful to chase or run away. It is countered by MKB however.

Other Items

Early & Mid game
Bottle
Phase boots
Yasha
Manta_Style_icon
Linken's Sphere
Late game
Daedalus
Assault_Cuirass_icon
Nullifier
Monkey_King_Bar_icon
Bottle

Bottle: a good source of sustain mid if you think you can control the runes better than your opponent.

Phase boots

Phase Boots are the more aggressive alternative to Treads. They allow you to chase down targets before you have Blink and the attack speed boosts your DPS output more because Refraction already gives you enough bonus damage.

Yasha

Yasha: great cost-effective item, allows you to farm and move faster.

Manta_Style_icon

Manta: useful in cases where you need to dispel certain abilities like root, silence

Linken's Sphere

Linken’s Sphere: Good against heroes like Doom, Batrider, Legion Commander, Razor, against heroes with Hex who can disable you for a long time before you can blink away. 

Daedalus

Daedalus: much more cost-effective than Bloodthorn in terms of damage (and is not dispellable), so if you don’t need the silence you can just go for it instead.

Assault_Cuirass_icon

Assault Cuirass: an alternative to Butterfly which is not countered by MKB. Similar to Butterfly, you can buy it when you need the armor against high physical damage heroes. AC also synergizes with Meld since it also reduces targets’ armor

Nullifier

Nullifier: This item is great against heroes who don’t have natural defensive abilities so they only use items to stay alive – for example, SF, Arc Warden, Bloodseeker, Luna rely almost entirely on items to stay alive and Nullifier is great against them. It can also be used in combination with Orchid/Bloodthorn to ‘Doom’ the enemy, blocking both spells and items (countered by Linken however). It also dispels Ghost Scepters.

Monkey_King_Bar_icon

Monkey King Bar: As of 7.07 MKB doesn’t give bonus damage anymore which is a nerf for TA – doesn’t synergize well with armor reduction and doesn’t improve critical strikes. You still need it, however, against evasion heroes with Manta/BKB. Bloodthorn is a better substitute if they can’t dispel it.

Laning

Templar 350px

TA’s main priority in the laning stage is to out-last-hit and deny the enemy opponent. As a lane dominator, you also want to harass the enemy hero in the meantime. Your primary harassing tool is your Psi Blades passive.


You shouldn’t stay in one place and take last hits but rather try to move around so that you can hit the enemy hero with Psi Blades whenever you last hit or deny. The high spill range of Psi Blades will help you harass even high range heroes.


A few things to focus on in order to master laning as TA:

Priorities
  • When last-hitting with Refraction ALWAYS try to hit the enemy hero as well with the Psi Blades spill. Don’t focus on the creeps, last hitting them with Refraction is easy and most of the times uncontested – focus on positioning yourself in a way that will always hit the enemy hero as well. He will try to position himself outside of your angle, watch his movements and try to outplay him.
  • ALWAYS look for an opportunity to harass/last hit by hitting your own creeps, spilling the damage with Psi Blades to preserve Refraction charges.
  • If possible, try to last hit (or deny and last hit) multiple creeps at the same time to preserve Refraction charges.
  • Decide what you want to do with the creep equilibrium: hold it on your high ground so that it is easier to out-last-hit and deny your opponent or push the lane as fast as possible to spend your free time stacking and farming the jungle.

How the hero against you will try to win the lane:

Ok, we explained how we win a lane as TA. However, there are ways for a good player to abuse TA’s low range and win the lane against her. TA is most vulnerable at levels 1-4.

A good opponent will try to harass you a lot on the first levels while positioning himself outside of your Psi Blades angle. Especially on your first 2 levels, you are very vulnerable to harass as your range is still low and your Refraction only has 3 charges. The enemy will try to exhaust your charges and then use their spells on you. In those situations, better back off a bit, you don’t want to man-fight at level 1-2 as the entire creep wave will be hitting you. 

You should draw the creeps’ agro by issuing an attack to the enemy hero, so they come closer to you. That will allow you to hit the creeps and harass the enemy from a safer distance.

The enemy can also come close to you with the intention of baiting you to hit him, so the creeps will start attacking you and break your Refraction. Usually, you never want to hit the enemy when he’s close to his creeps unless you’re sure you can deal much more damage to him than he can. Try to attack the creeps so you can spill damage on the hero as well, even if he’s close to you.

At level 5, your damage becomes too high for the enemy to deal with, so you shouldn’t have many problems. However, against heroes with strong nukes, don’t man-fight them close to their creeps. Heroes like SF, Lina, Puck, Storm, Tinker will deal much more damage to you if the creeps break your Refraction charges first. 

Dual lanes:

Dual lanes on mid are quite common at the beginning of the game, especially against TA, because people know they need to shut her down at the early levels. Unfortunately, this is the biggest weakness of the hero, she can’t deal with supports like Bane, Ogre, Winter Wyvern, Jakiro coming to harass her even if she gets help from a similar support hero. If your creep equilibrium is on the enemy side, you’re better off heading to the jungle to farm 1-2 camps. The good thing is that TA can farm jungle from very early levels, so you can still salvage the situation and go back to the lane once the enemy support is gone.

How to survive:

TA is naturally tanky thanks to Refraction. However, against multiple hero ganks her charges can get consumed very quickly, which will leave her exposed. In addition, there are spells that remove refraction charges quite fast because they deal multiple instances of damage over a short amount of time.  Therefore, you shouldn’t rely all too much on your Refraction when it comes to surviving, especially if enemies have such abilities.

The timing of Refraction use when you are getting ganked is also important. If you are surrounded by enemy creeps or units and they are attacking you, it might be better to try to create some distance from these units and then use Refraction. Otherwise, your charges will get removed very fast and you will be left vulnerable to attacks. Against some heroes like Tiny whose Avalanche spell applies multiple instances of damage, it might be better to use Refraction after Tiny has cast Avalanche (if you can afford to tank it, or course).

Meld is your second spell that can be used to survive ganks. The spell can be used to dodge projectiles or hide in one place if enemies don’t have detection.  However, it is pointless to hide with Meld if enemies have high AoE damage (since the AoE damage will usually affect you even if you are invisible) or detection. It would be better to use it to dodge a hit or a projectile and then keep running away. Because of this checking inventories is very important.

Last but not least, you can use your Traps to scout enemies’ movement and/or slow them down once they initiate on you. You can, for example, place the Traps around the Mid lane so that you can spot enemies rotating to gank you and avoid getting initiated in the first place.

Kill Potential:

Although TA has a lot of damage you rarely have solo kill potential before you get to level 6 because you lack any lockdown. However, with the help of teammates or a lucky rune, you can score kills even before this point. Level 3 Refraction essentially gives you the bonus damage of a DD rune. If a teammate disables your target you can burst it down very quickly. If you get a lucky Haste rune, on the other hand, you can even dive a tower to get a kill on your opponent since Refraction will protect you from the tower damage.

Once you get level 6, you can use your Traps to slow down a target and chase him down. Usually, you want to use the double-trap technique. You place one or two traps on his high ground. Whenever you see an opportunity, you trigger the already placed trap. It will deal damage and slow the enemy for 60%. When the duration is about to end, you cast a new trap – it will only slow for 30% and it will deal no damage, but if the enemy is low, it should be enough.

Whether you can get a kill on your own depends on the target’s mobility and the disables it has. If there aren’t any good targetable disables and the hero isn’t mobile, getting a kill will be relatively easy. For example, if you dodge a disable like Lina’s AoE stun, then you can finish her off with Meld and Refraction hits while she is slowed. Even if the enemy can escape, you should still give him a hard time, it will deal damage to him and scare him, he will miss creeps, etc.

As we mentioned earlier, if you cast Refraction around 10 seconds before a fight, you will have it off CD again after 7 seconds. This means that you can use up your Refraction charges and then recast the spell to get full charges again. In the span of 10 or so seconds, you can in theory attack 12 times with bonus damage and block 12 instances of damage.

Timings and Rotations:

In the laning stage, TA needs a good amount of levels before you can start fighting. Your first timing window is when you get around level 6-7 and have a high level in Refraction in addition to your ultimate. With the help of the slow from Traps and the survivability and damage from Refraction, you can rotate and get kills. Nevertheless, TA is also a great lane dominator –you shouldn’t attempt rotations if you are not absolutely sure of the outcome. A good rotation is to teleport and help your team if they’re being dived under their tower, so you can be sure you can catch the enemy. Bad rotation is to gank heroes who are close to their tower, unless you have a rune, like Haste or Invis.

The best kills to happen are actually on the mid lane. At level 6-7, you can call a teammate to gank or if you see enemies grouping up to come for you (with a ward or trap), you can turn it around with the help of teammates and carefully placed traps. Those are the best kills that can happen because you don’t have to move from your lane, so your farm doesn’t suffer either.

For those reasons, it’s better to farm a bit before you start fighting. Depending on the game, you can farm your Blink Dagger first, so you can start fighting and help your team. If the game is slow and you think it’s better to farm, you get Desolator first and then farm Dagger. Blink as a first item usually comes at around 10-12 minutes, while Desolator at 14-15. 

So generally, you want to have 10-15 minutes to farm before you start actively fighting. Of course, it depends on the amount of time can your team afford to play without a mid laner, but in most situations, taking some time to farm secures your early game and allows you to be much more effective later on. 

Ancients stacks:

Ancient stacks are very important for TA as she’s one of the heroes who can farm large stacks very early into the game, like level 7-8 with just Power Threads and Aquilla. The ancient stacks also give you a huge experience boost and help you farm your first core item much faster.

If your teammates don’t stack for you, you can go yourself without losing much farm on the lane. If you already have level 6, you can stack them with traps as we explained earlier.

Trap the area around the ancients, enemies will often try to gank you while you’re farming them. Call teammates if needed to protect you, they can benefit from the experience too.

Have the ancients chase you and then attack them all in a line with Psi Blades. You can use your traps to slow them down, it makes it much easier.

Unless you’re having a godlike lane and you’re destroying the enemy hero (in which case you want to keep doing that so you can shut him down completely), it’s always good to make stacks to farm later.

Matchups on the Mid Lane

Easy matchups: Zeus, Puck, Invoker, DK, Alchemist, Storm

Zeus Portrait
Puck Portrait
Invoker
Dragon knight
Alchemist hero icon
Storm spirit

Against those heroes, you can pretty much do whatever you want, you can farm and harass them as much as you want. They’re not a free win (except maybe Zeus, he’s the weakest possible laner against TA), you still need to be careful of the things we explained a few points above, but you’re usually going to be fine.

Average matchups: Ember, Sniper, Veno (maxing wards), Lina, Leshrac, OD, Death Prophet, Tinker

Ember Portrait
Sniper
Venomancer
Lina
Leshrac
Outworld Devourer
Death prophet
Tinker

Against them, you want to just farm, don’t play risky, don’t be too aggressive unless you see a good opportunity. Sniper is close to unkillable with his sprapnels, Leshrac, Tinker, Lina can burst you down once your Refraction is down so don’t fight them with creeps around. OD on higher levels can bully you out of the lane with his Arcane Orb.

Ember is a bit tricky – his Flame Guard can melt your Refraction almost instantly, so he can deal a lot of damage to you with Searing Chains afterwards. However, he doesn’t have much armor and he’s a melee hero, so you can harass him easily. The way to play against him is to always keep him at a bit lower HP than you by harassing with Psi Blades. If he goes on you while he has lower HP, you can fight him back – just make sure to issue attack again after he uses Chains because it forces a stop command onto you. If you’re on the same HP, try to run away as soon as you see him being aggressive or using Flame Guard. At lvl 6 he will try to kill your with triple Fire Remnant, so make sure you don’t engage in a melee fight with him unless you have 200-300 hp more than him. 

Hard matchups: Razor, Viper, Veno (maxing gale), Clinkz, Queen of Pain, Huskar

Razor
Viper
Venomancer
Clinkz Portrait
Queen of pain
Huskar Portrait
Jakiro Portrait

Queen of Pain can harass you a lot with her Shadow Strike. Against that, there’s not much you can do, you will just farm less than her for the first few levels. Play safe, don’t risk, get tangoes instead of a salve with your first money. It will be better once you reach lvl 4-5.

Clinkz is nasty because his Searing Arrows are a separate damage instance, so he takes down 2 Refraction charges with one hit. Once your Refraction is down, he can zone you and if you attempt to fight, he will destroy with Strafe. Same as QoP, play safe and get experience.

Against Veno (maxing gale) and Jakiro you’ll be fine on the first 2-3 levels, but after that, they have an amazing way to deal with your Refraction charges and pressure you, so better push out the wave as quickly as possible and hit the jungle. 

Against Huskar and Razor, there’s nothing you can do in the long run. Request a lane swap from early on or if that's not possible - hit the jungle when they start bullying you. Both of them will destroy you if you spend too much time in the lane unless the player skill gap is really huge in your favor.

Video Examples

(Fnatic vs OG, Dota summit 8)

In this video we can see Abed going up against Notail’s Broodmother in Dota Summit 8 – generally an unfavorable matchup although not that bad.

At level 1 he gets a little help from the Ogre who secures the last hits on the first wave. He starts with Psi Blades at level 1 with the intention of harassing the enemy.

Follow how he always tries to position himself in a way that hits the enemy hero as well. Also, watch how the enemy is trying to avoid being hit which makes the entire laning stage a game of positioning and harassing.

At 04:20 you can see a perfect Psi Blades spill from max range which is pretty hard to execute.

At level 6 he starts placing traps all over the mid lane – enemy high ground, his own high ground, low ground. At 05:50 you can see he starts stacking ancients with traps – also an important thing to do, as it doesn’t cost you farm to go stack in the traditional way. 

(Fnatic vs LGD, Dota summit 8)

Another game of Abed, this time against Somnus/Maybe – arguably one of the top mid laners in the world.

This time Abed is in the position of being harassed by Doom, who hits him with Infernal Blade at level 1. He chooses Psi Blades at level 1 again as Refraction will not offer him much protection against 2 heroes.

At 01:50 we can observe a beautiful succession of Psi Blades hits which results in a solo kill for the TA. From this point forward, he gets the upper hand and starts harassing the SF very effectively.

At 02:50 you can see how he realizes his advantage and zones the SF, dealing some nice damage as well. 

At 06:20 he is being ganked by 4 heroes, however, the perfect placement of his traps saves his life.

At 07:20 he attempts to kill the SF – it doesn’t work as the CM comes to help his teammate, however take a note that this is how kills happen with TA – you activate an already prepared trap and start hitting the enemy hero, then cast a new trap to slow him after the first one ends. One trap is usually never enough, but with two of them, you can pose a real threat. 

Mid & Late Game

templar_assassin_immortal_350px

You are a very strong mid game hero since you can deal more damage than most heroes at this stage thanks to Refraction and Meld. In that sense, you can dominate team fights even with a single BKB.  You have to decide if your team is stronger or not, however. If you are stronger, you should fight and push towers with your teammates. If, on the other hand, you didn’t have a good start, it will be better to control the map using your Traps and flash farm until you get enough items to start fighting.


Team fight, push with team
Farm
Gank
Timings:

The mid game for you starts when you have Desolator and Blink Dagger. At this point, you are able to nuke a squishy target very fast. This allows you to force fights favorably or efficiently gank unless you’re playing from behind.

Comeback Potential:

If your laning stage went well, you should use the gained advantage to push towers, gank and fight enemies. Usually, the enemy carry will deal much less damage than you at this point in the game. In that sense you are a “timing” counter to most enemy carries – you will simply have more DPS than them and will be able to easily win direct fights.

If the laning stage went poorly, you won’t usually be in a position to fight. Rather, try to catch up in terms of farm and get some items. You are a decent flash farmer and you can allow being passive when you are behind. If you are behind but your team composition allows you to fight efficiently in the mid game you should try to get pick-offs. Even without much items you deal considerable damage and killing the enemy farmers will quickly decrease the lead of your opponents.

Team Fights:

Although TA doesn’t have any team fight spell (reliable AoE damage or control), she is a decent team fight hero because of her high single target nuke damage and in-build survivability. She can potentially burst down a disabled target very fast and provide a numbers advantage for her team in that way.

Starting a team fight:

Usually, you are not the hero that start the engagement. If you go in you will be probably brought down quickly even with Refraction – the spell is not very efficient when multiple enemies are focusing you.

Instead of initiating you should slow heroes down with Traps and only go in whenever you see an opportunity to burst down a target. More often than not you should wait for a target to get disabled by one of your teammates and then go in to burst it down. Before a fight it is smart to cast Refraction 10 second beforehand in order to have the spell off CD again soon after (so that you can potentially benefit from the spell 2 times in a row).

Movement and positioning in a team fight:

Usually, you are not a static man-fight hero – if you go in even with BKB, you will likely get kited or you will get killed since your defensive Refraction charges get quickly removed in team fights. When your refraction is on CD, you need to be much more careful not to get focused – unless your opponents have used most of their spells, it is better to stay at a safe distance with Refraction unavailable. You are more of a single-target nuker rather than a continuous damage dealer at least while you don’t have many items. Your job is to bring down a disabled target as quickly as possible.

Also, unless you need to focus a key hero in a team fight, your target priority should start from the lowest armor heroes.

Example:

No[o]ne makes the critical decision to finish Rosh instead of immediately joining the fight – this is possible only because TA’s great at killing Rosh fast. Afterward, he manages to kill the enemy Luna. Even though Luna is the most farmed hero in the game, TA has far more single target damage. From that point on the fight is won and TA chases down enemy heroes to claim additional kills – this is possible because of Blink Dagger and the slows coming from her traps. Notice how he uses the spill damage of Psi Blades to finish off the Axe without having vision on him.

Pushing:

5-man pushing:

TA is a decent pusher for two reasons. First, her Refraction bonus damage works on towers which means that she can push relatively fast. Second, the defensive charges make her quite resilient against any anti-pushing nukes.  Your job would be to stay upfront and attack a tower. Thanks to Refraction it will be hard for the enemy team to initiate and bring you down quickly. You will likely survive the initiation thanks to Refraction and afterwards you will be able to activate your BKB and fight back.

When you are out of Refraction charges you need to immediately go to a safer position until the spell is available again.

Split-Pushing:

TA is a good split-pusher especially if she has Blink (you are more mobile this way, can move faster around the map and avoid ganks). Thanks to her Psi Blades and high damage output she can quickly clear creep waves. In addition, she can place Traps around the area where she is split-pushing to scout for enemy movement.  Last but not least, TA has quite a lot of damage that allows her to destroy towers fast if enemies don’t react in time.

Using your traps to clear out waves is also a great tool to keep the lanes pushed, even if you’re playing from behind. Make sure you always have traps on the lanes if you’re not in a leading position. 

Ganking:

Although TA has quite a lot of burst potential she doesn’t have any disable to cancel TP’s or to lock down very mobile enemies. Therefore ganking on your own in the mid and late game would be a rather hard job (unless you are ganking immobile targets without escape mechanisms). Usually, you will need a teammate with a good disable that can set up kills for you.  TA excels against solo targets since they can hardly deal with her Refraction. If you gank multiple heroes, however, you will be relatively squishy especially without BKB.

Executing a gank depends on your items, but generally, you want to let an ally initiate and afterwards follow up immediately with a Meld strike and subsequent Refraction hits. 

Map control and Vision:

Traps provide a lot of Vision in the mid and late game since you can scout important routes and areas. They make it quite hard for enemies to move undetected around the map without using smokes. Your primary job in this context should be to place as many Traps as possible in key areas around the map – rune spots, Roshan, enemy jungle, ramps, and chokes etc. 

TA also creates pressure and acquires map control by using the gained item advantage in the laning stage (since she usually wins her lane) to gank heroes or push towers.

Farming:

Your primary farming tool is Psi Blades. Don’t passively auto-attack lane creeps or jungle creeps. Rather, try to aim your attacks so that you hit several units at once with your Psi Blades. In the jungle, you can attack a creep camp then move back a bit so that the creeps chase you in a line. Then you can attack the first creep and so hit several units with your attacks. You can keep doing this until you have cleared the camp – step back, attack, repeat.  You can use your Meld attack on the biggest neutral creep to kill it faster. Usually, you will use your Refraction on CD to increase your farming speed.

Keep in mind that although TA is a strong mid game hero and can fight without a lot of items, she is a good late game carry as well. You can farm quite fast and if your team is not in a position to fight, you should farm up until you get some items that will allow you to engage (for example - a BKB). However, you are not the strongest late game carry since you can get easily kited because you lack mobility and have relatively low range. Therefore you shouldn’t passively farm but rather farm up to a point, for instance until you get a BKB, Orchid, Hurricane, Nullifier or another key item and then use the items to force engagements or gank.