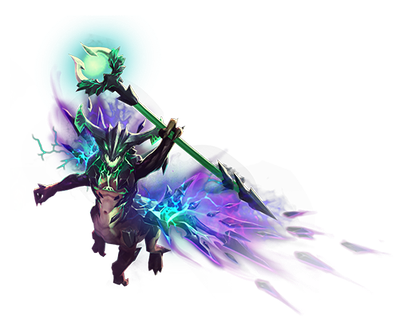
Outworld Devourer Guide by Xcalibur
Artist: Valve
  • Guide Navigation
  • HOME
  • ABOUT
  • DRAFTING
  • SKILLS & BUILDS
  • ITEMS & BUILDS
  • EARLY GAME
  • MID & LATE GAME
Author:
Xcalibur & Co.
Date: 01/2019
Tags:
text
Outworld Devourer
Builds
Tactics
Analysis

Welcome

Welcome to Xcalibur's Book of the Outworld Devourer, a hero guide part of the Book of Dota series!

Here you will find all the information you need to learn to play OD on a high level – from drafting and builds to the optimal playstyle in different lanes and situations. We hope you’ll enjoy this guide and find it useful!

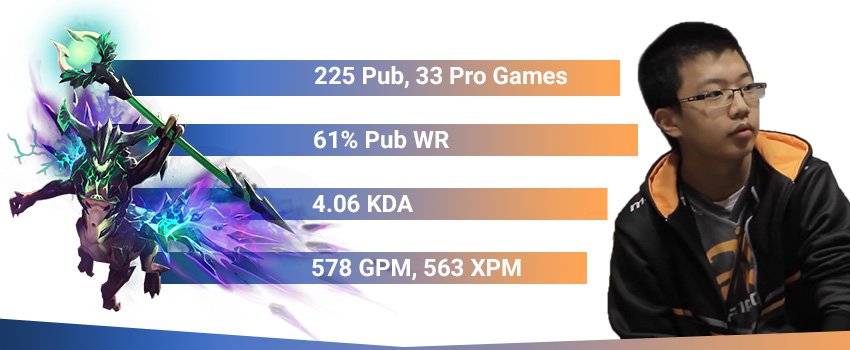
Xcalibur OD Stats
TL;DR:

Draft: Picking OD right away is usually a bad idea because opponents can try to counter you both in the lane and in fights. Preferably, you want to pick him closer to the end of the draft after you’ve seen the enemy mid laner.

Early Game: Initially you need to focus only on last hits and denies. Use your Astral to harass and hide your opponent, preventing them from taking some last hits. Value points in Equilibrium and Orb can help you harass more and accelerate your farm.

Mid & Late Game: Once you get your first core items group with your team and force fights. With mobility items, you can even start paling the role of an initiator. Successful pick-offs and fights will allow your team to take objectives and secure map control. You have very good late game potential, but you need the map control advantage to out-farm the enemy team because you are a bad flash-farmer and a terrible split-pusher. Continue pressuring to maintain the map control, but don’t be in a hurry to end the game prematurely – you can throw away your advantage. Farm your luxury items, get Rosh and force safer fights afterward.

Authors

Steve "Xcalibur" Ye
Endorsement & Info

Xcalibur is one of the biggest pub-stars in the history of Dota - he has claimed the number 1 spot on the EU leaderboard numerous times and before the reset, he peaked at over 9 000 MMR.

His incredible success in pubs made him one of the hottest stand-ins in the pro scene and later on allowed him to play for major Dota teams like Fnatic.

Nikolay "CTOMAHEH1" Kalchev
Info & Editing

CTOMAHEH1 started his pro career as a support in Basically Unknown together with Mind Control. Since then he has consistently been playing on the European T2 scene, most recently on Unchained Esports. 

His highest placement on the EU ladder is top 100 - he plays all roles (mainly support), which is untypical for high-ranking players and shows his great versatility and understanding of the game.

Kyril "MrNiceGuy" Kotashev
PM, Writing & Editing

Esports and gaming enthusiast since forever and founder of Dotahaven.

Has been playing Dota since 2005 (5.84). An Ancient I player in Dota 2.

From the outer dark I come.

OD is one of the INT heroes with the highest carry potential and at the same time, he is a very strong laner. He is an extremely powerful damage dealer whose damage scales uniquely based on his INT and mana pool. OD has sustained DPS through his pure damage attacks in addition to a powerful AoE nuke - Sanity’s Eclipse.

OD’s laning strength and level dependence usually put him in the mid lane. He is a damage dealing carry that relies on snowballing to dominate mid and late game engagements.

Outworld Loadout
Stats
Level 1
Level 15
Level 25
STR
19
Low
58
Medium
86
High
AGI
24
Very High
52
High
72
High
INT
28
Very High
70
Very High
100
Very High
Attack
44-59
Medium
86-101
Medium
116-131
Medium
Armor
5.34
High
9.82
High
13.02
High
Resistance
26
Medium
28
Medium
29
Medium
HP
542
Low
1244
Medium
1748
Medium
MP
495
Very High
1125
Very High
1575
Very High
MS
318
Very High
323
Very High
326
Very High
STRENGHTS

MAJOR

Strong Laner:
OD has great stats for a ranged hero (high armor, good attack damage, fast movement speed), which makes him hard to bully in lane. On top of that his skills help him continuously grow stronger in the lane and eventually start bullying his opponent and even threatening kills.

High Damage Output:
OD deals a lot of damage in engagements thanks to his AoE magic damage ultimate and Arcane Orb, which adds extra percentage-based pure damage to his attacks.  Those two skills combined allow the hero to burst down opponents if he is left uncontrolled in fights. 

MINOR

Carry Potential: 
As the game progresses, his auto-attacks with Arcane Orb and his ultimate deal progressively higher damage, unlike most INT heroes whose skills don’t scale particularly well.

Control from Astral:
OD has the option to use Astral Imprisonment defensively and to “hide” a hero, making him invulnerable for a short duration. This way he can save a teammate from getting burst down in fights and can potentially disrupt the enemy initiation. It is also possible to use the Astral offensively and keep an enemy target at one place in order to set up for impactful but hard to land spells.

WEAKNESSES

MAJOR

Inflexible:
OD is a static and passive laner. Without enough items, he is also a bad ganker and a terrible split-pusher, which forces him into just one playstyle – 5-man Dota.

Bad Catch-up Hero:
If OD gets shut down in the laning stage (for example if he gets constantly ganked and killed by enemy supports), he doesn’t have a way to catch up quickly with gold and experience. He is an average farmer and terrible split-pusher, which means he relies on winning fights to stay in the game, which could be hard when you are already playing from behind.

MINOR

Mana Management:
OD is very mana-intensive. Although Equilibrium allows him to restore his mana, when the skill is on CD he can easily run out of mana in the early-mid game while farming or fighting.

Bad Pusher:
OD is a 5-man Dota hero, yet he has terrible building damage. If your teammates don’t have good pushing potential you will have trouble closing the game.

Replays

VP vs EG, Chongqing Major

MATCH ID 4349909776
Replay

No[o]ne has an absolutely flawless 15-0-7 performance on OD. He deals almost twice more damage than the hero with the 2nd highest hero damage in the game (Sumail's NP), has the highest GPM, participates in 70% of kills, and does all of this without dying.

The game is a great example of laning (two kills on the enemy NP in the early laning stage as well as 65 CS on the 10th minute), smart builds (unconventionally builds Force Staff after a couple of Nulls and Treads to counter NP), and perfect positioning in order to have high participation and fight impact.

TNC Predator vs Vega Squadron, MDL Changsha

(Pre 7.20)
MATCH ID: 3891663985
Replay

Armel plays a mid OD vs a mid Venomancer. He manages to snowball together with his team and claims a 23-minute victory. He deals the most hero damage on the game, while his Lycan deals tremendous amounts of building damage, compensating for OD’s low pushing potential.

Despite having two deaths on the lane he manages to out-farm his opponent and gets the items he needs to deal very high ammounts of damage in the fights after the laning stage.

Drafting

Outworld art 350px

OD is both a hard late game carry and a very strong solo laner. He is a good carry choice for snowball strategies – with this hero you want to pressure your opponents right from the laning stage and never relent the pressure until you secure a big resource advantage. Generally speaking, OD is a bad carry for passive and defensive lineups because he doesn’t flash farm too well, cannot split-push and doesn’t have mobility or survivability mechanics.


He is an ideal pick when you need a save (e.g. for your frontline core against enemy initiators) and a lot of DMG. Because of his ultimate, he obviously works best against heroes with lower INT.

Solo Mid OD

The most common position for OD is in the mid lane. He needs a lot of experience and farm, which makes the solo position very suitable for him. He is a reliable laner thanks to his high stats and his ability to control the lane with Astral. The more levels he gets, the more threatening he becomes with levels in Orb and Equilibrium.

Safe Lane OD

OD works fine in 1v1 situations in the side lanes, but he is not great 2v2 because he is very level dependent and he cannot fight on early levels. Nonetheless, if the 2v2 matchup is better than the mid lane matchup (e.g. vs Brood), it's still possible to send him there. Use Astral to set up the spells of your allies and attempt kills.

Synergy

Heroes with control: Sand King, Tide, Shadow Shaman, Lion, Bat 

Sand King
Tidehunter Portrait
Shadow Shaman
Lion
Batrider
Combining OD with some good disables can give the hero the needed space in fights to deal damage with attacks.

Although OD has a huge amount of damage output due to his Arcane Orb and Ultimate, he needs good CC in order to have the freedom to attack heroes. His Astral doesn’t provide enough control because it hides the target and prevents OD from attacking it. If you are playing an OD in a team without sufficient control, you risk getting kited very easily.

Healers: Dazzle, Treant Protector, Abaddon, Omni Knight

Dazzle Portrait
Treant Protector
Abaddon Portrait
Omniknight portrait
Heroes who have some kind of healing and other protection abilities can allow OD to stay alive longer in engagements and deal more damage.

Allowing OD to survive and fight for longer means he will be able to steal more INT and deal more damage. Moreover, HP sustain is very important for a snowballing 5-man strategy because it will reduce the need to go back to base to recover after successful fights.

Pushing heroes: Pugna, Lycan, Shadow Shaman, Jakiro, Bristleback, Luna

Pugna
Lycan
Shadow Shaman
Jakiro Portrait
Bristle Portrait
Luna
Pushing strategies synergize very well with the snowball nature of OD.

Pushers, especially with control or spammable spells, are great partners for an OD because he is a 5-man hero who lacks the tools to push towers fast enough. OD can secure the mid game team fight wins, his teammates need to secure the objectives, otherwise, the snowball could stop rolling.

Counters

Weak Against:

Lane Counters: Medusa, Razor, Sniper, Warden, LD, Puck, Brood, Clinkz, Lina, Tinker  

Medusa
Razor
Sniper
Arc warden
Lone Druid
Puck Portrait
Broodmother Portrait
Clinkz Portrait
Lina
Tinker
Against strong mid laners (especially if they have roaming supports on their team) it might be a good idea to swap lanes.

Razor is a special case since he is, arguably, the only hard counter to OD out of all other heroes in the lane. Razor can use his very low mana cost Static Link to drain the attack damage of OD and gain a huge last hit advantage in the early laning stage – the period when OD is not that strong of a laner yet.

Medusa is also worth talking about because her Snake is an amazing nuke vs OD especially on higher levels – it drains a percentage of his huge mana pool, which makes it very difficult for him to keep his mana full. This makes it much harder for him to farm or harass. In the late game, however, OD is a great damage dealer against Medusa because aside from dealing a lot of damage he reduces her INT and as a result – mana pool, which she uses for tankiness.

Other strong laners, particularly heroes with a high range who are hard to Astral or attack with orbs, could also do quite well against him.

Split-Pushers: Arc Warden, Lone Druid, Brood, NP, Tinker

Arc warden
Lone Druid
Broodmother Portrait
Nature's Prophet Portrait
Tinker
If the enemy team wants to slow down the game and split-push, make sure you have strong gankers on your team that can stop them.

OD is a slow-pushing 5-man hero. Moreover, he is a bad ganker until he gets a lot of ganking items. This gives strong split-pushers the opportunity to out-farm him and trade objectives favorably unless ODs team can stop them.

Initiation + Control: Bat Rider, Nyx Assassin, Clockwerk, Beastmaster

Batrider
Nyx
Clockwerk
Beastmaster
Playing OD against a team with potent fight initiators can be a very difficult task. You usually need defensive items or allies with defensive abilities to survive the initiation and deal damage afterward.

OD has trouble against initiators that can easily jump on him and disable him in fights because he is vulnerable to burst damage. If he gets initiated upon, he can be brought down quickly. Since he is usually a major source of DPS for his team, killing him after an initiation means that his team will likely lose the fight due to lack of damage. At the same time playing around this problem is very hard because OD’s range is relatively short and he needs to be in the fight to deal damage.

If said initiators initiate on an ally of OD, however, he has the opportunity to save his teammate with Astral. This is extremely valuable and makes OD a great pick against most initiators. To do this, however, you need great defensive positioning in fights.

Nyx

Nyx Assassin: OD has a high INT gain and usually purchases items that increase his primary stat even more. As a result, the hero is very vulnerable to Nyx’s Mana Burn spell which deals damage based on the target’s Intelligence. Moreover, Nyx can use carapace to reflect OD’s Astral (or Orb) damage and setup for an easy Impale stun. Reflecting Sanity is also possible, but more difficult.

Pugna

Pugna: Pugna’s Ward is a big problem for OD as each of his attacks costs a lot of mana and because of this the Ward damages OD in fights continuously. OD is also immobile and with a relatively short range, which makes reaching and killing the ward difficult.

Strong Against:

Tanks relying on magic resistance or armor: AM, Timber, DK, Underlord, Omni, Axe, Tide, Viper, Pudge, Bristle,

Anti mage
Timbersaw
Dragon knight
Underlord Portrait
Omniknight portrait
Axe Portrait
Tidehunter Portrait
Viper
Pudge
Bristle Portrait
Choosing OD as your main damage dealer against a team with tanky heroes that rely on armor or magic resistance is a good idea.

OD deals Pure damage with his Arcane Orb which ignores any magic resistance or armor. Therefore, OD can nuke down tanky heroes that rely on such stats much faster than most heroes in the game. DK deserves a special mention because in the laning stage OD can orb him to drain his INT and prevent him from using Dragon Breath to secure last hits, which is a big problem for DK.

Skills

OD Arcane Orb
OD Astral Imprisonment
OD Essence Aura
OD Sanity's Eclipse

Adds extra pure damage to Outworld Devourer's attacks, based on his remaining mana pool. Steals intelligence for 80 seconds per hit when attacking an enemy hero. Arcane Orb damage splashes in a small area.

STATS

Cast Range: 450

Damage Radius: 175

Current Mana as Damage: 6%/7%/8%/9%

Intelligence Steal: 1/2/3/4

Steal Duration: 80

CD: 0

Mana: 110/140/170/200

Arcane Orb

Damage: You deal extra damage as a percentage of your mana (calculated when the projectile hits). This means that the more mana you have, the more damage you will deal with the ability – one of the main reasons OD scales very well into the late game when he has more mana from items. Note that Arcane Orb deals pure damage, not magic. Therefore, targets take full damage, irrespective of their magic resistance or armor.

Apart from the extra pure damage, Arcane Orb also deals bonus damage to illusions and summons, which helps OD clear such units very quickly – quite useful in finding the real target in fights or stopping split-pushing units.

Harassing: You want to use the spell for harassing not only because of the damage but even more importantly – because of the INT steal. It increases your attack damage, Orb damage and even the damage of your ultimate. Moreover, it decreases the mana pool of the hero you are harassing, making him/her a lesser threat. Early on you should try to manage your mana – Arcane Orb is quite mana intensive and without Equilibrium, it will drain your mana.

Farm: Arcane Orb is great for farming because of the dmage and AoE, however it is mana intensive and initially you should manage your mana efficiently. Use it scarcely when Equilibrium is on CD. Use it on auto-cast when Equilibrium is active.

Places a target unit into an astral prison. The hidden unit is invulnerable and disabled. When the astral prison implodes, it deals 100/175/250/325 damage to enemies in a 400 radius around the target.

STATS

Cast Animation: 0.25+0.4

Cast Range: 225/300/375/450

Damage Radius: 400

Damage: 100/175/250/325

Imprison Duration: 4

CD: 22/18/14/10

Mana: 140/160/180/200

Aghanim's Scepter

Grants charges to Astral Imprisonment. Damage areas stack.

Astral Imprisonment

Damage:

The damage is AoE, which means that when you have a high level of Astral you can use it to speed up your farm (cast it when creeps are clumped up to damage all of them).

The damage of the spell is its least important aspect in fights – the main utility is the disable and invulnerability, so you rarely think about the damage. Nonetheless, it is useful for canceling enemy Blink Daggers after the disable or to finish off enemies on low HP who are outside of your attack range (Imprisonment has a slightly longer cast range). 

Defensive Use:

The imprisoned target is invulnerable, which gives another level of utility to the spell: Astral can be used to dodge certain projectiles flying at you or to hide an ally who is disabled and is getting focused down. You are buying 4 seconds of time for your teammates to respond and hopefully turn the fight. The downside of using the spell defensively is that you will be trapped in a place for a few seconds. In certain situations, this could ensure your death.

 If an ally gets initiated upon by opponents, usually it is a great idea to use the Astral on him/her. If the ally is about to get initiated but can still move, it might be better to use Astral on one of the initiators in order to prevent the initiation before it happens and buy your teammate time to run away.

Disable: In fights, you can use Astral as a form of disable – bear in mind that you cannot focus the target you are disabling because it is invulnerable. This means you need to be careful when it is appropriate to Astral:

  1. You should use it on an enemy hero to get him out of the fight for a brief duration. Astral will cancel any actions of the target, including channeling spells.
  2. You should use it to buy your teammates time to catch up to a running target and secure the kill.
  3. You should use it as a setup for other spells: For example, Invoker can cast his Sun Strike 1.6 seconds before your Astral will expire to hit the target. Mirana can also time her Arrow to hit exactly when the duration of the Imprisonment is over. In the animation of the spell, there is a visual clue (the ring) showing when the Imprisonment duration ends.

Bear in mind that you can unwillingly help out opponents with Astral. Don’t use it on a target which your team is already focusing down – save it for other enemies.

Causes any spell damage you deal to slow enemies and restore mana based on how much damage was dealt.

STATS

Spell Damage as Mana Restored: 65%/90%/115%/140%

Movement Speed Slow: 12%/22%/32%/42%

Slow Duration: 1.75

Buff Duration: 7

CD: 18

Mana: 50

Equilibrium

Mana-Management: OD is incredibly mana intensive (for fighting and farming), but Equilibrium usually allows you to max-out your mana in a few Arcane Orb hits and even faster from the AoE damage of Sanity and Astral AoE. Use it on CD when farming - this will allow you to use your other spells much more often and will increase your farming speed.

Slow: always activate it when fighting - this will help you stick on the target your are attacking while maintaining your mana. The duration is usually enough to finish-off your initial targets.

Unleashes a psychic blast that removes 40% of the mana from affected heroes, while also damaging them based on the difference between the affected hero's intelligence and Outworld Devourer's. If an enemy has the same or higher intelligence than Outworld Devourer, Sanity's Eclipse will not cause damage. Sanity's Eclipse can hit units trapped by Astral Imprisonment.

STATS

Cast Animation: 0.25+0.4

Cast Range: 700

Effect Radius375/475/575

Intelligence Difference Damage Multiplier: 9/10/11

CD: 160

Mana: 175/250/325

Sanity's Eclipse

Sanity’s Eclipse deals magical AoE damage based on the difference of your Intelligence and that of the enemy hero. For example, at level 1, your ultimate will deal 50*8 = 400 damage, if you have 70 intelligence and the enemy hero has 20. Provided that the INT difference is high enough, you can use your ult to nuke down targets. Before you use Sanity’s Eclipse make sure to use a couple of Orb attacks on enemy heroes. Even just two hits (with max lvl orb) will create a difference of 16 INT between you and your target, which equals to 128 bonus damage with a lvl1 ultimate.

In addition to dealing damage, Sanity’s Eclipse burns 40% of your targets’ maximum mana. This can be particularly useful against heroes that rely on their mana to be effective (for example against Storm Spirit or Invoker). If you use your ultimate at the start of a fight against such heroes, it may greatly reduce their impact in said fights.

If enemies have more or the same amount of INT as you do, then your ultimate will deal no damage whatsoever. Therefore it is essential to get yourself a lot of INT – either by buying INT items or by buying items that allow you to attack a lot of times in a fight with Orb (AS and survivability). If you are targeting high INT heroes it is even more important to use your Orb on them so that you create an INT difference.

Note that you can use your Sanity’s Eclipse through your Astral Imprisonment. A good reason to use your Astral before Eclipse is when an enemy hero can dodge your Eclipse by becoming magic immune (usually when he activates his BKB). If you cast the spell during the Imprisonment your target wouldn’t have this opportunity.

Skill Builds

Outworld Devourer gains a lot of the utility of his spells from the first point invested. This means that almost all OD skill builds get 1 point in each skill relatively fast.

Standard Build
OD Astral Imprisonment
1
OD Essence Aura
2
OD Astral Imprisonment
3
OD Arcane Orb
4
OD Astral Imprisonment
5
OD Astral Imprisonment
6
OD Arcane Orb
7
OD Essence Aura
8
OD Sanity's Eclipse
9
Talent Icon
10
OD Arcane Orb
11
OD Sanity's Eclipse
12
OD Arcane Orb
13
OD Essence Aura
14
Talent Icon
15
OD Essence Aura
16
OD Sanity's Eclipse
18
Talent Icon
20
Talent Icon
25
Pros: higher Astral range and nuke damage; good farming speed because of the Astral AoE damage;
Cons: low INT steal and a late Sanity’s Eclipse for kill attempts;

Astral is an important early game spell as it has defensive and offensive capabilities. Maxing it first can be a good choice because on early levels the low range is very restrictive. With high levels in Astral, you are much better at harassing with it, pushing out the wave and even farming jungle camps a bit faster. Most importantly, you can easily use it to set up for kill attempts with your roaming supports early on.

You get 1 value point in Equilibrium (for mana sustain) and Orb (for harass and kill attempts). You usually want to max Orb after Astral to maximize your damage output, but mixing in a point or two of Equilibrium is also a good choice for mana management.

Until the INT steal of Orb is higher and/or you have sufficient INT items your ultimate wouldn’t be particularly strong, which means that more often than not it is a good choice to level it up a bit later on in the game (most often on lvl 9 or 11), when those requirements are met.

Getting it on lvl6 is possible, but it is a good choice only if you are facing low INT heroes. Moreover, high levels in Astral means you will focus more on out-pushing the lane and farming. This means you will not need your ult to fight right away.

Talents

15% Spell Lifesteal

25

+60s Arcane Orb Int Steal

+2 Sanity's Eclipse Multiplier

20

+20 Strenght

+6 Armor

15

+30 MS

 +20 Attack Speed

10

+250 Health

Lvl10: If there are heroes that can burst you down, getting the health talent is the better choice. AS means more Arcane Orbs, more INT steal, and more overall damage, but only take it when you’re certain you will survive.

Lvl15: The MS is usually better. Get armor only when you're facing armor reduction drafts.

Lvl20: The STR is the usual choice - being tankier is good for obvious reasons, but also bear in mind that if you survive for longer you will be able to accumulate more INT from Orb hits, which can increase your ult damage more than the talent.

Lvl25: The INT steal duration is the usual choice - it's very useful for long late-game fights. Get the spell lifesteal only if you desperately need the sustain (e.g. against mega creeps, you can stack it with Octarine's lifesteal).

Items & Builds

OD has the following itemization philosophy:

He deals a lot of DPS based on his INT and mana pool. There are two ways to get lots of INT:

  • Through items that give you INT.
  • Through items that give you survivability and attack speed. They allow you to fight for a long time and generate a lot of stolen INT from your Orb.

In practice, your build would be a mix of the two. Moreover, you lack control, so buying items that allow you to stick to your target (disables or mobility) is also a good idea.

Standard Build:

The starting build is a bit greedy and requires you to bring yourself a salve ASAP. If you don't get pooled tangoes, you can go for Circlets, Mantles and your own regen.

In the early game, you get cheap stat items to help yourself in early fights. You need to increase your mana pool, and a couple of Nulls is the fastest way.

Your boots of choice are Tranquils - you don't get hit by creeps often (Astral and the slow from Equilibrium help in this regard even when farming jungle), which makes them the best source of HP sustain for you. If you prefer, however, it's possible to go for Treads for even more INT.

Your core items are K&Y for DPS output, BKB for survivability, Blink for mobility, and Hex for control. If you're team has plenty of initiation, Hurricane Pike might be a good substitute of Blink simply because it is better defensively and gives more stats. You can still go for Blink later on in the game.

Starting items
Null talisman
Iron branch
Pulled Tango
Pulled Tango
Early game
Null talisman
Null talisman
Tranquil Boots
Kaya
Mid game
Yasha & Kaya
Blink_Dagger_icon
Black King Bar
Late game
Scythe of Vyse
Shiva's_Guard_icon
Null talisman
Iron branch
Pulled Tango
Pulled Tango
Null talisman
Null talisman
Tranquil Boots

Tranquil Boots: A cost-efficient source of HP sustain. You don't get hit by creeps often, so Tranqs don't get broken often.

Kaya

Kaya: OD uses all of the stats very well - the INT and spell amp are great for mana pool and damage. The mana-loss reduction helps you when Equilibrium is on CD.

Yasha & Kaya

Y & K: gives you all you need to increase your impact in fights - more attack speed, more mana, and even Spell Amp. The manaloss reduction is useful when Equlibrium is on CD, and the bonus MS is great for sticking to your target and moving between farming locations.

Blink_Dagger_icon

Blink Dagger: One of the main benefits OD gets from the item is that once you Astral yourself you can instantly blink away after the duration wears off. You can blink out the same way Puck does when he uses Phase Shift. The disadvantage compared to Force Staff is that Blink Dagger doesn’t give any INT, nonetheless, it is a much superior initiation tool when combined with items like Hex and it is not unusual to go for both Hurricane pike and Dagger.

Black King Bar

Black King Bar: In the mid-to-late game, OD needs BKB in order to deal right-click damage in team fights without getting disabled. Moreover, the longer he survives in a fight the more INT he can accumulate from Orbs for a devastating ultimate. 

Scythe of Vyse

Scythe of Vyse: OD lacks a disable that allows him to lock down his target while he is attacking it with Arcane Orbs, which makes Scythe the perfect choice. Moreover, Scythe grants a large amount of INT and for that reason is not only a utility item but a strong DPS increase for the hero.

Shiva's_Guard_icon

Shiva’s Guard: Shiva not only makes OD more survivable against physical damage and so solves partially the problem of his squishiness, but it grants him a lot of intelligence which increases the damage output of his Ultimate and Arcane Orb. 

Other Items:

Early & Mid game
Bottle
Power treads Strength
Phase boots
Drums
Hurricane Pike
Rod of Atos
Late Game
Boots_of_Travel_1_icon
Linken's Sphere
Refresher orb
Assault_Cuirass_icon
Moon Shard
Octarine_Core_icon
Bottle

Bottle: Early on it is risky to rely only on Essence Aura because an unlucky streak could leave you without any mana – Bottle can fix this problem.

Power treads Strength

Treads: if you think you need more stats to survive (or more INT for mana pool and damage), get Treads instead of Tranquils. The drawback is that you would probably have to buy consumables for HP sustain and you don't really need the bonus damage you're paying for.

Phase boots

Phase Boots: the rarest boots choice on OD, but still viable. Phase Boots have the same problem as Treads - you'll probably need consumables for HP sustain. They are a good offensive choice, however, because they increase your DPS with the AS bonus and the MS helps you stick to your target.

Drums

Drums: Gives great cheap stats and can be very useful if you want to be aggressive from early on.

Hurricane Pike

Hurricane Pipe: A powerful and easy to build item for OD. The 4 no-range attacks he gets from the active could be devastating since he hits for a lot of damage. Moreover, the bonus attack range helps fix his low attack range.

Rod of Atos

Rod of Atos: RoA is a great early-mid game choice if the game is going well for you. It allows you to stick to your targets and attack them with Orbs. It increases your overall INT and as a result – DPS. Last but not least – it makes you tankier. Often, however, if the game is not going well enough for you it might not be a good idea to delay your BKB – you need it for team fights. In the late game getting Hex is usually better.

Boots_of_Travel_1_icon

Boots of Travel: You tend to go for the item in the very late game when you don’t have an additional slot to carry a TP. You are not a good split pusher and getting the item earlier for that purpose is usually not a good idea.

Linken's Sphere

Linken’s Sphere: OD is vulnerable to initiators that can jump on him and get him disabled. If he gets controlled in a fight and focused, he will likely die before he is able to deal significant damage. Getting a Linken’s would solve the problem against potent single target disables, especially those going through BKB (Bat Rider’s Lasso, Bane’s Fiend’s Grip, Doom, etc.).

Refresher orb

Refresher Orb: The ability to cast Sanity’s Eclipse two times in a fight gives you immense AoE nuking potential. If the intelligence difference between you and your enemies is large enough, you can nuke down almost all opponents by using two ultimates one after the other. Therefore, Refresher is usually a good super late game item for OD; you want to have some INT-increasing items before you build it. Otherwise, your Ultimate won’t be strong enough and being able to cast it twice won’t be as impactful.

Assault_Cuirass_icon

AC: It follows the same logic as Moon Shard (AS means more Orb hits and more Int steal), but it also has defensive benefits in the form of armor.

Moon Shard

Moon Shard: The huge attack speed boost increases your DPS, but also allows you to steal a lot more INT for a shorter time. This is very useful in most late game situations – you want to be able to cast as many Arcane Orbs as possible during your BKB duration in order to cast a more powerful ultimate afterward.

Octarine_Core_icon

Octarine Core: Octarine is an all-around good late game item for OD because all of its benefits work well with the hero. The extra mana pool and HP are useful for damage and for survivability, it gives very decent life steal from the ult and the auto attacks and even more importantly – it decreases the CD of your ultimate, which reduces your downtime. Rushing the item is a bad idea because you usually need other core items to fight efficiently (mobility, BKB, Hex).

Early Game

Outworld 350px

OD is always played as a 1st position hero with farm priority. His number one goal from the laning stage is simply to get as much gold and XP as possible. How strong you are in the lane depends on the matchup. With time you can start to dominate low-range heroes with Orb harass, slowing down their development. Against worse lane matchups, however, you will usually simply prioritize farming - you can abuse Astral to get as many last hits as possible.


You are a passive hero early on, you shouldn’t try to be a playmaker even if the other lanes are struggling – you need your core items before you can start contributing to fights and bad rotations could slow down your development a great deal.

Get as many hast hits & denies as possible
Get levels and control the wave
Harass and possibly try to zone out melee heroes
Kill (with the help of an ally)
Farming:

OD has relatively high base attack damage, decent attack range (450) and good stats (high armor, high HP/Mana). Even if you are contesting last hits only with your attack you should be successful in winning the last-hit war.

Astral Imprisonment: Try to cast Astral when the enemy is about to get a last hit/deny – this is usually the case when a creep is on low HP and is about to get into “last-hit range”. This way you will benefit not only from the damage but also from the disable of the spell in order to make it more difficult for your opponent to get last hits.

Arcane Orb: Don’t use the Orb to secure last hits – it is too mana intensive and it is much better to use it for harassing. Later on in the laning stage, you can use it together with Equilibrium to push-out the wave, which will give you free time to control the runes or farm the nearby camps.

Harassing:

Astral Imprisonment:  Try to use Astral in moments that allow you to utilize the disable as well – to deny and get uncontested last hits. In later levels Astral deals good harass damage.

Arcane Orb: Use orb walking to deal damage and steal INT without overextending too much. Moreover, you shouldn’t shy away from hit exchanges. OD has good attack damage that gets increased as you repeatedly cast Arcane Orb on the enemy hero. Therefore you will likely have at least 20-30 more damage than the enemy – this, along with your high armor, will allow you to trade harass favorably in most situations. Nonetheless, you should care not to waste your mana when Equilibrium is on CD. Orb is incredibly mana intensive, and without Equilibrium you should play more passively in the lane.

Kill Potential:

Before level 6, OD doesn’t have a lot of kill potential. The only way to get a kill is with the help of an ally. You can use Astral as a setup, allowing your teammate to get closer and use spells to secure the kill. Your auto-attacks deal a lot of damage which will help you contribute towards the kill.

After level 6, OD has good kill potential against low INT heroes with the help of Sanity’s Eclipse. The usual way to kill a hero with OD is as follows: you open up with Arcane Orbs and use your Astral on the hero when he tries to get away. Then you move forward – the closer you are to the target once the Astral is over, the more attacks you will be able to do. After the Astral, you start auto-attacking the target and once he gets relatively low or out of your attack range you use your ultimate to finish him off. You need the Orb INT steal to increase the damage of your ultimate, otherwise it will deal very low damage. Use Equilibrium for the slow and to make sure you won't run out of mana while hitting with Orbs.

Surviving:

If you get initiated upon you have two choices – either Astral one of the enemy heroes or Astral yourself. Astralling the enemy hero is the usual choice, as it gives you time to run away. Astralling yourself is advisable only if you cannot run away and you hope that an ally can teleport and save you.

Usually, the safest position is on your high ground middle where you have enough vision to either Astral yourself or an enemy or even better – to run away before the initiation happens. 

Rotations and Timings:

You rotate on rare occasions. If you grab a favorable rune (let’s say Haste) and you already have your ult, then you can go for a rotation and attempt a kill if an opportunity arises – i.e. if your allies have enough lockdown and damage so that you actually get a kill out of the rotation. Apart from such rare situations, you are expected to stay in the lane, get most last hits and denies and farm up. You function as a carry and even when you are not helping out the other two lanes, your team benefits from having a farmed OD in the long run. If you are playing OD in an early pushing strategy, then you can rotate (gather with your team) at the end of the laning stage once you get to level 8-9 and some stat items.

Video Example:

(pre 7.20)

Maxing Astral in this lane (against Puck) is a great choice because Puck can Phase Shift the Orb Attacks, but can’t Phase Shift the instant Astral. This allows OD to control the lane much better than he would with just one point in Astral and allows him to get ahead in terms of last hits and denies even against Puck, who is a very strong laner.

Notice how OD is using his Astral only when he can make Puck miss last hits and in the same time secures his own last hit. When attempting kills with the roaming Tusk, he uses Astral to make sure Tusk can easily reach the Puck and block him with his shards. Even more importantly, they engage on the Puck after he has used his Orb to last hit and cannot use it as an escape mechanisms because it is on CD.

As we said you usually don`t want to rotate much with OD. You want to pressure your own lane and focus on your own farm. However, in this example OD sees that enemies are tower-diving and decides that this is a great opportunity to take a fight (he already has his ult). In this case the rotation pays off (they kill the most farmed enemy hero), but it is quite obvious that it is a risky move. OD almost dies and in the meantime Puck catches up in farm a bit. If the rotation was unsuccessful for any reason this move would have thrown away all of his early game advantage. You should simply treat OD as a hard carry – rotate only when you are 100% sure the rotation is worth it and don’t take too big risk. OD wins the game slowly and steadily, not with flashy moves.

Mid & Late Game

outworld immortal 400px

Despite being an Intelligence hero, you should think of OD as a strong late game carry. His ultimate in combination with Arcane Orb provides a lot of damage and burst in fights and scale extremely well with items.


Item progression is a priority for you. Getting your core items will allow you to pressure your opponents and scale well into the mid and late game. Playing too passively, however, is a mistake because fast flash-farmers could out-farm you and you will lose your advantage.


The game plan with OD is to win the lane, get core items and snowball with fights. When your ultimate is up, you should fight with your team and pressure your opponents. If you have the proper items (mobility and/or disables), you can even initiate ganks and pick-offs to keep the pressure up.

Farm up and get your core items.
Pressure the enemy team - team fight when your Sanity’s Eclipse is off CD.
Gank if possible;
Comeback Potential:

The outcome of the laning stage is very important for OD – he is a bad catch-up hero.

If the laning stage went poorly for you, you should still try to farm up your core items and join fights or ganks. Spam Astral to push out the waves, get a mobility item and BKB and try to win fights.

In case you don’t manage to recover in the mid game you should aim to take it into the very late game. Farm up and turtle as much as possible – avoid direct fights and make sure you are not getting ganked. If your opponents don’t break your base and you reach the late game you might be able to take some favorable defensive fights and win the game on the back of your carry potential.

Pushing & Split-Pushing:

Split-Pushing:

OD can easily push-out waves with Astral on a low HP creep + 1 hit on every other creep is enough to finish off a wave. If Astral is not available, Orb hits (possibly with Equilibrium) will kill the wave quickly. This means the amount of time he shows on the lane is minimal. Moreover, enemies usually need multiple heroes to gank him successfully – otherwise, he can simply Astral the enemy and TP out.

OD, however, has bad tower damage, which means that you rarely stay and hit towers on your own – you simply out-push waves and go to the jungle/another lane.

If OD has Blink, he is good at punishing split-pushers. He can initiate the gank with Blink and Astral, which will buy time for his teammates to join the gank.

5-man Pushing:

OD is bad at pushing before he gets BKB and a mobility item. Once he gets them, however, he can be very useful in a 5-man push:

Don’t stay in front to hit the tower unless the enemy team is dead. You deal little damage to buildings anyway and it is not worth the risk to expose yourself to danger – if you get picked off in the start of the fight your team will have a problem winning the engagement because as OD you are likely to be the main damage dealer.

You should stay behind instead and be ready to save your frontliner with Astral (and/or Force Staff) if he gets initiated upon while he is hitting the tower. Afterward, you can activate your BKB and enter the fight to deal damage.

Team Fights:

Before the Fight:

Decide whether you want to initiate on an important enemy to burst him down or wait more patiently to save an ally with Astral. For example, if you are playing against a Void (or other initiators), it’s a very good idea to stay further back, to wait for his Chronosphere and once he uses it – to save your ally.  If you have Blink + Hex and you see the Void, however, you can try to initiate on him and burst him down before he is able to use his spells.

Starting the Fight:

Generally, you have two options when it comes to initiation. You can either be the initiator or follow up an ally’s initiation. In the former choice, you can catch targets either with Hex (or Atos). Astral will give the enemy team time to react to your initiation, so don't use it on your initiation target, but on other enemies (or save it for defensive use). In the latter choice – you simply jump in after your initiator and deal as much damage as possible with Orbs. Ideally, you want to finish-off the target with Eclipse ASAP.

If enemies have good counter-initiators and disablers, jumping in like that might get you killed. Make sure you have BKB ready if you intend to start the fight. If even BKB cannot keep you safe from the counter-initiation, then it’d be better to follow up a teammate’s initiation and play more like a glass cannon damage dealer.

It is also possible to start the fight with Blink into Hurricane Pike on someone to buff your INT with four free and safe hits. Doing this on a squishy support can even get it killed before the fight starts for real.

Positioning:

After you start the fight, you shouldn’t stay in front of your allies, exposed to attacks and spells but in the same time, you need to be close enough to deal as much damage as possible. Try to be behind but close to all your allies – you are a hero that has a way to save anyone from dying by casting Astral on him. In the engagement itself, you can cast Astral to either save an ally or disable an important hero that you don’t want to focus down.

Dealing Damage:

In terms of dealing damage, the general tactic is to cast as many Arcane Orbs on enemy heroes as possible and to use your ultimate when you’ve accumulated enough intelligence. Usually, after the fight starts you would activate your BKB, go in with orb attacks and Equilibrium and you would try to use your ultimate before your BKB times out or your opponents run away.

Dealing with BKBs:          

At the start of the fight, enemies will pop their BKBs, and you will have to disable and focus targets that don’t have magic immunity – there is little value in attacking heroes that are magic immune since you deal almost no damage without Arcane Orb. Use Astral defensively and use your mobility items to kite enemies in order to delay the fight. Wait out the BKB timings with as little casualties as possible.

Once the BKB timers are over, right-click heroes down and attempt to finish the fight with Eclipse.

Using your ultimate early in the fight is a good idea only when you are very under-farmed and care more about the mana burn than the damage or when you are about to die – it is important you cast your ultimate before your death because it could provide your teammates with the needed damage to win the fight. Otherwise, wait for at least a couple of INT stacks from Orb hit to maximize the damage.

Example:

Omni Repels Armel, who is playing OD, and he jumps very aggressively into the enemy base to kill the enemy Veno and Shaker. Notice how once the Repel is over and enemies buy back, Armel hides in the trees and stays there defensively. He even manages to avoid getting hit by the Ice Blast (which would have broken his Dagger). When Repel is available again, he jumps in aggressively to get more kills and secure the victory.

Farming:

You are a hero that scales very well with items and you should continuously farm up, especially when your ult is on CD and you are not in a position to take team fights. The way you farm with OD is pretty straightforward: You use your Arcane Orb on auto-cast when you have Equilibrium. With Arcane Orb’s auto-attacks you can quickly clear waves and even jungle camps. Without Equilibrium you should still use Orb, but pay close attention to your mana.

Use your Astral Imprisonment AoE damage to clear camps and waves faster. As with every AoE spell, try to maximize the efficiency of the AoE damage – don’t focus creeps one by one, instead spread your damage and let the Astral finish all of them off.

When the game progresses and enemy carries get DPS and farming items passively farming is not a good idea because you will start falling behind. You need to use your mid game potential together with your teammates to pressure your opponents and deny free space for them to farm (push, gank, etc.). You win the farm war on the back of better map control, not on the back of your split-pushing and flash farming.