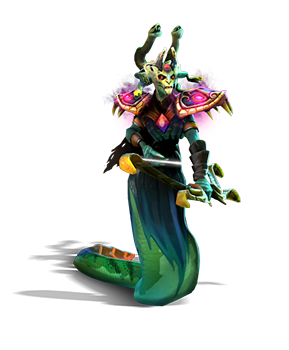
Medusa Guide by Nikobaby
Artist: Yestar
  • Guide Navigation
  • HOME
  • ABOUT
  • DRAFTING
  • SKILLS & BUILDS
  • ITEMS & BUILDS
  • EARLY GAME
  • MID & LATE GAME
Author:
Nikobaby & Co.
Date: 11/2018
Tags:
text
Medusa
Builds
Tactics
Analysis

Welcome

Welcome to Nikobaby's Book of Medusa, a hero guide part of the Book of Dota series!

Here you will find all the information you need to learn to play Medusa on a high level – from drafting and builds to the optimal playstyle in different lanes and situations. We hope you’ll enjoy this guide and find it useful!

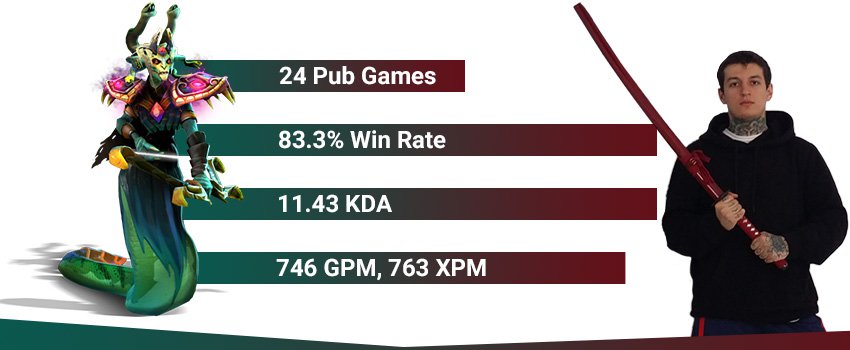
niko medusa stats
TL;DR:

Draft: Medusa is a very predictable pick – you want to passively farm with her for the first half of the game and to win team fights in the latter half. If you reveal her early on in the draft the enemy team will counter with early game aggression and possibly direct counters like mana burn. Avoid this situation by picking her late into the draft. Make sure your allies are not also passive heroes because as Medusa you need someone to create space for you while you’re farming.

Early Game: Focus entirely on maximizing your farm (and surviving if you are getting pressured). Get your early game items, push out the lane and enter the jungle. Utilize your Split Shot and high attack range to farm two camps at once and ideally – stacks.

Mid & Late Game: You are going to be the best scaling hero in the match, which means the default game plan is to secure the victory in the late game once you are farmed. Don’t be over-aggressive in the mid game, focus on farming and team-fight with your team only when you are confident you will win the fights. Once you have an item advantage over the enemy team you will be extremely difficult to stop. This could happen earlier if your team is creating incredible amounts of space for you, but usually, Medusa games are long.

Authors

Nikolay "Nikobaby" Nikolov
Endorsement & Info

Niko is a rising star on the EU & CIS pub and pro scene and he is absolutely proficient at carrying. He has played for teams like Basically Unknown, Effect, DD, and recently - 20 min afk les, which won the TI8 CIS Open Qualifiers.

His peak placement on the EU Leaderboards is top 3, while his highest MMR before the reset was 8.5k. According to Dotabuff's player rankings, he is the rank 1 Morphling player in the world.

Nikolay "CTOMAHEH1" Kalchev
Info & Editing

CTOMAHEH1 started his pro career as a support in Basically Unknown together with Mind Control. Since then he has consistently been playing on the European T2 scene, most recently on Unchained Esports. 

His highest placement on the EU ladder is top 100 - he plays all roles (mainly support), which is untypical for high-ranking players and shows his great versatility and understanding of the game.

Martin "BRING IT ON" Slavov
Writing & Info

Martin has lots of experience writing about Dota and he is no pushover in the actual game - a Divine III player, Martin plays mid and carry heroes on a very high level.


He has been playing Dota since Guinsoo's Dota Allstars (more than 12 years) and he loves thinking about new builds and strategies.

Kyril "MrNiceGuy" Kotashev
PM & Editing

Esports and gaming enthusiast since forever and founder of Dotahaven.

Has been playing Dota since 2005 (5.84). An Ancient I player in Dota 2.

Look me in the eye!

Medusa is one of the hardest carries in the game. She is very hard to kill, scales well with farm and is able to turn any team-fight in her favor especially in the late game when her multi-shot will deal very high AoE damage. All of this is compensated by her extreme need of gold which makes her a very passive hero in the early stages of the game.

Medusa Loadout
Stats
Level 1
Level 15
Level 25
STR
15
Very Low
33
Very Low
46
Very Low
AGI
22
Very High
70
Very High
104
Very High
INT
19
Medium
48
Medium
69
Medium
Attack
46-52
Low
93-99
High
127-133
High
Armor
3.4
High
12.9
Very High
19.72
Very High
Resistance
25
Medium
26
Medium
27
Medium
HP
470
Very Low
797
Very Low
1031
Very Low
MP
303
Medium
651
Medium
903
Medium
MS
278
Very Low
286
Very Low
292
Low
STRENGHTS

MAJOR:

Powerful late game:
Medusa scales well with each new item she gets – she doesn’t lose effectiveness even in the very late stages of the game, unlike other carries.

Extremely hard to kill:
Her Mana Shield makes her very tough as she gains effective HP from mana which makes +all attribute items give her almost double the HP compared to other heroes.

Team-fight monster:
Medusa is usually very strong in team-fights as she can survive for a very long time, she’s able to damage multiple enemies and her Stone Gaze makes it hard for the enemy team to commit to the fight.

MINOR:

Fast farmer:
Medusa has been known as one of the hardest late game carries for years, but the introduction of talents and the buffs to Mask of Madness (Berserk no longer amplifies incoming damage by 25%) made her farm much faster and gave her some power in the early and mid game as well.

Good laner:
She has a great attack animation, her starting damage is not bad and her Mystic Snake ability is a great tool for lane control. She’s also hard to gank, even when playing on the mid lane because of her tankiness. 

WEAKNESSES

MAJOR:

Mana Burn:
Any heroes with mana burn are extremely effective against Medusa as she always relies on her Mana Shield in order to stay alive.

Farm dependent:
Medusa always wants to be on top of the net worth charts or to at least be even with the enemy cores, otherwise, she loses effectiveness. 

MINOR:

Slow movement:
Medusa’s 275 MS is one of the lowest in the game (270 being the lowest starting speed).

Bad stats:
Medusa has the lowest strength and strength gain in the game and her INT isn't great either. 

Replays

Countering PA with Medusa:

After 7.20 came out and PA became a top carry, some teams started attempting to counter her with Medusa. In the articles below, we analyze the two games to get a better understanding of the matchup. In the first game, TNC were successful in their strategy, but in game two Nisha's PA was victorious.

Part 1: TFT vs NIP, Chongqing Major Qualifier

MATCH ID 4244096428

Part 2: TFT vs Secret, Chongqing Major Qualifier

MATCH ID 4245828481

IG vs Ehome, CHINA DOTA2 SUPER MAJOR

MATCH ID: 3845360065
Replay

XXS from IG plays a flawless game on Medusa. He doesn’t die even once in a 44-minute game and manages to kill 590 creeps and 10 heroes, resulting in 872 GPM. Thanks to his farm he deals the most hero and tower damage in the game and with a late game Rapier manages to secure the victory for his team.

Notice that Medusa’s 4 allies are well suited for pushing and fighting aggressively as 4, which frees up space on the map for Medusa to out-farm the enemy team.

In the early game both mid laners farm very well by abusing the jungle (Lina farms a bit more thanks to her nukes), but Medusa scales with items much better than Lina - this becomes noticeable in the mid-late game.

Drafting

Medusa is good in “4 protect 1” strategies where she’s going to be the main farmer. She needs a lot of space to farm, usually for the first 20-25 minutes. This means you want to play with a team that is not very farm dependent and can hold their ground early on without your help. Medusa is not bad in fights, even early on, but any team-fight slows her progression down and deaths could cripple her.

Positions

  • Safe lane carry

As is the case for most carries, the safe lane is great for Medusa. It gives her a lot of space to farm, it usually means she’s going to have a support as well and is generally a good lane to stack and farm the jungle later in the laning stage. 

  • Mid lane carry

On the mid lane, Medusa should still have #1 farm priority, she just starts on a different lane. She’s good here because she’s very hard to drive off the lane, you can’t zone her and it’s pretty hard to stop her from farming as she has great attack range and attack animation. Her Mystic Snake allows her to occasionally harass the enemy heroes as well or to push-out the wave and buy herself some time to stack or farm jungle in the later laning stage.

Substitutes:
Gyro
Luna

Luna and Gyrocopter have a slightly similar playstyle - they’re good in team-fights and can farm stacks. Both of them also have multi-target attacks and scale well into the late game. Both Luna and Gyro are better than Medusa in the early and mid game but don’t scale as much as her later on.

Synergy

Good friends to have are:

Buffers: Ogre, Venge, Beastmaster, I0, Omni, KotL

Ogre Magi Portrait
Venge
Beastmaster
IO Wisp
Omniknight portrait
Keeper of the Light

Heroes who can grant buffs or auras are good as they can improve your team-fight effectiveness. Since you don’t deal a lot of damage before you get items, DPS buffs life Ogre’s Bloodlust and Venge’s aura are very useful in the early and mid game. Bloodlust also makes you farm faster and Omni can keep you alive for a long time in a fight. KotL deserves a mention because his Chakra serves as a heal to Medusa and it allows her to cast 2 Snakes close to one another, allowing her to fill up her mana in fights even more. An IO with Arcanes/Guardians can also provide a “burst heal” through his Tether and makes her even tankier with Overcharge.

Disablers, especially with good counter-initiation: Axe, Enigma, Tidehunter, Magnus, Puck, Batrider

Axe Portrait
Enigma Portrait
Tidehunter Portrait
Magnus Portrait
Puck Portrait
Batrider

You usually want to stay in the frontlines of the battle and deal damage. If the enemies try to make a move on you, your teammates can counter-initiate with their disables and give you a lot of space to auto-attack the whole enemy team. Axe deserves a special mention because with his taunt he can force multiple enemies to look towards you, which synergizes with your ult.

Counters

Strong Against:

Burst damage: CK, Sven, Lifestealer, Necro, Legion, Techies, Lesh, Tiny, Axe, Lina, TA, Puck, QoP

Chaos Knight
Sven
Lifestealer Portrait
Necro
Legion commander
Techies Portrait
Leshrac
Tiny
Axe Portrait
Lina
Templar Assassin
Puck Portrait
Queen of pain

Medusa is pretty good against cores who want to end the fights quickly by killing the enemies with a lot of burst damage. Her Mana Shield and Stone Gaze allow her to survive for a very long time, so she’s pretty much impossible to burst down. Stone Gaze punishes melee cores the most, but her good attack range means she can stand her ground against most ranged nukers as well.

Bloodseeker

Blood uses Rupture to capitalize on the mobility of heroes. Medusa doesn't really move in fights - she stands her ground, uses ult and right-clicks. This means Rupture is literally useless against her. Moreover, she doesn't really mind the silence as well because she has the needed time to use her ult before it activates.

Undying Portrait

Undying's zombies get instantly killed by split-shot. Medusa's long range and decent attacks speed means she can also take care of the Tomb relatively fast.

Weak Against:

Mana burn: Anti-Mage, PL, KotL, Weaver, Nyx, Invoker

Anti mage
Phantom Lancer
Keeper of the Light
Weaver
Nyx
Invoker

Heroes with mana burn are able to make your Mana Shield worthless.

Anti-Mage farms extremely fast and with the help of his in-built mana burn can out farm you and easily focus you down in fights.

PL is hard to deal with because he can back off with Doppelganger and wait for Stone Gaze to end and then overwhelm you with mana burning illusions.

Weaver is strong in the early/mid game against Medusa as he burns 70 mana per hit (with Diffusal Blade + talent). Not that strong in the late game though.

KotL with his Mana Leak is extremely annoying as he can just push you around with Blinding Light or Force Staff and burn thousands of mana points while making you miss attacks. 

Sniper

Sniper can attack from 1000+ range, so he’s actually the only hero who can fight through Stone Gaze as its range doesn’t reach him. 

Spectre Portrait

Spectre is the only hero that arguably scales as well as Medusa (or even better) into the super late game. Moreover, she loves to go for Manta + Diffusal, which means she deals significant damage to you.

Elder titan

Elder Titan removes all of your armor and spell resistance as you usually don’t build items like Hood/Pipe and all of your armor comes from stats. You are not mobile, so you are an easy target for his stun and ultimate.

Outworld Devourer

OD’s Arcane Orb indirectly drains mana as well – he also loves tanky enemies whom he can attack for a while and build a lot of intelligence. Sanity’s Eclipse also destroys 40% of your maximum mana. 

Skills

Medusa Split Shot
Medusa Mystic Snake
Medusa Mana Shield
Medusa Stone Gaze
Medusa magically splits her shot into several arrows. These arrows deal a lower percent of her normal damage.

The extra targets will not receive other attack effects (such as critical strike).

STATS

Secondary Arrows Range Bonus: 100

Bonus Attack Targets: 3

Secondary Arrows Outgoing Damage: 30%/45%/60%/75%

Split Shot

Mechanics:

  • Causes Medusa to perform instant attacks on a certain number of enemies whenever she launches an attack projectile. This means all projectiles are released at the same time together with the main attack. Therefore, it does not matter whether the primary attack misses or not, the extra arrows are still released.
  • The primary attack target is not affected by Split Shot. It is only hit by the primary attack, which deals full attack damage to it.
  • The extra arrows travel at the same speed as the primary arrow.
  • The search radius is based on Medusa's attack range + 100, resulting in a search radius of 700, considering her default attack range.
  • The instant attacks of Split Shot may not proc any attack modifiers or on-hit effects unless the talent which allows them to do so is chosen. They are also affected by armor type and blocked by damage block like regular attacks.
  • If Medusa is blinded, Split Shots can miss, unless she has True Strike. They can also miss because of evasion.
  • Does not target wards, buildings, invisible units, or units inside the Fog of War in range, but does target couriers. However, attacking wards or buildings still causes secondary arrows to hit valid targets within the radius.

Uses and tips:

This ability greatly improves your farming speed - it allows you to clear stacks, kill creep waves, and even farm multiple jungle camps at once in certain spots where the camps are close to each other.

Split Shot is one of the main reasons Medusa scales amazingly with items. It is great in team-fights as it allows you to just stay in the middle of the fight and hit everybody around you. This is a huge problem for the enemy team if you are farmed enough and in the super late game, it is almost impossible to take a direct fight against Medusa. Split Shot also makes Medusa one of the best Rapier carriers in the game (her tankiness also helps).

A mystic snake made of energy jumps from target to target dealing damage and stealing mana. After it reaches its last target, it returns to Medusa to replenish her with mana. The snake deals more damage per jump and steals 11%/14%/17%/20% of the targets' total mana.

STATS

Cast Animation: 0.4+0.57

Cast Range: 700

Bounce Radius: 475

Number of Bounces: 3/4/5/6

Base Damage: 80/120/160/200

Damage Increase per Bounce: 35%

Max Mana Stolen: 11%/14%/17%/20%

CD: 11

Mana: 140/150/160/170

Aghanim's Scepter

Causes Mystic Snake to turn enemies into stone for 1 second, increases by 0.3 seconds per bounce.

Mystic Snake

Mechanics:

  • Mystic Snake travels at a speed of 800.
  • The snake always bounces to the closest valid target around its current target. Cannot hit the same unit more than once per cast.
  • Upon returning to Medusa, she receives exactly the amount of mana all targets lost to Mystic Snake. The snake does not steal any mana from illusions it jumps on.
  • Each successful hit on an enemy increases the damage of the next bounce by 35% of the ability's base damage. This means its damage grows not exponentially but linearly, dealing 28/42/56/70 damage more per bounce.
  • The snake can bounce on units in the Fog of War, but not on invisible, invulnerable or hidden units.
  • The snake provides 100 radius flying vision around itself. The vision does not last.

Aghanim's Scepter:

  • It applies the same modifier as Stone Gaze does, so their effects do not stack. The debuff also always uses Stone Gaze's icon.

Uses and tips:

  • Mystic Snake is a great lane control ability – it allows you to last hit creeps, to harass the enemy hero if he’s close to the creeps and deals a ton of damage after it hits a few units. It can also be used to out-push the wave together with Split Shot.
  • The mana steal is also pretty useful as it increases your effective HP (through Mana Shield). That makes it useful in team-fights as well.
  • Almost all ancient neutrals have mana pools, so you can steal a ton of mana from them.

Creates a shield that absorbs 60% of the incoming damage in exchange for Medusa's mana.

STATS

Cast Animation: 0+0

Damage Absorption: 60%

Damage Absorbed per Mana: 1.6/1.9/2.2/2.5

CD: 0

Mana Shield

Mechanics:

  • Mana Shield does not interrupt Medusa's channeling spells upon cast.
  • Absorbs damage before any damage reduction takes place, including damage block or reduction from spells (e.g. Aphotic Shield).
  • This also affects everything which works directly with damage dealt after reductions (e.g. Orchid Malevolence).
  • Increases Medusa's effective health by 150% when toggled on, assuming she has enough mana.
  • Mana Shield persists through Medusa's death. If Mana Shield was active upon death, she respawns with it active.

Uses and tips:

Because of Mana Shield we want to build mostly all-stats items as they give both HP and mana, giving you much more effective HP than it gives other heroes. 

Any enemy units looking at Medusa will have their movement and attack speed slowed. If 2 seconds of total time is accumulated looking at Medusa while Stone Gaze is active, that unit will turn to stone. Petrified units are stunned and take bonus physical damage.

STATS

Cast Animation: 0.4+0.5

Radius: 1000

Move Speed Slow: 35%

Attack Speed Slow: 35

Turn Rate Slow: 35%

Attack Damage Amplification: 50%

Gaze Duration: 5/6/7

Stone Duration: 3

CD: 90

Mana: 200

Stone Gaze

Mechanics:

  • Every enemy unit that faces Medusa within 85 degrees in front of them within a 1000 radius around Medusa gets the facing and the slow debuff applied.
  • The facing debuff counts for how long the unit faces Medusa. If it accumulates 2 seconds of facing time, it petrifies the unit. The 2 second facing counter does not reset when looking away once.
  •  The facing debuff lasts for either as long as Stone Gaze does (ending whenever Stone Gaze ends in any way), or until getting petrified.
  • Facing Medusa while invulnerable or hidden still counts towards the 2 second counter. This means the petrifying can be avoided by being invulnerable as the spell attempts to petrify.
  • The slow debuff only slows affected enemies while facing Medusa. Units that turn away are not slowed but keep the debuff. The slow debuff lasts for either as long as Stone Gaze does (ending whenever Stone Gaze ends in any way), or until getting petrified.
  • Once the petrify debuff expires, the unit can be affected by Stone Gaze again, repeating until Stone Gaze ends, as long as the unit faces Medusa.
  • The petrification is a stun that freezes their animations and amplifies incoming physical attack damage.
  • Only increases physical damage dealt by attacks. Physical damage from spells is not increased.

Uses and tips:

  • Stone Gaze is a very powerful ability in team-fights as it forces enemies to reposition and not face Medusa. This not only keeps you alive for as long as the ultimate lasts but also creates space for your teammates to deal unpunished damage. Of course, this is much more effective if your allies can provide other slows and disable to keep your opponents from simply running away from you while the ultimate is active.
  • Stone Gaze is also pretty useful when you’re being ganked as a defensive tool. If you use it while running away, enemies will have trouble chasing you without getting petrified.

Skill Builds

Standard Build
Medusa Mystic Snake
1
Medusa Mana Shield
2
Medusa Mystic Snake
3
Medusa Mana Shield
4
Medusa Mystic Snake
5
Medusa Split Shot
6
Medusa Mystic Snake
7
Medusa Stone Gaze
8
Medusa Split Shot
9
Talent Icon
10
Medusa Split Shot
11
Medusa Split Shot
12
Medusa Mana Shield
13
Medusa Mana Shield
14
Talent Icon
15
Medusa Stone Gaze
16
Medusa Stone Gaze
18
Talent Icon
20
Talent Icon
25
Pros: maximum farming speed; good nuke damage;
Cons: sub-optimal survivability;

The logic behind this build is simple. You always want to max Mystic Snake – it’s your main tool of harassment and lane control, it’s good for farming creep wave and it’s also strong in the jungle where it could potentially return all of the mana you used for it.

2 points in Mana Shield by level 4 – this is for survivability on the lane, a protection against ganks. Besides, you don’t really want Split Shot on the lane as it pushes the wave and you will rarely use it.

Split Shot is maxed immediately afterward for farming purposes. In the later laning stage, it allows you to clear creep waves faster, farm the jungle and kill stacks.

The dilemma is when do we want Stone Gaze – it’s not too useful on the lane and it doesn’t help with farm, nor do we want to fight early on, so we’d rather delay it as much as possible. You only want to level it if you feel you’re going to need it to protect yourself against ganks. If your team is doing good and they pressure the enemies, they probably won’t have the time to gank you – then you can skip it. But if the enemies are playing aggressively and they’re likely to gank you on the lane or jungle, you can get a point in it earlier.

Stone Gaze also only increases its duration with 1 seconds for each point, nothing else – it doesn’t reduce cooldown or manacost, doesn’t increase effectiveness. This is why we’re going to delay the second point in it as much as possible, as you want all of your other skills maxed.

If you get to level 6 but you’re still laning, save the skill point: you can level Split Shot when you enter the jungle or Stone Gaze if you get ganked before that.

Talents

Split Shot Uses Modifiers

25

+1000 Mana

+2.5s Stone Gaze Duration
20

-4s Mystic Snake CD

+30% Mystic Snake Mana

15

+30 Attack Speed

15% Evasion
10

+15 Damage

Lvl10: The damage might not seem much, but it’s a huge boost to farming because of Split Shot and because you boost your attack damage only through items. 15% evasion is not very useful in the early game and is later outshined by Butterfly (they stack multiplicatively, so you will have 44% Evasion and 9% bonus is not worth the early investment).

Lvl15: Both are pretty good. The mana steal is not bad for sustain in fights and it can also be useful to recharge your mana between fights (stealing from neutrals for example). The attack speed, on the other hand, is always reliable, it’s good for both farming and fighting. So the final choice is yours, you can’t really go wrong here.

Lvl20: 2.5s bonus Stone Gaze duration sounds very good for team fight control, the Snake CD is great for sustain in fights. Go for the Snake talent together with the lvl15 Snake talent.

Lvl25: A classic defensive vs offensive talent. Both options are great, choose according to the game. The Split Shot modifiers are great – it allows you to slow multiple enemies with Skadi, to lifesteal from multiple targets (that’s quadruple lifesteal), you can crit the secondary targets and if you have Mjollnir it gets even uglier – you practically throw lightning with every attack. The mana boost, however, is huge and helps your survivability.

Standard Build

The early game items are no surprise, it’s the standard package for every agility carry – Wraith Bands and Treads for stats. Magic Wand is especially strong on Medusa as it gives you both HP and mana (and mana can be converted to HP with Mana Shield), so it actually increases the survivability a lot and you always want to have it.

You get Madness to increase your farming speed and then you go for Hurricane Pike – its extremely useful not only for the mobility, but also for the +all stats it gives for relatively cheap.

Afterward, you have a hard choice to make: Skadi is the best all-around option because it gives you the highest amount of HP and mana and the attack modifier is very useful since you don’t have control. You can, however, substitute it for Manta, Linken’s or even directly Butterfly (and leave the Skadi for later). Manta is best in case the enemy team has silences and other dangerous debuffs you can dispel. Linken’s is best if they have strong single-target spells and they want to burst you down. Butterfly is best if the game is going great and you want to increase your DPS as much as possible to win fights, get Rosh and end the game.

In the late game, you get Butterfly to increase your DPS and to finish the game. You usually go for Daedalus as the best late-game DPS item (thanks to the lvl25 talent) followed by Rapier, but only after you are confident you are extremely hard to kill.

Starting Items
Tangoes
Circlet
Slippers of agility
Faerie Fire
Iron branch
Early Game
Wraith Band
Wraith Band
Magic wand
Power treads Strength
Mask of madness
Mid Game
Hurricane Pike
Skadi
Late Game
Butterfly
Daedalus
Divine Rapier
Tangoes
Circlet
Slippers of agility
Faerie Fire
Iron branch
Wraith Band
Wraith Band
Magic wand

Wand: gives you a very powerful heal since you use mana as HP.

Power treads Strength

Power Treads: the stats are great for survivability (and Tread-Switching).

Mask of madness

MoM: MoM is an insane farming item on Medusa as it provides damage (10 doesn’t seem much, but when it’s combined with the level 10 talent and the other small items, you get close to 150 attack damage at level 10, which for Medusa is pretty good) and Berserk significantly increases your attack speed with Split Shot. 

Hurricane Pike

Hurricane Pike: Hurricane Pike is good against strong melee heroes like Ursa or Sven. It also provides some of all three stats, which is great for Medusa.

Skadi

Skadi: Usually heroes who build Skadi use only 2 of the offered attributes and the last one is often wasted. Medusa, however, is one of the best carriers of this item as she uses all of its bonuses to the maximum as strength, intelligence and the raw HP and MP all contribute to her total effective HP. It is your core late game item.  

Butterfly

Butterfly: Butterfly is great against heroes who rely on physical damage. Since it doesn’t provide any survivability against spells, it’s often better to delay it as much as possible in favor of items like Hurricane Pike and Skadi. However, if you feel you are tanky enough, Butterfly is superior in terms of DPS. You can also disassemble MoM and use the Quarterstaff to finish Butterfly for a bit cheaper. The Morbid Mask can turn into a Satanic afterward.

Daedalus

Daedalus: A very powerful late game item thanks to the level 25 attack modifiers talent – you can crit the secondary targets as well, giving you insane team fight damage.

Divine Rapier

Divine Rapier: Medusa is arguably the best Rapier carrier in the game. She is extremely hard to kill and she can attack 4 targets at once, so Rapier is not exactly a gamble with this hero – it’s more of a usual last item.

Other Items

Mid Game
Manta_Style_icon
Linken's Sphere
Late Game
Bloodthorn_icon
Mjollnir_icon
Satanic
Aghanim's_Scepter_icon
Black King Bar
Manta_Style_icon

Manta: The early Yasha is very good for farming and it further increases your low movement speed. The completed Manta offers nice stats and it helps you deal with heroes with silence. The illusions also have the Split Shot ability, and since we build mainly stats items, they are pretty strong in the very late game (but deal extremely low damage early on). 

Linken's Sphere

Linken's Sphere: Linken's is great if the enemies have single target initiation heroes like Batrider or Beastmaster. The stats and regen are also great on Medusa, but with Linkens you don’t receive a lot of starts for the money you pay.

Bloodthorn_icon

Bloodthorn: Bloodthorn is a potent late game item because the BKBs in the late game have low duration and you can kite the enemies with Stone Gaze until the BKB is down. It’s also useful against heroes with disables or escape mechanisms and if the silence is not removed, the target takes colossal amounts of damage. Unlike most carries, Medusa also makes good use of the INT and mana regen.

Mjollnir_icon

Mjollnir: Maelstrom is a nice mid game item, the lightnings are pretty good in fights and it upgrades into Mjollnir which is very strong with the level 25 talent – you will throw a lightning with almost every single hit as the chance is quadrupled. The only reason Mjollnir is situational is because it’s not that good against heroes with BKB and the lightning won’t deal damage to petrified targets.

Satanic

Satanic: A nice late game item, it offers a ton of survivability against heroes without many disables. As we mentioned, the level 25 talent allows you to lifesteal from all targets, so if you’re hitting 4 targets, that’s 100% lifesteal without using the active ability!

Aghanim's_Scepter_icon

Aghanim’s Scepter: It’s only useful against Illusion Heroes, mainly CK.

Black King Bar

BKB: You don’t usually want to build BKB but if the enemies are so full of disables that you literally can’t hit in a fight – you will need it.

Laning

Medusa 350px

Medusa’s early game is very important as this is the time window where she’s most vulnerable. However she’s pretty hard to kill, so you should only be worried if you’re being ganked by multiple heroes or if you’re out of position.

The whole playstyle of Medusa revolves entirely on maximizing your farm efficiency and surviving the early game. In the safe lane, your supports will help you out by zoning out. In the mid lane, you will have to abuse your Snake to secure last hits on the ranged creep and harass your lane opponent.

Farm
Survive
Stack camps if you have the time
Harass the enemy hero if appropriate
Farming:

Mystic Snake can be used for last hitting, but only if you’re playing mid and even then – only if it’s going to hit the enemy hero as well. Avoid using it on the safe lane as it pushes the lane – it’s only worth using it if your supports left and you want to push out the wave anyway.

When the lane is pushed always try to stack the closest camps. At level 5, you can start nuking the stack with Mystic Snake (target the smallest creep with it) – 2 Mystic Snakes should be enough to clear it.

Jungling

As a safe laner, you want to farm on the lane until you get Phase, Aquilla, Wand, MoM. With those items, you can start clearing the jungle as well. The most efficient way is to push the creeps wave, kill the next wave that is coming as fast as possible and then move to the jungle. Clear the entire jungle and return to the lane. If the lane has been pushed, you can teleport back to your tower so you don’t miss the farm.

On the mid lane, it’s a bit more different. You’re going to be higher level, so you only need the Morbid Mask before you start jungling – you can kill the creep wave with Mystic Snake and then go to kill the closest jungle camps. Stack the ancients if possible but wait for Mask of Madness before you start clearing them. You can buy MoM before finishing Phase Boots if you want to start farming jungle earlier.

When you have MoM, you can clear out ancient stacks as well. Always stay with activated Mana Shield so you don’t take much damage. As we mentioned, almost all ancient creeps have mana pool, so spam Mystic Snake all the time to deal some damage and regain mana.

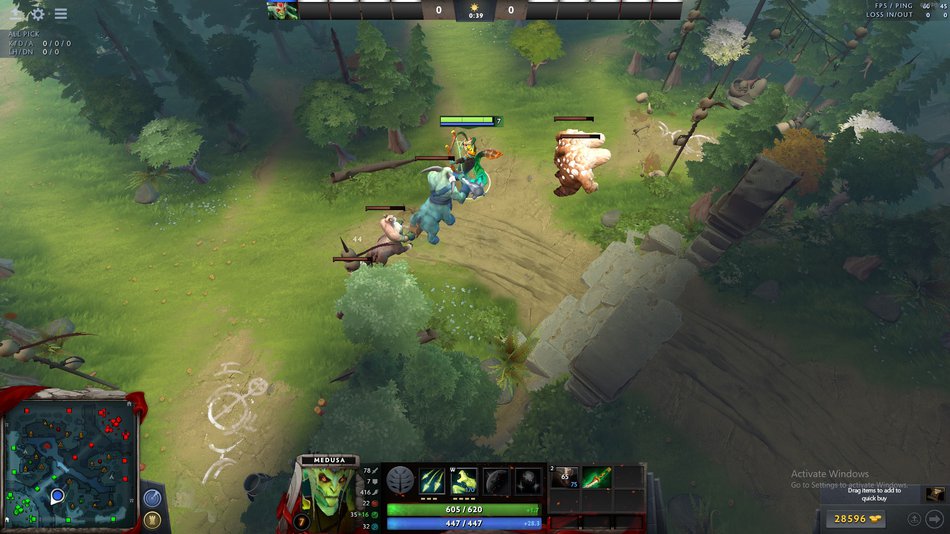
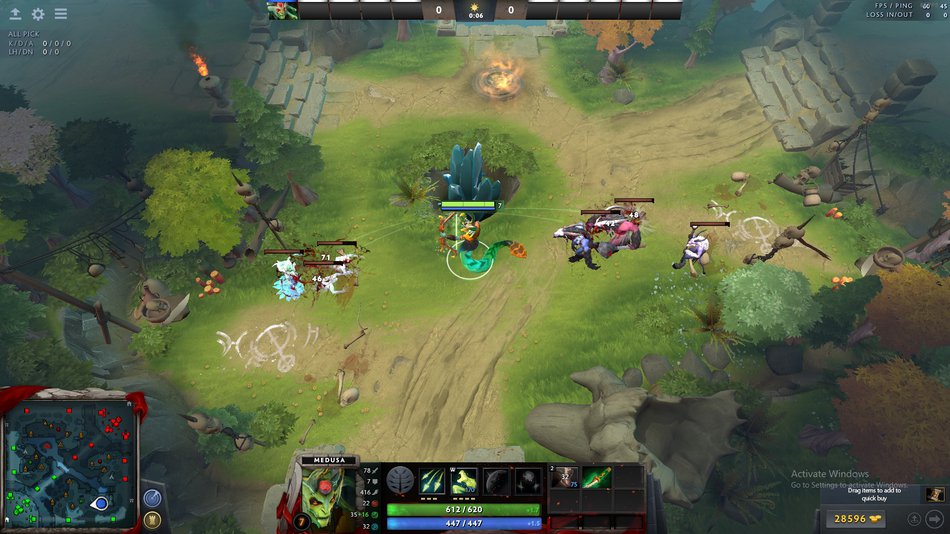
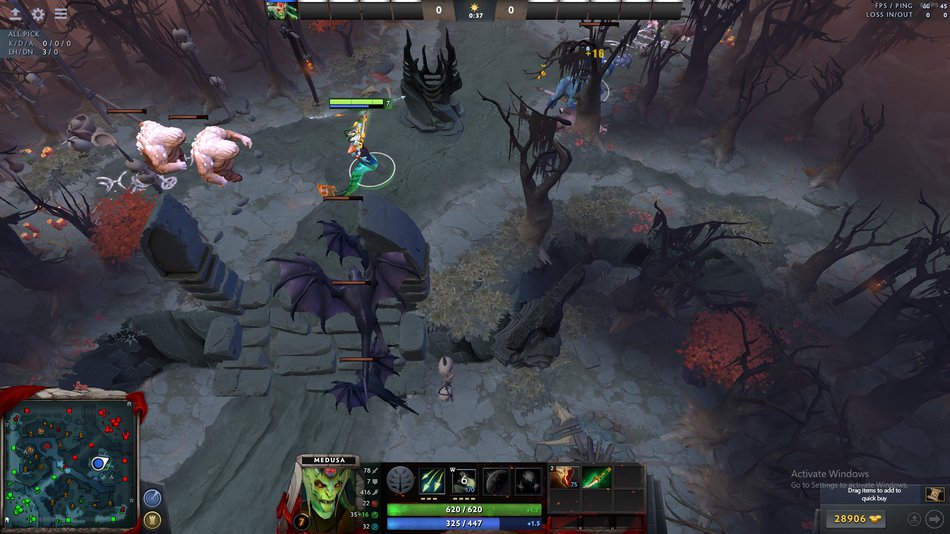
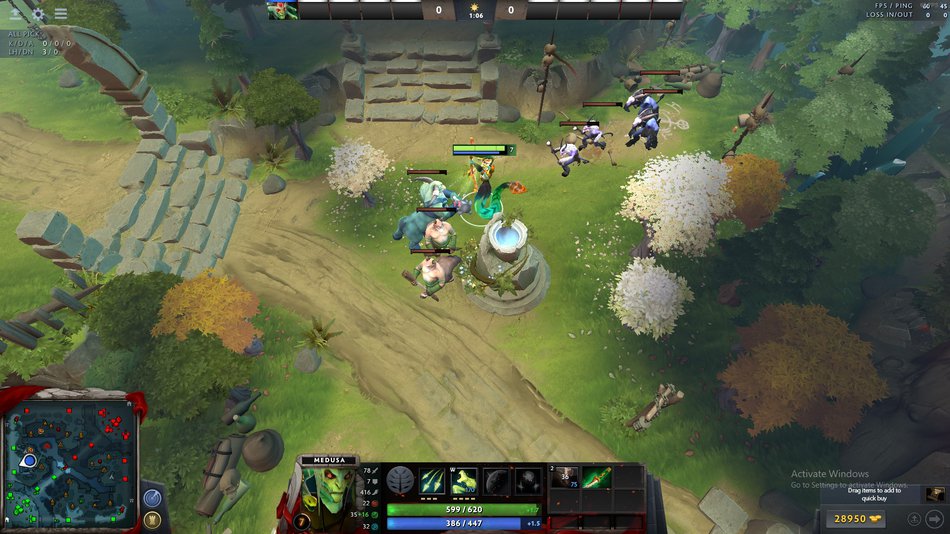
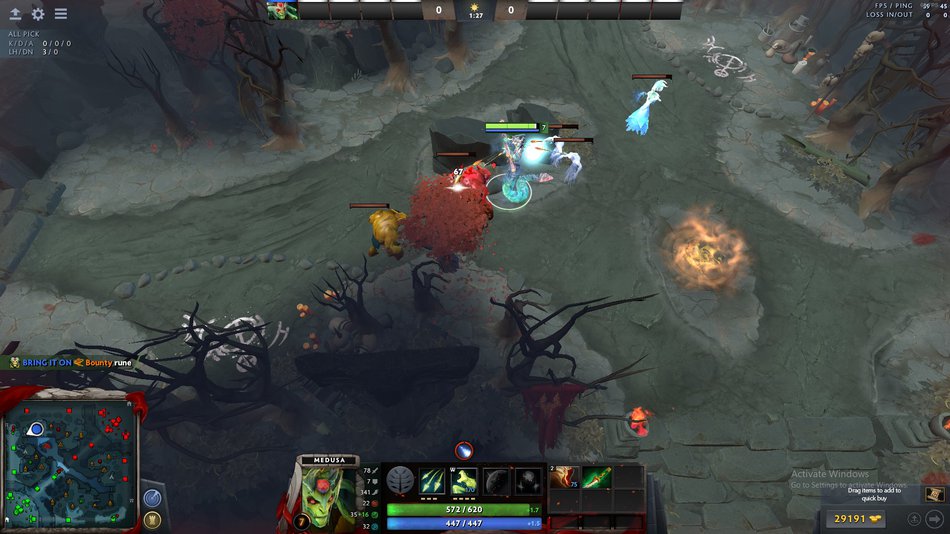
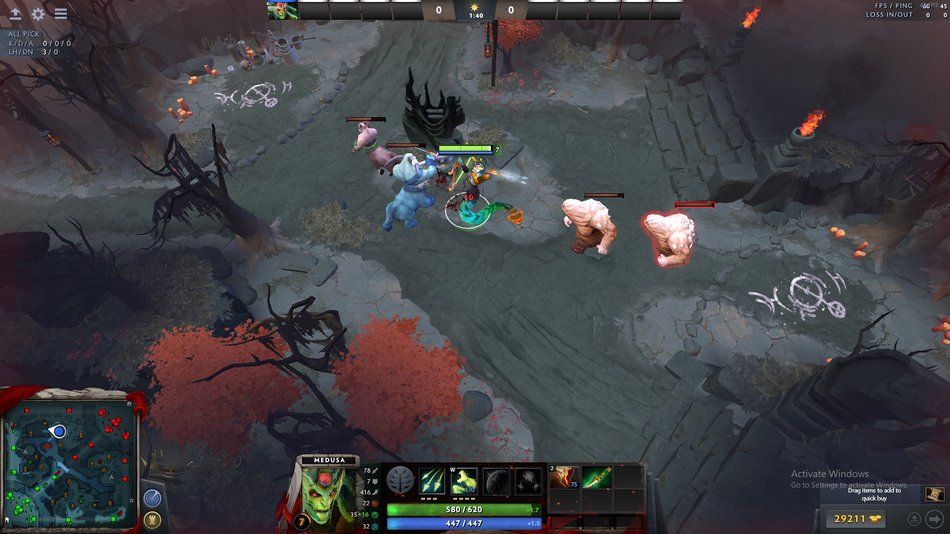
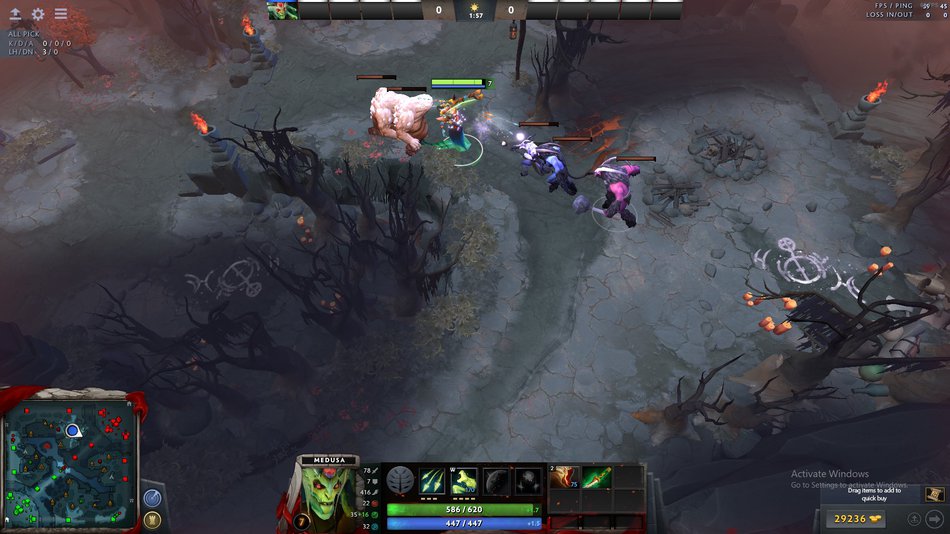
The farming power of Medusa comes from the jungle. While farming jungle, try to always hit 2 camps at once – to do that, simply pull one of the camps, then start hitting the other and then position yourself between the 2 camps. Check the time too, if it’s close to x:53, try to stack them as well. Another trick is to use Mystic Snake to hit creeps from both camps – you just have to use it while the second camp is coming towards you, otherwise, it might miss if the first camp is one of those who chase only for 5 seconds. Check out the screenshots and try to always position yourself in a similar way.:

Medusa Scr 1
Medusa Scr 2

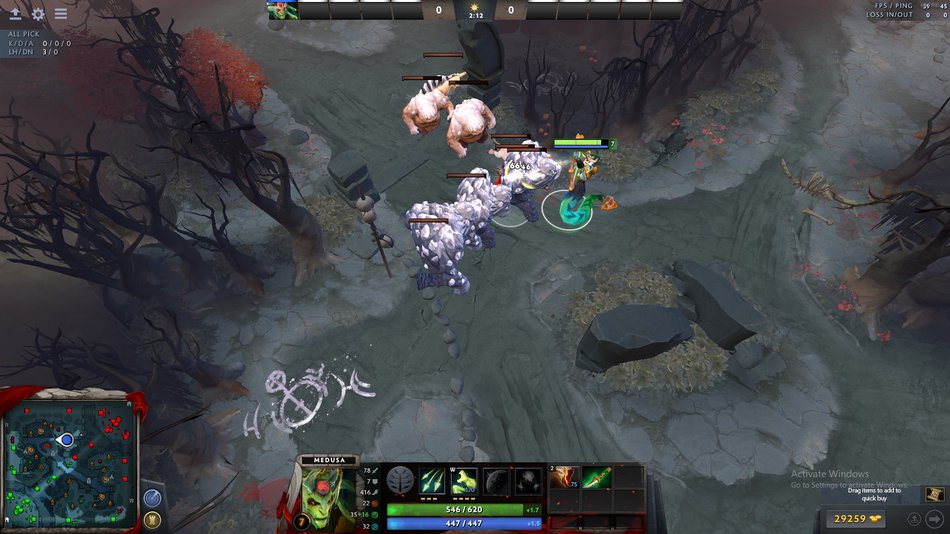
The Dire position (on the bottom ancient camp) is probably the best farming position as you can farm 3 camps at once:

Medusa Scr 3

More 2-camp farming spots:

Medusa Scr 4
Medusa Scr 5
Medusa Scr 6
Medusa Scr 7
Medusa Scr 8
Harassing & Kill Potential:

You don’t usually want to use Mystic Snake on the safe lane because it pushes the lane. The only exception is if you’re playing solo against the offlaner – then you can spam it to control the lane.

On the mid lane, if the enemy is playing aggressively and comes to harass you, punish him with Mystic Snake – use it on a creep, so it can bounce to him and deal a ton of damage.

You can also cast Mystic Snake while the enemy is going for a last hit – this is an easy trick, just wait for a creep to get low and throw the snake while the enemy is moving towards it. It will often hit even the heroes with high range.

Consider the level of Mystic Snake – it hits 3/4/5/6 units, so if you want to hit the enemy hero, you have to wait for 1 or 2 creeps to die (with snake level 1-2). Level 5 (Snake lvl 3) is the first level where you can nuke the entire creep wave and still hit the enemy hero.

If you’re worried that the enemy can dodge the snake – you can throw it at him directly, but that’s not usually worth it – it doesn’t deal that much damage and your mana won’t be compensated.

As Medusa, your kill potential is minimal. If your teammates gank the enemy – help them, but don’t try to kill the enemy hero yourself. That can only put you in a bad position. 

Survival:

As we mentioned, buy Magic Stick/Wand as soon as possible so you start gaining charges. Don’t use it until you get ganked – you want to have a full Wand in those situations. Buying Raindrops is also a great idea to help you with survivability.

If you suspect a gank, turn your shield on immediately – it costs you nothing to play safe. With Mana Shield and a good number of Magic Wand charges, you’re very hard to kill. At the very least, you can survive long enough for your teammates to teleport and help you.

If the enemies are playing very aggressively and are constantly trying to gank you, you can skill Stone Gaze earlier, even at level 6 if needed.

If you can’t stay on the lane, just get a Morbid Mask and move to the jungle. 

Timings and rotations:

As we mentioned, the most important timing in the early game is when you get your Mask of Madness – that allows you to farm the lanes and jungle very effectively.

You don’t have to make any rotations with Medusa. Ever. Adapt your whole mindset to a single doctrine – anything that happens on the map in the early game is designed to create space for you. You want to get big as soon as possible, so you can use your farm advantage to fight.

Video Example:

We’re going to observe Sccc’s Medusa against Mineski. He gets to play against Moon’s Death Prophet.

Check how he uses Mystic Snake to punish DP’s aggression at 2:00, dealing a lot of damage with it.

He gets ganked at 4:20 while trying to take the rune, although he still manages to deny it.

Otherwise, the lane is very passive as it usually is with Medusa. He uses occasionally Mystic Snake to last hit and harass.

At 5:50 he starts stacking ancients. Take a look at how much mana Mystic Snake steals – he gets +60 mana.

At level 6 he gets a point in Split Shot which means he wants to start pushing the lane and farming jungle – and indeed he auto-attacks the creep wave and finishes it with Mystic Snake.

At 8:30 he starts farming the jungle and farms 2 camps at the same time. One thing to point out here is how he uses Mystic Snake to hit both camps before they go back. This is easy with those 2 camps but a bit harder with others. He continues farming 2 camps at a time consistently which is very important in order to maximize your efficiency.

The mud golems are worth mentioning as well – all of them, even the small ones, have mana pools. So when Sccc uses snake on them, he completely regenerates his mana.

Look at 12:50 how he kills both camps just in time for them to spawn again.

Once he has his Mask of Madness, he starts clearing the ancient stacks that his team made for him, spamming Mystic Snake on them.

Mid & Late Game

Medusa Immortal 350px

Medusa is one of the very best late game carries in Dota. This fact pretty much determines her playstyle – you need to use Split Shot to farm as efficiently as possible and to get your core items. You are not a mobile hero, so you need to farm the safe locations or to stay close to your team most of the time. Once you feel you are ready to fight walk as 5 and try to claim objectives. If you cannot take direct fights you simply need to anti-push and defend your high ground for as long as necessary.

Keep farming the safe locations on the map, out-push the waves
Join your team for objectives
Anti-push and defend HG for as long as necessary
Farming:

Farming in the mid/late game is pretty much the same as in the early, just faster. You still kill neutral camps and push waves whenever possible.

One of the differences is that you can use Manta illusions to clear the waves if the lane is not safe enough. Since the hero is not very mobile, you don’t want to go too far into enemy territory without back-up.

How much mana do we need?

Given that you have enough mana, Mana Shield is a 60% reduction, which equates to a 2.5 effective HP multiplier against all types of damage.

This means you need to have enough mana so Mana Shield can block damage until you’re out of HP for maximum effectiveness. Less mana is insufficient, more is useless. In theory, this breaking point is reached when you have mana equal to 60% of your HP.

BUT

You want to have enough mana to cast our abilities – Manta is 125, Stone Gaze is 200. Mystic Snake is 170 but it will usually return with more mana, so we won’t count it.

Mana Shield is calculated BEFORE damage reductions. To block the same amount of damage, with every point of armor you get, you will lose less HP, but the Mana Shield will use the same amount of mana. This means that in the late game you’re going to need much more mana to sustain the shield.

Magical damage is easier to calculate as your spell resistance will always be 25%, although we all know there are many ways for your team to increase it (Rubick, Pipe) or for the enemy team to decrease it (Veil, Elder Titan), so it’s situational as well.

A few simple tests showed the following results (with HP = Mana):
At 20 armor, your mana ends when your HP is at around 20%
At 25 armor, your mana ends when your HP is at around 27%
At 30 armor, your mana ends when your HP is at around 35%
At 25% magic resistance, it’s the opposite – your HP ends when your mana is at around 33%

Yet, you’re also going to lifesteal in the late game, so you gain more HP and you need more mana to sustain the shield.

In conclusion, if you are playing against plenty of physical damage and you have high armor, you need a mana pool a bit higher than your HP pool, usually achieved with stat items like Skadi and the mana talent.

Timings:

Unlike most other heroes, Medusa becomes level dependent in the late game as her level 25 talents are very powerful.

At level 25 you become even more powerful as you can lifesteal more, slow everybody you hit or deal more damage (if you have Daedalus, MKB or Mjollnir).

So if you’re close to those levels, let your team know so they can wait for you before pushing/fighting.

Comeback Potential:

As a Medusa, you will always have potential to come back into the game. The hero is designed to be strong in the late game, so don’t panic if you’re losing in the beginning.

In a losing position, you should be farming as usual in the jungle. If the enemy creep waves are pushing, you can use the hero to clear them if you don’t feel any threat of ganks and re-enter the jungle afterward. Try to stay close to your allies while farming (or call for your allies, at least the supports, to stay close to you). You are slow, so if caught alone you will die.

Anti-Pushing:

You’re also pretty good in team-fights, so you should always defend your base with your team. Anti-push with Mystic Snake and use Stone Gaze when the enemy team commits to a fight. Try to hit as many heroes as possible with the Snake. Even if you don't instantly kill the creep wave, you will pull it and easily finish it off with your AoE attacks.

Team Fights:

Medusa is very strong in team-fight – she is tanky, she hits a lot of units and the Stone Gaze forces enemies to either run from you or to get stunned (and take increased damage).

You don’t want to initiate the fights, you want to wait until someone else initiates and then walk in. Having a Hurricane Pike here is a huge advantage as it will allow you to force yourself into the fight and use Stone Gaze. Otherwise, you can get silenced or chain stunned.

The key moment is deciding when to use Stone Gaze. You don’t want to use it too early into the fight when the enemies can easily disengage and wait for the effect to end, but at the same time, you don’t want to use it too late when your team has already suffered losses.

So watch the enemy team carefully, if they engage, and can’t really run away easily, go in and use it.

Position yourself in the center of the fight – this will allow you to hit all targets with Split Shot and will also affect as many enemies as possible with Stone Gaze.

If the enemy carry is a strong melee hero like Sven, Ursa, Lifestealer and comes to hit you, and Stone Gaze is already down, you want to back off. As tanky as you are, you don’t want to man-fight such heroes if they’re pretty farmed. You are a ranged hero, so use that advantage and kite them (another situation where Hurricane Pike is very useful).

Example:

In this example XXs Smokes with his team in order to find a favorable team fight. As soon as the Smoke breaks he knows the fight is about to start and he manages to activate his BKB just as the enemy Tiny blinks next to him and tries to stun him. With BKB and Rapier the enemy team cannot man-fight against the Medusa and XXs manages to kill both the Tiny and the Gyro.

Pushing:

5-man pushing:

Medusa is a great hero for sieging as you can just hit the enemy towers while your team stays behind you. If the enemies initiate a fight, you can win it with Stone Gaze. So don’t be afraid to push while the enemy team is alive if you have an advantage. You are very tanky, so you are extremely unlikely to die from the initiation of the enemy team and the first wave of nukes.

Both Aegis and Cheese are amazing on Medusa, so try to take Rosh before you push the enemy high ground. Your enemies are very unlikely to be able to burn through 4k EHP twice or even three times.

Split-Pushing:

While she out-pushes lanes very easily, Medusa is not very mobile so split-pushing is not really an option. Besides, if you’re farmed enough to take towers, it’s better to use that farm to fight with your team instead. A late game Medusa should always be with her team when she’s not farming.