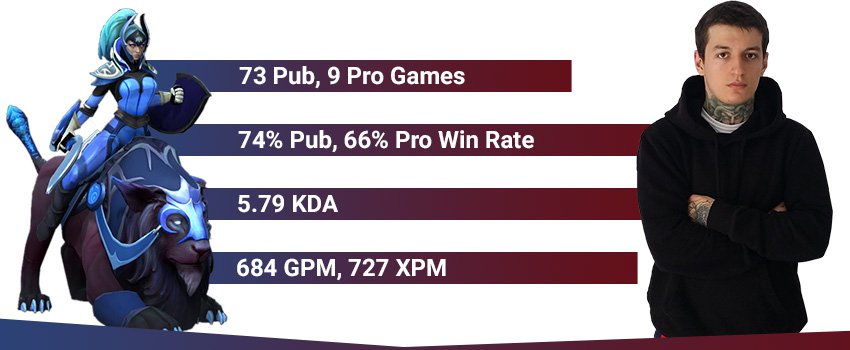
When you pick Luna your aim is to farm, team fight when your ultimate is up and push towers. During the laning stage Luna has good synergy with heroes that can benefit from her damage aura - usually ranged heroes. For the same reason, she also works quite well with pushers. After the early game, you want to have teammates that can complement your team fight potential. When choosing Luna, one should take into account the composition of the enemy team as well – if they are very mobile or have high gank potential, then Luna would have a hard time. Conversely, if heroes are squishy, not mobile and vulnerable to magic damage, then Luna would be a reasonable pick.
MAJOR:
High damage potential:
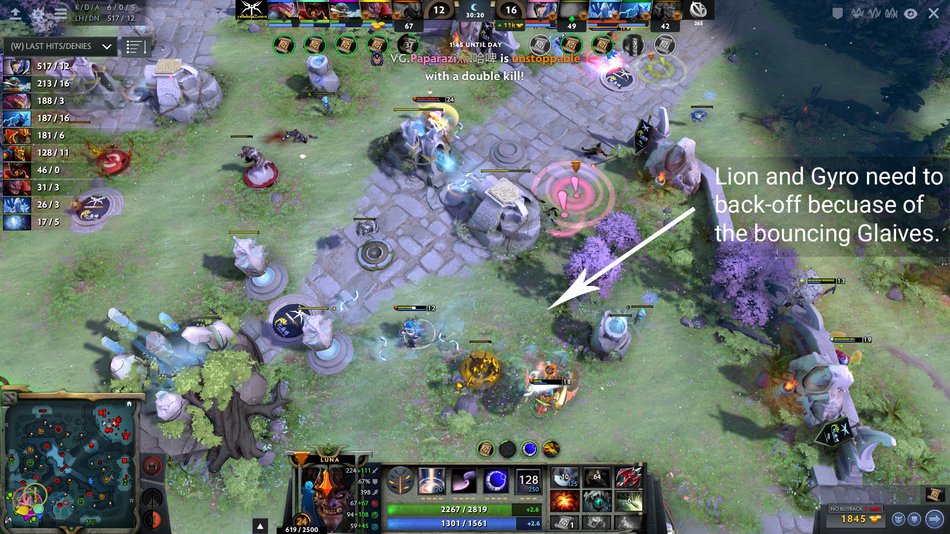
Eclypse has a lot of nuke power which allows her to burst down heroes very fast if their positioning allows it. At the same time, her attacks with the damage aura and Glaives provide considerable sustained physical AoE DPS, which is perfect for team fights.
Flash-farmer:
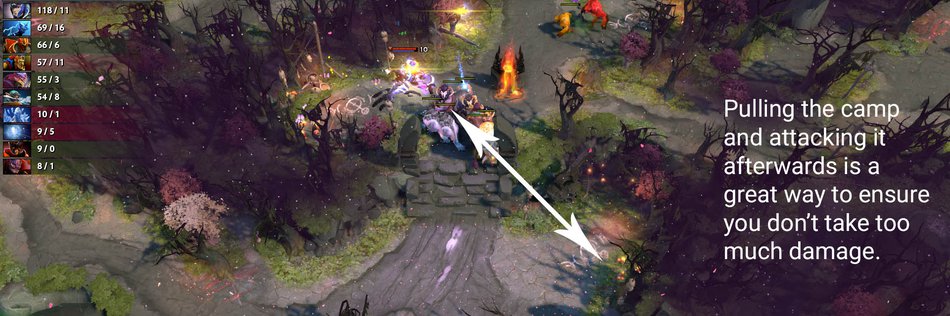
Luna is one of the fastest farmers in the game thanks to her AoE attacks (the Bouncing Glaives), damage aura and high movement speed. She is one of the best heroes in the game at utilizing stacks.
Movement Speed:
Luna has an extremely high MS. This helps her position herself more favorably in fights or even chase down enemies. Moreover, the speed helps her avoid ganks and increases her farming speed as she can move faster between lanes and jungle camps.
MINOR:
High night vision:
The 1800 range night vision that comes from Lunar Blessing allows Luna to be very effective during night engagements. She can spot the positioning of enemies from afar before they have a chance to see her only with hero vision. The extended vision gives her team a significant initiation and positioning advantage during the night.
Scales very well with items:
Due to her skills and stats (being a very fast agility carry), Luna scales very well with items which makes her a very strong late game carry.