Juggernaut Guide by Xcalibur
Artist: 澈水
  • Guide Navigation
  • HOME
  • ABOUT
  • DRAFTING
  • SKILLS & BUILDS
  • ITEMS & BUILDS
  • EARLY GAME
  • MID & LATE GAME
Author:
Xcalibur & Co.
Date: 01/2019
Tags:
text
Juggernaut
Analysis
Builds
Tactics

Welcome

Welcome to Xcalibur's Book of the Juggernaut, a hero guide part of the Book of Dota series!

Here you will find all the information you need to learn to play Jugg on a high level – from drafting and builds to the optimal playstyle in different lanes and situations. We hope you’ll enjoy this guide and find it useful!

xcalibur jugg stats
TL;DR:

Draft: Jugg is one of the few carry heroes who are not a terrible pick early in the draft because of his versatilty and reliability . Thanks to his ability to fight from early on while also scaling late in the game, he is a great carry for more active pushing and/or ganking drafts.

Early Game: As any carry, you should prioritize your farm. Nonetheless, if possible you need to utilize the kill potential of Blade Fury together with your supports to secure an advantage in the early game. You can also use Blade Fury to push out the wave and flash farm the jungle later in the laning stage. Attempt a kill on your lane opponent when you get your ult.

Mid & Late Game: Get your core items and if you are ahead in the game start being aggressive with your team. Push with Healing Ward and force fights. Once your ult is on CD go back to farming and repeat. Get Rosh and siege the enemy base by pushing with Blade Fury and sustaining yourself and your team with the ward. If you are playing from behind you can try to split-push and smoke gank with your ult to slow down the game and reach the late game.

Authors

Steve "Xcalibur" Ye
Endorsement & Info

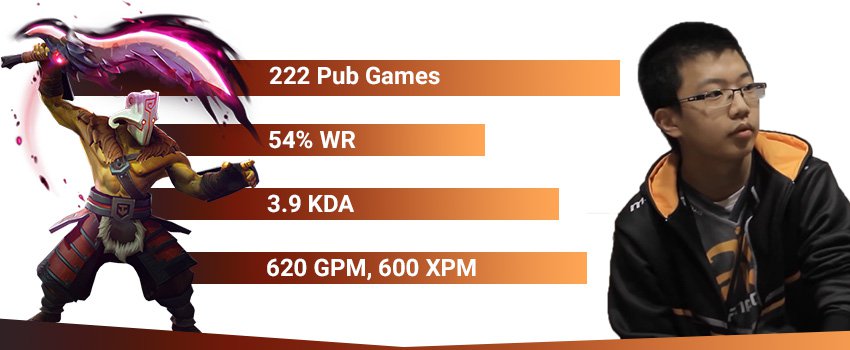
Xcalibur is one of the biggest pub-stars in the history of Dota - he has claimed the number 1 spot on the EU leaderboard numerous times and before the reset, he peaked at over 9 000 MMR.

His incredible success in pubs made him one of the hottest stand-ins in the pro scene and later on allowed him to play for major Dota teams like Fnatic.

Nikolay "CTOMAHEH1" Kalchev
Info & Editing

CTOMAHEH1 started his pro career as a support in Basically Unknown together with Mind Control. Since then he has consistently been playing on the European T2 scene, most recently on Unchained Esports. 

His highest placement on the EU ladder is top 100 - he plays all roles (mainly support), which is untypical for high-ranking players and shows his great versatility and understanding of the game.

Kyril "MrNiceGuy" Kotashev
PM, Writing & Editing

Esports and gaming enthusiast since forever and founder of Dotahaven.

Has been playing Dota since 2005 (5.84). An Ancient I player in Dota 2.

Each blow sharpens my blade!

Yurnero the Juggernaut is a very versatile hero – he is a strong laner, a fast farmer, good at fights in the midgame and scales very well with resources into the late game. Moreover, he gives his team good utility in the form of AoE healing. This means that Jugger could contribute to various strategies and even be played in different positions.

Juggernaut has very high lane flexibility and in different situations, he could go to all possible lanes. Most often he is a supported farmer in safe or offensive dual or trilanes, but he is not a bad solo hero thanks to his survivability (could go even solo mid). Wherever he is laned, he is played as an active carry hero that doesn’t shy away from fights.

Yurnero could actually be played as a support hero as well thanks to the early game power of Blade Fury and the utility he gives to the team with Healing Ward, even though this is a very unconventional approach.

Jugg Loadout
Stats
Level 1
Level 15
Level 25
STR
20
Medium
50
Low
72
Low
AGI
36
Very High
69
Very High
93
Very High
INT
14
Very Low
33
Very Low
47
Very Low
Attack
48-52
Medium
81-85
Low
105-109
Low
Armor
8.2
Very High
14.92
Very High
19.72
Very High
Resistance
26
Medium
28
Medium
29
Medium
HP
560
Medium
1114
Low
1510
Low
MP
243
Very Low
471
Very Low
639
Very Low
MS
299
High
305
High
310
High
STRENGHTS

MAJOR:

DPS:
Jugg has very high damage output at all stages of the game. Blade Fury gives him great kill potential early on, Omnislash allows him to get solo kills even on full HP heroes and in the late game his right click DPS increases greatly with items thanks to his superb BAT and Blade Dance.

Hard to kill:
Jugg is invulnerable during Omnislash, has spell immunity during Blade Fury and on top of this has very good health sustain thanks to his Healing Ward.

Versatile:
Juggernaut is strong at all stages of the game: early on he is a potent laner with kill potential and survivability, in the mid game he could easily get solo kills with Omnislash and in the late game he has very good carry potential – he is an AGI right-clicker with crit and great base attack time. Moreover, he is useful in different strategies: he is very good at taking objectives thanks to his physical DPS and sustain from Healing Ward and in the same time he is a good ganker whenever Omnislash is up. 

MINOR:

Good stats:
Jugger has one of the best BAT’s in the game, good MS, decent armor, base stats and stat gain and an average damage. This makes him a well-rounded character without a lot of obvious weaknesses.

Ultimate pierces spell immunity:
The fact that your ultimate could be used through spell immunity is very useful in late game team fights and ganks

WEAKNESSES

MAJOR:

High-risk high-reward hero:
One major problem of Jugg is that he has trouble using his offensive AND defensive abilities at the same time. You cannot attack or cast Omnislash while spell immune from Blade Fury. Consequently, every time you want to go into melee range to deal damage with attacks or with Omnislash you expose yourself to a big risk - disables and nukes. Since you are relatively squishy, if you get caught you could get killed before you can even use your spells.

Omnislash could be countered with items:
Ghost Scepter and Eul’s are prime examples, but items like Manta Style or SB could also cause serious problems. Jugg wastes his jumps (and attacks) on invulnerable targets and stops using his ultimate if no targets are available nearby (e.g. your target turns invisible). This could be devastating in fights because it majorly reduces the impact of Jugg’s strongest spell.

MINOR:

Vulnerable to kiting:
You need to be in melee range to attack your targets and you need to get very close in order to use your ultimate (one of the main reasons mobility items are very important on Jugg). Since you don’t want to use Blade Fury while you are on the offense, you are exposed to all kinds of control abilities. 

Replays

Liquid  vs VG, ESL One Katowice 2018

MATCH ID: 3750844055

Replay

A record-breaking performance by Miracle- on Jugg vs VG. He managed to get the highest GPM of all time on the hero at the 30th-minute mark (above 800). This is even more impressive bearing in mind this game was not a total stomp, in which he has multiple kills and no deaths – he finished the game 6-2-9. A great replay to watch if you want to learn how to farm as fast as possible with a BF Jugg.

Drafting

Juggernaut is very versatile laning and strategy-wise and because of this, he is rarely a bad hero to pick-up. If the enemy team is trying to counter your Yurnero pick, however, it might be worth it to use him as an additional semi-carry 2nd position and to invest in another 1st position hero.

Thanks to his strategic versatility and lane flexibility Juggernaut could efficiently be utilized in different ways with different lineups. As a carry, Juggernaut’s major strength is that he is good during all stages of the game – he is able to fight from early on very efficiently and in the same time he scales very well into the late game. Even without farm, however, Jugg could give good utility to his team and be useful in fights.

The most conventional way to use the hero is to give him access to farm and to maximize his physical damage output and farming speed. This will allow him to be aggressive from early on but at the same time to serve as the main carry and physical damage dealer in your lineup.

It is also possible to focus your drafting around Jugg’s ability to sustain 5-man pushes with Healing ward and claim objectives. Jugg could be the main carry in such a lineup, but since the important aspect here is the utility he provides to the team it is possible to put him in 2nd position.

Safe lane Jugg

If you want to ensure access to farm and a good start to your Juggernaut the best option is to support him in your safe lane. When he gets some resources he becomes very good at harassing and zoning out the enemy offlaner on his own, which gives freedom to your supports.

Lifestealer Portrait

Naix:

If you want a Jugg for the inbuilt spell immunity, the obvious substitute is Naix because of his rage. Both heroes have good single target physical DPS and are survivable. Both of them could siege buildings thanks to their immunity and both have a source of HP sustain (LS has 3). A difference in the lane is that Jugg deals more damage thanks to his spin, but Naix has a powerful slow.

Offensive lane Jugg

Juggernaut has very good kill potential and survivability early on. This means that with supports that have enough kill potential of their own Jugg could be part of a very dangerous offensive lane. This way you could not only secure farm for him but also pressure and deny farm to the enemy team. Of course, running Jugg in an offensive lane is riskier and because of this, it is a good idea to have another carry (or semi-carry) mid or in the safe lane.

Solo mid Jugg

In certain 1v1 matchups, Jugg could be a decent solo laner (e.g. against Ember). He could use Blade Fury to pressure his opponent or to push out the wave and control the runes. His Blade Fury could also serve as a defensive mechanism that makes him a very hard target to gank. Even though it is unlikely that he will get as much farm as in the safe lane or that he will pressure his opponents as much as in an offensive dual or trilane, putting Jugg mid is an option that gives you lane flexibility – e.g. you could put another carry that needs more protection in the safe lane and Jugg mid when the enemy team has good roaming supports.

Synergy

Pushers (tanky heroes or heroes with creeps): DK, Chen, Bristleback, Cent, Enchantress

Dragon knight
Chen
Bristle Portrait
Centaur
Enchantress
Healing Ward is an invaluable tool to a pushing lineup.

Healing Ward is very useful for pushing because it counters the effect of any anti-push your opponents have. Usually, the ward can out-heal the long-range nukes and sustain your push for very long. It could even allow you to recover very fast after a fight and continue pushing. Since the healing is AoE and percentage-based, the ward is most powerful with heroes with high HP or with heroes that have units that benefit from the heal (could tank the tower and anti-pushing spells).

Team fight control: Magnus, Tide, Axe, Puck, BM

Magnus Portrait
Tidehunter Portrait
Axe Portrait
Puck Portrait
Beastmaster
Jugg is a melee carry that needs space in fights to have an impact.

Heroes with good fight control spells give Jugg the freedom he needs in order to have an impact in fights – he wants to be able to get to melee range, stick to his target and usually, he wants to do this without buying a BKB. All of this is a lot easier to do when multiple enemy heroes are disabled.

Strong early-game supports: CM, Venomancer, Lion, Skywrath Mage, Ogre

Crystal Maiden
Venomancer
Lion
Skywrath Mage Portrait
Ogre Magi Portrait
Jugg’s high early game kill potential allows him to be a part of powerful aggressive lane combinations.

Jugger has a very good early game DPS output (thanks to Blade Fury). Consequently, combining him with an early game support that has good kill potential (mainly control) will create a very powerful lane. This could allow you to hinder the development of your lane opponents and secure very good farm for the Jugg early on.

Buffers: Magnus, Ogre, Invoker

Magnus Portrait
Ogre Magi Portrait
Invoker
Jugg is great with DPS buffs as most right-click carries.

Heroes that can buff Jugg’s attack speed or damage can increase his impact on the game a lot. For example, with Empower into RP Jugg can kill the entire enemy team with his ult, while with Alacrity and Bloodlust he becomes amazing at sieging towers.

Counters

Strong Against:

Slow, immobile heroes: SF, Luna, Gyrocopter, AA, Undying

Shadow Fiend Portrait
Luna
Gyro
Ancient Apparition Portrait
Undying Portrait
Slow heroes without disables or escape mechanisms are easy targets for Jugg to kill.

Slow and immobile heroes, especially heroes that don’t even have reliable long-range disables are easy to play against as Jugg. The reason is that first of all you can kill such targets with

your ultimate without problems and second you can easily stick to them when auto-attacking.


Weak Against:

Mobile heroes: Weaver, Storm Spirit, Anti-Mage, Morphling, Phantom Lancer, Puck, QoP

Weaver
Storm spirit
Anti mage
Morph
Phantom Lancer
Puck Portrait
Queen of pain
Slow and immobile heroes are the easiest gank targets for ES in the early game.

Mobile heroes are very hard to kill with Omnislash because they usually have the tools to disengage after you use the spell. Moreover, since you are a melee carry in order to stick to such targets you need your teammates to provide reliable lockdown, otherwise, you will simply get kited.

Powerful initiators, especially ones that have disables through BKB: Beastmaster, Mag, Void, Lion

Beastmaster
Magnus Portrait
Faceless Void Portrait
Lion
Having an impact in fights is harder against heroes that could easily interrupt your casting animations.

Heroes that could start the fight by initiating on you and disabling you (even through the spell immunity of your Blade Fury) are especially potent against Jugg – he is a squishy target and could get nuked down before he uses his defensive abilities.

Blade Mail taunts: Axe, Legion

Axe Portrait
Legion commander

These two heroes can be one of the biggest counters for Jugg. Blade Mail used in Call or Duel can kill Jugg for seconds because of his high physical DPS and crit. In this kind of situations, you need some of your teammates to be able to save you (Shadow Demon, Oracle, OD, WW) or someone needs to use Eul`s on the Blademail hero while Jugg is taunted.

Skills

Jugg Blade Fury
Jugg Healing Ward
Jugg Blade Dance
Jugg Omnislash

Causes a bladestorm of destructive force around Juggernaut, rendering him immune to magic and dealing damage to nearby enemy units.

STATS

Cast Animation: 0+0

Radius: 250

Damage per Second: 90/115/140/160

Duration: 5

CD: 42/34/26/18

Mana: 120/110/100/90

Blade Fury

Mechanics:

  • Instant cast time – ideal for dodging projectiles
  • While spinning, you can use your Healing Ward, but not Omnislash
  • Blade Fury applies spell immunity and dispels certain buffs and debuffs
  • The total damage dealt is 400/525/650/775
  • While spinning you can attack:
  • You don’t deal the attack damage to creeps and heroes, but you deal it to buildings, so you can use the skill to siege towers.
  • Attack modifiers like Basher, Diffusal Blade, the MKB procs, Cleave, etc. work normally while you are attacking through Blade Fury even if you don’t deal attack damage.

Early game kill potential:

In the early game, you would most often use the spell for its very good kill potential. It is one of the spells with the highest total damage on lvl1 (400) – if you can stick to your target you could easily get kills. Needless to say, this is easiest to do with the help of disables from your allies.

If the target is running, you need to have a higher MS to be able to stick to it without the help of your allies – because of this getting Boots before your opponents is important for your kill potential with Blade Fury.

If you have higher MS, the best way to maximize your damage output is to right-click your target while it is disabled/slowed and then to activate Blade Fury when it starts running. If you know that the spin damage would be enough to secure the kill, however, you should start spinning right away because on early levels you deal more DPS with Blade Fury than with attacks.

Use move command: By far the easiest way to stick to your target while spinning is to issue a move command (click “M” on your target). This way the enemy hero wouldn’t be able to get out of the spin radius no matter how it changes direction. The only problem with this approach is that if the enemy target gets in the fog of war you would stop moving. Because of this when the enemy enters Fog you need to start issuing move commands on the ground in the direction the target is moving.

Don’t forget that you can use items while spinning. In the early game, this usually means activating your Phase Boots to catch-up to your target. Phase Boots also allow you to pass through creeps and stick to your target more easily.

DO NOT right-click your target while chasing with Blade Fury: If you right click it you will issue an attack command and Jugger will stop moving to do the attack animation – this will buy your target time to get out of the spin radius.

Late game offensive use:

Once you get high levels of crit and decent items you would deal far higher single target DPS with attacks. The only time you would want to use Blade Fury offensively is when you see that enemies are trying to disable you and you don’t have BKB. For example, if a stun projectile is flying towards you, you can start spinning to dodge it and to continue dealing damage to your target, possibly finishing the kill.

If you have Skadi or Basher, you should issue an attack command on your target when chasing with spin because of the utility of the attack modifier.

Use Blade Fury while pushing: Since you deal damage to buildings with attacks while spinning it is a good idea to use Blade Fury when you are pushing towers. This will make it much harder for the enemy team to initiate on you and defend. Be mindful of the spin duration – it is a good idea to move backward before Fury ends.

Defensive use:

The defensive use of Blade Fury is quite straightforward – you activate the spell when you feel in danger and run towards safety. Blade Fury will dispel some slows and other dangerous debuffs. Use any MS items (Phase Boots, possibly MoM) to create distance between yourself and your opponents while the spin is active. Pass through creeps with Phase Boots, don’t walk around them.

A great defensive trick is to use TP while spinning – enemy heroes aren’t going to be able to interrupt the TP with most abilities and unless they deal very heavy physical damage you will be able to get out safely.

Summons a Healing Ward which heals all nearby allied units, based on their max health. The Healing Ward moves at 420 movement speed after being summoned. Lasts 25 seconds.

STATS

Cast Animation: 0.3+0.47

Cast Range: 350

Radius: 500

Max Health as Heal per Second: 2%/3%/4%/5%

Duration: 25

CD: 60

Mana: 140

Healing Ward

Мechanics:

  • The heal comes from an aura with 500 radius and it lingers for 2.5seconds once you get out of the healing range
  • The heal is applied as HP regen, which means it heals in 0.1 second intervals
  • The total heal equals 54.94% / 82.41% / 109.88% / 137.35% of a unit’s maximum health (25s duration + 2.5lingering buff)
  • Does not heal buildings and siege creeps

Use in or out of fights:

Healing Ward heals for a significant amount, however, it is very easy to kill (it dies from one hit). This means that theoretically, it is a good idea to have the Ward up while you are fighting. In the same time, it is very difficult keeping it alive during the fight. If you are already inside the melee your ward will most likely instantly get killed. Because of this, you should try to use it before you enter the fight and keep it at a safe distance (if you cannot micro it, you could issue a move command on a back-line hero). Sometimes it is even better to save the ward for HP sustain after the fight ends in order to be able to use it for its whole duration rather than use it inside the brawl. Healing up to max HP after a successful fight will typically allow you to take objectives.

Controlling the ward:

If you end up man-fighting another carry with auto attacks using the ward is a must. When you use it you need to immediately control it in order to move it outside of the attack range of enemy heroes but to keep yourself inside the healing range. Sometimes it is not a bad idea to issue an attack command on your hero and to micro the ward in an optimal position.

You could issue a move command to the ward on an ally. When you are farming, for example, you would usually issue the move command on yourself in order not to have to micro the ward. In fights, you could issue the command on another hero that needs the HP sustain or that stays in a safer position.

Bear in mind that the MS of the ward is quite high – 420. You can use this to easily keep it outside of the attack range of enemies. For example, when you are retreating from combat and running towards safety you always want to keep the ward in front of you. This way it will continuously heal you while being outside of the reach of your opponents.

Gives Juggernaut a chance to deal double damage on each attack.

STATS

Proc Chance: 20%/25%/30%/35%

Critical Damage: 180%

Blade Dance

Mechanics:

  • Sound and animation trigger at the start of the attack animation rather than when the hit lands

Blade Dance is a straightforward critical strike ability. It scales very well with damage and attack speed items. Combined with Jugg’s AGI main stat (damage and attack speed from AGI items) and very good BAT, Blade Dance is one of the main reasons why the hero scales very well into the late game.

Juggernaut leaps towards the target enemy unit with an attack, and then slashes other nearby enemy units at an increased attack rate. Juggernaut is invulnerable for the duration.

STATS

Cast Animation: 0.3+0

Cast Range: 350

Slash Radius: 425

Attack Rate Divisor: 1.8

Attack Damage Bonus: 30/40/50

Duration: 3/3.25/3.5

CD: 130/120/110

Mana: 200/275/350

Aghanim's Scepter

Increases number of slashes and decreases cooldown.

Omnislash

Mechanics:

  • Turns Juggernaut invulnerable and spell immune for the whole duration, and applies a basic dispel on cast.
  • The slash interval equals Juggernaut's current attack rate, divided by 1.8.
  • Causes Juggernaut to perform instant attacks on enemies he slashes.
  • Jumps on ethereal and invulnerable units (Ghost, Eul’s), but doesn’t damage them
  • If your solo target disappears during the Omnislash (becoming invisible; Phase Shift; blink abilities; using Manta Style split, etc.) the ultimate will be interrupted because no valid targets would be in range
  • Juggernaut can cast spells, and use items during Omnislash (e.g. Blink Dagger. Blade Fury is disabled.)

Optimal Use:

Omnislash gives Jugg a very high kill potential on isolated targets: if there are no additional targets around and every single jump and attack lands on your intended target, this usually means a secured kill even on tankier heroes on full HP. This means that in terms of kill potential the optimal use of Omnislash is on an isolated important hero.

Inside fights the spell has two aspects – damage and protection:

You would rarely be able to pick-off an isolated target because of the proximity of enemy heroes, but unless you are wasting a lot of jumps on creeps it is usually worth it to use the spell simply to deal damage in fights. (If there are a lot of enemy units in the fight (illusions, creeps), it will be better to wait for your teammates to clear them a bit with AoE spells and use Omnislash afterward.) With items like Mjollnir and Battle Fury, you would deal additional AoE damage, which is very powerful in group fights.

The protection Omnislash offers you, however, is equally invaluable in fights. It disallows the enemy carries to fight back and the utility heroes to control you and kite you. You can even use Omnislash as a defensive mechanism – to buy yourself some time and allow your teammates to react.

Skill Builds

Interestingly, most of Jugg’s skills (with the exception of his ultimate) don’t scale particularly well with more levels invested into them. Blade Fury gives you the whole defensive utility on lvl1 and the damage doesn’t even double. Healing Ward scales well only when your total HP becomes higher and Blade Dance gives you 20% proc chance on lvl1 and 5% for each additional level (lvl2, 3 and 4 combined don’t give as much as lvl1).

You prioritize Blade Fury early on because it is the skill that gives you the most kill potential. The only choice available is whether to max your Crit or to max Healing Ward.

Standard Build
Jugg Blade Fury
1
Jugg Blade Dance
2
Jugg Blade Fury
3
Jugg Healing Ward
4
Jugg Blade Fury
5
Jugg Omnislash
6
Jugg Blade Fury
7
Jugg Blade Dance
8
Jugg Blade Dance
9
Talent Icon
10
Jugg Blade Dance
11
Jugg Omnislash
12
Jugg Healing Ward
13
Jugg Healing Ward
14
Talent Icon
15
Jugg Healing Ward
16
Jugg Omnislash
18
Talent Icon
20
Talent Icon
25
Pros: very high kill potential early on.
Cons: your sustain on the lane is not that good (if it’s a hard lane to be in).

Maxing Blade Fury will give you kill potential on the lane. Later in the laning stage, you can easily just spin on creep waves to push the wave faster and farm the jungle with the sustain from Healing Ward. One of the best things about maxing Blade Fury is the cooldown as it falls significantly with each new level into the skill. 

Theoretically, you can prioritize your Ward over your Crit if you want to start moving as 5 and pushing (or taking Roshan) from early on. Nonetheless, maxing crit first is standard because it increases your DPS, which means you farm a bit faster and deal a bit more damage in kill attempts (makes your Omnislash more powerful).

Talents

+1s Omnislash Duration

25

+600 Health

+100 Blade Fury DPS

20

+10 Armor

+20 Attack Speed

15

+1s Blade Fury

+20 MS

10

+5 All Stats

Lvl10: The MS is great combined with Phase Boots/Yasha/Drums, but if you feel you need more HP  you can take the stats.

Lvl15: Attack Speed should be your choice here, the 1s Blade Fury duration is simply not impactful enough in most cases.

Lvl20: Blade Fury DPS in the late game is not that useful since you want mainly to right-click enemies and use your Omnislash for damage. You can still take it against units/illusions if you don’t have other good sources of AoE (BF, Mjollnir). The armor is the standard choice since it can be very good against high Physical damage heroes or against minus armor strats.

Lvl25: +1s Omnislash Duration is just too good to pass. You want this talent almost in every case. Getting the HP is a desperate attempt to survive burst damage, but even if you are in such a situation the bonus strikes could keep you safe and dealing damage for longer.

Standard Build

Starting with tangoes, Salve and Stout Shield will help you deal with harassing or tanking the creeps, Quelling blade is always good for helping you to last hit and you need it anyways later for your Battle Fury.

Both Treads and Phase Boots are viable. Phase Boots are better for kill attempts with Blade Fury (and possibly Omni Slash - they help you reach your target). Treads are more well-rounded because of the stats - make you tankier, the damage is great for last-hitting and harassing with your crit, and you can switch to INT when casting spells to manage your mana better.

Getting a fast Battle Fury could increase your farming speed a great deal thanks to your crit. Moreover, the HP and Mana regen are very helpful early on.

Getting a Blink afterward will help you use your ultimate in the most efficient way possible (e.g. you can jump on a back-line squishy target and finish it off just with the ult). It also increases your farming speed further, by allowing you to jump from camp to camp. Delaying it in favor of more stat-heavy items is possible if you feel this is what you need.

After the BF and Blink you go for your usual stat/AS heavy items, to increase your physical DPS and the effectiveness of your ultimate: Manta, Butterfly, Skadi, Mjollnir.

Starting Items
Stout Shield
Tangoes
Healing_Salve_icon
Mango
Early Game
Quelling Blade
Boots of Speed
Wraith Band
Wraith Band
Power Treads Agility
Magic wand
Mid Game
Battle_Fury_icon
Blink_Dagger_icon
Manta_Style_icon
Late Game
Butterfly
Skadi
Mjollnir_icon
Stout Shield
Tangoes
Healing_Salve_icon
Mango
Quelling Blade

Quelling Blade: Helps with last hitting in the lane and even more importantly – increases your farming rate a lot since you rely almost exclusively on attacks to kill creeps.

Boots of Speed

Boots of Speed: if you have kill potential in the lane, get Boots as fast as possible to attempt kills with Blade Fury. If not, get Wraith Bands first for better stats in trades.

Wraith Band
Wraith Band
Power Treads Agility

Power Treads: Extra STR for tankiness in fights, extra INT for Tread switching to conserve mana or extra AGI for damage and attack speed.

Magic wand

Magic Wand: Wand is a great mana sustain tool to have early on – your spells are costly and you don’t have a big mana pool. The burst heal is also useful for surviving in certain situations.

Battle_Fury_icon

Battle Fury: BF has two valuable aspects:
First, it increases your farming speed a great deal because of the extra damage and cleave. Second, it increases the potency of your Omnislash in group engagements, especially if you are fighting against many units (illusions, summons, etc.). If your main goal is to benefit from the second aspect, you could delay the Battle Fury instead of getting it in the early game. 

Blink_Dagger_icon

Blink Dagger: Sometimes Jugg has big trouble reaching his targets because of potent disables – this is a problem since Omnislash could only be used from a very short range. Blink solves this problem. Moreover, you can use the item to move your hero while Omni-slashing. This is very valuable in fights – you can blink onto a target which is more isolated and finish it off, instead of wasting your jumps on groups of illusions and creeps. Last but not least, even though Blink Dagger doesn’t give any stats, it increases your mobility a great deal, which helps increase your farming speed and could serve as a defensive mechanism.

Manta_Style_icon

Manta Style: Since you don’t want to go for a BKB (especially in the early/mid game), Manta provides you with an invaluable defensive mechanism. You can use the split to dispel debuffs (most importantly silences), which will allow you to use your ultimate or a Blade Fury – this could save your life and even turn a fight. This is the reason you almost always want to go for a quick Manta against a team with silences. The stats the item provides are also useful – MS for mobility, AGI for DPS, STR for survivability and INT for mana pool. The illusions are also fairly strong if you choose to go for other stat heavy items.

Butterfly

Butterfly: As is the case for all AGI carries Butterfly gives you a huge increase in both survivability and DPS. The high IAS coming from the item also synergizes well with your BAT and ultimate.

Skadi

Skadi: The slow allows you to stick to targets and the stats are very valuable for tankiness, some DPS and solving your mana problems. You usually want to get Skadi as a third/fourth big item after you have secured your mobility and high DPS.

Mjollnir_icon

Mjollnir: The very high IAS works very well with your low BAT and your ultimate. Moreover, the attack modifier allows you to deal AoE damage, which is useful for farming faster or for group fights (especially if the enemy team has multiple units like illusions or summons).

Fighting Build

With a fighting Jugger you want to skip your Battle Fury and instead you want to take some cost-efficient early-game items like Yasha/Drums – it is a great choice to sustain your mana. Phase Boots is a must since you want to chase and fight (Yasha does the same but also increases your farm capability).

Late game Basher/Abyssal + Blink is great for picking-off targets (and gives you good survivability), Butterfly increases your DPS a great deal.

Starting items
Stout Shield
Tangoes
Healing_Salve_icon
Mango
Early game
Quelling Blade
Boots of Speed
Wraith Band
Phase boots
Magic wand
Drums
Mid game
Yasha
Diffusal Blade
Manta_Style_icon
Late game
Blink_Dagger_icon
Abyssal_Blade_icon
Butterfly
Stout Shield
Tangoes
Healing_Salve_icon
Mango
Quelling Blade

Quelling Blade: Helps with last hitting in the lane and even more importantly – increases your farming rate a lot since you rely almost exclusively on attacks to kill creeps.

Boots of Speed
Wraith Band
Phase boots

Phase Boots: the MS burst is great for following your target with Blade Fury or reaching it for Omnislash. The AS also synergizes with your ult. The drawback is the lack of stats, but you compensate this with other stat items.

Magic wand

Magic Wand: Wand is a great mana sustain tool to have early on – your spells are costly and you don’t have a big mana pool. The burst heal is also useful for surviving in certain situations.

Drums

Drums of Endurance: Drums is a well-rounded stat item – it gives some AGI for DPS, some STR for survivability and some INT to help solve your mana problems. Moreover, it increases your MS, which is useful for chasing or running away. The main problem for the item is that it takes an item slot and often you wouldn’t want to waste time getting it instead of another more powerful item when you know that you would have to sell it after a while (for a support Jugg this wouldn’t be a problem).

Yasha

Yasha: Gives you MS, which is useful for chasing or getting out of danger with Blade Fury. Moreover, the AGI increases your DPS significantly and when combined with the MS allows you to farm at a faster rate. You have the choice to upgrade the item into S&Y or Manta, depending on what fits the current game more – both items work great on Jugger and in that sense going for Yasha first gives you item choice flexibility.

Diffusal Blade

Diffusal Blade: The stats it provides are very useful – high amounts of AGI for DPS and some INT to solve your mana problems. The most valuable part of the item, however, is the active ability, since it allows you to catch enemies easier. You can even use Diffusal while spinning to make sure your target doesn’t get away. The slow is especially valuable if you don’t have S&Y/Skadi/Basher to help you stick to your target. Diffusal has great synergy with the illusions of Manta, and if you go for one of the items you usually want to go for the other as well.

Manta_Style_icon

Manta Style: Since you don’t want to go for a BKB (especially in the early/mid game), Manta provides you with an invaluable defensive mechanism. You can use the split to dispel debuffs (most importantly silences), which will allow you to use your ultimate or a Blade Fury – this could save your life and even turn a fight. This is the reason you almost always want to go for a quick Manta against a team with silences. The stats the item provides are also useful – MS for mobility, AGI for DPS, STR for survivability and INT for mana pool. The illusions are also fairly strong if you choose to go for other stat heavy items.

Blink_Dagger_icon

Blink Dagger: Sometimes Jugg has big trouble reaching his targets because of potent disables – this is a problem since Omnislash could only be used from a very short range. Blink solves this problem. Moreover, you can use the item to move your hero while Omni-slashing. This is very valuable in fights – you can blink onto a target which is more isolated and finish it off, instead of wasting your jumps on groups of illusions and creeps. Last but not least, even though Blink Dagger doesn’t give any stats, it increases your mobility a great deal, which helps increase your farming speed and could serve as a defensive mechanism.

Abyssal_Blade_icon

Abyssal Blade: The active stun is very valuable for solo-killing heroes without using your ultimate as it gives you a very reliable lockdown (that even goes through BKB).

Butterfly

Butterfly: As is the case for all AGI carries Butterfly gives you a huge increase in both survivability and DPS. The high IAS coming from the item also synergizes well with your BAT and ultimate.

Other Items

Early & Mid Game
Maelstorm
Shadow_Blade_icon
Sange_and_Yasha_new
Linken's Sphere
Late Game
Nullifier
Boots_of_Travel_1_icon
Bloodthorn_icon
Silver edge
Monkey_King_Bar_icon
Black King Bar
Refresher orb
Maelstorm

Maelstrom is a cheaper farming and DPS alternative to Battlefury. It is inferior for farming, but it allows you to get other stat items faster and be more efficient in fights. Mjollnir later on has great synergy with Omnislash because of the big AS boost.

Shadow_Blade_icon

Shadow Blade: A mobility item serving a similar function to Blink Dagger – it allows you to get in position for good Omni Slashes and possibly to disengage. The pros of SB are the stats it gives – the AS and damage increase further your DPS. The con is that it is not as reliable because it is countered by true sight – if you get disabled while you are still outside of Omnislash range you could easily get killed.

Sange_and_Yasha_new

Sange and Yasha: S&Y is another really cost efficient item on Jugger - you benefit from all stats it gives. The maim is great for chasing and sticking to your target with physical attacks. The same applies to the bonus MS, but in addition, it allows you to disengage fights more easily and to farm faster. The STR makes you tankier, which is important for surviving nukes and disables. The AGI gives you a significant DPS increase and again helps you farm faster. All things considered, S&Y is a very balanced item for Jugg and usually the only reason to skip it is if you need to buy Manta instead.

Linken's Sphere

Linken’s Sphere: It’s good against the usual suspects like Batrider, Doom, Beastmaster, etc.

Nullifier

Nullifier: Useful against heroes like SF, Luna, Sniper and many other cores who use items to protect themselves like Shadow Blade, Euls, Hurricane, etc.

Boots_of_Travel_1_icon

BOTs: great in the late game for split-pushing.

Bloodthorn_icon

Bloodthorn: A nice late game item when BKBs have low duration and you can jump on a hero who doesn’t have protection against silence.

Silver edge

Silver Edge: Upgrading to silver Edge is a great idea if you can make use of the Break mechanic.

Monkey_King_Bar_icon

MKB: Provides a good DPS buff and counters directly evasion.

Black King Bar

BKB: If you have a serious problems fighting without Omnislash because the enemy team is constantly kiting you, getting a BKB in the late game is not a bad choice – it will allow you to right-click freely and man-fight enemy carries.

Refresher orb

Refresher Orb: Double Omnislash is a force to be reckoned with in team engagements. If you decide to go this route it is important that you make sure that you have enough mana to cast two ults and a Refresh. Usually, you want to build Refresher after Agh’s and at least one DPS item. If you are going for an Abyssal Blade you can refresh the active of the item, which is also very powerful.

Early Game

Jugg 350px

Jugger is a dominant laner and more often than not you want to use his qualities to achieve an early game lead. You can harass with your crit, sustain yourself with ward and attempt kills with Blade Fury early on (with the help of your supports) and even Omnislash later on in the laning stage. Blade Fury is also quite useful for boosting your GPM by flash-farming the lane and jungle.

Farming:

Jugger has a very fast attack animation and an average attack damage, which makes last-hitting relatively easy. The only exception is if you are facing a very dominant 1v1 laner, in which case you usually need some help from a support to provide you with space to farm. If you are facing a lane opponent who has very high damage it is a good practice to pull the creep wave away from your opponent to last hit without allowing the enemy hero to deny (a useful trick for most melee heroes).

If you have trouble last hitting with attacks you could theoretically use Blade Fury. The problem is that this is very mana intensive and that by using Blade Fury you are pushing out the wave, which is unfavorable in certain situations (e.g. you don’t want to give farm to the enemy offlaner). Consequently, more often than not you need to rely mainly on your attacks for last hits.

If you have a level in Blade Dance you need to make sure a crit proc wouldn’t mess up your attack. When the creep gets close to LH range but is still out of it don’t attack because a critical strike could leave it on very low HP in which case your ally creeps could steal the last hit.

Harassing & Zoning-out:

Even though he is a melee hero and he needs to get in melee range to harass, Jugg’s skills and importantly – item choices allow him to easily harass in the laning stage.

Critical strike is a powerful harassing tool especially once Jugg gets his Phase Boots. Not only do they give him damage that helps to win in a hit exchange, but they help him stick to his target for 2-3 hits especially in the side lanes where there is more room to chase. The MS of MoM (usually acquired before the end of the laning stage) is also very valuable for sticking to your target with physical attacks.

Blade Fury deals significant damage early on. Even if you wouldn’t be able to get a kill with it, during the laning stage it is not a bad idea to use the spell for harass if you have mana to spare. Sticking to your opponent for a few seconds will force him to use up his regen consumables, which will make the laning stage easier for you. As with your physical attacks, harassing with Blade Fury is easier if you have more MS than your opponent. Because of this Phase Boots is useful for early game harass. If you are not leveling your Blade Fury up, harassing with physical attacks becomes more efficient as the laning stage progresses compared to harassing with Blade Fury – it doesn’t cost mana but even more importantly, it could deal more damage for a shorter duration.

Healing Ward doesn’t do damage but it is very useful for harassing in the sense that it helps you with HP sustain. If you exchange a lot of hits with your lane opponent and you are both on low HP he would have to use his regen consumables while you would have the choice to use Healing Ward to regen HP for the cost of mana rather than consumables.

All things considered, Jugg gives you the opportunity to deal damage and to keep your HP up at the same time, which means that exchanging harass during the laning stage might allow you to dominate your lane opponent in the long run.

Survival:

Your main survivability tool is Blade Fury – it gives you magic immunity for 5 seconds, which is usually enough to get to the safety of your tower. Because of this, it is important to keep in mind the CD (on lvl1 – 42 sec) and mana cost of Blade Fury. If you suspect you will get ganked or you might need it to survive for whatever reason it is a good idea to conserve the CD and your mana in order to have your survivability mechanism.

Getting MS items (Phase Boots and Yasha most notably in the early game) is a huge boost to your survivability simply because it allows you to run a further distance for the 5 seconds of spell immunity.

Healing Ward is also a valuable survivability tool if you are sustaining continuous rather than nuke damage. Just remember to micro your Ward out of harm’s way. More often than not Blade Fury is your most important survivability mechanism and you would need to use Healing Ward only for sustain after the fight.

Kill Potential:

Blade Fury:

Most of your kill potential in the early laning stage comes from Blade Fury – the ability deals very high amounts of magical damage if you are able to stick to your target and has the added benefit of making you spell immune. This means enemies wouldn’t be able to disable you in order to run away. Since you usually need to chase, the more space you have the better. E.g. chasing in the mid lane is harder than in the safe lane because the enemy heroes mid are generally closer to their tower.

Importance falls on MS once again – if you cannot keep up with your opponents you cannot deal damage with the spell for long enough

Against enemies with mobility spells you only have kill potential if your allies have long enough disables (you cannot chase with Fury if your opponent has e.g., Blink).

Attack damage:

Thanks to Blade Dance you deal significant right-click damage from early on if you get good resources in the very early game and you manage to build the cheap DPS items fast (Phase, Aquila). Whit a fast Yasha/Diffusal/Battlefury your DPS whit right clicks will increase significantly.

Omnislash:

Omnislash gives you a tremendous amount of solo kill potential, but in order to utilize it, you need to isolate your target from any other units. Lvl 1 Omnislash has only three jumps and wasting even one on a creep will decrease the damage of the spell a great amount.

A useful way to isolate your lane opponent from the creep wave is to start auto-attacking him (or to use Blade Fury) while he is near the creep wave. This way your opponent will face a decision – stay near the creeps and fight (if you are the more farmed hero he will lose the fight) or run away towards the safety of the tower, which will give you an opportunity to Omnislash. If the Omnislash damage is not enough you can use Blade Fury to chase and finish the kill.

Timings and Rotations:

Rotating for kills:

Your most important timing by far is getting Omnislash. Once you acquire the skill you should use the kill potential it provides you. If you are a farming Jugg it is important that you don’t waste time – you want to farm continuously. Consequently, rotating simply to search for a kill with Omnislash is usually not a good idea. Instead, try to find a kill in your lane (call for a gank if you cannot do it alone). If this is not possible, buy a TP scroll and wait for an opportunity to counter-gank or join a fight.

Rotating for pushes:

If your team has good early game pushing potential (DK, Chen, Enchantress, etc.) it is a good idea to join your teammates and support the push with Ward.

Rotating to farm the jungle:

Last but not least, if you are struggling in the lane or if your allies need the farm there, you always have the option to rotate to the jungle. After getting a Battle Fury you can farm jungle camps and get comparable GPM to farming the lane.

Safe Lane Jugg

Use your kill and harass potential to pressure your lane opponent(s)
Get as much farm and XP as possible
Consider rotations for pushes/ganks/farming the jungle
Playstyle:

Your play style in the safe lane usually combines two things. First, as every hard carry, you need to try to get as many last hits as possible. It is your job to out-farm the enemy carries and provide your team with a resource advantage. Second, you need to use your laning presence to pressure your lane opponent(s).

Initially, your teammates would usually help you in the lane – a babysitter could zone out the enemy offlaner while you get some basic items. If the babysitter has good control you can even attempt kills with Blade Fury. Afterward, once you get your Phase Boots and some other cost efficient item (e.g. Aquila) you are typically in a good enough position to deal with the offlaner by yourself. Phase Boots and Blade Dance make your physical attacks very dangerous and if you harass the enemy offlaner often, he/she will struggle in the lane. This gives your supports the freedom to farm in the jungle or help out the other lanes.

When you get lvl6 you should try to get a kill on the enemy offlaner if he is still in the lane. As you don’t have such an opportunity get a TP in case you can quickly join a fight in another lane.

Video Example:

Ramzes knows that this is going to be a duo offlane so he gets as much regen as he can (Tangoes, Salve and Clarity and Mango can potentially be used for Healing Ward).

In the laning stage he knows that it is very important to get your Boots as quick as you can (ideally before the offlaners). In some games it is possible for you to skip your point in Healing Ward, but when you play against offensive lanes and more importantly a ranged hero that is going to zone you all the time you need your Healing Ward early.

At lvl7 Juggs kill potential is at his maximum so you should always have a TP on you and be ready to TP and help your team in a fight.

Solo Mid Jugg

Get levels and farm
Use Blade Fury to push out the wave and control the runes
Use your kill potential together with your allies
Playstyle:

Your play style in the mid lane is quite simple. Your first goal is to find enough last hits to get a fast Bottle. The mana an HP sustain is very important for using your Blade Fury often, and Blade Fury is your main lane control mechanism. Getting fast Boots is also vital – allows you to chase with BF as usual, but also allows you to run the distance to the runes faster and more efficiently.

First, if you have the opportunity to do so, you should use the kill potential of BF. This usually means your supports ganking your lane – it is hard getting a solo kill only with BF against an equally farmed opponent mid, where you don’t have a lot of space to chase. Harassing with BF is not a bad idea if your opponent lacks HP sustain.

Second, when you get your mana sustain you should use BF to kill-off the creep wave quicker. This will force your opponent to last-hit under the tower and will give you valuable free time to either control the rune or stack a nearby creep camp that you could later on farm with Blade Fury. Good rune control and efficient flash farming is the most important thing to make your time in the mid lane worth it.

Last but not least, you should carefully manage your BF CD and mana cost. If you suspect you might get ganked you need to have the spell available to escape the gank attempt.

Mid & Late Game

jugg immortal 350px

Jugg is a very versatile carry in the sense that he can adopt different strategies and tactics in the mid and late game. Generally speaking, you want to gank when your ultimate is available and farm-up when it is not. Ideally, after each successful skirmish you will be able to take objectives and sustain your team with Healing Ward.


Later on, when you have more items, you can start forcing fights when your ultimate is available. If you are ahead - siege the enemy base with Blade Fury and Healing Ward. If you are playing from behind – split-push and smoke-gank with your ult to slow the game down and buy yourself time to get the items you need.

Pressure the enemy team: gank with Omnislash;
Take objectives with Healing Ward when you can take favorable fights;
Farm as efficiently as possible;
Comeback Potential:

Jugg scales very well with items but is not particularly item dependent. This means that even if you have a bad start in the game your play style wouldn’t change a lot.

When your ultimate is available you should (with the help of your allies) try to pressure your opponents and get some kills. This will give you map control and when your ult is on CD you would be able to use this space on the map to farm.

After a very good laning stage, your play style would be the same but the fact that you are leading at resources would mean you can afford to be more aggressive. E.g. you can start farming in the enemy jungle (make sure you are not seen entering it); once you bump into an enemy core that wants to farm it as well, you can kill it with Omnislash and afterward TP home with Blade Fury.

Team Fights:

Omnislash:

The first thing you need to think about in fights is Omnislash. First of all, it has a short casting range. This means that while you are running towards your target you could get disabled and focused down. To avoid this try to observe when enemies use their disables. Don’t be the first one to run into the fight (without a BKB) – better wait for an ally to initiate and follow up with your Omnislash.

Positioning of the enemy team is very important – you could have an opportunity to run towards a target and use your ultimate without being in range of other dangerous enemies with disables. If the enemy team is separated by some distance you can even cast Omni on some important isolated hero and kill it off quickly. In that sense flanking the enemy team could give you a valuable positioning advantage and win you the fight.

With Blink Dagger getting in position for the perfect Omnislash becomes much easier.

While Omni-slashing try to observe how the fight develops – after the ultimate ends you would have to choose your next action. If the enemy team has wasted most of their lockdown abilities the right thing to do would be to use auto attacks. If they are in position to fight back, however, it might be safer to disengage with Blade Fury.

Last but not least, if enemies initiate on you and you survive the disables you can use Omnislash to buy your team time to react.

Attacks:

Generally speaking, you rarely want to commit hard in a fight and man-fight targets unless you have a BKB. If you over-commit you risk getting disabled and focused down, especially when under the effect of MoM. Typically you want to go in, attack and when you see dangerous targets with disables in range you want to use Blade Fury to disengage. Once at a safe distance you can re-engage again. Your tendency to go for MS items makes this go-in-go-out fighting style possible.

Healing Ward:

Using Healing Ward to sustain your team is a good idea, but you need to micro it to keep it outside of the attack range of your enemies.

Example:

Miracle moves very well in this fight:

  • First, he uses his spin to gain magic immunity and to break the Cogs without being pushed-back.
  • The fight doesn’t go in their favor, so they start retreating. Miracle, however, uses his ult not only to deal damage but to buy himself some time – he needs his spin to come off CD to be able to fight or retreat.
  • Once his spin is available, he uses his Healing Ward and spin and goes back into the fight with his allies.

Pushing & Split Pushing:

5-man pushing:

As Jugg, you are a frontline hero during 5-man pushes. In the early-mid game, you usually want to use your Healing Ward to mitigate any damage from the tower and any anti-push spells. Later on, however, it might be a better decision to save the ward for a potential fight and/or sustain after the push.

The most important skill you need to think about while pushing is your Blade Fury. It is what makes you a hard target to initiate on – you need to have quick reactions and activate it before your opponents are able to lock you down and kill you.

Remember that you can damage buildings with attacks while spinning. This means that when the tower is at low HP it is a good idea to use Blade Fury while finishing it off. This will make it very hard for the enemy team to engage in the last moment for a defense.

Split-Pushing:

Split-pushing with Jugg is more often than not related to your item choices. If you have items that allow you to push-out waves quickly (Mjollnir, Battle Fury) and MS items that allow you to move around the map fast, then split-pushing is definitely a possibility. Your greatest split-pushing tool is the safety that Blade Fury gives you – even if your enemies manage to catch you, you always have the option to use the spell immunity and TP to safety.

One thing to consider when split-pushing is that your major strength as Jugger is your fighting potential rather than your split-pushing potential. Because of this you always need to carry a TP and make sure you join fights in time.

Ganking:

Ganking with Juggernaut is quite straightforward. Your main killing tool is Omnislash and because of this, you need to worry about two things – getting close enough to your target and using Omnislash when there aren’t other units around. Mobility items help in this regard a great deal, most notably Blink Dagger (possibly SB).

If you have mobile initiators with a reliable disable you could even gank without using Omnislash – you deal very high damage just with attacks. Nevertheless, even in a situation where you don’t need to use your ultimate, it is important to have it available - in case of a counter-gank, it could help you win the fight.

Bear in mind that in the late game you do more damage simply with right clicks rather than with Omnislash (the jumps slow down your physical attacks, which are the main DPS source). In that sense, the more valuable part of your ultimate becomes the invulnerability, not the damage. Because of this in the late game, you usually want to stave Omnislash for fights and use only attacks for ganks. 

Map Control:

As Jugg, you are the kind of hero that uses space well (farms fast) but at the same time could create space (good at ganks and fights). This predetermines your play style a great deal – rather than passively farming, you usually want to gank or force fights and afterward use the newly acquired map control to farm up, especially while your ultimate is on CD.

Farming:

Farming with Juggernaut is mechanically simple:

If you have high levels of Blade Fury you could stack a camp once or twice and farm it afterward. In the mid and late game, however, you would usually farm much faster simply with auto attacks. If you have an item that deals AoE damage (Battle Fury, Maelstrom) stacking is an option again, but more often than not you would simply rotate from camp to camp.