Anti-Mage Guide by Xcalibur
Artist: Kunkka
  • Guide Navigation
  • HOME
  • ABOUT
  • DRAFTING
  • SKILLS & BUILDS
  • ITEMS & BUILDS
  • EARLY GAME
  • MID & LATE GAME
Author:
Xcalibur & Co.
Date: 01/2019
Tags:
text
Anti-Mage
Builds
Tactics
Analysis

Welcome

Welcome to Xcalibur's Book of the Anti-Mage, a hero guide part of the Book of Dota series!

Here you will find all the information you need to learn to play AM on a high level – from drafting and builds to the optimal playstyle in different lanes and situations. We hope you’ll enjoy this guide and find it useful!

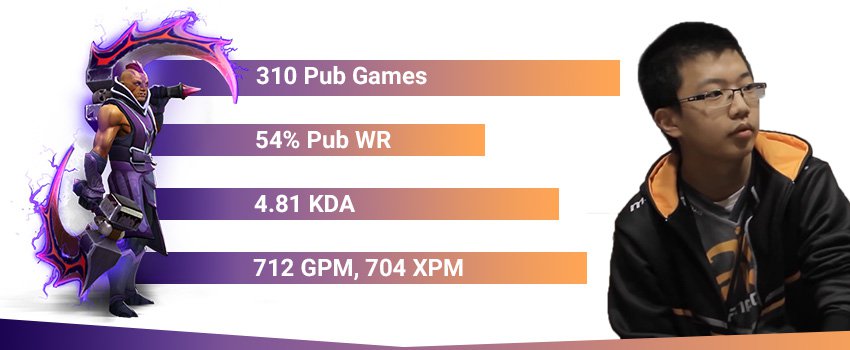
Xcalibur AM Stats
TL;DR:

Draft: Anti-Mage is a true pos. 1 win-condition hero, which means it’s generally a great idea to wait until the end of the drafting phase to pick him. This way you will reduce the chance of facing strong counters. He needs a decent start and enough space in the early-mid game to get his items and secure a victory.

Early Game: AM is an inflexible laner, which means you will go to the safe lane 90% of your games. The only reason to go to another lane is if you want to avoid a very strong offensive offlane by the enemy team – a good start is quite important for an AM. Needless to say, during the laning stage, you need to focus almost exclusively on your farming.

Mid & Late Game: Keep farming to maintain a big item lead. If you are ahead – join your team in fights and even solo-gank with items like Basher/Abyssal + Manta. A TP plus a couple of Blinks could get you in position very quickly, so you don’t need to constantly walk with your team. Ideally, you want to end the game in the mid-late game, when the effect of leading your opponents with 1-2 big items is felt the strongest. If you are not ahead, flash farm and split-push in order to force rotations and to prolong the game. Sometimes you can secure a victory only by split-pushing.

Authors

Steve "Xcalibur" Ye
Endorsement & Info

Xcalibur is one of the biggest pub-stars in the history of Dota - he has claimed the number 1 spot on the EU leaderboard numerous times and before the reset, he peaked at over 9 000 MMR.

His incredible success in pubs made him one of the hottest stand-ins in the pro scene and later on allowed him to play for major Dota teams like Fnatic.

Nikolay "CTOMAHEH1" Kalchev
Info & Editing

CTOMAHEH1 started his pro career as a support in Basically Unknown together with Mind Control. Since then he has consistently been playing on the European T2 scene, most recently on Unchained Esports. 

His highest placement on the EU ladder is top 100 - he plays all roles (mainly support), which is untypical for high-ranking players and shows his great versatility and understanding of the game.

Rijad "Cookie" Sarajlic
Writing & Info

Rijad originally calibrated at 1k MMR when playing with a friend. When his friend quit Dota, he decided to git gud and in 1.5 years he was able to reach 5k MMR. Nowadays he is 6k and spends a lot of time writing guides and making educational streams on Twitch.

The one bad thing about him is that he spams Arc Warden (Shame!). Yet, who are we to judge when his methods are obviously so effective.

Kyril "MrNiceGuy" Kotashev
PM & Editing

Esports and gaming enthusiast since forever and founder of Dotahaven.

Has been playing Dota since 2005 (5.84). An Ancient I player in Dota 2.

I bring an end to magic.

Anti-Mage is one of the fastest farmers and a very strong late game carry. His Blink ability allows him to not only farm and split-push effectively, but to also be very elusive and mobile in fights. Yet with all his strengths the hero is very item-dependent and needs time in order to shine.

Anti-Mage is played as a hard carry irrespective of the lane he goes to. The hero is one of the most famous 4 protect 1 picks because he can use free space incredibly efficiently, out-farm the enemy and close the game. He is great in strats where his team is active while he split-pushes and joins engagements selectively.

Anti-Mage Loadout
Stats
Level 1
Level 15
Level 25
STR
23
High
41
Very Low
54
Very Low
AGI
22
Very High
61
Very High
89
Very High
INT
12
Very Low
37
Very Low
55
Very Low
Attack
49-53
High
88-92
Medium
116-120
Medium
Armor
3.4
High
11.24
Very High
16.84
Very High
Resistance
26
High
63
Very High
64
Very High
HP
614
Medium
941
Very Low
1175
Very Low
MP
219
Very Low
519
Very Low
735
Low
MS
314
Very High
321
Very High
327
Very High
STRENGHTS

MAJOR

Can't touch this:
AM is an incredibly elusive hero, his Blink combined with his Spell Shield and some items will make him incredibly hard to catch and kill.

CS LUL:
AM has an amazing attack animation and BAT, this makes last hitting very easy. With only a Battlefury and some levels, an AM could clear the entire jungle in less than a minute, this makes him one of the fastest farmers and split-pushers in the game.

Magic trick? I’ll make your cores disappear:
Due to his farming speed AM has one of the best late-game potentials in the game, usually getting into the late game 10-20 minutes before the enemy cores would. With all this net worth advantage he can deal massive bursts of damage in very short periods of time.

MINOR

Nice mana pool you got there, would be a shame if something happened to it:
Due to his mana burn and ultimate AM is incredible against heroes who rely on mana.

WEAKNESSES

MAJOR

It’s 3 AM, why are you still farming!!!
Even though his farming speed might be his biggest strength, it is also his team’s biggest weakness. AM requires a huge amount of farm compared to other carries and this usually leaves his team starved and fighting 4v5 for a very long period.

STOP RUNNING:
AM doesn’t have a built-in CC/lockdown mechanism and he has to rely on items or his teammates to lock down enemy heroes for him to do damage.

Get a GYM membership!:
AM simply isn’t fit to fight in the laning stage & early mid-game. This makes him very bad against early push strats that could abuse his team’s 4v5 and end the game before AM has time to catch up.

MINOR

Don’t touch me, I’m sensitive.:
AM doesn’t have a built-in farming mechanism, so he relies on getting his farming items (BF) early on so he can leave the lane and go farm the jungle and split-push. A bad laning stage could slow him down a lot.

Replays

Mineski vs IG, Dota 2 Asia Championships 2018

MATCH ID 3805456168
Replay

Mushi plays a flawless game on AM against IG. Notice that the enemy team has very little disables, which makes this a relatively easy game to stay alive as an AM, as seen from Mushi’s 0 deaths.

AM is pretty strong against Omni in the lane (if you burn his mana, he cannot heal himself). Because of this, with some help from his supports early on he is able to get an advantage in the lane and afterward secure his farm on his own. This frees up his supports to rotate and help out the other lanes.

His teammates are quite good at ganking and pushing, which means in the mid game Mushi has plenty of space to secure his farm and the game later on. He reaches almost 1k GPM thanks to this. Moreover, the enemy team is good at 5-man Dota and relatively bad at ganking in the later stages of the game, which allows Mushi to split-push aggressively without much to be afraid of.

Drafting

When you pick Anti-Mage your aim is to give him space to farm during the laning stage and the midgame. Hence, the rest of your heroes should be capable of creating such space by fighting - pushing or ganking, without the help of AM. Though, even if your team can’t create space for AM, a good AM player will sacrifice his farming speed to start split-pushing early on so he can create space for his team instead.

That being said, there are 3 big things you have to consider before picking AM:

Can the enemy team finish the game before you get your items?

AM requires a huge amount of farm. If the enemy has a pushing + fighting lineup that can abuse the fact that your team is playing 4v5, then picking an AM would be a guaranteed loss. 

Do the enemy have a stronger lane?

AM is very lane reliant if your laning stage is bad then picking him would mean that his BF would be delayed from his standard 11-13 minutes up to even 19+ minutes, which should never happen. 

Are there any other heavy farm dependent cores on my team?

This is probably the biggest mistake lower rank players make when picking AM, he eats the map like no other so this makes it almost impossible to combine him with another farm dependent core (Alchemist, Meepo, Invoker etc.).

Synergy

Good friends to have are:

Potent Gankers: Night Stalker, Clockwerk, Pudge, Sand King

Night Stalker
Clockwerk
Pudge
Sand King

Gankers, especially those that are very strong early on, create space for Anti-Mage. Their rotations and ganks shift the focus of enemies away from AM – opponents have to deal with the constant pick-offs, try to stay together and don’t have space themselves to attempt ganks on AM. As a result, AM can farm up his core items much more easily.

Pushers: Chen, Enigma, Dragon Knight, Enchantress

Chen
Enigma Portrait
Dragon knight
Enchantress

Pushers have the same role as gankers – to create space for AM to farm up. By pushing, you force enemies to rotate and defend. Additionally, if you manage to get some towers early on, you will help AM get his core items faster.

Heroes with control: Puck, Bane, Magnus, Enigma

Puck Portrait
Bane Portrait
Magnus Portrait
Enigma Portrait

Since AM lacks disables he needs heroes with control who can allow him to stick to his targets in fights. Single target disables are sufficient to focus down one hero (e.g. in a gank), but AoE disables could incapacitate more opponents and disallow them from having an impact in a team fight, creating space for AM to right-click freely.

Strong lane supports: Ogre, Bane, Lich, Dark Willow

Ogre Magi Portrait
Bane Portrait
Lich
Dark Willow Portrait

Since AM is lane dependent, he must almost never lose the laning stage. Having a strong support will make sure that he hits his early Battlefury so that he can become independent. 

Counters

Strong Against:

Heroes without control: Venomancer, Kotl, Templar Assassin, Zeus, Nature’s Prophet, Lich

Venomancer
Keeper of the Light
Templar Assassin
Zeus Portrait
Nature's Prophet Portrait
Lich

Since AM is very mobile due to his Blink, enemies without control have no way to gank him or kill him in fights without purchasing a Hex or an Orchid. Lack of control in the enemy team gives Anti-Mage freedom around the map and in fights: he can farm very aggressively without worrying of ganks (you cannot kill him if you cannot lock him down) and he can fight without fear1 of being kited.

Heroes that depend on mana: Medusa, Wraith King, Invoker, Storm Spirit

Medusa
Wraith King
Invoker
Storm spirit

AM can drain a lot of Mana, especially once he gets his Manta Style (his illusions also drain mana). This makes it hard for mana dependent heroes to make an impact if they are focused by the AM. More importantly, once their mana is low, AM can use his ultimate (which deals damage based on % mana missing) to burst such enemies down. The relatively high radius of Mana Void’s damage effect (500) makes it a threat not only for the target hero but also for all nearby enemies.

Weak Against:

Tanky man-fight heroes: Ursa, Sven, Lifestealer, Phantom Assassin

Ursa Portrait
Sven
Lifestealer Portrait
Phantom Assassin

The main reason being that these heroes come online way faster than AM, even though he can out-carry most of these in the late game, these heroes will be able to snowball on his 4v5 team and end the game before he can get his items.

Heroes with good disables: Doom, Puck, Bat Rider, Lion, Bane, Shadow Shaman, Windranger

Doom
Puck Portrait
Batrider
Lion
Bane Portrait
Shadow Shaman
Windranger

Disables which prevent AM from Blinking away make him a very easy target to kill. This is a problem both when you are split-pushing (because you easily can get ganked by a hero with such a disable) and when you are fighting (disables will allow other enemies to focus you down and kill you before you are able to Blink away).

The hero is particularly vulnerable to disables that go through BKB, instant disables which do not give him any time to react, and silences prior to him getting Manta or BkB.

Skills

Anti mage Mana Break
Anti mage Blink
Anti mage Spell Shield
Anti mage Mana Void

Burns an opponent's mana on each attack. Mana Break deals 50% of the mana burned as damage to the target.

STATS

Mana Burned per Hit: 28/40/52/64

Burned Mana as Damage: 50%


Mana Break

Mechanics:

  • You deal damage based on a % of the mana burned, meaning that you deal 14/20/26/32 bonus damage per hit.

  • You can lifesteal based on that damage provided that you have a lifesteal aura (from Vladimir’s’ Offering for instance).
     
  • Illusions of your hero will also benefit from the ability and will steal enemies’ Mana. For that reason, Manta Style is one of the core items of AM it increases the effectiveness of Mana Break and, ultimately, the damage output of Anti-Mage.

  • Finally, if the target hero has no mana left, he/she will take no Mana Break damage. This means that when fighting heroes with very low mana pools you might not be able to sustain high DPS for a long time (if you rely purely on the Mana Break damage). At the same time focusing such heroes might not be a bad idea – in a few seconds you can burn their whole mana pool and make it impossible for them to use any spells.

Uses and tips:

Bear in mind that Mana Break deals physical damage but is blocked by BKB anyway. If you don’t have a lot of DPS items it might be better to focus on heroes without magic immunity. You have more choice than most heroes which enemy to focus because of your mobility.

Harass: It is highly recommended to use this ability to harass the offlaner out of the lane for the first couple of waves. Even missing some last hits is completely fine if you are successful as this will secure you free farm for the next 10 minutes. If the enemy offlaner can’t be reached easily, then focusing on last hitting and leaving your support to harass them is better.

Fights: Either focus a hero with a big mana pool to burn a lot of mana and cast a devastating Mana Void, or focus mana-dependent heroes with a low mana pool to prevent them from casting their spells (the most notorious example is WK with his ult and low mana pool).

Short distance teleportation that allows Anti-Mage to move in and out of combat.

STATS

Cast Animation: 0.4+0.53

Cast Range: Global

Max Blink Distance: 925/1000/1075/1150

CD: 15/12/9/6

Mana: 60

Blink

Uses and tips:

Blink is the spell that makes Anti-Mage the powerful split-pusher and flash farmer he is. It gives him the mobility and elusiveness needed to survive ganks and to escape if initiated upon in fights. In addition, since the ability has a very low cooldown and costs little Mana, you should use it almost on cooldown at later stages of the game to move faster around the map between jungle camps and lanes in order to accelerate your farm or to reach fights faster.

When split-pushing/team-fighting, don’t just wildly use Blink in a place where you don’t have vision or if your enemies haven’t shown on the map in a long period of time. You could Blink into somewhere where your enemies are grouped up waiting for you. Be careful and if in doubt – save your cooldown to blink to get out, not to get in. Of course, if you think you are safe you can use it aggressively, the spell, after all, has a very short cooldown.

It is important to remember that Blink has a 0.4 seconds casting delay, meaning that if enemies have instant spells such as Hex you might not be able to Blink away. Therefore, do not wait for the last possible second to Blink when you spot opponents coming to gank you, especially if they have long-ranged instant initiation; play as safe as possible. The play style of the hero requires you to stay alive at all times and continuously flash farm and out-farm your opponents. 

Disjoint: Blink can also be used to dodge (disjoint) projectiles such as Tower attacks or spell projectiles, even as the projectile is flying at you. This means that when your Blink is available disables (and spells in general) with slow projectiles are a much lesser threat to you compared to instant disables which might not give you a chance to Blink.

Passively grants you magic resistance. Can be activated to create an anti-magic shell around you that sends any targeted spells back towards enemies instead of affecting you.

STATS

Magic Resistance Bonus: 15%/25%/35%/45%

Shell Duration: 1.2

CD: 15/11/7/3

Mana: 45/50/55/60

Counterspell

The passive of Counterspell is very straightforward. The magic resistance of the ability stacks with resistance from items and with the hero’s own magic resistance. This means that combined with your own resistance at each level you will have a total of 36.25%/43.75%/51.25%/58.75%. Even at level 1, the spell will make you very survivable against magic damage abilities

The active part is a short-duration shield that blocks and reflects targeted spells. This makes it a great tool to deal with targeted disables and silences, but it requires good game sense and very fast reactions.

The shield doesn't reflect spells like Phantom Strike and Blink Strike (unlike Lotus Orb), but still blocks them.

Morphling changes his form to match the targeted enemy, gaining their basic abilities. Can be toggled for the duration of the ability.

STATS

Cast Animation: 0.25+0.1

Cast Range: 1000

Duration: 20

CD: 160/100/40

Mana: 50

Mana Void

Damage:

In terms of mechanics, the spell deals damage to a target based on its Mana points missing. Worth noting is that the damage, dealt in a 600 Radius, is based on the primary enemy that you targeted. This means that you should look for the hero with the highest amount of Mana missing and use the spell on him in fights. Keep in mind which opponents use the most mana intensive spells.

For example, if you see a Skywrath Mage using his ultimate this could be your clue that he is an ideal target without having to click on him to see how much mana he is missing. You can help yourself by focusing with your hero and Manta illusions such mana intensive heroes – you will bring their mana down even further, increasing the potential of your Mana Void. Allies with spells or items that burn mana (Nyx’s Mana Burn or any hero with Diffusal Blade) can also increase the damage potential of your ultimate.

The ultimate’s AoE damage can be devastating in fights that take place in clustered areas where heroes tend to group up and stay close to each-other. Mana Void has particular synergy with heroes that have spells that gather up enemies or abilities with an AoE lockdown. Examples of such would be Dark Seer’s Vacuum, Enigma’s Black Hole, and Magnus’ Reverse Polarity

Control:

Mana Void not only damages opponents but also applies a mini-stun, which goes through magic immunity. However, enemies won’t get damaged if they are magic immune.  You can use the ability to cancel channeling spells such as a Black Hole or simply a TP scroll.

Mana issues:

Manta and Ultimate cost a lot of mana. When going for a kill make sure that you not only have enough mana to cast both but also to escape with Blink afterward.

    Skill Builds

    Since leveling stats was removed from the game, AM is not a versatile hero when it comes to skill builds. He always goes for one build where he takes a value point in each spell at level 3, or a 2nd build where he takes 2 points in Mana Breah instead, then a value point in Counterspell at level 4 and then proceeds to max Blink into Break. Unless there’s a specific lane matchup where you’d want to level more Mana Break early to harass the offlaner out of lane, his build doesn’t really change.

    Standard Build
    Anti mage Mana Break
    1
    Anti mage Blink
    2
    Anti mage Mana Break
    3
    Anti mage Spell Shield
    4
    Anti mage Blink
    5
    Anti mage Mana Void
    6
    Anti mage Blink
    7
    Anti mage Blink
    8
    Anti mage Mana Break
    9
    Talent Icon
    10
    Anti mage Mana Break
    11
    Anti mage Mana Void
    12
    Anti mage Spell Shield
    13
    Anti mage Spell Shield
    14
    Talent Icon
    15
    Anti mage Spell Shield
    16
    Anti mage Mana Void
    18
    Talent Icon
    20
    Talent Icon
    25
    Pros: maximum possible farming speed; maximum survivability; decent harassing and kill potential in the laning stage;
    Cons: sub-optimal damage output in the mid game because of the late points in mana break;

    The standard build for Anti-Mage. If you can harass the offlaner early on then getting another point in Mana Break at level 3 is best, otherwise get the value point in Counterspell and then your 2nd level of Mana Break at level 4.

    Talents

    -50s Mana Void Cooldown
    25

    +25% Magic Resistance

    -2.5s Blink Cooldown

    20

    Blink Uncontrollable Illusion

    +15 Agility
    15

    +400 Blink Cast Range

    +20 Attack Speed

    10

    +10 STR

    Level 10: +20 attack speed is by far the superior talent as AM spends the majority of his early and mid game farming. That being said, the +10 STR talent is not bad to get if your enemies have lots of nuke/lockdown and might catch you in the early/mid game.

    Level 15: AM is a very mobile hero that relies on his Blink to farm and fight, so the Cast range talent is superior, but that being said if you can't split-push as much/ you have to fight then getting the +15 AGI is better.

    Level 20: Blink uncontrollable illusion is a very good choice, not only does this prevent people from chasing you, but also helps you take kills and objectives with ease. If you take the Blink creates uncontrollable illusion talent, make sure to not block your camps from respawning after farming them, as the illusion does last 10 seconds and won’t move anywhere. If you think that you will need more escape, you might opt to go for the Blink CD (especially if you have the 400 Blink Cast range on lvl15).

    Level 25: 25% magic resistance is just amazing. AM will be very tanky in the late game: this makes him even more impossible to kill, but if you play mainly against Intelligence heroes you can go for Mana Void CD.

    Standard Build

    The proposed build is the most common one for AM in the safe lane. You get your Battlefury as quickly as possible in order to get your flash farming started. Your next item should be Manta, as this item allows you not only to fight but also to split-push without worrying about dying. The dispell is great against silences - the most common AM counter, and the illusions increase your DPS (as they inherit Mana Break).

    Abyssal, Butterfly and Heart are your standard luxury items. In what exact order you get them depends on the game. Abyssal gives you control if you want to fight and gank, Butterfly gives you the most DPS and Heart - the most survivability. In some games, you will also need BKB to team-fight if the enemy team has a lot of control.

    Starting items
    Tangoes
    Tangoes
    Stout Shield
    Iron branch
    Iron branch
    Early game
    Quelling Blade
    Wraith Band
    Wraith Band
    Ring of health
    Power Treads Agility
    Battle_Fury_icon
    Mid game
    Manta_Style_icon
    Butterfly
    Basher
    Late Game:
    Black King Bar
    Abyssal_Blade_icon
    Heart
    Tangoes
    Tangoes
    Stout Shield

    Stout Shield: a very cost-effective item for melee farmers. It allows you to tank creeps under the tower without losing too much HP and to reduce harass damage from heroes’ auto-attacks.

    Iron branch
    Iron branch
    Quelling Blade

    Quelling Blade: allows you to last-hit more easily. The item is a good starting pick-up if you are laning in a 1vs1 situation against a hero that doesn’t have a lot of harass. You want to contest last-hits and you probably won’t need a lot of regeneration to sustain your HP.

    Wraith Band

    Wraith Band: cost-efficient stats for early-game fights. Get fewer Wraith Bands if the laning stage is passive and you're free-farming.

    Wraith Band

    Wraith Band: cost-efficient stats for early-game fights. Get fewer Wraith Bands if the laning stage is passive and you're free-farming.

    Ring of health

    Ring Of Health: Gives you HP sustain in the lane and you need the item anyway for Battle Fury later.

    Power Treads Agility

    Power Treads: provides AM with attack speed. The item gives the option to switch PT to strength when fighting in order to be tankier, and to agility when farming, even to INT when traveling long distances with Blink.

    Battle_Fury_icon

    Battlefury: BF is the most important item for Anti-Mage in terms of farming and is his first big item in almost all builds. It allows you to significantly increase your farm by clearing jungle camps and split-pushing very quickly with the cleave bonus the item grants.

    Manta_Style_icon

    Manta Style: the first fighting/split-pushing item for AM. Illusions use the Mana Break effect and also drain enemies’ mana, which significantly increases AM’s damage output. The dispel is particularly important if you face gankers with Orchid such as Storm Spirit or Clinkz that can otherwise silence you and kill you.

    Butterfly

    Butterfly: since AM’s primary attribute is agility, the extra agility of the item increases his DPS significantly. The evasion makes him a bit more survivable against right-clicks (important when the enemy carries get items).

    Basher

    Basher: You will upgrade this to Abyssal, but even just a Basher with your high Attack Speed works very good on AM.

    Black King Bar

     Black King Bar: a fighting item for AM. AM doesn’t have a lot of HP and needs to keep hitting his targets during fights, so he can be easily locked down and burst. If you face enemies with a lot of disables you will be forced to go for the item in order to fight. 

    Abyssal_Blade_icon

    Abyssal Blade: since AM lacks control over his targets the item gives him a way to stick to his enemy of choice and not get kited. It works particularly well against elusive but squishy targets such as Storm Spirit or Puck.

    Heart

    Heart of Tarrasque: the item makes AM very tanky and hard to kill in fights. It synergizes quite well with his Spell Shield and increases his EHP against magic damage – the higher your HP pool coupled with the high magic resistance, the more magic damage enemies will have to deal to bring you down.

    Other Items

    Early & Mid Game
    Orb of Venom
    Linken's Sphere
    Late Game:
    Moon Shard
    Boots_of_Travel_1_icon
    Monkey_King_Bar_icon
    Skadi
    Orb of Venom

    Orb of venom: Optional item if you want to harass the enemy offlaner by yourself better so that your supports can leave you to get solo exp while they pull or gank other lanes.

    Linken's Sphere

    Linken’s Sphere: a rare defensive item choice for AM.  It is purchased to counter some targetable initiation spells that go through magic immunity. Example of such spells would be Bat Rider’s Lasso, Beastmaster’s Roar, Bane’s Fiend’s Grip. 

    Moon Shard

    Moon Shard: since AM is one of the fastest farmers in the game, he fills up his inventory quite quickly. Because of this, the ability to consume Moon Shard is a very valuable option to free up an item slot in the late game. 

    Boots_of_Travel_1_icon

    Boots of Travel: a late game item to replace AM’s Power Treads. BoT help AM split-push even more effectively or join team fights quickly after split-pushing.

    Monkey_King_Bar_icon

    Monkey King Bar: it is often purchased to counter heroes with evasion in the late game after you have your cores. 

    Skadi

    Skadi: substitute for HoT, gives AM more DPS but also lets him deal better with a heavy BKB lineup.

    Early Game

    Anti-Mage 350px

    You put the hero in the safe lane to allow him to get as much gold as possible since AM is a very farm-dependent hero – he needs his Battlefury to start flash farming the jungle and split-pushing lanes.


    Due to his mobility, AM can easily punish overextension of the enemy offlaner. If allies get a good initiation, he can simply Blink-in and right click the enemy offlaner. AM is also quite good at harassing enemies due to his Mana Break. For example, AM can keep harassing and draining any melee hero’s mana until that hero has no mana left to stay in the lane (e.g. if Dark Seer doesn’t have mana for Surge, he is an easy kill target and without Ion Shell, he will have trouble getting any farm).

    Anti-Mage can be laned in a 1vs1 situation, usually in the safe lane. This is done usually after you harass the offlaner out of the lane, or kill him. Supports can now do a couple of pulls so that AM gets a level advantage over the offlaner and can be left solo against most offlaners while the supports should go roaming, or they can resume pulling/stacking - the solo EXP is quite welcome on any carry.

    Priorities:

    Your objective is to control the wave so your supports can harass the enemy out of lane and to farm up your core items as fast as possible. 

    Farm and control the creep equilibrium
    Harass
    Blink in to help in kill attempts
    Farming:

    Anti-Mage doesn’t have any active spells he can use to get last hits during the laning stage. Nonetheless, his very fast attack animation and good damage are what allows AM to get last hits relatively easyly.

    The Mana Break helps AM deal extra damage to the ranged lane creeps and jungle creeps that have mana. Whenever you last hit you need to take into account the Mana Break bonus damage, otherwise, you might miss a last hit on a ranged creep, especially if you are last-hitting under your tower.

    Harassing:

    AM doesn’t have any active spells he can use to harass. The only thing you can do is auto-attack enemy heroes and drain their mana with Mana Break. You can use your Blink to close the distance between you and the enemy in order to harass them with your attacks.

    Alternatively, you can walk to the enemy, hit them a few times and Blink back after burning their mana, even if you lose the HP trade the mana loss on the enemy ensures that you will diminish your opponent’s laning presence.

    Kill Potential:

    Anti-Mage has no disable and no active ability that deals damage except for his ultimate which is not a big threat at early levels - enemies don’t have a large mana pool yet. So AM doesn’t have almost any kill potential, but his mana burn helps set up kills from supports roaming in, as enemies won’t be able to cast spells to survive afterward.

    Surviving:

    Anti-Mage is a very hard hero to kill due to his Blink. You can always Blink away if you are low on HP or if you see that enemies are coming to gank you.  You can, therefore, play more aggressively if the heroes against you have no instant silence or initiation to catch you off guard. Your Spell Shield also makes you quite hard to burst down since most heroes lack high physical damage output and only have magic nukes early on.

    Rotations:

    Rotating to another lane is not a good idea with Anti-Mage. There is simply nothing you can do to help out struggling lanes. However, if you are getting pressured and zoned-out of the lane, then you should try to switch the lane. If a lane switch is not possible it’s always better to go to the jungle and have a way slower BF timing than feeding the enemy for a couple of last hits in the lane.

    Timings:

    When it comes to the laning stage AM only has 1 timing which is when you finish your PT + RoH + QB and level 7 to be able to start pushing the wave towards the offlaner and start clearing the side camp. This gives you more EXP and gold and not only helps you finish your BF faster, but also the levels make you farm even FASTER when you get your BF. If your supports aren’t taking the bounty runes, you should go take them by yourself to deny the enemy offlaner or roamer from taking them, but not at the expense of losing lane control or missing last hits.

    Video Example vs Solo Offlaner:

    He starts off with an additional set of tangos as he knows that he’s going to lane against a Legion Commander, who’s known for being extremely aggressive in the laning stage.

    Before the rune spawns he runs quickly to his lane to possibly scout enemy placing a ward.

    Then he proceeds to pick up his rune and go block. Once he gets into the lane he starts off with controlling the lane by denying his creeps while his support harasses. This is important as you don’t want to push into the enemy offlaner as this makes it impossible for your roamer to gank them and they’ll get free last hits under the tower. If the enemy offlaner comes close enough to him, he stops his last-hitting/denying to help his support kick him out of the lane. Once the lane is secured enough he now primarily focuses on denying and last-hitting while going to harass the enemy offlaner every now and then so he can keep his mana low.

    Due to all of this preparation, they managed to keep LC on low HP/mana and low level, while still maintaining creep equilibrium near their tower, which was enough for their roamer Tusk to come in and secure a much-deserved kill.

    Later on, the supports have secured AM his advantage they can now leave him to solo lane against an under-farmed and under-leveled LC, who is no longer a threat to him. AM goes for Treads first then Aquila as he didn’t use up all of his regen and this helps him harass the LC even further out of the lane.

    With levels and more farm he can, later on, start farming the side-camp and once he gets his BF his midgame starts and he can start farming the whole jungle or split-pushing.

    Video Example 2v2:

    Alliance.miCKe plays AM with his ally Warlock against Team Spirit's dual-lane of BS + Shaker.

    He starts the laning stage by trading farm very aggressively against both opponents. Alliance are prepared for this: 

    • First, AM has a lot of regen from his starting item build and his quick Stick purchase (BS gives charges by spamming his Bloodrage), which helps him keep his HP up in the first few minutes of the game.
    • Second, his support Warlock is able to heal him even if he loses the harass exchange heavily

    And indeed, he loses the trade in terms of HP, but he gains something very important in return: he fully burns the mana of the enemy Shaker, which makes ES almost useless in the lane because he cannot replenish it quickly enough. Knowing this, the Shaker leaves the BS alone for a while. AM and Warlock fully capitalize on this opportunity and get a kill on the enemy BS.

    By understanding that they have an advantage in the harass trades because of the Mana Burn and heal and by planning out the first few minutes of the lane, Micke and Insania (on Warlock) secure a great start for the AM. He wins the lane handily, which is surprising for an AM who is traditionally not considered the strongest hero in 2v2 situations.

    AM, however, is quite strong versus opponents that rely on their mana pool to win their lane (like, in this example, ES).

    (We made a more detailed break down of this game and miCKe's play on AM for esportsheaven.com.)

    Mid & Late Game

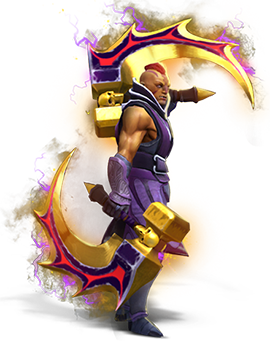
    Anti-Mage Immortals 350px

    After the early game, you should focus on farming to get your core items as fast as possible. With AM you can reach proper hard-carry status quite fast since you can out-farm the enemy core heroes. 


    Once you get your Manta you can start fighting and pushing with your team, but this isn’t always necessary unless you have to defend a key objective like Roshan or high-ground. If you are given the choice, it is ALWAYS better to keep split-pushing and farming for your Butterfly/Abyssal/HoT as AM can rat and farm way faster than almost any hero in the game. This will allow you to get 6-slotted much faster than the enemy cores, which in turn will give you a valuable timing window to end the game.

    Before Manta:

    Keep farming
    Split-push, only if necessary

    After Manta:

    Split-push
    Take objectives
    Farm
    Team fight
    Timings:

    The first important timing for Anti-Mage is when he gets his Battlefury – usually at the 11-13 minute mark if he is free farming. At that point, you start flash-farming and avoiding most fights (usually the jungle) until you get the next item.

    AM before his fighting items should be played always opposite to everyone else on the map. So, if your teammates/enemies are on the bot lane - you’re on the top lane if they’re in your jungle - you’re in their jungle, if they’re pushing your towers - you’re pushing their towers.

    The next timing is when you get your Manta – you can start split-pushing and taking some pickoffs if they get in your way. 

    The last timing is when you get your next core items such as Butterfly, BkB, Abyssal Blade, Heart etc. Then you should start initiating engagements, push with your team and close the game using the item advantage you have compared to the enemy carries. 

    Comeback Potential:

    Once you get your Battle Fury you can out-farm most heroes in the game even if they are currently leading you in items. This gives you a valuable opportunity to catch up in farm if not for the mid-game than at least for the late game. Hence, the most important aspect of the game when you are having a bad time is for your team to successfully create space for you 4v5 so that you can flash-farm and catch up. You should focus on avoiding fights and split pushing as much as possible, betting on the fact that you are a very fast hero and a hard hero to gank.

    Team Fights:

    The mobility of Anti-Mage allows him to choose the way he approaches a team fight and gives the player a variety of viable options.

    Which targets to focus?

    You have three types of targets you can focus in fights.

    First, you can Blink in on a support, use Manta and try to quickly bring it down before he/she has a chance to have an impact in the fight. Even though supports are usually positioned quite defensively Blink gives you the opportunity to reach such targets almost instantly.

    Second, if you have Basher of Abyssal Blade you can jump on an enemy carry. Preferably, in that case, you will follow up a disable of your allies on the opponent and with the help of your fast AS and Bashes prevent the enemy carry from efficiently fighting back. You can also jump on a squishy but elusive hero and lock him/her down with Abyssal Blade, disabling your target from running away. You can even try to jump on a BkB-dependent hero and try to stun him before he can use his BkB, giving your allies a valuable window of opportunity to use spells on the target.

    Third, you can go on a mana-dependent hero, use your Manta and burn his mana so that he can’t use his spells in fights. Even if you don’t manage to finish the kill you would have created a big problem for the hero – he needs its mana to have an impact in the fight. Even more importantly, by doing this you create a very good target for Mana Void later in the fight. If the target is close to any other opponents you can deal a massive AoE nuke which could win you the fight.

    Entering the fight:

    What you need to be careful about is how you close the gap between yourself and your enemies. If opponents have a lot of disables and DPS and you are not survivable enough, Blinking in might quickly lead to your death (since you will have your Blink on cooldown and won’t be able to get away). Therefore, in such a case it might be better to walk in the fight and keep your Blink as an escape tool. The other option is to jump on a target which is somewhat far from any other opponents. If the allies of your target want to assist him/her they will have to walk a certain distance – this should give you enough time to retreat (either by running or by waiting for Blink) and avoid getting in danger.

    If you are survivable enough, however, it is way better to use the Blink to immediately get to your preferred target in the fight – this will make kiting you much harder and could net you quick kills. 

    Ideally, you don’t want to be the first hero to jump in – you go for BKB relatively late and if you are the first available target for your opponents you are likely to get disabled. The perfect scenario is that your allies initiate and manage to control the enemy team and then you immediately Blink on the squishiest high-priority target and burst it down before the disables are over. With an Abyssal Blade and BKB, however, you can be a very potent initiator yourself. Blinking and immediately disabling a high-priority target will allow your teammates to follow up and allow you to get the kill.

    By using your Blink you can quickly reposition yourself and switch targets during the fight. For example, you can jump in and kill a support then Blink towards the enemy carry hero that got disabled by one of your allies. 

    Using Mana Void:

    Look for enemy heroes that have lost a lot of Mana during the fight and use your ultimate on them. You can use it to burst heroes when they are escaping on low HP or cast it when heroes are grouped up to deal a lot of damage in an AoE.

    In the ideal situation you will manage to use your ult on a low-mana target which is close to other opponents, however, this doesn’t happen very often. Because of this, you need to find a balance – don’t save your ultimate for too late, killing an important opponent with it can win you the fight. At the same time if you use it too early you are probably going to have a low impact with it (most heroes are on full mana at the start of the fight) and you might miss a very valuable opportunity that comes later in the fight because your ult is on CD.

    Video example:

    Notice how Mushi uses AM’s mobility to its full potential in this late game fight:

    • Great Manta-dodge of the DK stun, which allows Mushi to back-off safely.
    • He tries to burst down the enemy Omni with his BKB and Abyssal to prevent him from using Guardian, but his team saves him so Mushi backs-off.
    • During the Naga sleep, he uses his mobility to go around the enemy team and get to the Omni once again and finish him off with a powerful AoE Mana Void, which wins his team the fight.

    Pushing:

    Split-pushing: 

    When it comes to split-pushing your Manta sets the starting point for you since it increases your push potential a lot. Nevertheless, you can start split-pushing even before Manta if enemies are 5 man-pushing against you. The idea of split-pushing and not fighting is that AM out-farms enemy heroes – you want to delay the game a bit until you get a large advantage in items. If you start fighting too early on, you might get killed in fights too often and lose the game because of this.

    How you split-push depends on the enemy heroes and their items of choice. If opponents have a lot of ways to lock you down and kill you (such as Hex, Doom, Bat Rider’s Lasso etc.) then you should Blink in, clear the creep wave as fast as possible and then Blink out. Don’t stay too long in the lane – once enemies see you, they will rotate to kill you. You can use your Manta illusions to continue split-pushing without exposing yourself to danger.

    If opponents, on the other hand, don’t have ways to lock you down, you can be more aggressive and push to the enemy tower to force a TP reaction. You will always be able to get away with the help of Blink.

    5-man pushing:

    When it comes to pushing with your team there is one rule to observe – don’t get initiated upon and killed. You should chip the tower’s HP with your hero and/or Manta Illusions. Run in, hit the tower a few times and then Blink out.

    You are not a natural 5-man Dota hero and you should participate in 5-man pushes only when you are certain that you are in a good position to force fights (usually because of an item lead).

    Ganking:

    Anti-Mage is not a very good ganking hero before you get your Manta and Basher/Abyssal Blade.  After you get the items, however, you can catch split-pushers and go for solo kills. 

    Nevertheless, your priority is to farm – don’t try to roam to search for solo kills. Gank only when someone is in your way of farming/split-pushing and is a free kill, otherwise avoid wasting time like this.

    Map Control and Vision:

    Since you are a split-pushing carry, map awareness is incredibly important for you. Check the positioning of enemies that can kill you constantly. Keep in mind that opponents will try to pressure you even before you get your Battlefury – you need to be extra careful where you are positioned if you don’t see enemies.

    If you have doubts about the positioning of your opponents you can even use your Manta illusions to scout out the territory close to your position. This tactic might allow you to dodge an incoming gank. This tactic should be avoided if the enemy is Silence heavy as you’ll need your Manta to purge it.

    Carrying TP scrolls is always a must so you can Blink into trees and teleport away to farm a safer area.

    Farming:

    Since AM is always played as a hard-carry, farming is your top priority - you become a threat to the enemy team by out-farming the opponent’s carries.

    Mechanically, farming with AM is quite straight-forward. The hard part is realizing how much risk you can take to find the necessary space to farm. Ideally, you want to split-push as much as possible and even farm the enemy jungle (this way your own territory is available for your team), but you need to be super-aware of the positioning of dangerous enemies. Dying as an AM is a bigger disaster compared to most heroes (the opportunity cost is extremely high and it slows you down considerably), so make sure you find the necessary space to farm, but not at the cost of your life.