In-Depth Mars Guide
Artist: Valve
  • Guide Navigation
  • HOME
  • ABOUT
  • DRAFTING
  • SKILLS & BUILDS
  • ITEMS & BUILDS
  • EARLY GAME
  • MID & LATE GAME
Author:
MrNiceGuy
Date: 03/2019
Tags:
text
Tactics
Analysis
Builds

Welcome to our Mars Guide

Welcome to our comprehensive Mars guide! Needless to say, the hero is brand new so take the info here with a grain of salt - the way people play him is bound to evolve. That being said, Mars is relatively straight-forward, so even if his builds change, his playstyle is unlikely to shift massively. Consequently, this guide should be able to give you a solid base on top of which you can start building your mastery of Dota's God of War!

Mars Ingame Wallpaper
TL;DR:

Draft: Pick him against attack-damage-heavy lineups and avoid teams with a lot of spell damage. His builds and playstyle are relatively versatile, so adjust your game plan for the situation. He provides great team-fight control and initiation, so try to build your team around those qualities.

Early: Chose in which lane you’d go to give the best possible matchups for your team. You are a hard hero to push out of lane, so often you can take the hard matchups without paying a heavy price. Even if you don’t get a lot out of the lane, you farm very fast and with some mana sustain items you have the possibility to catch up. Moreover, your skillset lets you have an impact without many items (you need Blink, though).

Mid: Be active whenever you have Arena available. You usually want to create space for your pos. 1 hero, so don’t play too passively. Moreover, your skillset works best when you are the one playing proactively. Get your Dagger and decide whether you want to gank or to push towers together with your teammates. 

Late: Keep farming and pushing-out the waves to apply constant pressure to the lanes. Move together with your teammates and use the initiation potential of Blink, Spear, and Arena to take favorable fights and secure the game.

< --- The side navigation menu on the left will take you to the sections of the guide.

Authors

Nikolay "CTOMAHEH1" Kalchev
Info & Editing

CTOMAHEH1 started his pro career as a support in Basically Unknown together with Mind Control. Since then he has consistently been playing on the European T2 scene, most recently on Unchained Esports. 

His highest placement on the EU ladder is top 100 - he plays all roles (mainly support), which is untypical for high-ranking players and shows his great versatility and understanding of the game.

Kyril "MrNiceGuy" Kotashev
PM & Editing

Esports and gaming enthusiast since forever and founder of Dotahaven.

Has been playing Dota since 2005 (5.84). An Ancient player in Dota 2.

About Mars - Strengths & Weaknesses

Great sound design, great cast and attack animations, and a lot of manliness make Mars a very, very fun hero to play. He is an extremely durable frontline tank with great team-fight control abilities. Due to his Bulwark passive (aka Bristlefront) he has a unique offensive playstyle. He is much more durable when facing his enemies, which makes it easy for him to commit to fights (and pushes) and difficult to disengage and reposition.

Mars is a durable laner and team fight initiator, a little bit similar to Tidehunter.

In the lane, he plays a bit like Tide. He takes less damage from passive harass than most heroes (like Tide with Kraken) and has an AoE nuke that uses his attack damage, similar to Anchor Smash. 

Later on, he has a huge team-fight spell and usually he needs Blink to fully utilize it. Like Tide, Mars needs allies that can follow-up and deal damage during his ultimate to win the fight, otherwise, it could easily be wasted. Arena of Blood is a bit harder to land optimally than Ravage because of the smaller AoE (still big), but it has the potential for a higher impact because it splits up the enemy team extremely efficiently. Thanks to Blink + Spear, he is a bit better at ganking than Tide, who loves 5-man Dota exclusively.

Dota Mars Grid IMG
Stats
Level 1
Level 15
Level 25
STR
23
High
73
High
109
Very High
AGI
20
High
46
Medium
65
Medium
INT
17
Low
36
Very Low
50
Very Low
Attack
58-66
Very High
108-116
Very High
144-152
Very High
Armor
3.2
High
7.46
Medium
10.50
Medium
Resistance
26
Medium
30
High
33
High
HP
660
High
1660
Very High
2380
Very High
MP
279
Low
507
Very Low
675
Very Low
MS
313
Very High
317
Very High
320
Very High
STRENGHTS

  • Great team-fight control thanks to his ultimate, but also thanks to Spear of Mars which allows him to reposition and stun enemies

  • Extremely Durable against attacks when facing his enemies.

  • Good farming speed thanks to the wave-clear potential of his two nukes.

  • Scales well with items thanks to Rebuke and Bulwark 

WEAKNESSES

  • Much less durable against damage from spells

  • Much less durable when retreating

  • Countered hard by spell immunity

  • Countered by repositioning abilities

  • Relies on abilities with CD to have an impact – missing them could be a disaster

  • Mana problems (bad INT and INT gain)

Drafting

Mars Buwlark

Mars is a frontline tank and team-fight control hero – those are his two main contributions in a lineup and to use him efficiently you need to build a team that can utilize his strengths.


He can be played as a core in all three lanes – he deals with harass well thanks to Bulwark, which means he is hard to bully out of lane. He farms fast and scales with items, which means he is usually a core.

Positions

He fits best the 2nd or 3rd position on the team. Unless he has insane farm, he’ll have trouble dealing enough continuous damage in fights because his main damage-dealing ability is Rebuke, which has a 10 sec CD. This means he works best if the team has another core (the 1st position) that is the main damage dealer and can dispatch the enemy team during Arena of Blood.

That being said, he can also be used as a greedy position 4. In the early game Spear has high kill potential and he can roam to attempt to set up kills. Moreover, his team-fight control potential is unlocked with only a Blink Dagger. The downside is that he wouldn’t be as tanky and the damage of Rebuke will be weaker, so fight control will be his only real contribution.

Mars Synergies:

AoE team-fight spells: Monkey King, Phoenix, Clinkz, Jakiro, Dark Seer, Enigma

Monkey king
Phoenix
Clinkz
Jakiro Portrait
Dark Seer
Enigma Portrait

Arena of Blood holds enemies within an AoE for a relatively long time. This makes it a great setup for AoE spells like Supernova, Midnight Pulse, Wall of Replica, Burning Army, etc.

Damage-dealers without enough control: Terrorblade, Nevermore, Clinkz, Luna, Leshrac, OD, Sven

Terrorblade
Shadow Fiend Portrait
Clinkz
Luna
Leshrac
Outworld Devourer
Sven

The barrier keeps enemies in place (while allowing allies to pass freely), which gives a lot of time to damage-dealers to deal damage while the enemies have trouble running away. Any damage-dealer can work, but damage dealers that lack disables benefit from Arena of Blood the most.

Physical Barriers: Fissure, Ice Shards, Sprout

Earthshaker Portrait
Tusk
Nature's Prophet Portrait

Spear of Mars can impale (and stun) units on player-generated barriers like Fissure, Ice Shards, and the trees of Sprout. These spells make it much easier to land the stun in open areas.

Mars Counters:

Strong Against:

Attack Damage: Legion Commander, Phantom Assassin, Clinkz, Drow Ranger, Sven

Legion commander
Phantom Assassin
Clinkz
Drow Ranger
Sven

Bulwark makes you impossible to bring down only with attacks while you are playing offensively and walking towards your enemies. Legion Commander deserves a special mention since her Duel is directly countered by Bulwark because it forces you to face her (her allies can still kill you from behind while you’re locked in one place, but that’s easier said than done).

Weak Against:

Magic Immunity: BKB, Juggernaut, Naix

Black King Bar
Juggernaut
Lifestealer Portrait

Arena of Blood is hard-countered by magic immunity. You simply cannot keep magic-immune units in. That being said, Naix and Jugg (and many carries going for BKB) are attack damage dealers, which makes it very hard for them to bring Mars down in a fight, so this counter goes both ways.

Spell Damage: Timber, Queen of Pain, OD, Leshrac, Zeus       

Timbersaw
Queen of pain
Outworld Devourer
Leshrac
Zeus Portrait

Bulwark simply doesn’t work against spell damage. It’s going to be much less effective against a team with a lot of magic-damage dealers.

Break: Viper, Silver Edge

Viper
Silver edge

Like all heroes who rely on their passives for survivability (Timber, Bristle, DK, PA), Mars is countered by the Break mechanic.

Skills

Spear of Mars
God's Rebuke
Bulwark icon
Arena of Blood

Mars throws his legendary Spear with deadly precision, damaging each enemy unit it strikes. The first enemy hero it hits is skewered on the spear, pushing it back. If a skewered hero hits a tree, building, or cliff, they will be impaled to it and stunned.

STATS

Cast Animation: 0.25+1.03

Cast Range: Global

Max Travel Distance: 900/1000/1100/1200

Spear Collision Size: 125

Damage: 100/175/250/325

Knockback Distance: 75

Knockback Duration: 0.25

Impale Stun Duration: 1.6/2/2.4/2.8
CD: 14
Mana: 100

Spear of Mars

Mechanics:

  • Skewers only the first enemy hero hit
  • Hits invisible units
  • It can impale units on trees, cliffs, and buildings – i.e. towers in the early game

Spear of Mars is likely the ability with the highest skill ceiling because it requires aiming allows for some creativity.

Disable: The easiest way to utilize it is for a guaranteed stun: from a short-range onto an obstacle, usually the walls of your ultimate or nearby trees. The stun duration is long (especially with the Talent), so Spear of Mars is a very potent ganking tool.

Repositioning: You can use Spear to mess-up the positioning of enemies. For example, you can blink behind a hero and skewer him towards your teammates. Alternatively, if you are getting chased you can Skewer an enemy backward to create some distance and escape. 

Farming: the spell deals decent AoE damage, which makes it good for clearing creep waves or camps.

Mars smashes enemies in front of him with his shield, knocking them back and damaging them with a critical hit based on his attack. Bonus damage is added when hitting heroes. Has True Strike.

STATS

Cast Animation: 0.2+1.07

Cast Range: 500

Critical Damage: 160%/200%/240%/280%

Radius: 500

Angle: 140°

Knockback Duration: 0.3

Knockback Distance: 150

Bonus Damage vs Heroes: 25
CD: 16/14/12/10
Mana: 55/60/65/70

God’s Rebuke

  • Attack modifiers are applied on the God’s Rebuke AoE attack (i.e. armor reduction, lifesteal, proc chance modifiers, etc.)

Rebuke is a straightforward AoE nuke that scales based on your attack damage. It takes bonus damage into account, so items like Desolator, Radiance or even Rapier increase its nuke damage significantly. It is your main damage tool in fights and also your main farming tool in the mid and late game. Together with Spear, it allows you to clear creep waves instantly from relatively early into the game. 

It also knocks back enemies slightly, so you can use it if you want to push them into the walls of your ultimate or if you are trying to disengage.

Mars wields his massive shield to block a portion of each physical attack when hit from the front or sides.

STATS

Front Angle: 140°

Side Angle: 240°

Front Damage Reduction: 25%/40%/55%/70%

Side Damage Reduction: 12%/20%/27%/35%

Bulwark

  • Unlike Bristleback’s passive, it only works on attacks – i.e. it does not reduce spell damage.

A straightforward damage reduction ability. The obvious implications are that you usually have to man-up in fights. Running away or trying to reposition yourself will get you killed much quicker. This is great when you want to play offensively (i.e. you are the one initiating ganks and fights rather than the one getting jumped), yet it implies that you have to take fight carefully. 

If you want to increase your effective HP the most, get raw HP, heals, and magic resistance if playing against magic damage from spells.

After a short formation time, Mars summons an arena lined with the undead warriors of the Ash Legion, who block enemy attacks and movement. Enemy heroes near the inside edge of the arena will be attacked by spears, dealing damage and knocking them back.

STATS

Cast Animation: 0.1+0.97

Duration: 5/6/7

Radius: 550

Width: 100

Spear Damage: 150 / 200 / 250

Formation Time: 0.6

Distance from Wall for Spear: 160

Spear Attack Interval: 1.0

Warrior Count: 14

CD: 90/75/60
Mana: 200

Arena of Blood

Mechanics:

  • Hard-countered by magic immunity (immune units can freely move through the walls)
  • Countered by some sources of mobility – e.g. Blinks, but not by others - pushes like Force Staff.

Control:

Arena of Blood is an amazing team-fight spell. The obvious use is to prevent enemies from running away in ganks or fights. It locks the units inside (unless they have magic immunity or mobility spells like Blink), which gives your whole team a lot of time to kill them.

In team fights, however, the spell has an equally important feature – it allows you to split the enemy team very efficiently. It prevents enemies from moving in and out while allowing allies to pass freely. To top that off, it even blocks enemy attack projectiles, which means enemy heroes on the outside of the AoE could be fully unable to join the fight. Trapping one or two targets in the AoE and the rest of the team outside can provide your team with an effective numbers advantage and win you the engagement.

Damage:

The damage you can deal with the ultimate seems low, but this is deceptive. Thanks to the way Spear and Rebuke work you can effectively keep an enemy hero stuck to the wall of the ultimate for a long time, which means the Spearmen are guaranteed to hit enemies multiple times (unless you miss your Spear). In the early-mid game, this could even lead to solo-kills.

It is possible to use the terrain to your advantage as well. An enemy unit can get stuck for a while between the wall of the arena and a physical barrier (e.g. building/cliff), which will give the Spearmen time to hit.

Mars Skill Builds:

You can subscribe to the guide on Steam to follow the builds easier.

Standard Mars Skill Build
Spear of Mars
1
God's Rebuke
2
Bulwark icon
3
Spear of Mars
4
Spear of Mars
5
Arena of Blood
6
Spear of Mars
7
God's Rebuke
8
God's Rebuke
9
Talent Icon
10
God's Rebuke
11
Arena of Blood
12
Bulwark icon
13
Bulwark icon
14
Talent Icon
15
Bulwark icon
16
Arena of Blood
18
Talent Icon
20
Talent Icon
25
pros: high burst damage
cons: mana problems

You usually want to max your two nukes ASAP not only because they provide you with kill potential, but because they are your farming tools. Combined with mana sustain items and consumables, you will be able to push-out waves and clear camps very fast.

Which one of the two you max first depends on what you are doing more of. Usually, you want more points in Spear for the longer range and stun duration in combination with your ultimate. This gives you more kill potential.

If you are spending most of your time farming, however, you can max Rebuke first because it’s more mana-efficient. 

Bulwark is the last one maxed, but you usually want to invest at least 1 value point in it (maybe even two in very harass-heavy lanes). The harder your lane, the earlier you want to invest a point in the passive. In an easy lane where getting zoned out is unlikely, you can leave even the value point for later.

Talents

Arena Of Blood Grants Team +100 HP Regen

25

+80%  God's Rebuke Crit

Spear of Mars stun lasts +1.5 seconds

20

Spear of Mars +200 Damage

+8 Armor

15

+35 Damage

+20 Movement Speed

10

+8 Strength

Lvl10: If you're going for Phase + Drums, you might want the MS talent to increase your MS further. In most other cases, you want the STR.

Lvl15: You are already very survivable against attacks, so the armor is usually unnecessary (especially if you have some from items). The damage is usually better because of the Rebuke crit.

Lvl20: At this point in the game Spear is definitely not your main source of damage. The disable, however, could be game-breaking. With the talent, it goes over 4 seconds in duration.

Lvl25: The 100 HP regen could be very impactful in the late game where 5v5 clashes decide the outcome of the match. The Crit is a nice buff, but not that significant. Only go for it if you have plenty of items with bonus damage and your allies aren't spending a lot of time in the Arena (e.g. because they are ranged and they don't clump up).

Mars Item Builds

You can subscribe to the guide on Steam to follow the builds easier.

Utility Build:

Since your main contribution in fights is your AoE control and initiation while other heroes are the main damage dealers, Mars is a great hero to get utility items on. This will make you extremely hard to bring down while giving value to your whole team in 5-man fights.

In this example, you go for a fast Dagger (after Arcanes), Greaves and Lotus. You can always substitute Lotus with other items if you feel the situation doesn’t call for it.

In the late game, you go for Abyssal (which makes you even tankier and works great with Blink for an additional disable) and BKB to deal with powerful disables.

Starting (mid)
Stout Shield
Quelling Blade
Iron branch
Gauntlet Icon
Pulled Tango
Pulled Tango
Early Game
Bottle
Boots of Speed
Soul_Ring_icon
Arcane Boots
Mid game
Blink_Dagger_icon
Guardian Greaves
Lotus Orb
Late game
Black King Bar
Abyssal_Blade_icon
Stout Shield
Quelling Blade
Iron branch
Gauntlet Icon
Pulled Tango
Pulled Tango
Bottle

Bottle: A great source of sustain in the mid lane.

Boots of Speed
Soul_Ring_icon

Soul Ring: since you deal well with harass, HP is rarely a problem, while mana often is. This makes Soul Ring a logical choice.

Arcane Boots

Arcane Boots: an additional source of mana – you need it to spam your two nukes for farming and fighting.

Blink_Dagger_icon

Dagger: your only real core item. You need it to use your ult and Spear to their full potential.

Guardian Greaves

Greaves: further tankiness in addition to utility for your whole team. In combination with Bulwark, you will be nearly unkillable in the mid game.

Lotus Orb

Lotus Orb: you are more vulnerable to spells than attacks. If the enemy has targeted abilities, Lotus is a great tool to make it a problem for them to target you.

Black King Bar

BKB: with Spell Immunity activated in combination with Bulwark, you are practically unkillable. Use this to play aggressively and to keep dealing damage to your target.

Abyssal_Blade_icon

Abyssal Blade: an additional source of control and tankiness. Great in combination with Blink.

Semi-Carry Build:

If you want to increase your damage output, you can go for a Phase into Drums early game build. Afterward, your options are either Radiance for faster farming and great AoE damage if you’re getting kited, S&Y for a mix of survivability and damage, or Desolator if you want to increase your nuke.

Usually, you want to get Blink before your damage item to be able to stay active on the map and gank. If you are playing passively or if you are only pushing as 5, getting Radiance before Blink is possible.

Your late game options are relatively open, but BKB to deal with magic damage and disables is usually great in most situations. In this example you follow this up with Heart for absurd tankiness and Nullifier to deal with BKB’s and increase your damage further.

Starting items
Stout Shield
Tangoes
Healing_Salve_icon
Mango
Early game
Quelling Blade
Boots of Speed
Soul_Ring_icon
Phase boots
Drums
Mid game
Blink_Dagger_icon
Radiance
Late game
Black King Bar
Heart
Nullifier
Stout Shield
Tangoes
Healing_Salve_icon
Mango
Quelling Blade
Boots of Speed
Soul_Ring_icon

Soul Ring: since you deal well with harass, HP is rarely a problem, while mana often is. This makes Soul Ring a logical choice.

Phase boots

Phase Boots: movement speed is crucial to position yourself for better Spear and Arena usage. Phase also give you bonus damage for the nuke of Rebuke.

Drums

Drums: a well-rounded item that provides further MS (extremely valuable before Blink), as well as stats and some mana sustain. If you are not going for Arcanes, every additional source of mana sustain is valuable.

Blink_Dagger_icon

Dagger: your only real core item. You need it to use your ult and Spear to their full potential.

Radiance

Radiance: Radiance works on Mars the same way it does on Naix, WK, Abaddon, Brewmaster, etc. You are a very tanky hero, which means you will have a lot of time to deal burn damage even if enemies are trying to focus you down. If you don’t have your ultimate, you rea vulnerable to kiting, which makes the Burn even more valuable. Needless to say, it is also great for farming and it increases the nuke damage of Rebuke. Last but not least, the miss chance makes you even tankier against attacks.

Black King Bar

BKB: with Spell Immunity activated in combination with Bulwark, you are practically unkillable. Use this to play aggressively and to keep dealing damage to your target.

Heart

Heart: a lot of tankiness especially in combination with Bulwark. A slight damage increase as well thanks to the STR.

Nullifier

Nullifier: you are countered by BKB, and Nullifier prevents your target to use the item. The bonus damage also increases your Rebuke nuke.

Other Items

Early & Mid:
Vladmir's Offering
Desolator Icon
Sange_and_Yasha_new
Pipe
Solar Crest Icon
Late Game:
Scythe of Vyse
Assault_Cuirass_icon
Satanic
Vladmir's Offering

Vladmir’s: a source of sustain (the lifesteal works with Rebuke) and mana-regen, which is valuable early on. The aura is also great for playing as 5 with your team.

Desolator Icon

Desolator: Rebuke applies attack modifiers and scales very well with bonus damage. Consequently, Desolator is the most cost-efficient way to increase its nuke potential. It also increases your right-click DPS, which shouldn’t be underestimated.

Sange_and_Yasha_new

Sange & Yasha: tankiness, movement speed, some damage. A great well-rounded item for semi-carries.

Pipe

Pipe: you are vulnerable to magic damage – Pipe is the logical solution when enemies have a lot of it. It also provides great utility for your whole team.

Solar Crest Icon

Solar: further tankiness against physical damage. The active armor reduction increases the nuke damage of Rebuke.

Scythe of Vyse

Hex: an alternative to Abyssal Blade – less tankiness, but more mana pool and mana regen.

Assault_Cuirass_icon

Assault Cuirass: the armor aura is great for breaking the enemy base together with your team. It increases your otherwise sub-par building damage and allows you to be the frontline pusher easier.

Satanic

Satanic: an additional source of tankiness and an easy way to heal yourself especially when combined with the nuke of Rebuke.

Mars in the Early Game

Mars Png

The early game for Mars is defined by three aspects:

  • The durability from Bulwark makes him very hard to bully out of lane, which makes staying to contest last-hits easy.

  • The damage from Rebuke and Spear helps him farm and push-out waves (as well as occasionally harass).

  • The repositioning from Spear allows him to attempt kills and disengage from enemies ganking him.

Farming:

Contesting last-hits shouldn’t be too difficult in most cases. Even if you are getting harassed, a value point in Bulwark + Stout and some regen should easily take care of that.

You can always use your two nukes (mostly Rebuke) to secure last hits if you need to or to push-out the wave. This might give you time to control stack, control runes, or even rotate later on in the lanes. Make sure you have enough mana sustain, otherwise it would be very difficult to use your two nukes often enough. 

Stacking is a viable option because you will be able to clear the stack relatively quickly with your two nukes. Moreover, with Stout and a point in Bulwark, you wouldn’t take too much damage even from bigger stacks.

Kill Potential:

Spear of Mars:

Initially, your kill potential comes entirely from the repositioning and stun from Spear. It is possible to skewer an enemy backward and stun them on your tower, which will allow your tower to deal a lot of damage. You can try to chase down and finish the kill with Rebuke.

More commonly, however, you will be using the stun of Spear on the nearby trees and cliffs on the sides of the lane to try to secure kills together with your allies.

Arena of Blood:                                                                    

Before Arena, your solo-kill potential is relatively low and you usually rely on the damage of your allies (or tower). With your ultimate, however, solo kill attempts are definitely possible. It deals significant damage early on if you are able to keep your target close to the wall.

To prepare a kill, try to deal some harass damage with Rebuke and even Spear. Once the enemy is around ¾ health (obviously depending on the hero), you can initiate with Arena, into Spear, into attacks, and Rebuke to push the enemy back to the edge. Obviously, it is vital that you don’t miss the Spear. Getting a few Wall Spearmen hits should be enough to secure the kill on most opponents. 

Of course, such kill attempts are much less risky if you have an ally to provide some additional damage.

Example: Mars mid by Dendi

In terms of skills and item builds, there are two things that are worth noting.

First, he gets plenty of HP and mana sustain items and consumables. Bottle, Soul Ring AND Arcanes might seem excessive but notice that he very rarely stays at max mana. These items allow him to use his two nukes very often, which brings us to the second point:
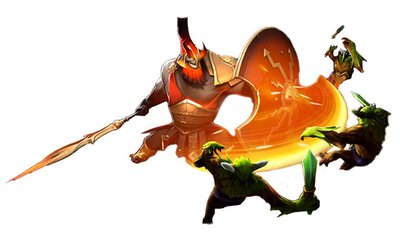
Dendi prioritizes two levels in Rebuke and one in Spear early on. He uses both spells very freely to help himself secure last-hit and even kill a couple of Treants, which lets him get ahead in terms of last hits compared to your lane opponent. Afterward, he maxes Spear for the possible kill potential (of course, he still uses it for farming).

Using the spells freely means he is pushing-out the lane a lot, which gives him free space and time to control the rune with his Bottle and even to stack.

He doesn’t invest a point in Bulwark until both nukes are maxed. Constantly pushing-out the lane also gives Prophet little time to harass. Because of this, he doesn’t feel that the harass coming from Prophet is enough of a threat. Consequently, maxing both nukes for maximum farming speed and kill potential is a good move.

On 03:50 (game time) you can see a stack, rune 
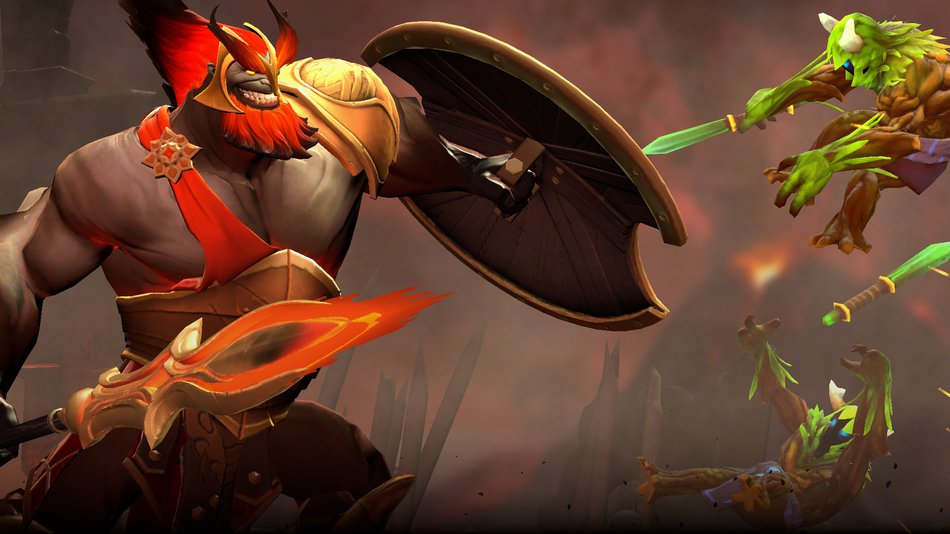
control, followed by great usage of Spear for kill attempts. First, he skewers BH back into the tower (which doesn’t prove to be enough), but then he stuns the Prophet on the mid lane Cliff to secure a kill together with this Tiny.

On 08:10 you can see a standard kill attempt with Arena. Notice that the damage wouldn’t have been enough if Lich wasn’t there. That’s why before solo kill attempts you need to deal some harass damage to your target.

On 10:30 you can see how Dendi uses Arena to punish the over-commitment from the enemy team behind his tower, which leads to a triple kill for him.

Mars Mid & Late Game

Mars Swing White BG

In the mid and late game, Mars has three main roles.

  • The first and most important one is that of an initiator – getting a good Arena off is what determines your impact in fights.

  • Second, he is a good frontline pusher. Bulwark makes him great at tanking towers and a very unfavorable target to jump on when his team is behind him.

  • Third, he is great at flash-farming and pushing-out waves. In more passive games, you need to make sure the lanes are constantly pushed-out to pressure your opponents while also farming as fast as possible.

Team-Fighting:

Blink is the key item in team fights. It will make using Arena as an initiation tool much easier, so try to have it before you start actively taking fights.

Initiating:

Unlike most AoE initiators, you usually DON’T want to catch the whole team inside the Arena. The reason is simple – they can turn and still take the fight if they are strong enough. In the ideal situation, you want to split the enemy team in two. The heroes inside the arena would be the ones your team can focus, while the enemies outside of the arena wouldn’t be able to help. This will give you an effective numbers advantage and could win a fight on its own.

The exception to this rule is when enemies are trying to disengage – in such cases catching as many of them as possible is obviously better.

Counter-Initiating:

Another difference between Mars and other AoE control heroes is that most heroes with big AoE ultimates prefer counter-initiating, while Mars doesn’t. For example, the easiest way to get off an effective RP, Black Hole, or even Ravage is to wait for the enemy team to commit to the fight and clump together. Arena is not a hard disable, however, and putting a ring around the enemy team while they are killing your teammates wouldn’t accomplish much. When counter-initiating you still need to try to split up the enemy team with the edge of the AoE. This way you will isolate enemies and make them easier targets, but equally importantly – the wall will serve as a protective barrier around the ally that the enemy team is trying to focus. Heroes (even ranged) outside of the barrier wouldn’t be able to deal attack damage.

Ganking:

Before 5vs5 team fights start taking place, it’s a great idea to try to use Arena of Valor as often as possible to set up kills for your team. This is much easier to do with Blink, but early on you can also simply walk out of the fog of war (ideally from the trees) and get in range by walking. Phase Boots, Drums, and other MS items are helpful in this regard.

Example early-mid game gank by Dendi:

Notice how Dendi uses Spear immediately after Arena. This way he doesn’t give Bane a chance to react and disable him – if he gets caught by Nightmare and possibly Grip afterward he’ll be in great danger because he is deep in enemy territory.

Since he is ganking a under-farmed support, the damage from both nukes and the wall is enough to easily secure the kill.

Example late-game gank by Dendi:

Pushing:

5-man Pushing:

Mars is a great frontline pusher because of Bulwark. Towers barely damage him and he is an unfavorable target for the enemy team to jump on. Bear in mind, however, that you take full damage from spells. This means that when you are acting as the frontline pusher it’s a good idea to have BKB or Pipe prepared to deal with this problem.

Another thing to consider is that you deal low tower damage if you’ve gone for the full utility and survivability item build. Desolator and AC could solve this problem, but before that, you might need the help of allies in order to push fast enough. Because of this, if you have other strong frontline pushers it might be a better plan to stay hidden, ready to counter-initiate with Arena.

Split-Pushing:

you push-out waves almost instantly, but you deal low building damage (unless you have Desolator) and have no escape mechanism. Because of this, you usually don’t want to split-push deep into enemy territory. Push out the waves to let the creeps apply pressure and go back to jungle farming. Because of your building damage, when your opponents are pushing, rather than split-pushing you want to be present for the fight to use your initiation.