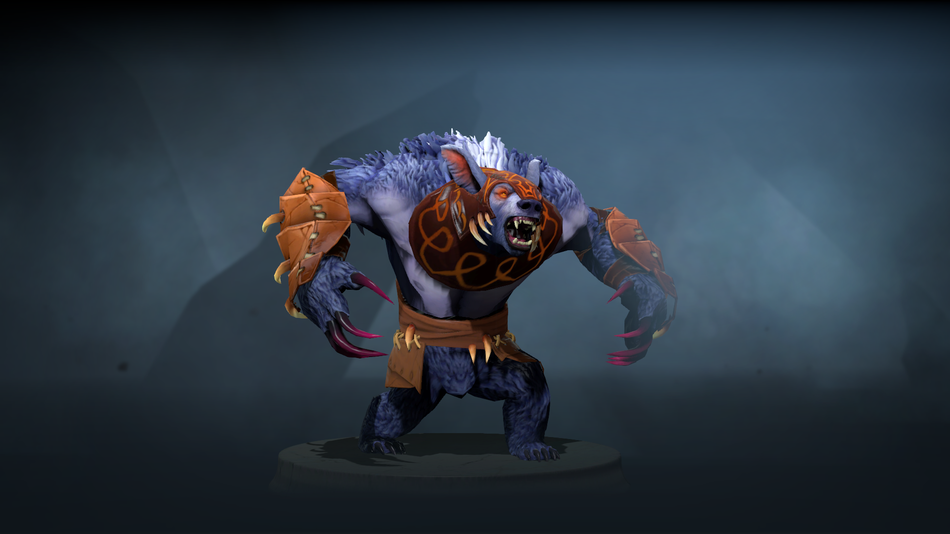
Ursa Guide by a 7k MMR Player
Artist: Valve
  • Guide Navigation
  • HOME
  • ABOUT
  • DRAFTING
  • SKILLS & BUILDS
  • ITEMS & BUILDS
  • EARLY GAME
  • MID & LATE GAME
Author:
MrNiceGuy
Date: 01/2019
Tags:
text
Ursa
Builds
Analysis
Tactics

Welcome

Welcome to Book of the Ursa Warrior, a hero guide part of the Book of Dota series!

Here you will find all the information you need to learn to play Ursa on a high level – from drafting and builds to the optimal playstyle in different lanes and situations. We hope you’ll enjoy this guide and find it useful!

TL;DR:

Draft: Don’t pick him right away as enemies might counter you with strong disables and heroes good at kiting. It’s a good idea to tell your team to get another carry that can use the space you will be creating.

Early Game: Try to secure your core items as fast as possible while pressuring your lane opponent. Avoid unfavorable lanes at all cost, a bad early game with Ursa is often fatal.

Mid & Late Game: Abuse your ability to take Rosh alone as often as possible but be careful. Always use smoke and tell your teammates what you’re doing so they can cover you if needed. Gank and secure kills as often as possible. After successful kills take towers so that you gain map control and eventually secure the game.

Authors

Nikolay "CTOMAHEH1" Kalchev
Info & Editing

CTOMAHEH1 started his pro career as a support in Basically Unknown together with Mind Control. Since then he has consistently been playing on the European T2 scene, most recently on Unchained Esports.

His highest placement on the EU ladder is top 100 - he plays all roles (mainly support), which is untypical for high-ranking players and shows his great versatility and understanding of the game.

Martin "BRINGITON" Slavov
Writing & Info

Martin has lots of experience writing about Dota and he is no pushover in the actual game - a Divine III player, Martin plays mid and carry heroes on a very high level.

He has been playing Dota since Guinsoo's Dota Allstars (more than 12 years) and he loves thinking about new builds and strategies.

Kyril "MrNiceGuy" Kotashev
PM, Writing & Editing

Esports and gaming enthusiast since forever and founder of Dotahaven.

Has been playing Dota since 2005 (5.84). An Ancient I player in Dota 2.

Fuzzy Wuzzy!

Ursa is one of the heroes with the highest physical burst damage output in the game and he doesn’t need much farm to dish out this damage. This makes him one of the scariest heroes to face in the early and mid game. He is notoriously aggressive and can often snowball out of control and stomp games.

The Ursa Warrior is hands down the best hero at taking Rosh – he can do it on his own and all he needs is a few levels and source of life steal. This, combined with his incredibly aggressive play style, make Ursa a very fun and unique hero to play.

Ursa Loadout
Stats
Level 1
Level 15
Level 25
STR
24
High
70
Very High
103
Very High
AGI
18
High
47
High
68
High
INT
16
Low
37
Very Low
52
Very Low
Attack
42-46
Very Low
71-75
Very Low
92-96
Very Low
Armor
6.6
Very High
12.48
Very High
16,68
Very High
Resistance
26
Medium
29
Medium
31
Medium
HP
632
High
1463
High
2057
High
MP
267
Low
519
Very Low
699
Very Low
MS
318
High
324
High
328
High
STRENGHTS

MAJOR

Huge single target damage: Ursa is a hero who can destroy almost any hero in a 1v1 fight. Your job in a team-fight will be to focus a key hero and bring him down.

Best solo Roshan killer: He can kill Roshan very early in the game just with a Morbid Mask. The enemy team needs to be aware at all times that you might be on a date with Rosh.

MINOR

Destroys melee lane opponents: Ursa completely wrecks any melee heroes on the safe and mid lane that are usually very tanky like Timber, DK, Alchemist, Underlord.

WEAKNESSES

MAJOR

Slow farmer: Unfortunately, the hero is a pretty slow farming core because he has no wave-clearing abilities. That also means he can fall behind in the mid/late game.

Heavily dependent on his core items: While being able to dish out colossal amounts of damage without items, Ursa is not very mobile and needs Blink Dagger and BKB to be able to deal his damage without being disabled.

MINOR

No disables: The hero has 0 ways to deal with Force Staffs, Ghost Scepters and life-saving abilities like Cold Embrace (Winter Wyvern), so he’s reliant on teammates or items to help him with that.

Not very good in the late game: Ursa suffers in the late game because heroes there have enough gold to buy Force Staffs, Ghost Scepters, Heaven’s Halberd, Hex, etc. Your BKB also goes down to 5 seconds, so it’s easier for enemies to kite you. 

Replays

Vega vs No Bounty Hunter – Dota Summit 9 Qualifier

Match ID: 3986737263

Replay

Slayer plays an innovative support Ursa with great success. He manages to pressure the enemy Underlord a lot in the lane and gives him a terrible start. He goes for a fast Phase Boots + Dagger in order to start ganking and securing kills.

Despite playing a support Ursa, he manages to snowball and finishes the game with a 17-7-13 score, and deals the second highest hero damage on his team (just slightly behind his mid TA).

Secret vs Fnatic - ESL One Katowice 2018 powered by Intel

Match ID: 3747355056

Replay

Ace from team Secret plays a flawless game on Ursa and demonstrates how devastating the hero can be if he starts snowballing. He goes for rather unusual skill and item builds – he starts by maxing out his nuke and doesn’t get a source of lifesteal, instead decides to build Dagger – Aghanim’s – Mjollnir.

The reason to go for a fast Aghanim’s is that the item gives him the ability to break out of Beastmaster’s stun. He gets Mjollnir to be able to deal with Terrorblade’s illusions, as Ursa’s only source of AoE is his Earthshock. Moreover, both of Fnatic’s cores are with very high armor (TB and DK), which means the magic damage coming from Mjollnir is going to be very useful.

Drafting

Ursa is usually picked in teams that want to have a dominant mid-game, utilizing the hero’s high burst damage to win small skirmishes, take Roshan and use the advantage to end the game or transition to the late game.  

Since Ursa is not that good in the late game, you want to have another core that can carry the game in case you don’t manage to close the game early. You can create a lot of space in the mid game allowing your teammate to get some farm as well. 

You also want to have teammates with disables – the more, the better. The hero is really easy to kite and needs a teammate who can hold his victim in one spot.

Safe Lane Core

The primary position for Ursa. He doesn’t need much help in the lane (except against dual and tri lanes), has kill potential if paired with a support who has disables and the free farm allows him to get his core items.

    Mid Lane Core

    Used only to punish melee mid lane heroes like Alchemist, Ember Spirit, etc. The playstyle after the laning stage is pretty much the same: you farm until you have your core items, then you repeatedly get Roshan and search for small skirmishes until you control the map and are able to finish the game.

    Pos. 4 Support

    The idea is to use Ursa’s laning strength to punish the melee cores of the enemy team as hard as possible while investing the farm into another core. After the laning stage, the playstyle doesn’t change a lot – having less farm means you cannot afford to be as aggressive and need help for most kills, but you still want to apply pressure and get Blink. Helping your team get quick Rosh kills is also key even as a support. If you are having a good game you can easily snowball and become a core.

    Synergy

    Good friends to have are:

    Disablers: Shadow Shaman, Crystal Maiden, Lion, Witch Doctor, Bane, Batrider, Magnus, Beastmaster, Puck

    Shadow Shaman
    Crystal Maiden
    Lion
    Witch Doctor
    Bane Portrait
    Batrider
    Magnus Portrait
    Beastmaster
    Puck Portrait

    You just want to have heroes with disables – the more, the better. On every position, except maybe the other core farmer. Anyone that holds the enemy in one place is a valuable ally.

    Semi-carry core: TA, Tiny, SF, OD, DK

    Templar Assassin
    Tiny
    Shadow Fiend Portrait
    Outworld Devourer
    Dragon knight

    Those are heroes who can still fight in the mid game but also have carry potential in the late game as well. It is good to have such a hero on the mid lane (or respectively another carry on the safe lane if you’re playing mid) as Ursa has a hard time if he’s the only damage dealer.

    Counters

    Strong Against:

    Low mobility cores: Lifestealer, Huskar, Alchemist, Drow Ranger, Gyro, Luna

    Lifestealer Portrait
    Huskar Portrait
    Alchemist hero icon
    Drow Ranger
    Gyro
    Luna

    Pretty much any hero who can’t run away from you. They can all build items like Force Staff and Heaven’s Halberd though, so you’ll still need help from your teammates to be able to deal with them.

    X-hits to destroy heroes: Undying, Phoenix

    Undying Portrait
    Phoenix

    Ursa is pretty good against those because he destroys Tombstone and Phoenix’s Egg in the blink of an eye with Overpower.

    Weak Against:

    Heroes who can save allies: Winter Wyvern, Omni, Oracle, Lich, Shadow Demon, OD

    Winter Wyvern Portrait
    Omniknight portrait
    Oracle Portrait
    Lich
    Shadow Demon Portrait
    Outworld Devourer

    You want to avoid playing against those heroes, they’re very hard to counter - for example, you need a Nullifier to break Omni’s ult, Cold Embrace can’t be removed at all and Treant has 2 different root abilities on top-off the armor he provides. Lich’s Frost Armor is also pretty annoying if the hero is not disabled as it slows your movement speed greatly when you attack your target. Shadow Demon saves an ally, slows you (not dispellable by Enrage and can be used while you’re in BKB) and removes your Overpower.

    Evasion heroes: Brewmaster, Windranger, Phantom Assassin, Tinker

    Brewmaster
    Windranger
    Phantom Assassin
    Tinker

    While it’s not impossible to play against those heroes, they force you to build an MKB which will slow other items you want to build like BKB, Nullifier, Basher, etc.

    Very high armor heroes: Sven, Terrorblade, DK, Razor

    Sven
    Terrorblade
    Dragon knight
    Razor

    All of Ursa’s damage is physical, so those heroes take a lot of time to bring down. Razor’s Static Link is a nightmare to play against and Unstable Current dispels Overpower so you can’t just blink on him and kill him fast. 

    Heroes that can kite you: Weaver, Queen of Pain, Puck, Viper, Shadow Shaman, Pugna

    Weaver
    Queen of pain
    Puck Portrait
    Viper
    Shadow Shaman
    Pugna

    Those heroes can be a real pain to deal with as they can take advantage of your lack of disables - some are very mobile and hard to catch, others have powerful disables that can stop you from dealing damage in fights.

    Skills

    Ursa Earthshock
    Ursa overpower
    Ursa Fury Swipes
    Ursa Enrage

    Ursa slams the earth, causing a powerful shock to damage and slow all enemy units in a nearby area for 4 seconds.

    STATS

    Cast Animation: 0.3+0

    Radius: 385

    Damage: 50/100/150/200

    Move Speed Slow: 25%/35%/45%/55%

    Slow Duration: 4

    CD: 5

    Mana: 75

    Earthshock

    Mechanics:

    • Cast Animation: 0.3
    • 1 sec downtime – it slows for 4s and the cooldown is 5s.

    Uses and tips:

    Earthshock is actually does very good damage and low for its mana cost and CD. The reason it often gets neglected is because you need your other skills to deal the physical damage burst Ursa is famous for.

    Don’t forget to use it for farming - especially after you get some mana regen items.

    In fights/ganks you usually want to open up with the spell – the slow will make it easier for you to stick to your target with attacks. Moreover, the low CD means you might be able to use it again on the same target after you expend your Overpower hits.

    Using his skill in combat, Ursa gains increased attack speed for a number of subsequent attacks.

    STATS

    Cast Animation: 0.3+0

    Attack Speed Bonus: 400

    Number of Attacks: 3/4/5/6

    Duration: 15

    CD: 10

    Mana: 75

    Overpower

    Mechanics:

    • Cast Animation: 0.3
    • Does not guarantee max attack speed. The provided attack speed can be negated by strong attack speed slows.
    • Attacking items or missed attacks does not use up any charges.
    • Successive casts do not stack but refresh the whole amount of charges instead.
    • Dispellable with any dispel.

    Uses and tips:

    Great synergy with items like Basher, Abyssal, MKB.

    You can pre-cast Overpower before fights start, so you can have it ready immediately after you land 6 hits, making a 12-hit combo possible.

    Ursa's claws dig deeper wounds in the enemy, causing consecutive attacks to the same enemy to deal more damage. If the same target is not attacked after 20 seconds, the bonus damage is losat.

    STATS

    Attack Damage Bonus per Stack: 12/18/24/30

    Debuff Duration: 10/16/22/28

    Debuff Duration on Roshan: 6

    Fury Swipes

    Mechanics:

    • The bonus damage is applied even with the first attack.
    • The damage is dealt in one instance together with Ursa's attack damage.
    • Ursa can lifesteal off of the damage dealt by Fury Swipes, however, it cannot crit or cleave.
    • The damage can be reduced with Enfeeble or Static Link.
    • Each successful attack refreshes the whole stack. Missed attacks neither place the buff nor add a stack or refresh it.

    Uses and tips:

    When laning, you want to hit the enemy often to refresh the stacks duration – they will try to hide and wait for the stacks to disappear, losing farm/experience.

    As everybody probably knows, this is the ability that lets you destroy Roshan very early on – you lifesteal more with each attack and deal more damage.

    The ability helps you to last hit on the lane as the damage is applied to the first attack. You can also hit a creep once, so you can deal more damage with the next attack, allowing an easy last hit – this is a useful trick when you play 1v1 and the enemy contests the last hits as well.

    Fury Swipes deal physical damage, which means you won’t be able to burst down heroes like DK, Terrorblade, Sven, etc. This is why you want to focus the heroes with lower armor first unless there is a key hero to focus down. That also provides synergy with Desolator.

    Ursa goes into a frenzy, multiplying his Fury Swipes damage and causing him to take 80% less damage. Removes any existing debuffs.

    STATS

    Cast Animation: 0+0

    Incoming Damage Reduction: 80%

    Fury Swipes Damage Multiplier: 1.4/1.7/2.0

    Duration: 4

    CD: 50/40/30

    AGHANIM'S SCEPTER

    Reduces cooldown and allows Ursa to use Enrage while disabled.

    Enrage

    Mechanics:

    • Applies a strong dispel on Ursa upon cast.
    • The 80% damage reduction reduces all 3 damage types.
    • Does not reduce damage from abilities that do HP removal.
    • When upgraded, Enrage can be cast while stunned, cyclone, slept, taunted, hidden or during forced movement - It still cannot be cast while silenced, hexed or prevented from acting.

    Uses and tips:

    Great for early Roshan as it allows you to build Fury Swipes stacks faster.

    You usually want to use it right before you jump on a target. This way you will deal more burst damage and you will mitigate any nukes coming your way right when you jump in. If you have Agh’s, however, you can decide to save it for the dispel:

    The Aghanim’s Scepter upgrade allows you to break disables that go through BKB like Flaming Lasso, Reverse Polarity, Fiend’s Grip, Primal Roar. It will also stop Cyclone (Eul’s, Brewmaster ulti), Sleep (Bane, Elder Titan, but NOT Naga). You can cast it while in Disruption, Astral Imprisonment and Berserker’s Call, however, it will not dispel them, only reduce the damage.  

    Skill Builds

    Ursa’s skill build is very flexible because all three skills are useful early on. Because of this, usually you end up having a mix of all abilities in your build, but when exactly you get them and exactly how many points you invest is very situational.

    • Fury Swipes is your usual priority because it is your best harassing and last hitting tool in the lane, especially against melee opponents. Moreover, maxing it fast while also buying Morbid Mask will let you farm the jungle easier and most importantly – get a fast solo Rosh.
    • One value point in Overpower gives you enough kill potential in the lane – you get most attacks just with one point in it and additional points don’t give that much value early on. You usually want to max it second, because having the max attacks will help you get kills easier in the mid game, especially once you get Blink Dagger.
    • Earthshock is also a skill you usually want to invest one or two value points in. It’s a great cheap low CD nuke and slow for the lane and it is extremely valuable if your support(s) don’t have enough disables because you can chase people down while hitting them with Fury Swipes. The AoE damage also shouldn’t be underestimated especially versus dual or trilanes. Nonetheless, over-investing in it will slow down your other two skills, which is not ideal because you want your full nuke damage earlier rather than later.

    Standard Skill Build
    Ursa Fury Swipes
    1
    Ursa Earthshock
    2
    Ursa Earthshock
    3
    Ursa overpower
    4
    Ursa Fury Swipes
    5
    Ursa Enrage
    6
    Ursa Fury Swipes
    7
    Ursa Fury Swipes
    8
    Ursa overpower
    9
    Talent Icon
    10
    Ursa overpower
    11
    Ursa overpower
    12
    Ursa Enrage
    13
    Ursa Earthshock
    14
    Talent Icon
    15
    Ursa Earthshock
    16
    Ursa Enrage
    18
    Talent Icon
    20
    Talent Icon
    25
    Pros: high levles in Fury Swipes for harassing, farming and taking Rosh; decent kill potential with the value points in Overpower and Earhshock;
    Cons: fewer Overpower hits early on;

    At level 1 you have to make a decision between Fury Swipes and Earthshock. Fury Swipes is the standard choice for last hitting and harassing, while Earthstock is better for kill attempts with your teammates because of the great slow it provides.

    In this example, you get two points in Earthshock by lvl3, which is very useful if your lane partner(s) don’t have a good source of disable and if you are facing a dual lane. It will make harassing and chasing down heroes with Fury Swipes easier. The opposite (only one point in Earthshock and two in Fury Swipes) is the better choice if your supports have decent disables and if you are facing a single opponent.

    You get your value point in Overpower on lvl 4 and then you proceed to max Fury Swipes, followed by Overpower second and Earthshock third.

    It is possible to delay getting your second point in Enrange (it doesn’t provide much value) or your first talent point in favor of maxing Overpower faster – reaching the maximum number of hits increases your kill potential, especially with Dagger. This, however, is optional and is a matter of preference.

    Talents

    Enrage gains 80% Status Resistance

    25

    +600 AoE Earthshock

    +12 Fury Swipes Damage

    20

    +1.5s Enrage Duration

    +25s Fury Swipes Reset Time

    15

    +14 Agility

    +8 Strength
    10

    +1.75 Mana Regen

    Lvl10: The mana regen is quite good combined with other mana regen items like Raindrops & Basilius/Aquilla because it allows you to freely spam your spells while farming. If you have trouble staying alive, however, you can go for the STR.

    Lvl15: The agility is the more reliable choice, but if you want to get the Fury Swipes Damage on lvl20 you can go for the Fury Swipes Reset Time talent.

    Lvl20: If you already have the Swipes talent on lvl15, the damage is better here. If you want to go for Agh’s or if you have trouble staying alive, however, the Enrage Duration is way better. 

    Lvl25: Enrage gains 80% Status Resistance is really good in the late game, especially if you have Aghs and can use it more often against disables. A 600 AoE Earthshock is pretty sweet, but it doesn’t do much in the late game where everybody has Blink Daggers, Glimmers, Force Staffs, etc.

    Item Builds

    Ursa has a lot of kill potential and decent tankiness coming from his skills. His biggest problem by far is getting kited, so his item builds revolve mainly around solving this issue - Blink for mobility, Basher for lockdown, BKB and Aghanim's to avoid getting disabled, etc.

    Standard Build

    The standard Lifesteal>Blink>BKB build we’ve been using since Warcraft 3 DotA. It allows you to take Rosh very early in the game thanks to the lifesteal and the Blink Dagger allows you to start killing enemies right away. It is possible to skip the Mask of Death in very active games - it will speed up your Blink+Basher timing. It is, however, a riskier option because taking Rosh becomes much harder (your allies will need to help you by tanking him).

    The quick Basher gives you an almost guaranteed stun thanks to the huge AS of Overpower, which increases your kill potential a lot. Delaying the Basher in favor of BKB, however, is also possible if the enemy team starts walking as 5 from early on and you need to participate in team fights.

    Starting items: Boots or Orb of Venom is good when you play in the safe lane against melee heroes so you can bully them out of the lane like Timbersaw, Bristle, Void, Underlord, Earthshaker, etc. Against ranged heroes or dual lanes, the Stout Shield provides better protection.

    Starting
    Stout Shield
    Tangoes
    Healing_Salve_icon
    Early game
    Orb of Venom
    Phase boots
    Magic wand
    Morbid Mask
    Blink_Dagger_icon
    Mid game
    Basher
    Vladmir's Offering
    Black King Bar
    Late game
    Abyssal_Blade_icon
    Nullifier
    Stout Shield
    Tangoes
    Healing_Salve_icon
    Orb of Venom

    Orb of Venom: a must versus melee heroes. Combined with Earthshock, the slow % is very high and allows you to pose a lethal threat to them. 

    Phase boots

    Phase Boots: the best choice because the ability to chase down enemies and stick to your target is vital for Ursa to be successful early on.

    Magic wand

    Wand requires no explanation - it gives a lot of value in lanes against heroes who spam spells.

    Morbid Mask

    Morbid Mask: A fast Morbid Mask with max Fury Swipes pays for itself very quickly by sustaining you in the jungle and allowing you to kill Rosh insanely fast. That being said, in very active games you can choose to go for Blink right away to start roaming for kills.

    Blink_Dagger_icon

    Blink Dagger: since you can burst people very quickly, Blink allows you to close the distance

    Basher

    Skull Basher: synergizes very well with your attack speed and you want to upgrade it later to Abyssal.

    Vladmir's Offering

    Vlad's makes your Morbit Mask slot more valuable and gives utility to your whole team. When exactly you want to upgrade it is situational. If you want to gather as 5 early on you can buy it earlier. If not, you can delay it. 

    Black King Bar

    Black King Bar:  required in almost every game as people will try to keep you disabled in every single fight. If you prefer, you can delay it a bit and buy another item first. 

    Abyssal_Blade_icon

    Abyssal Blade:  good if you already have the Basher, allows you to lock down enemies.

    Nullifier

    Nullifier: This item is great against heroes who have no defensive abilities and rely entirely on items for their survival like SF, Arc Warden, Bloodseeker, Alchemist, Luna, Gyro, Death Prophet, etc. It also dispels Ghost Scepters, Eul’s, Omni’s Guardian Angel. Also has great synergy with Overpower as it slows the enemy with every hit for a short duration.

    Radiance Build

    If you are facing a lot of heroes who can kite you and especially if you are facing heroes with many units and illusions, going for a Radiance build is a good choice. The reason is that with your standard single-target focused build you will have a lot of trouble finding kills and having an impact in fights if you are constantly getting kited and if you cannot kill the enemy cores because they are illusion heroes and you cannot find the real one. The AoE damage of the Radiance + Shivas + Earthshock (especially with the lvl25 talent) means you will be a problem in fights even if you cannot stick to a single target.

    The Radiance + Earth Shock will also help you to push-out waves and farm jungle much faster, which is welcome in games where constantly hunting for heroes is hard to achieve.

    Starting
    Stout Shield
    Tangoes
    Healing_Salve_icon
    Early Game
    Phase boots
    Magic wand
    Blink_Dagger_icon
    Mid Game
    Radiance
    Aghanim's_Scepter_icon
    Late Game
    Shiva's_Guard_icon
    Octarine_Core_icon
    Stout Shield
    Tangoes
    Healing_Salve_icon
    Phase boots

    Phase Boots: the best choice because the ability to chase down enemies and stick to your target is vital for Ursa to be successful early on.

    Magic wand

    Wand requires no explanation - it gives a lot of value in lanes against heroes who spam spells.

    Blink_Dagger_icon

    Blink Dagger: since you can burst people very quickly, Blink allows you to close the distance

    Radiance

    Radiance seems unusual for Ursa, but it is a viable damage (and farming) item on any tanky carry that has a problem with being kited. It increases your GPM when you are not fighting and allows you to have a bigger impact in fights when you cannot easily stick to enemies. 

    Aghanim's_Scepter_icon

    Aghanim’s Scepter: You could buy it against heroes with disables that go through BKB and you can dispel like Batrider, Magnus, Bane, Beastmaster, etc. Be careful with the silences however as you won’t be able to cast Enrage if you’re stunned + silenced.

    Shiva's_Guard_icon

    Shiva's Guard is often paired up with Radiance builds because the AoE nuke and slow synergizes well with the AoE DPS of Radiance. Moreover, it is the best source of protection against physical damage. If you cannot man-fight enemy carries (which is likely if you've gone for the Radiance build), you will need to survive for as long as possible while they are chipping away at your health from a safe distance.

    Octarine_Core_icon

    Octarine works great with the magical damage coming from Radiance, Shiva's active skill and your Earth Shock, especially with the lvl25 AoE talent. The CD reduction is also very powerful with your Aghanim's ultimate and allows you to spam all of your spells and active items more often.

    Other Items

    Early & Mid:
    Clarity
    Quelling Blade
    Mask of madness
    Shadow_Blade_icon
    Sange_and_Yasha_new
    Force staff
    Diffusal Blade
    Desolator Icon
    Late game
    Bloodthorn_icon
    Butterfly
    Monkey_King_Bar_icon
    Linken's Sphere
    Scythe of Vyse
    Clarity

    Clarity: sustain your mana while farming or roaming.

    Quelling Blade

    Quelling Blade: good for last-hitting and farming the jungle, but with Ursa you often have the "too many small items" inventory problem, so you usually skip it. 

    Mask of madness

    Mask of Madness is good against heroes you can chase after the Overpower hits and also helps to kill Rosh faster. Be careful, however, because you won’t be able to activate Enrage while MoM is on. 

    Shadow_Blade_icon

    Shadow Blade: A fun alternative to Blink Dagger and can also be upgraded to break the passives of heroes like Enchantress, Dragon Knight, Bristleback, Bloodseeker, Tidehunter. The advantage over Blink is that you can roam the map undetected by Observer Wards. It is however much easier to counter. 

    Sange_and_Yasha_new

    Sange & Yasha: Provides nice stats and movement speed, however just lacks the explosive effects of items like Desolator, Hex, Nullifier. It is still optional though.

    Force staff

    Force Staff: It is pretty good against Razor’s Static Link and is generally a nice mobility item that allows you to better chase enemies. The main problem is inventory slots - you'd prever your allies to buy it.

    Diffusal Blade

    Diffusal Blade: Not really recommended in other situations, but it could be used against Medusa to burn mana with the 6 Overpower hits and the active slow makes it easier to chase down targets and finish kills.

    Desolator Icon

    Desolator: great in case you don’t need MKB or Basher as it boosts your DPS more than anything else in the mid game.

    Bloodthorn_icon

    Bloodthorn: It is nice in very rare situations where you play against heroes without BKB and Linken. 

    Butterfly

    Butterfly: good against physical damage, however, Ursa is not that good in long team fights where people continuously hit you after Enrage, so you want to build more offensive items that allow you to kill people and end the fights faster.

    Monkey_King_Bar_icon

    Monkey King Bar: is sadly required against evasion heroes 

    Linken's Sphere

    Linken’s Sphere:  Good against things that go through BKB and you can’t dispel with upgraded Enrage – Doom, Duel, Viper Strike, Winter’s Curse.

    Scythe of Vyse

    Hex: Scythe is an alternative control item to Nullifier and/or Bloodthorn. The advantage of Hex is that it solves the problem of both defensive items (Nullifier) and defensive skills (Bloodthorn) at once. The drawback is that it provides less DPS. If you are already snowballing with Ursa, however, damage output is unlikely to be one of your problems.

    Early Game

    Ursa 350px

    Ursa’s laning stage revolves around farming and bullying the enemy hero at the same time, eventually setting up a kill with your teammates. Finding a good lane matchup is essential because you want to snowball from the laning stage into the mid game. With a bad start it will be much harder to apply pressure successfully on the enemy team and playing passively with Ursa is a bad option.


    Try to find 1v1 matchups against melee opponents. If not possible, go with a strong support in a lane where the two of you have kill potential.

    Farm your core items;
    Harass & kill the enemy whenever possible;
    Look for a Roshan opportunity from early on;
    Farming:

    Farming with Ursa has always been a pain as the hero never had wave clearing abilities (unless you decide to use the Battle Fury build).

    In the laning stage, you just want to last hit every creep possible. If there is no hero against you, if the offlaner decided to hit the jungle, you can maximize your farm by killing the creep wave as fast as possible and then going to farm the big neutral camp close to the lane and eventually taking the bounty rune. 

    Harassing & Zoning out:

    This is where Ursa shines. You can harass and zone out pretty much any melee hero in the safe lane. Heroes like Bristleback, Timbersaw, Underlord who are generally very hard to kill flee in terror when they see Ursa running at them in the laning stage.

    If you’re up against a melee hero, don’t let them approach the lane at all, try to hit them as much as possible and maintain a very aggressive position on their side of the creep wave. You probably won’t be able to bully them out of the experience range of dying creeps, but you want to occasionally chase them for a random hit just to keep the Fury Swipes stacks. This applies to mid lane as well, you want to bully Ember, Alchemist, DK to the point where they have to play jungle because they can’t touch a creep (you want to be careful for ganks, however). Against melee heroes, your team can even let you stay solo on the lane which allows your supports to help the other lanes.

    Heroes like Dark Seer, Tidehunter, Axe can just go between your T1 and T2 towers to farm your creeps while you’re left to last hit under your tower. There’s not much you can do in this situation - you will need a support to help you deal with those or you can just trade farm.

    Something else that almost any offlaner can do is to just pull your first wave and farm it between his 2 towers. You need to do the same with his wave or just hold it in front of your tower in order to keep your creep equilibrium.

    Against ranged heroes, you want to have a support to zone them and harass them. If your support is a good disabler like Lion, Shadow Shaman, CM, you could easily kill the enemy. 

    Survival:

    Killing an Ursa is not the easiest thing to do, you have high armor and nice starting HP. You need to be ganked by several heroes in order to lose your life, especially if you have Raindrops and Magic Wand.

    Many players die with the hero because they dive too deep and they’re caught out of position. You want to check the map and only be aggressive when the enemies are showing on the map. Keep in mind they can always teleport to help as well, so don’t commit too much unless you’re sure you can survive. If you kill an offlaner and then die to the enemy supports, it’s not worth it.  

    Kill potential:

    Against melee heroes, you always have some kill potential. With a simple Orb of Venom, you have the potential to kill them after harassing them for a bit. Or if they stay close to you while having some Fury Swipes stacks, you can attempt to dive them. Other than that, with a good support, you can always find a kill on the enemy offlaner as Ursa is able to burst most heroes down from full health in a matter of seconds.  

    Timings and Roshan:

    The obvious timing is when you buy your Blink Dagger. That allows you to move from your lane and start getting kills.

    Other than that, a Morbid Mask or a Mask of Madness allows you to solo kill Roshan very early in the game. This is not however as easy as it seems. While Roshan himself poses no threat to you, the enemy team is always aware that you might be in the Rosh pit when you’re missing on the map. This is why you usually want to go there when you know what the enemies are doing: for example, they’re pushing a tier 1 tower – then you can safely go Rosh.

    Make sure your supports have dewarded eventual Roshan wards and check for heroes with vision granting skills – TA will always have a trap in the Rosh pit, Beastmaster can send a hawk, Clockwork has rockets, also every invisible hero can scout you there and try to steal the Aegis or wait for his teammates to kill you. Many times it would be better if you don’t attempt to Rosh at all against such heroes or at least wait until they all appear on another side of the map. 

    Video Example:

    In this game, EternalEnvy’s Ursa goes up against team Execration’s offlane Tidehunter. It is a great example of a 1v1 lane against a melee hero and both players played it pretty well tactically.

    One of the things that melee heroes will try against you is to pull your creep wave between their T1 and T2 tower. Envy responds very well by pulling Tidehunter’s wave.

    At 1:50 Tidehunter tries the same thing again and Ursa holds the creep wave until his next wave arrives. That keeps the creep equilibrium close to his own tower which gives him a huge advantage.

    At 2:55 Envy beautifully blocks Tidehunter which allows him to almost kill him. Tidehunter teleports to his tower to survive with almost no HP.

    At this point, Jakiro goes top to help his teammate and they almost manage to kill Ursa so he calls one of his supports for help as well. A 3v3 fight follows shortly after where we can see how good Ursa is in such fights early on thanks to Earthshock's low cooldown – he uses it several times and collects a few kills.  

    Mid & Late Game

    Find kills with your teammates
    Check Roshan timers
    Take good team fights
    Don’t forget to farm
    Timings:

    In most games, you want to have a BKB before you start taking team fights as otherwise every disable in the game will be pointed at you.

    The next timing comes when you manage to get a disable item like Basher/Abyssal/Hex, allowing you to solo kill enemy heroes. Don’t try to solo kill heroes with disables or escape mechanisms before you have a disable – this could only turn into a bad situation for you.

    Come-back Potential:

    Ursa’s comeback potential has never been too impressive, mainly because the hero doesn’t farm that fast and because enemies will buy armor items or items like Force Staffs, Ghost Scepters, Heaven’s Halberd to counter you.

    If your game starts bad, the chances for a comeback will be pretty low. This is why you want to tread lightly and not take unnecessary fights where you can die early on. There will be some tough games where the enemies group up and push together from minute 10 and you won’t be able to fight at all before they reach your high ground. In those situations, just focus on farming and try to get your Blink/BKB as soon as possible. 

    Team Fights:

    In team fights your role is simple – you want to take down a certain hero as fast as possible. The choice of target depends on the specific game, but generally, you want to focus key heroes with low armor.

    Try to use Overpower a few seconds before the fight so that you can have it ready again soon after the fight starts. With a perfect timing, you will be able to land 12 hits with 2 Overpower uses.

    If you have Aghanim’s Scepter, you can save your ultimate for an eventual BKB-piercing disable, but usually, you want to use it with Overpower in order to bring down your first target. That leaves the enemy team fighting 4v5 and in an ideal situation, the enemy you focus won’t have the chance to cast his spells. 

    Two things are important to note in this fight:

    First, despite having a huge lead, Ace stands at a safe distance and doesn’t hit the tower - doing so will result in the enemy team disabling his Blink and easily kiting him in the fight. Instead, he chooses the right moment to jump in with his team and secure a couple of kills.

    Second, notice how he saves his ult, uses it defensively and easily disengages. If he tried to stand his ground and to man-fight, he would easily get kited and killed. He tries to weave in and out of the fight to use his burst damage potential but at the same time to stay safe and fight for longer.

    Pushing:

    5-man pushing:

    Don’t try to siege with Ursa – the building damage is extremely low and even with Overpower you’re not dealing much damage. Ursa can successfully push only after he wins a team fight, so aim to find a good fight instead of pushing while the entire enemy team is alive.

    Split-Pushing:

    No wave clearing abilities and slow tower pushing – those 2 factors make Ursa absolutely horrible at split-pushing.

    Farming:

    Farming with Ursa in the mid/late game can be troublesome as you don’t have any wave-clearing abilities.

    Many players also ‘forget’ to farm in those stages of the game and are only looking for kills. Try to analyze the game – if you have opportunities for easy kills, by all means, grab them. However, if the enemy team is grouping up all the time or they have heroes you can’t kill, just focus on farming until you have disable items or your team reaches their peak.