Timbersaw Guide by Miposhka
Artist: 澈水
  • Guide Navigation
  • HOME
  • ABOUT
  • DRAFTING
  • SKILLS & BUILDS
  • ITEMS & BUILDS
  • EARLY GAME
  • MID & LATE GAME
Author:
Miposhka & Co.
Date: 02/2018
Tags:
text
video
Timbersaw
Builds
Tactics
Analysis

Welcome

Welcome to Miposhka's Book of the Timbersaw, a hero guide part of the Book of Dota series!

Here you will find all the information you need to learn to play Timber on a high level – from drafting and builds to the optimal playstyle in different lanes and situations. We hope you’ll enjoy this guide and find it useful!

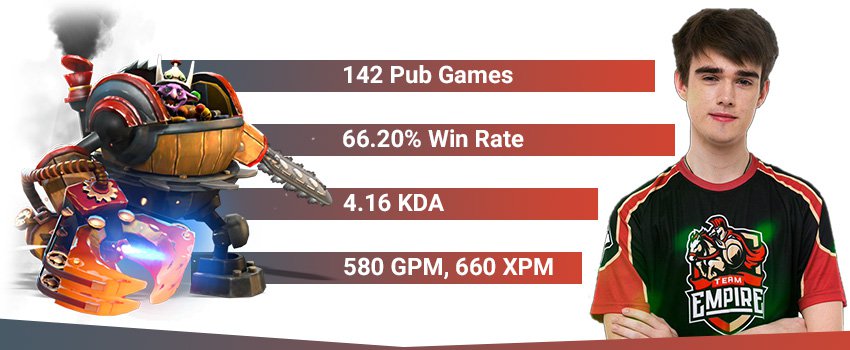
Miposhka Timber Stats
TL;DR:

Draft: Timber wants to snowball, which means he needs a good start. Try to dodge lanes with a lot of magic damage harass (e.g. Sky) or simply very high early game DPS (e.g. Ursa, Monkey). You want to lane against weak melee cores, ideally STR heroes.

Early Game: Abuse your Reactive Armor as hard as you can to stay in the lane. Harass your opponents and draw the attention of the enemy team if you can. Get levels and farm. Start thinking about kills when you get lvl6.

Mid Game: Get your core items as fast as you can – you cannot afford to fall behind in farm, you are a momentum based hero. Join fights.

Late Game: Keep flash-farming by using all of your spells – you no longer have mana issues. Farm the more dangerous spots on the map to open up space for your less survivable teammates. Out-push the lanes constantly. Join fights.

Authors

Yaroslav "Miposhka" Naidenov
Endorsement & Info

Miposhka is the captain and support player for Team Empire and his biggest achievement so far in his pro career is getting 7th-8th place at TI7 after eliminating EG from the tournament to the surprise of many.

He is also a god-tier support in pubs, but also a genuine and lovable person and an all-around-nice-guy.

Nikolay "CTOMAHEH1" Kalchev
Info & Editing

CTOMAHEH1 started his pro career as a support in Basically Unknown together with Mind Control. Since then he has consistently been playing on the European T2 scene, most recently on Unchained Esports. 

His highest placement on the EU ladder is top 100 - he plays all roles (mainly support), which is untypical for high-ranking players and shows his great versatility and understanding of the game.

Martin "BRING IT ON" Slavov
Writing & Information

Martin has lots of experience writing about Dota and he is no pushover in the actual game - a Divine III player, Martin plays mid and carry heroes on a very high level.

He has been playing Dota since Guinsoo's Dota Allstars (more than 12 years) and he loves thinking about new builds and strategies.

Kyril "MrNiceGuy" Kotashev
PM, Writing & Editing

Esports and gaming enthusiast since forever and founder of Dotahaven.

Has been playing Dota since 2005 (5.84). An Ancient I player in Dota 2.

I cut things, it's what I do.

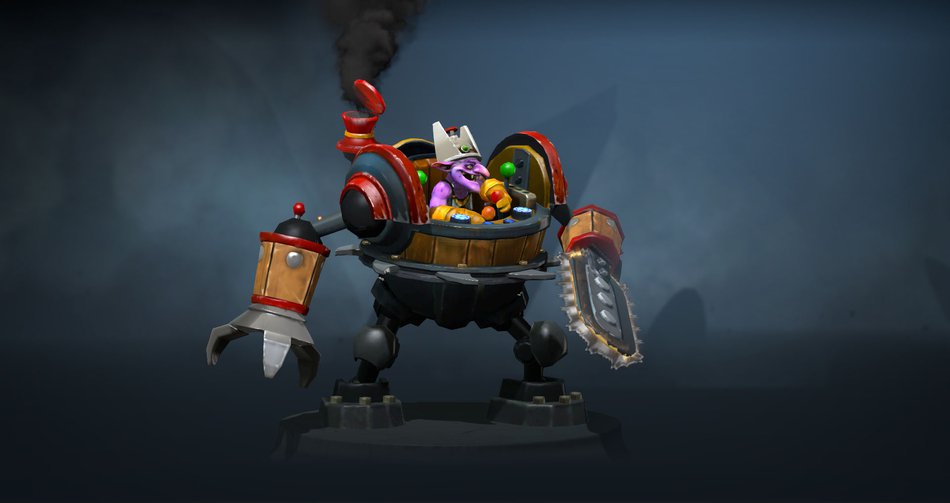
Timbersaw is melee strength hero who is best known for his tankiness and high mobility. One of the unusual mechanics of the hero is that he uses trees to move around and deal more damage. Timber is also unique as he deals pure damage with 3 different abilities, making him strong even against extremely hard to kill heroes.

Timber Loadout
Stats
Level 1
Level 15
Level 25
STR
21
Medium
54
Low
78
Low
AGI
16
Medium
34
Low
47
Very Low
INT
21
High
54
High
78
High
Attack
47-51
Low
76-80
Very Low
97-101
Very Low
Armor
0.56
Very Low
3.472
Very Low
5.552
Very Low
Resistance
26
Medium
28
Medium
30
Medium
HP
672
High
1415
High
1955
High
MP
327
High
723
High
1011
High
MS
287
Low
289
Very Low
291
Very Low
STRENGHTS

MAJOR:

Hard to kill: The hero has high armor, HP regen and is very mobile (unless there are no trees around). With multiple reactive armor stacks he could be invincible in the early game and is likely the best hero in the game at tower dives.

Pure Damage: All of Timber’s abilities deal pure damage, making him strong throughout the entire game and great against enemies with high armor or magic resistance. 

MINOR:

Versatile laner: Can be played as a core in all lanes.

WEAKNESSES

MAJOR:

Mana issues: Needs A LOT of mana to farm and fight.

Level and item dependent: Timber needs to keep up with the other cores in the game in terms of levels and farm to be effective. He is a momentum based hero – a bad start could make him useless.

MINOR:

No disables: Timber has a single unreliable slow (his ultimate) and doesn't give any utility to his team.

Replays

Mineski vs Col at ESL One Katowice 2018 powered by Intel

Match ID: 3743877987
Replay

IceIceIce demonstrates the huge impact a Timber could have if he gets a good start. He manages to find 61 last hits in the laning stage (the first 10 minutes of the game) and never stops snow-balling from that point on. He deals a total of 39.7k damage, which is more than the two highest hero damage heroes on the enemy team combined. The replay is a great one to watch if you want to learn how not to throw your advantage with Timber- IceIceIce dies only once this game despite having a huge fight impact

Drafting

Timber is mainly played in the offlane but can still be picked as a mid or safe lane hero. He’s generally a strong laner unless you have to play against 3 heroes or specific counters.

He’s also good at any stage of the game, so he can be played in any strategy, but you want your other heroes to have enough control as Timber has none.

Solo Offlane Timber

Offlane is the most common lane for him. Thanks to reactive armor, Timber is a good offlaner as he is very hard to kill or zone-out by one or two heroes and he can pressure the enemies a lot once he gets a few levels. If left unchecked, he can even score solo kills after level 6.

Mid or Safe Lane Timber

Timber usually goes to the mid or safe lane to face melee heroes like Tidehunter, Bristleback, DK. Whirling Death is an incredibly powerful skill versus melee STR heroes. The philosophy is that Timber is very hard to deal with in such a 1v1 situation, which means he doesn’t need any help to win his lane. His teammates will be able to focus on the other lanes.

Although he scales well with items, he’s not a traditional carry but more of a space creator, so you need another damage dealing core.

Synergy

Good friends to have are:

Heroes that solve his mana problems: KotL, Crystal Maiden, IO

Keeper of the Light
Crystal Maiden
IO Wisp

As we mentioned, the hero has mana issues. KotL, CM and IO help him deal with this problem. 

Disablers: Shadow Shaman, Lion, WD, Magnus, Void, DK

Shadow Shaman
Lion
Witch Doctor
Magnus Portrait
Faceless Void Portrait
Dragon knight

Basically, any hero with disable can do the job. You just want to have more of those in order to compensate your weakness in that department.

Counters

Strong Against:

Weak laners: Slark, PA, Alchemist, Rubick, CM

Slark Portrait
Phantom Assassin
Alchemist hero icon
Rubick
Crystal Maiden

Thanks to aggroing the creeps in order to build-up your Reactive Armor stacks, you have extremely high armor and HP regen on early levels. You become almost invincible against heroes who have low magical damage nukes - they cannot bring you low enough just with attacks.

Strength heroes: Lycan, Tidehunter, Underlord, Clock, Magnus, DK

Lycan
Tidehunter Portrait
Underlord Portrait
Clockwerk
Magnus Portrait
Dragon knight

The Whirling Death ability causes enemies to lose 15% of their main attribute, so it deals a ton of damage to strength heroes. Another benefit is that most STR heroes are melee, which makes them easy to reach with Whirling Death.

Heroes with illusions/minions: Brood, PL, NP

Broodmother Portrait
Phantom Lancer
Nature's Prophet Portrait

The pure damage AoE abilities exterminate spiders, treants, illusions and all other kinds of summons with ease.

Weak Against:

Viper

It is very hard to play against Viper later on, since his second spell removes your Reactive Armor, which makes you much more squishy (you actually have very low armor, when Reactive is down).

Silver edge

Silver Edge has the same effect, but it is not AoE range like Viper and has 5 sec Break effect duration.

Mana drain: Anti-Mage, KotL, Invoker

Anti mage
Keeper of the Light
Invoker

These heroes amplify his mana issues greatly, and a Timber without mana is a sad picture – he cannot do anything in a fight. KotL deserves a special mention because his mana Leak works great against Timber’s mobility.

High damage in the lane: Skywrath, Shadow Shaman, WD, Ursa, Monkey King, Luna

Skywrath Mage Portrait
Shadow Shaman
Witch Doctor
Ursa Portrait
Monkey king
Luna

Monkey King and Ursa are the best lane counters to Timbersaw, Luna increases the damage of his teammates, so they can break through Reactive Armor. Skywrath, Shadow Shaman, WD can deal a ton of damage (primarily magical) in the early levels as well.

Skills

Timbersaw Whirling Death
Timber Chain
Reactive Armor
Timbersaw Chakram

Timbersaw whirls extremely sharp edges, damaging enemies and destroying trees around him in an area. If an enemy hero is affected, it loses some of its primary attribute for a short duration. Whirling Death will deal bonus damage per tree destroyed.

STATS

Cast Animation: 0+0

Radius: 300

Damage: 90/120/150/180

Bonus Damage per Cut Tree: 10/15/20/25

Primary Attribute Reduction: 12%/13%/14%/15%

Attribute Reduction Duration: 14

CD: 6

Mana: 70

Whirling Death

Mechanics:

  • Deals Pure damage

  • Before applying the damage, it first reduces current health for each point of strength Whirling Death reduced from STR heroes
  • Debuffs from successive casts stack additively, but the duration does not get refreshed.

  • The attribute reduction fully affects illusions, Meepo clones and Tempest Doubles.

Uses and tips:

  • This ability is really strong against strength heroes as it reduces their strength and then applies the damage. This is the reason why Timber basically destroys almost any strength hero in a 1v1 situation. Because the debuff stacks, you can effectively remove up to 30% of the hero’s primary attribute, making STR heroes much more squishy (the duration doesn’t refresh, so because of the CD of the skill you can apply two stacks at the most.
  • You want to always use it near trees so it can deal bonus damage.

Timbersaw fires a chain that embeds itself in the first tree it hits, pulling him towards it. Any enemy in the path takes damage.

STATS

Cast Animation: 0.3+0

Cast Range: 800/1000/1200/1400

Max Travel Distance: 800/1000/1200/1400

Tree Search Radius: 50

Damage Radius: 225

Damage: 100/140/180/220

CD: 4

Mana: 60

Timber Chain

Mechanics:

  • The chain travels at a speed of 1600/2000/2400/2800 and always travels either the full distance or until connecting with a tree.
  • The hooked tree is destroyed once the chain stops pulling.
  • Timbersaw stops being pulled if he is disabled at any point during Timber Chain.
  • Timbersaw can cast spells and items during the pull, but cannot attack.
  • If Timbersaw dies during Timber Chain and then instantly respawns (e.g. after buying back), the pull still continues possibly moving him all across the map to the targeted tree.

Uses and tips:

  • This is your escape mechanism. Unfortunately, it can be unreliable as enemies can disable you while you’re throwing it if they’re fast enough. The tree search radius is quite small (50), so make sure you click very near the tree you are aiming at.

Each time Timbersaw is attacked, he gains increased health regen and armor.

STATS

Max Stacks: 5/10/15/20

Armor Bonus per Stack: 1.3/1.4/1.5/1.6

Health Regen Bonus per Stack: 1/1.15/1.3/1.45

Stack Duration: 10/13/16/19

Reactive Armor

Mechanics:

  • Only procs when a unit lands an attack on Timbersaw, regardless of distance. This means it cannot proc on missed attacks.
  • Secondary attacks from Moon Glaives, Split Shot, and Flak Cannon cannot trigger Reactive Armor.
  • Procs on attacks from any unit, regardless of team or unit type (including wards and buildings).
  • Each successful attack on Timbersaw grants him 1 stack. The stack is added right before the attack's damage is applied.
  • Each stack has its own duration and is independent of other stacks. The amount of stacks is shown on the status buff icon.
  • Each stack can restore a total of 10/14.95/20.8/27.55 health.

Uses and Tips:

  • Check the last mechanic – each stack restores a certain amount of HP (in the form of regen). This means that if you’re trading hits against someone 1v1, you will still lose a lot of HP. However, if you draw the creeps to hit you as well, you will be gaining a lot more HP as the creeps do not deal that much damage, so you have profit.
  • Unlike most heroes, you want to right-click the enemy heroes and draw the creeps’ agro to you so you can constantly refresh your armor.  
  • Drawing the creeps’ agro however pushes the lane, so be careful with that either. You don’t want to under the enemy tower very early into the game. Later on, you can use this to dive the enemy hero.
  • High damage heroes like Shadow Shaman, Bane, Treant, Luna will still be able to damage you in the laning stage at the early levels, so you still want to be careful. Taking a few steps backward to let your Reactive Armor heal you is useful in such situations.

Fires your main saw blade at the target location where it will spin in place, dealing damage in an area around it. Enemies caught in the saw blade will move more slowly for every 5% of health missing. The blade deals damage and cuts down trees in its path when fired and retracted. While active the ability costs mana, and you lose the ability to attack.

STATS

Cast Animation: 0.3+0

Cast Range: 1200

Effect Radius: 200

Pass Damage: 100/140/180

Damage per Second: 50/75/100

Move Speed Slow per 5% Max Health Missing: 5%

Mana Cost per Second: 16/23/30

CD: 8

Mana: 80/140/200

Aghanim's Scepter

Grants a second Chakram.

Chakram

Mechanics:

  • The Chakram travels at a speed of 900.
  • While traveling towards the target point, the blade deals pass damage and slow on enemy units within range once.
  • Upon reaching the target area, the Chakram starts draining mana, dealing damage over time, and applying a slow aura.
  • While returning, the Chakram deals the pass damage to nearby units again and slows enemy units by placing a debuff again.
  • The Chakram returns to Timbersaw upon using Return Chakram or automatically if it gets more than 2000 range away.

Uses and Tips:

  • First of all, let’s mention that the Chakram is rather slow, so it can be dodged and sometimes will be hard to aim. You want to predict where the enemy will be instead of throwing it at his current location.
  • Chakram can deal 2 instances of pass damage. That means that if the enemy is getting out of the AoE, you want to return the Chakram so it can deal a second instance of pass damage instead of just holding it.
  • It’s a great farming tool, however, you’ll need items in order to sustain its mana usage.
  • Great for harassing/killing enemies as it deals pure damage.

Skill Build

Timber’s skill build is very versatile. Whirling Death and Timber Chain are both good value points and also scale well, so it really depends on the lane you’re facing. Those are just general advises so that you can understand better how to build the hero in specific situations – there is no universal build. Very generally speaking:

Standard Build
Reactive Armor
1
Timber Chain
2
Reactive Armor
3
Timbersaw Whirling Death
4
Reactive Armor
5
Timbersaw Chakram
6
Reactive Armor
7
Timber Chain
8
Timber Chain
9
Talent Icon
10
Timber Chain
11
Timbersaw Chakram
12
Timbersaw Whirling Death
13
Timbersaw Whirling Death
14
Talent Icon
15
Timbersaw Whirling Death
16
Timbersaw Chakram
18
Talent Icon
20
Talent Icon
25
Pros: very hard to kill
Cons: not much burst damage early on

You generally want to have 3 points at Reactive Armor at level 5 in order to sustain your HP on any lane. Now the dilemma is between the other two abilities.

If you’re playing offlane, then you need to consider if the enemies can kill you – if the answer is yes, put a point in Timber Chain to escape. If they’re weak laners and you feel they can’t deal with you, it’s not mandatory and you can get Whirling Death to harass them better.

On the safe lane, it depends on your enemy – if it’s a melee hero, get 2 points in Whirling Death before level 6. Against ranged enemies, you can either choose 2 points in Timber Chain or 1 in both.

On the mid lane, people generally put 2 points in Whirling Death as there are no trees for Chain.

If you’re still laning at level 7, you can put the final point in Reactive Armor. You can also delay it in order to get a point in Chain (if your build was 2-0-3 before that) or Whirling Death (if it was 0-2-3).

After level 7, Whirling Death is good for farming (more damage, lower mana cost) and fighting melee heroes. Timber Chain is better for chasing. You can also distribute points evenly between all skills – it all depends on what you want in the specific situation.

Talents

+1400 Timber Chain Range

25

+12% Whirling Death Attribute Reduction

10% Cooldown Reduction

20
+15 Strength

+5 Reactive Armor Stacks

15
+100 Damage

+25% XP Gain

10
+6% Spell Amplification

Lvl10: 6% Spell Amplification is a very insignificant buff. The experience bonus is better as the hero is fairly level dependent and you want to max all of your abilities as soon as possible.

Lvl15: The Reactive stacks are objectively better. The hero doesn’t need to hit at all and he’s disarmed anyway while Chakram is active.          

Lvl20: Both are not bad but not that significant either so you can’t go wrong. The cooldown reduction stacks multiplicatively with Octarine Core and is usually the preferred choice for most players.

Lvl25: The Timber Chain range is a huge boost but also unnecessary (it’s quite long anyway) and very very situational. The attribute reduction is much better in the late game.

Standard Build

Timbersaw can go for a lot of different items but usually has the same core items as he needs to deal with his mana issues before he can do anything else.

Starting
Stout Shield
Tangoes
Healing_Salve_icon
Mango
Early Game
Magic wand
Arcane Boots
Mid game
Hood
Bloodstone
Late game
Shiva's_Guard_icon
Lotus Orb
Aghanim's_Scepter_icon
Stout Shield
Tangoes
Healing_Salve_icon
Mango
Magic wand
Arcane Boots

Arcane Boots: Timber has a huge mana deficit in the early game. Arcane is one of the most cost-effective items to deal with that problem, mainly because it turns into a Bloodstone later and almost doubles your mana pool. 

Hood

Hood: One of Timber’s weaknesses is magic damage. Hood started as a situational item before people realized how good it is on the hero and now it’s pretty much a core. It can still be skipped if you feel you don’t need it of course, i.e. when the enemy team has very little magical damage.

Bloodstone

Blood Stone: No other item gives that much mana regen and Timber needs it all – he’s like a Storm Spirit in that regard, he uses his mana for farming, for moving and for fighting. However, if you’re having a really bad game and you can’t farm it you can still skip it or delay it.

Shiva's_Guard_icon

Shiva's Guard: one of the best items against physical damage, feel free to build it against any physical damage carries.

Lotus Orb

Lotus Orb: another good counter of silences, however a bit more expensive than Eul’s, so it’s built later in the game. 

Aghanim's_Scepter_icon

Aghanim's Scepter: the second Chakram allows you to deal more damage in fights and also provides decent HP and mana. It’s also pretty good against pushes because you clear any creep waves from a huge distance.

Other items

Mid Game
Soul_Ring_icon
Euls
Blink_Dagger_icon
Blade Mail
Aeon Disk
Heaven's_Halberd_icon
Pipe
Boots_of_Travel_1_icon
Late Game
Octarine_Core_icon
Scythe of Vyse
Black King Bar
Linken's Sphere
Soul_Ring_icon

Soul Ring: You can build it before the Arcane Boots if you want to. This is another cost-effective mana item – try to always drop your Arcanes before you cast it so that it gives you more mana. 

Euls

Eul's Scepter: usually built as a counter for silences and also provides additional mana capacity and regen.

Blink_Dagger_icon

Blink Dagger: a very good initiation item. Timber Chain is not always reliable and this allows you to get in the center of the fight fast and easy. 

Blade Mail

Blade Mail: not a bad item when the enemies are dealing a lot of magic damage - it will force them not to focus you for the duration of the active skill and it will return AoE damage.

Aeon Disk

Aeon Disk: not a very popular item but it can be good if you’re being focused all the time. You can also initiate fights or just walk in front of your team without fear of death.

Heaven's_Halberd_icon

Heaven's Halberd: good item to counter strong physical damage carries like Ursa, TA, Void or pretty much any farmed carry.

Pipe

Pipe: since you usually have Hood, you can always upgrade it into Pipe in the late game if your team needs it.

Boots_of_Travel_1_icon

BoTs: you usually want those after you’ve built your core items. Can still be skipped or delayed if you’re having a tough game.

Octarine_Core_icon

Octarine Core: a very good late game item for Timber, especially with the CD reduction talent.

Scythe of Vyse

Scythe of Vyse: another strong late game item to counter certain heroes or just provide more disable to your team.

Black King Bar

BKB: another highly situational item, but sometimes the enemies have so many disable that you just can’t do anything without it. Buy it only if it’s impossible to play without it.  

Linken's Sphere

Linken's Sphere: a situational item but it’s good against things like Duel, Doom, Hex, etc.

Early Game

Timber 305px

Whether you go offlane, mid or safe lane, Timbersaw’s laning is very passive unless you’re playing against a weak lane or a melee hero. The fighting usually starts once you have Chakram, so you want to get to that point without casualties.


Without a doubt, the most useful trick with Timber in any lane is to pull the creep aggro to max your Reactive Armor stacks. This will give you a lot of regen and armor and will make you almost impossible to push-back. Remember that you actually don’t have high armor without your stacks.

Farming:

You need to get to level 3 without dying - Reactive Armor level 2 is where you start being tanky. 

The offlane really depends on the enemy heroes – if they can’t pressure you, you pressure them. If the enemies are strong laners and you can’t get close to the creep wave, you can go to the jungle with Quelling Blade. Timber is not very good in the jungle but you can still get something there. Try to steal the enemy bounty runes if possible.

As a mid/safe lane, you simply farm on the lane. If you’re playing against a melee hero, you can use Whirling Death to last hit creeps and harass the enemy at the same time. 

Harassing & Zoning-out:

As an offlaner, you might be able to harass the enemy carry if he only has one weak support or he’s alone. If he’s a melee hero, you can simply spam Whirling Death or Timber Chain to both last hit and harass him.

You want to constantly take the creeps’ agro so you can gain armor and heal. Keep in mind that you can’t kill the enemies unless they massively screw up so you should simply wait patiently for level 6. Once you have it, use Chakram to bully the enemy carry out of the lane. At this point, you’re so tanky that the enemies can’t kill you anymore unless their mid or offlane comes to gank you.

As a mid or safe laner, you want to be as aggressive as possible. If you have picked Timber for that position, you’re probably up against a melee hero, so simply spam Whirling Death on him and destroy him. Again, spam attack on him as well so you can be constantly with full stacks of Reactive Armor.  

Survival:

As we mentioned, a trilane will almost always be able to zone/kill you. On the offlane, you need to be cautious not to get flanked by the enemy supports and killed while you’re hitting creeps. A Timber Chain on lvl2 will help you escape bad situations easier.

Ask your team for a ward so you can see what the enemy supports are doing. You can probably deal with one support but not 2.

On the mid lane, you’re only vulnerable until you have Reactive level 2. After that, your armor and regen are too high and even if you get ganked, you will survive long enough for your team to eventually help you.

Magic stick/wand is very important on this hero as you can’t get burst down in a single stun and the enemies need to use a lot of things to kill you, so you will always have time to use it. 

Kill Potential:

The kill potential is pretty much non-existent before level 6, so don’t even try unless the enemy makes a mistake and stays at low HP close to you after getting harassed. Whirling Death and Timber Chain have low CD, so you can chase a low HP enemy down and finish him off with the two nukes if you have the required mana.

Once you have Chakram, you can use it to harass the enemy. Always try to get him low first before you dive him (for example throw a Chakram at him to deal some damage, then wait for it to refresh and then go). Solo kills are rather hard to execute because the enemies can disable you most of the times, but if you get some help from your teammates, you have every chance to get a kill.

Timings and Rotations:

As we already mentioned, level 6 is very important as Chakram allows you to dominate your lane.

The next thing you want to have is Arcane Boots + Soul Ring, so you can use your abilities whenever you want.

You usually want to stay on the lane until at least level 8-9 and unless your team needs your assistance, you can stay even longer so you can farm your core items.

With more levels and some mana items, your farm will also get better. Chakram and Whirling/Chain (whatever you decided to max after Reactive Armor) can clear creep waves easily and all you need in order to farm fast is mana. You can bring clarities to constantly regen mana.

Ganks with Timber are hard to execute. You want to help your team only when they’re fighting close to your tower, so you can teleport and join the fight easily. Or even better - ask them to come to your lane so you can kill the enemy and push the tower.

Offlane

Survive
Get experience
Farm if possible

As every other offlaner, your priority is to get levels. Once you’re level 5-6, you can start being more aggressive.

Abuse the creep aggro trick to make yourself tankier – issue an attack command on an enemy to draw the creeps and max your Reactive stacks. Don’t tank the creeps for an unnecessarily long time especially on lvl1 when you don’t have a lot of stacks. Once your stacks are maxed, you should be very hard to zone-out. Don’t be afraid to use most of your regen to get to lvl3 – it’s a very important level for your tankiness and with lvl2 in Armor you will be almost impossible to zone out by most heores.

Mid & Safe Lane

Farm
Harass the enemy laner

Be very aggressive, draw the creep aggro, hit the enemy and spam Whirling Death to harass him.

Video Example

In this game, we can observe Newbie’s Moogy against KG.LUMINOUS. He gets a Timber vs Brewmaster lane.

Check how he always uses Whirling Death near trees in order to deal pure damage and also how much damage it does when you stack 2 attribute losses.

After 4 minutes of spamming, he manages to score a solo kill on the Brewmaster.

Once he gets the Chakram, he’s pretty much unstoppable on the lane. Also, observe how he pressures anybody who comes to his lane from this point on. 

Mid & Late Game

timbersaw_burn_Immortal 400px

Timber is bad at ganking because he has no disables and quite bad at split-pushing because he has no tower damage. He is, however, a very fast flash-farmer and he deals tons of AoE damage in fights.


This means his playstyle in the mid and late game is pretty simple: you constantly flash-farm and push-out the waves (that’s why mana sustain is extremely important) while also joining every team fight to provide damage and hopefully snowball.

Push-out lanes and farm
Join team fights
Timings:

Timber doesn’t care about timings in the mid-late game at all. All of his spells are low CD, which means he is always ready to fight. Moreover, he scales well with items into the late game, so you are usually not playing against the clock.

That being said, if you have a lot of momentum on your side, it is a good idea to try to end the game before the late game phase. With a considerable resource advantage you can hit a timing when it feels almost impossible for the enemy team to kill you in the mid-late game (30-35 mind): e.g. when you have Hood + Bloodstone + Shiva’s, while the enemy carries still don’t have big DPS items. Use this timing to push together with your team – you can tank the tower and take the attention of your opponents, while your allies are taking objectives (ideally the Barracks).

Comeback Potential:

Timber is a momentum based, snow-ball hero. This means he has close to zero come-back potential.

If you have a bad game and you are playing from a resource disadvantage, your impact in fights will be much lower as you will be much easier to kill. Because of this try to make sure your early-mid game goes well or you will have a hard time winning.

If you are playing from behind there are a couple of things you can do to maximize your chances of success:

  • Focus on farming and split-pushing, avoid unnecessary fights. You are a fast farmer, so it is theoretically possible to acquire enough farm to be relevant in the late game, if your team survives for this long and if you don’t die too often.
  • Use your ultimate to slow down enemy pushes from a safe distance and to prolong the game as much as possible.
Farming:

At this point, we assume you have your core items which means you have enough mana to spam your spells. You can farm very fast by just killing the creep waves with Chakram + Whirling Death. In this stage of the game, you can actually flash-farm as much as heroes like Shadow Fiend, Storm Spirit, Queen of Pain, etc.

You want to farm the more dangerous parts of the map – the offlane, some of the enemy jungle camps, etc. By doing this you provide scouting information to your team and you leave safe space for your squishier teammates to farm. 

Your game is basically farming on lanes/jungle and waiting for fights to happen.

Team Fights:

In a team fight, you’re a front-line hero. It’s not necessary that you initiate the fight, but always try to join in as soon as possible. An exception is if the enemies have BKBs – in that situation, you might want to wait them out and just spam Chakrams from distance.

In a fight, you’re dangerous as all of your abilities deal pure damage (Whirling Death only if it hits trees). You’re also a hero with very low cooldowns, which means that you can have a lot of impact in prolonged engagements. You want to survive as long as possible, so you can continue dealing damage. You need to consider the enemies’ heroes and items and assess the situation – how long can you afford to stay on the front line and tank damage? If it becomes dangerous for you, you need to get back and kite the enemies with Chakram and Timber Chain. 

You’re pretty much able to do 600-700 pure damage every 7-8 seconds (less with Octarine), so try to stay alive. Timber is not one of the heroes who can just cast his spells once and then die peacefully.

Building up your Reactive Armor by tanking a creep wave or a neutral camp before a fight is a good idea, especially if your opponents have high physical damage. Of course, sometimes you don’t have this luxury, but try to do it as often as you can.

IceIceIce joins a mid-game fight. Notice how he focuses the enemy DK – because of his pure damage and attribute reduction, Timber is one of the best heroes in the game to kill him. He uses his mobility to finish-off the TA kill but immediately after he returns to his original target.

After DK dies he is left in a 1v3 situation. Instead of using Timber Chain to run away from the team, he decides to go through them and deal damage. He doesn’t man-fight them, but he smartly kites them and continues dealing damage, at which point his enemies decide to run away because the fight with Timber becomes too dangerous despite the big advantage in numbers. This is a great illustration of Timber’s early-mid game tankiness and of a player that knows the limits of the hero.

Pushing:

5-man pushing:

In a siege, you’re dealing pretty much 0 damage on the tower. You can, however, be the front liner and tank the damage, providing vision for your team.

Split-Pushing:

Although the hero is horrible at hitting towers, you can clear waves extremely fast with just Chakram and Whirling Death. You’re also very mobile with Timber Chain so you can get out as soon as the wave is cleared.

Your play style in that regard is pretty much like Tinker’s. This is also why Boots of Travel are good to have early on, so you can join fights if needed.

Always try to split-push when possible. Of course, follow your enemies’ movements as well, so you don’t get ganked.

Ganking:

You can’t do much to initiate ganks (unless you have Hex/Atos), but try to go with your team and deal the necessary damage to secure the kill.