Shadow Shaman Guide by Miposhka
Artist: Sandviper
  • Guide Navigation
  • HOME
  • ABOUT
  • DRAFTING
  • SKILLS & BUILDS
  • ITEMS & BUILDS
  • EARLY GAME
  • MID & LATE GAME
Author:
Miposhka & Co.
Date: 11/2018
Tags:
text
Shadow Shaman
Analysis
Builds
Tactics

Welcome

Welcome to Miposhka's Book of the Shadow Shaman, a hero guide part of the Book of Dota series!

Here you will find all the information you need to learn to play Shaman on a high level – from drafting and builds to the optimal playstyle in different lanes and situations. We hope you’ll enjoy this guide and find it useful!

miposhka shaman stats
TL;DR:

Draft: Shadow Shaman is a strong and reliable support that can be useful in most situations because of his great disables and awesome pushing potential. Ideally, you want to pick him against a team that cannot clear his Serpent Wards easily, but even if this isn't the case he can be useful with his other attributes.

Early Game: Your early game consists of three phases:

  • zoning-out and dominating your lane opponent(s) with your high attack and nuke damage for the first few minutes
  • rotating for kill attempts with the help of Boots and your disables
  • pushing towers as soon as you get your ultimate
Try to avoid playing against strong offensive dual or trilanes because you are a slow and squishy hero and might end up feeding. Switch lanes if needed.

Mid & Late Game: Do your support duties. When your ultimate is available, gather with your teammates, drop the wards in range of an enemy tower and try to force a favorable fight and take the tower. Repeating this will win you a lot of map control. If you are not in position to do this, use your nuke and high damage attacks to out-push waves and if the situation arises - drop your wards on an enemy tower to split-push it. This playstyle will give you enough farm to reach your Aghanim's + Refresher (orb or shard) timing in the late game, which will help you break the enemy base.

Authors

Yaroslav "Miposhka" Naidenov
Endorsement & Info

Miposhka is the captain and support player for Team Empire and his biggest achievement so far in his pro career is getting 7th-8th place at TI7 after eliminating EG from the tournament to the surprise of many.

He is also a god-tier support in pubs, a genuine and lovable person and an all-around-nice-guy.

Nikolay "CTOMAHEH1" Kalchev
Info & Editing

CTOMAHEH1 started his pro career as a support in Basically Unknown together with Mind Control. Since then he has consistently been playing on the European T2 scene, most recently on Unchained Esports.

His highest placement on the EU ladder is top 100 - he plays all roles (mainly support), which is untypical for high-ranking players and shows his great versatility and understanding of the game.

Rijad "Cookie" Sarajlic
Writing & Info

Rijad originally calibrated at 1k MMR when playing with a friend. When his friend quit Dota, he decided to git gud and in 1.5 years he was able to reach 5k MMR. Nowadays he is 6k and spends a lot of time writing guides and making educational streams on Twitch.

The one bad thing about him is that he spams Arc Warden (Shame!). Yet, who are we to judge when his methods are obviously so effective.

Kyril "MrNiceGuy" Kotashev
PM, Writing & Editing

Esports and gaming enthusiast since forever and founder of Dotahaven.

Has been playing Dota since 2005 (5.84). An Ancient I player in Dota 2.

Beat you like a drum!

Shadow Shaman is one of the strongest lane supports in the game thanks to his high attack damage and strong disables.  Moreover, he is one of the strongest (and cheesiest) pushers in Dota.

If you are a support player and you want to climb in rank, Shadow Shaman is one of the best heroes to master because of two reasons:

  • He provides great disables from early on, which go great with the aggressive cores that get picked in pubs very often (Ursa, Jugg, PA).
  • He provides a lot of push and could even split-push by himself, which could compensate for the reluctance of pub players to focus on objectives.

shadow shaman loadout
Stats
Level 1
Level 15
Level 25
STR
23
High
55
Low
78
High
AGI
16
Medium
38
Low
54
Low
INT
21
High
63
Very High
93
Very High
Attack
73-80
Very High
115-122
Very High
145-152
Very High
Armor
3.6
Medium
7.14
Medium
9.70
Medium
Resistance
26
Medium
28
Medium
29
Medium
HP
614
Medium
1190
Medium
1604
Medium
MP
390
High
1020
Very High
1470
Very High
MS
287
Low
290
Low
292
Low
STRENGHTS

MAJOR:

Davai, Comrade!
Because of his long-duration disables, Shaman is one of the strongest lane supports in the game. He has amazing kill potential in the lane when paired with carries that have high damage output like Jugg & Ursa. Moreover, he has a high-damage ranged attack that helps a lot with right-click harassing.

You stay there, ‘mkay?
Shaman has absurdly long disables. With talents, he can almost lock someone down permanently. He can even trap people in his ultimate if placed accurately. This makes him a great single target initiator with some mobility items. The instant cast time of Hex is also very valuable for this. Last but not least, the good damage output of his ultimate combined with his disables means he has solo kill potential on squishier targets.

Nice towers you got there, would be a shame if something happened to them…
Unlike most supports, Shaman is an amazing pusher and farmer. Not only does his first ability make it super easy to clear a wave, but his ultimate can make quick work of towers, which is very useful both for 5-man pushing and for split-pushing. This makes him one of the very few supports that can split-push and force a reaction by the enemy team by threatening to take objectives on his own. Moreover, Shaman scales very well with items. With a Scepter and Refresher, his push becomes almost impossible to stop.

WEAKNESSES

MAJOR:

Don’t touch me, I’m sensitive…
While he does have high base damage, he’s rather squishy and has a low attack range. If an enemy gets on top of him, there’s a high chance he’ll die. While harassing, it is very important for him to kite and keep a safe distance, or he might feed.

Support tax.      
Shaman is an aggressive support that likes items for initiation (Blink/Force), items for push (Aghs + Refresher) and utility/survival items (Glimmer, Ghost). Even his playstyle is a bit greedier than most other supports because he likes pushing-out lanes and split-pushing towers. Because of this, unlike most ranged spell-caster supports who are item-independent and like to move with their team, he’s much greedier and buying all support consumables could hurt his game impact.

MINOR:

That’s all I’ve got.
Even though he has very strong disables, he lacks in the mana pool department. Carrying some clarities and buying Arcanes is a must for this hero.

Skipped leg day…
While he does have pretty ripped biceps and can punch hard, Shaman is on the lower end of the MS spectrum. This makes it easy for an offensive offlaners to get on top of him. Combined with his squishiness, this could be a recipe for disaster. He requires great positioning in the lane and in fights – if not, he’ll end up feeding.

Replays

OG vs Mineski, TI8

MATCH ID 4063518923

Replay 

Jerax plays a Shadow Shaman in a very heavy pushing lineup together with pos. 2 Pugna, pos. 3 Veno and pos. 4 Enchantress and they manage to secure a 28-minute victory.

Jerax starts the game supporting in the offlane because he wants to avoid Mineski’s offensive trilane – he is a squishy and slow hero and he can easily die to the enemy Ursa repeatedly. In the offlane, he is playing against a Phoenix, which is a good matchup because of his very high attack damage and the very low armor of Phoenix. Notice, however, that he doesn’t stay in the lane longer than he needs to despite the good matchup and the dual lane meta – he rotates and manages to secure a few kills for his team.

After a good laning stage, OG slowly snowball into the mid game and start taking tower after tower (with the help of Shaman’s ward and all their other pushing tools) and secure a quick victory.

Drafting

Shaman is mostly picked for his lane presence and pushing potential. He can add the extra punch in a 5-man draft even if your cores don’t have enough tower damage. Moreover, his disables are always useful in fights, especially if he gets his hands on mobility items.

As already mentioned, Shaman is a great lane support due to his high base damage and long duration disables. This, however, is not true in all cases due to his squishiness, low movement speed and the fact that his 3rd ability is channeled – he can be beaten by strong aggressive lanes that can exploit those weaknesses. This makes it important to consider the exact lane matchup when you pick him (and when you want to decide where to lane him). He is a perfect support against a solo offlaner or weak dual lanes, but he is pretty vulnerable against aggressive dual or tri-lanes.

In the mid-late game, some heroes may be able to hunt him down or disrupt him before he can get his combos off. This is true not only in fights but also on the map – as mentioned, Shaman is a good split-pusher and against strong mobile gankers he will not be able to make use of this strength without dying repeatedly.

Support

Shaman is mostly played as a lane support. As already mentioned, he’s rather greedy so he usually does best in the safe lane where he can use pulls and lower-risk kills with his teammates to get his levels and items. He is much more dangerous in the lane when combined with a carry with good damage output and kill potential. He struggles against strong aggressive dual or triplanes, so try to dodge such matchups – his disables are single-target, which is not ideal when fighting two or three enemies.

Substitutes
Lion

Lion is similar to Shaman mainly thanks to his two sources of disables (one of which is Hex), with some key differences. His 1st ability can reach a much longer range than Shaman’s disables, meaning he can initiate from further back. While he doesn’t hit as hard as Shaman, he has the unique ability to drain mana, which can help in some lane matchups. Most importantly, his ultimate is completely different. While Shaman can push with his, Lion provides high burst damage ideal for ganks. If your team doesn’t lack the push but still wants the disables, Lion could be a decent substitute. 

Synergy

Good friends to have are:

Laning:

Cores with good DPS in lanes:  Jugg, Ursa, Gyro, Terrorblade

Juggernaut
Ursa Portrait
Gyro
Terrorblade
Core DPS + Rasta Disables = Insane Kill Potential

These carries have abilities that can deal a LOT of damage in the first couple of levels, but they lack the ability to get on top of their opponent. This is where Shaman can come in with his two long-lasting disables. A dual lane with a carry like these has insane kill potential and makes it very hard for most heroes to stay in the lane without help. 

Cores with decent disables:  WK, Venge, Sven, Lifestealer, CK, SK

Wraith King
Venge
Sven
Lifestealer Portrait
Chaos Knight
Sand King
Additional disables buy Rasta time to deal right-click damage in the lane.

Rasta has a very high damage for a ranged hero. The right-clicks he can deal while the enemy is under the effect of another disable can add up to a lot of damage. Moreover, stacking multiple disables is never a bad idea and can increase your kill potential substantially.

Mid & Late Game:

Push strats: Tide, Bristleback, DK, Underlord, Pugna

Tidehunter Portrait
Bristle Portrait
Dragon knight
Underlord Portrait
Pugna
Allies that can stand their ground near the Serpent Wards are the best 5-man Dota allies for SS.

5-man Dota heroes can make your team’s push very hard to counter and have decent synergy with Shaman. The best partners for him in this aspect, however, are not necessarily the pushers themselves (SS has enough tower damage most of the time), but rather 5-man heroes who can afford to stand at the frontline and make it very hard for your opponents to push your team backward. This will make it almost impossible for them to clear the wards, which is the only way to stop Shaman’s push.

Gankers, especially with high damage output:  Tinker, Ursa, PA, Clinkz, Riki

Tinker
Ursa Portrait
Phantom Assassin
Clinkz
Riki
map control. SS complements perfectly gankers with high hero and low tower damage.

The gankers above have one thing in common – they have plenty of hero damage, very bad disables and low damage (with the exception of Clinkz). The synergy is quite obvious – SS provides what they lack. He can help them get pick-offs easier with his disables, especially if he gets Blink. After a successful gank, his Serpent Wards will make sure his team gets an objective and wins longer-lasting map control.

Heroes who need setup: Mirana, Invoker, SF, ET, SK

Mirana
Invoker
Shadow Fiend Portrait
Elder titan
Sand King
Rasta’s long disables are perfect for setting up hard to land skills.

Shaman is very good with anything that needs setup. His long-duration disables can lock people down while these heroes hit their hard to land but heavy damage spells and combos.

Counters

Strong Against:

Lineups who can’t easily clear the wards:

If your opponents cannot kill your wards easily, they won’t be able to fight around them and thefend their towers.

If the enemy lineups don’t have the tools to quickly kill the Serpent Wards, this will make Shaman’s push even more powerful, nearly unstoppable if he gets Agh’s + Refresher (or Shard) in the late game. Ranged heroes with long range and fast AS are the best at clearing the wards while the opposite – short range heroes with bad attack speed (and low armor for tanking the wards) are the worse. E.g. Sniper and Drow are some of the best heroes at clearing your wards, while Phoenix, Undying, Treant are some of the worst.

Elusive heroes: Storm, Void, Weaver, Ember

Storm spirit
Faceless Void Portrait
Weaver
Ember Portrait
Instant disables like Hex are the best tools to deal with mobile enemies.

These heroes rely on going in and out of the battle with their mobility spells. Shaman can lock them down after they jump in or prevent them from escaping when they get ganked.

Farming carries:  AM, Slark, Jugg, Sven

Anti mage
Slark Portrait
Juggernaut
Sven
When paired with heroes that can play aggressively from early on, SS’s ganking and pushing potential can very quickly take space away from the enemy team.

Passive farming carries usually need space and time in the early-mid game to get the farm they need and win the game. This means that Shaman’s good ganking and great pushing ability will not allow them to get the required space. Shaman is best paired with other pushing/ganking heroes or 5-man push strats to make the game end fast before these heroes even get a chance to get their items.

It’s worth mentioning that SS is great against these heroes in particular because his instant disables counter their mobility (most notable against Slark, Hex cannot be dispelled by him) and makes them easier to kite.

Weak Against:

Strong Offensive Dual and Trilanes:

Tusk
Weaver
Venge
Ursa Portrait

One of the most important things to consider when picking SS as a support is the lane setup. You want to dodge very strong offensive dual or trilanes because your slow MS, squishiness and single-target focus could easily get you killed multiple times in such lanes.

Moreover, Shackle is a channeled ability. This means that while you can hold one person in place, the other one or two are free to focus you down (and even stop your channel if they have disables). Dual lanes with good gap-closing abilities are most dangerous for you.

Multiple Units: Meepo, PL, Visage, NP, Lone, Naga, Terror, CK, Spect

Meepo
Phantom Lancer
Visage
Nature's Prophet Portrait
Lone Druid
Naga siren
Terrorblade
Chaos Knight
Spectre Portrait

SS’s biggest strength is his ultimate and his long disables – both tools are not efficient against heroes with multiple units. His AoE nuke is decent at clearing units early on but falls off extremely fast. In the lane, due to his squishiness and slow MS, heroes like NP, Lone and Meepo can run him down with the units and kick him out of lane (or even kill him).

Tanky offlaners: Bristle, Timber, Tide, Dark Seer

Bristle Portrait
Timbersaw
Tidehunter Portrait
Dark Seer

Heroes who have a tool to deal with your high attack damage (like Kraken shell and Reactive Armor) and who can survive your disable duration are great against you in the lane and can apply a lot of pressure, especially if they get support.

Force staff

Force Staff: enemies will be able to push their allies out of the range of your wards.

Linken's Sphere

Linken’s: a great counter to your single target initiation especially when combined with BKB.

Hurricane Pike

Pike: if an enemy core out-ranges your Serpent Wards, they’ll be able to clear them very easily, which is a problem for your pushes and you’ll be forced to actively protect the wards with your team rather than just drop them on the tower.

Skills

Ether Shock
Hex
Shackles
Mass Serpent Ward

Creates a cone of ethereal energy that strikes multiple enemy units.

STATS

Cast Animation: 0.3+1.23

Cast Range: 600

Starting Radius: 200

Max Distance: 500

End Radius: 300

Number of Targets: 1/3/5/7

Damage: 140/200/260/320

CD: 14/12/10/8

Mana: 95/105/135/160

Ether Shock

Range: It can hit units up to 1000 range away (starting radius + distance + end radius), The complete area is shaped like a cone in front of Shadow Shaman, but the targets are not chosen randomly, it chooses the closest valid targets to the primary target within the cone.

Great damage on lvl1: this makes it amazing for harassing in the early game and you need to abuse it along with your high attack damage. It’s your most valuable tool against dual or trilanes.

It has low cooldown at max level. If the enemy has no escape mechanism, you can always use this ability right after hexing someone, meaning by the time your 2nd + 3rd disable combo is finished Ether Shock will be available against so you can cast it again.

Linken’s: One small thing to note about this ability is that it does proc Likens’ and is blocked by it, but only on the primary target. If you want to proc Linken’s e.g. before casting Hex with it, Ether Shock is quite useful, but if you want to finish off a unit with Linken’s – if there’s another unit next to it then use your spell on that 2nd unit.

Split-push & farm: It has a low cooldown and does a lot of damage, meaning it allows Shaman to shove waves during the midgame by himself. This can be used to get faster to a tower so you can take it with your snakes, or simply to out-push the waves towards the enemy for vision or for baiting reactions. 

Transforms an enemy unit into a harmless creature, disabling their attacks and abilities.

STATS

Cast Animation: 0+1.13

Cast Range: 500

Set Movement Speed: 100

Duration: 1.25/2/2.75/3.5

CD: 13

Mana: 70/110/150/190

Hex

Hex is a very straightforward spell and requires very little explanation.

The biggest thing to note is that Hex is not purgeable at all. This is especially useful for ganking heroes like Slark who have dispels.

The instant cast animation is also a great strength: usually, this is the ability that you initiate with, as it doesn’t have a cast time (0 seconds), meaning it is instantly cast on the target as soon as it’s in range. The range, however, is pretty short. This means that to unlock the full initiation potential of Hex, you usually need a mobility item like Dagger.

Another notable mechanic is that Hex will instantly destroy illusions.

Magically binds an enemy unit so that it cannot move or attack, while dealing damage over time.

STATS

Cast Animation: 0.3+0

Cast Range: 400

Max Channel Time: 2.75/3.5/4.25/5

Total Damage: 60/160/260/360

CD: 10

Mana: 140/150/160/170

Shackles

Shackle stuns the target as long as it is channeled. This ability has an absurdly long duration, starting from 2.75 seconds at level 1 and ending with even up to the ridiculous 8 seconds at level 4 if you have the talent, meaning combined with hex and it’s low cooldown (10 seconds) you can literally lock someone down forever, unless someone else disrupts your channel or you run out of mana.

The obvious problem is to channel it for long enough without getting interrupted. Glimmer could possibly help you, but the most important thing is to time your Shackles well. Use Shackle far away from group fights (so other enemy heroes can’t help your target) OR wait-out the disables that can easily interrupt you (e.g. Fissure, etc.).

It does damage in 0.1-second intervals, meaning this can break Templar’s refractions or Treant’s Living Armor very fast. Additionally, this ability provides true sight, but only when the target was not invisible or within a fade time upon cast.

Summons 10 Serpent Wards to attack enemy units and structures. The Wards are immune to magic. It takes two hits to destroy a single Ward.

STATS

Cast Animation: 0.3+0.97

Cast Range: 550

Number of Wards: 10

Attacks to Destroy: 2

Duration: 45

CD: 120

Mana: 200/350/600

Aghanim's Scepter

Causes Serpent Wards to have split shot, attacking two units for full damage. Increases attack range of Serpent Wards.

Mass Serpent Ward

Wards have a super long duration of 45 seconds, but a cooldown of 120 seconds. Like his other abilities, the mana cost is super high, especially at max level, but for a good reason. Not many supports can kill a farmed core by themselves or make quick work of an objective – don’t underestimate their DPS.

The Serpent Wards have a big drawback – they cannot move. Towers, however, have the same drawback, which means they cannot run away. This is the main reason why you want to use your wards in range of enemy towers – even if the fight moves away from the wards, you will be able to deal building damage with them.

Wards have an incredibly powerful Aghanim’s upgrade that gives them splash and a super long attack range. This allows for very fast clearing of waves around the tower and makes it hard for enemies to approach to clear them or take team fights in closed areas.

Since wards are a unit, you can phase through them with any ability/item that gives the phase effect.

This ability should be used as often as possible. No other supports can push as heavily as Shaman, even most cores would need a bunch of items to do what Shaman can basically for free, so take advantage of this big strength and win map control for your team. Try not to use the wards for uncertain kill attempts, however. If your target gets out of range, your ultimate will be wasted, and it has a big cooldown. Always try to force fights around towers (or Roshan) so that you can utilize their pushing potential.

Finally, if pushing is not possible in the early-mid game, you can use them to farm Ancient stacks. This is a good strategy to get some bonus gold and get your items faster.


shadow shaman ult trap

Skill Builds

Shaman’s build isn’t very flexible. You usually want to max Shock because it’s your main source of nuke damage. This is not only important for kills – it’s your main farming and wave-pushing skill, and since SS is a relatively greedy support, this is important for him. Wave-pushing is also very important when you want to drop your ultimate on an undefended tower.

You max your Hex second – the reason is simply that it doesn’t require channeling unlike Shackle and it’s much more reliable and easier to use. That being said, if you are playing against heroes with very little disables who cannot stop you from channeling, Shackle is could be prioritized.

Standard Build
Ether Shock
1
Shackles
2
Ether Shock
3
Hex
4
Ether Shock
5
Mass Serpent Ward
6
Ether Shock
7
Shackles
8
Hex
9
Talent Icon
10
Hex
11
Mass Serpent Ward
12
Hex
13
Shackles
14
Talent Icon
15
Shackles
16
Mass Serpent Ward
18
Talent Icon
20
Talent Icon
25
Pros: High damage for harassing, kill attempts & farming;
Cons: low-duration disables early on;

On lvl1 you usually get Ether Shock because of its very high damage. Combined with your high damage attacks, this will make you very powerful at harassing on lvl1. It is possible, however, to take Shackle on lvl1 if you are laning with a hero like Ursa or Gyro, who need to disable to deal lots of damage. This is only smart to do versus solo offlaners. Versus dual or trilanes, Ether is always the better choice.

You get Shackle before Hex because it provides a longer disable on lvl1 (and deals damage, unlike Hex).

Going 1-1-1 on lvl3 is rare but possible if you have allies with a lot of damage who need disables to secure early-game kills. Ether Shock deals high-enough damage with only 1 point in it.

Talents

+50 Wards Attack Damage

25

+400 Ether Shock Damage

+1 Wards Max HP

20

+3s Shackles Duration

-5s Hex Cooldown

15

+125 Cast Range

+20% XP Gain

10

+200 Health

Lvl10: It’s a hard choice – the talent you want is the XP gain. Reaching higher levels of your ultimate faster is extremely valuable for your pushing potential. Sometimes, however, you will simply need the health talent to survive in fights – you are very squishy and your spells are short range, which means you need some HP to survive in fights.

Lvl15: The cast range is the usual choice here because Shaman likes to purchase Arcanes, and later on disassemble them into Aether Lens, which combined with this talent counteracts his low cast range. If you’re getting fast mobility items, however, the Hex CD could be great for initiating with Blink, disengaging, and then going in against for a second disable.

Lvl20: This one depends on your situation. The Shackle duration + Aether Lens + 125 cast range talent allows you to lock someone down from a very far range for basically infinity. In some games, however, your team might not be able to easily break HG, which means you are your team’s main tower pusher. In such cases, the +1 attacks to destroy talent is better. Combined with Aghanim’s and Refresher you could even end the game by yourself.

Lvl25: The wards attack damage is the clear choice here, as by this point you should have Agh’s + Refresher (or at least a shard) meaning this amplifies your push and team fight potential by an absurd amount. You could get the Ether Shock damage if you’re playing against mega creeps to help your team push out the waves a bit better.

Standard Build

The first problem you need to solve is that your spells are very mana intensive. Rushing Arcanes is the logical choice. Windlace in the early game is also very valuable because you are not particularly fast, yet you have great catch and are consequently a good ganker.

Afterward, you usually want to rush Blink to activate your initiation potential. Blink into Hex is one of the best single target initiations in the game. That being said, if you don’t need to play the role of an initiator because you have other good heroes for the job, it is actually possible to skip the Blink in order to get your Aghanim’s faster. If your main role in the game is the team fight and Pushing potential of your ult, a fast Agh’s can be very impactful.

Disassembling your Arcanes into Aether Lens is standard because the extra cast range helps a lot to counteract your short cast range. Upgrading your brown boots into Tranquils is a good idea because you need the extra MS. (If you are particularly rich, you can upgrade them into Travels to become much better at split-pushing).

Last, in the late game, you aim for the classic Aghanim’s + Refresher combo. Situational items like Aeon Disk if you’re having trouble staying alive are also possible.

Starting Items
Animal Courier
Tangoes
Mango
Wards Icon
Healing_Salve_icon
Early Game
Arcane Boots
Wind lace
Magic wand
Mid Game
Aether Lens
Tranquil Boots
Blink_Dagger_icon
Late Game
Aghanim's_Scepter_icon
Refresher orb
Animal Courier
Tangoes
Mango
Wards Icon
Healing_Salve_icon
Arcane Boots

Arcanes: Shaman’s spells cost a LOT of mana, this lets him stay active as much as possible and even helps his teammates.

Wind lace

Wind Lace: You can get a 2nd windlace after your Tranquils to boost your movement speed, even more, if you need it. It can be later be upgraded into an Eul’s.

Magic wand

Wand: Not only does it let him survive fights, as he is super squishy, but also helps a lot with his mana issues.

Aether Lens

Aether Lens: Arcanes can and should be disassembled later on for a Lens. Add the level 15 cast range talent and Shaman will be able to lock people down from a safe distance. 

Tranquil Boots

Tranquil: While it can be bought as a first item, this is usually purchased after disassembling Arcanes for an Aether because you need Arcanes to fix your mana issues.

Blink_Dagger_icon

Dagger: What is a hero with insane disable potential without a gap closing mechanism? Dagger solves almost all of Shaman’s mobility issues.

Aghanim's_Scepter_icon

Agh’s: This is Shaman’s core mid-late game item. It upgrades your Serpents to an insane level and makes a Refresher Orb/Shard much more valuable. It’s usually built after 1 or 2 midgame items like e.g. Blink, which allow your other abilities to shine for much cheaper. 

Refresher orb

Refresher/Refresher shard: This lets you drop 2 sets of wards onto the enemy’s towers or in a team fight (which is preferably next to enemy towers). If you have level 25, Aghanim’s, Refresher and Refresher Shard, then the t4’s and enemy ancient will melt in seconds and there will be hardly anything the enemy team can do to stop this.  

Other Items

Early & Mid Game
Infused Raindrop
Glimmer Cape
Force staff
Hand of Midas
Ghost Scepter
Euls
Solar Crest Icon
Late Game
Aeon Disk
Rod of Atos
Lotus Orb
Shadow_Blade_icon
Black King Bar
Octarine_Core_icon
Infused Raindrop

Infused Raindrop: since you are very squishy Raindrops can help you survive some nukes.

Glimmer Cape

Glimmer: Shaman is squishy and has a channeling ability, which makes Glimmer valuable. Moreover, Glimmer lets you save your frontline cores and it can be used for initiation or to sneak into the enemy side for wards.

Force staff

Force: Especially useful against hero hunters like Riki/Clock.

Hand of Midas

Midas: lets you get into the late game with more items, which is great if you are aiming to win the game with your Aghanim's + Refresher combo. It works great with your XP talent. Nonetheless, a very greedy pickup on a pos. 5 hero, so only get if it’s inevitable that the game goes late.

Ghost Scepter

Ghost Scepter: Ghost helps you survive long enough to get your spells off or have your teammates react when you are getting focused by farmed carries with BKB.

Euls

Eul’s: Adds much-needed mobility, ability to purge yourself, mana sustain, but most importantly – even more disables! It’s a situational item because getting too many cheap small items can delay your Agh’s too much, but in games against Silence, you might have to get it.

Solar Crest Icon

Medallion/Solar: helps with taking Roshan and works great with keeping your teammates alive while they’re chipping high ground or taking team fights.

Aeon Disk

Aeon Disk: An alternative to Ghost/Glimmer, costs a lot more but helps you survive basically any kind of initiation.

Rod of Atos

Atos: A super high range 2-second root. This lets you catch heroes that are usually hiding in the back and reach them with your shorter range disables.

Lotus Orb

Lotus Orb: The best way to keep your cores alive in the late game. The only reason it’s not a standard pickup is that it can delay your Aghanim’s + Refrehser a lot if you get it first.

Shadow_Blade_icon

Shadow Blade: In the late game, when you already have Agh's + Refresher, Shadow Blade can help you to rat more easily.

Black King Bar

Black King Bar: when you are playing mainly against magical damage and many stuns it might be a good option to go for a BKB and lock down someone for a long time – remember that Shackle is a channeled spell.

Octarine_Core_icon

Octarine Core: reducing the cooldown of your Aghanim's ultimate and for Refresher's active is always useful in the late game. The obvious disadvantage is the huge price.

Early Game

shaman 350px

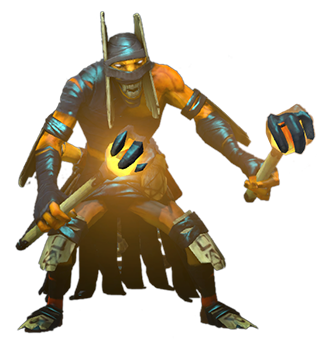
Shaman’s early game in particular because he is very strong in some areas but weak in others.


He has very high attack damage, high damage on his nuke on low levels and very long single target disables great for kill attempts if your lane partner(s) have enough damage. Because of this he is great at bullying single enemies and even securing kills on low levels with his disables.


At the same time, he is relatively slow, with a sub-par attack range and he is very squishy. This means that offensive dual or trilanes who can get on top of you are extremely dangerous and you need to make sure you are positioned safely against them. Harass for a bit on early levels and then if the lane becomes too dangerous once your opponents get levels you might want to start rotating for ganks or pulls instead of standing in the lane and risking death.

Stay in lane and use your high damage to harass and zone out.
If you are playing against dangerous opponents position yourself more safely when harassing and deny creeps.
When you have boots and the night comes, start attempting gank rotations.
When you have lvl6 try to force fights and use your ult to push towers – repeat.
Farming:

This hero usually doesn’t farm very much in the early game - his farm comes in the mid-game once he has maxed his 1st ability. In the early game, if there are no good gank opportunities you can do pulls to maintain the creep equilibrium for your carry and get some additional levels and farm. 

Harassing & zoning-out:

When harassing with Shaman you should always take note of the hero you’re harassing’s attack range and movement speed, as you don’t want your enemies to get on top of you. While you can win trades with your raw damage, you’re still a support who had to buy wards/courier so you won’t have as much regen as the enemy offlaner.

When harassing a melee hero, stay in the open and kite as much as possible. When harassing a ranged opponent, try to close the distance and trade. Most ranged heroes have better range and movement speed so they will try to kite you, you need to prevent that by sticking closer to them when you are trading and further away when you are not.

Avoid drawing aggro from creeps with your short attack range. To do this you can use aggro tricks like right-clicking someone while not having any units within 500 range of you, then walking in to harass, as the initial right click will disable aggro for 3 seconds. Just make sure to stop attacking after those 3 seconds and do the trick again.  Since you have strong nukes and long disables, if you drop the opponent low enough, make sure to call your carry and/or roamer for a free kill.

Versus offensive lanes:

As previously mentioned, Shaman is a squishy and slow short-range hero - this means you need to evaluate what you’re laning against before trying to harass aggressively. In some cases attempting to harass a strong lane could get you killed very easily. In such cases make sure to stay more defensively (closer to your ally/creeps/tower if possible) and harass with your attacks and spells from safe range. If trading harass is too difficult and dangerous, you can make use of your big attack damage by denying every creep possible.

If the enemy dual/trilane becomes too dangerous with some levels, you can start rotating for ganks in the other lanes.

Kill potential:

Shaman’s kill potential is one of the highest in the early game. He’s best paired with a strong damage-dealing carry like Jugg/Ursa who can burst an opponent down during your disable.

You have good kill potential with most other heroes as well. If you harass the opponent enough your nuke, disables and attacks in addition from some damage from your carry could be enough to secure a kill.

Because of your great single target disable, with Boots in the night time you are quite good at ganking and can attempt to roam in the other lanes for kills.

Timings and rotations:

Before 00:00

Since his 3rd ability is a super long disable, and he punches really hard, Shaman should almost always look to invade the enemy rune to get a kill with his teammates. In some games, enemies might expect you to gank with your carry, so instead, you and your other support can go into the offlane and gank with your offlaner at the rune.

Minutes 0-4

This is usually when you’re harassing, pulling, stacking, and just, in general, getting your levels and Boots. Kills done in this time should be if your opponent gets out of position, or you harass him enough such that you can lock him down while your carry finishes him off. Make sure to abuse your high base damage to always keep the enemy offlaner low, such that your carry can out-level and out-farm him so that you can leave the lane later on.

At the 4th minute, if possible look for a rune, if you’re lucky enough to get a haste/invis you can make an easy rotation to the mid lane. But, even without a rune, the rotation can happen, as this is when the nighttime starts

5 minutes+, this is when your mid laner should be level 6 and your other cores should hit 6 soon. Start rotating between the lanes where kills are easiest to achieve and once you get your ult – push a tower.

Try to use the catapult waves to time a tower push with your ultimate.

Video Example:

He knows he’s playing against Treant and because of this he gets two Sentries. Even though he couldn’t deward with the 1st one, the second made sure that he isn’t left in a bad situation in the lane – the true sight is absolutely vital for the slow Shaman against Bristle and Treant who can easily chase him down. With the Sentry, however, it’s easier to stay away from the Treant.

On min 02:35 in the video he is getting chased down by the two enemies but he has the presence of mind to turn around and disable the Treant, which gives his Spectre two kills despite the death of Shaman – an extremely good trade for them since they are, on theory, the much weaker lane.

Notice how before he returns to the lane he notices that his small camp is blocked, buys a Sentry and dewards it when he’s back.

On 05:00 he trades his life once again, which secures two runes and a kill for the Spectre. He uses his death very efficiently for the second time: he smokes, wards mid and top, and backstab-ganks the enemy mid Mirana, which helps the Pugna secure the T1 tower very fast. He returns back to Spect immediately after the gank – leaving the carry alone against a stronger lane is not a good idea.

Mid & Late Game

shaman immortal 350px

Shadow Shaman is a versatile support in the mid and late game in terms of playstyle. In the ideal situation, you want to walk with your team, to push and force fights whenever your ultimate is available. Sometimes, however, you might need to use your disables and initiation to gank important enemy heroes before pushing in case the enemy team is splitting up and farming. In other situations, if you have to avoid fights, you will out-push the lanes and split-push with your ultimate whenever you get the opportunity.

Support duties (ward, stacking, deward, sentry, dust, smoke etc.)
Use your ult whenever possible to secure objectives
Gank & counter-gank
Shoving & farming lanes when your carries don’t need them or to prep for split-pushing with your ult
Comeback Potential:

This hero as a surprisingly high comeback potential, the reason for this is that his ultimate makes it VERY hard to take team fights on his high ground. Additionally, it can be used for taking Roshan. This makes taking a fight near/inside Rosh pit impossibly hard. Most importantly, if your team is able to delay the game for long enough so that you can get your Agh’s + Refresher/Shard, you can use your ultimate to rat your way to victory. Pushing a single wave far enough and dropping two Aghanim’s ultimates near the enemy T4’s can single-handedly win you the game. 

Team Fights:

Usually, this hero is played in two ways in a team fight as initiation or counter-initiation, while the standard rules of team-fighting apply (walking in and out of the fight once your abilities are on/off cooldown). Since Shaman is rather squishy, sometimes you might have to omit using your Shackles if the enemy could instantly burst you down while you’re sitting there for a long period being an easy target. This means that Shaman really loves to find isolated targets on the corners of fights and lock them down while his cores do the damage, waiting outside the fight for a bit and then returning once his abilities are off cooldown again.

Initiation: When playing as initiator you have to consider that you’re really squishy. If you jump on a target and not know where the rest of the enemies are then you might get instantly burst down. Sometimes this is fine if you can get all of your abilities off so that your team wins the fight, but in general, the team who has more people alive for longer wins the fight so try to avoid such situations. Be careful when you jump in and run backward after providing your disable.

Counter-Initiation: When playing as counter-initiator it is very useful if you have items like Glimmer/Force as your job in these kinds of games is to stand at the back lines and support your cores. Just drop your ultimate in range of the objective and let your teammates push and fight in the frontlines around the wards. You’ll be waiting for the enemies to make their move so you can lock them down once they commit, otherwise, your wards will rip apart their objectives. 

You will usually play as the initiator when ganking, and as a counter-initiator when pushing and team-fighting as 5.

Remember to always track your mana pool, as your spells cost a lot of mana. You don’t want to start a fight and end up realizing you have no mana to cast your important spells. This is especially true with your lvl3 ultimate.

DJ has a very high impact in this fight because of one main thing – his great positioning. Notice that even though he has Blink he doesn’t jump into the fight and stays at a safe distance on the high ground. The Lens helps him contribute from further away. He manages to the enemy TA in his wards and controls her with Shackle, which forces the enemy team to stop the channeling with Reaper (practically wasting it). Afterward, he manages to control the enemy Enchantress for a very long time and at the end of the fight he uses the Refresher Shard to drop his wards on the T4 towers and secure the victory.

Pushing:

5-man pushing:

When it comes to 5man pushing your job is rather simple, but impossibly important: DROP YOUR WARDS and walk back. One thing that you might note is that wards will attack per normal attack rules, meaning they’ll focus heroes/creeps over towers. If you are pushing and want to kill a tower first, make sure to manually make your wards attack the tower. The easiest way to do this is to hold CTRL and right click that tower, this will force all controlled units to attack it, including your hero. Alternatively, you can use a control group like ‘’select all other units’’ which you can bind in the hotkey settings.

Once the wards are down and you are a safe distance away, wait and play as a backline support and counter-initiator as described above.

Split-Pushing:

Split pushing is simple: just spam your 1st ability on waves and right click the rest of the creeps down until you reach the enemy tower to drop your wards.

While most supports wouldn’t be split-pushing, Shaman usually spends a huge portion of his time doing this. Some games you might not be able to take direct pushes grouped with your team, but you still want to use your ultimate, so you can tell your team to push one side of the map while you push the other. The hero pushes waves fast due to his high damage and low cooldown nuke. At this point your opponents have 2 choices - they can either fight your teammates or they can gank you: if they gank you, then your teammates can take free towers on the other side. If they fight your team, then you get free towers. Regardless of which happens, you’ll be shoving waves towards the enemy side and taking objectives, which provides a lot of map control. Your big problem when split-pushing is that you are not mobile and have no escape mechanisms (try to Blink and TP out after using your ultimate). Nonetheless, dying as a split-pushing support is often worth it if your split-push is winning your team map control and creating space for your teammates.
Ganking:

Find someone on your team who has his abilities up, shove the lanes towards the enemy side, use smoke and gank (it’s obviously easier to gank with Blink). Do this repeatedly if your opponents are playing far away from each other on the map. If they are moving as 5, however, you need to group up with your team and force fights and objectives or if you can’t do that – to split push.

Map Control & Vision:

When you’re planning to push a tower in an area, your best option is to go ahead and smoke with your teammates to gank the enemy jungle and drop some Observers on the way there. This lets you both place deep wards for an upcoming push and get some free kills with your teammates.

Some players will start expecting pushes - in this case, you can always use a scan behind the enemy tower as you’re shoving a lane. This shows you people teleporting in and hiding there and you’ll be able to anticipate a fight or gank.

You gain map control for your team by pushing out the waves, placing offensive Observers and pushing the towers.

Farming:

As mentioned multiple times, Shaman spends a lot of his time shoving waves unlike most supports, which naturally gives you farm. Do this repeatedly, but try not to walk too far forward and get yourself killed. Push out the wave and once you feel in danger move back out of vision and closer to your teammates.

In the early-mid game, you could stack an ancient camp a few times and farm it with your wards. This is a smart move when you cannot easily take fights and push towers and will get you your core items a bit faster.