Razor Guide by a 7k MMR Player
Artist: blossomalex
  • Guide Navigation
  • HOME
  • ABOUT
  • DRAFTING
  • SKILLS & BUILDS
  • ITEMS & BUILDS
  • EARLY GAME
  • MID & LATE GAME
Author:
MrNiceGuy
Date: 01/2019
Tags:
text
Razor
Tactics
Builds
Analysis

Welcome

Here you will find all the information you need to learn to play Razor on a high level – from drafting and builds to the optimal playstyle in different lanes and situations. We hope you’ll enjoy this guide and find it useful!

TL;DR:

Draft: Your biggest problem for Razor are very mobile heroes, but besides that you are very hard to counter – this means you can pick Razor relatively early in the draft. You are a dominant laner and strong mid-game fighting hero. Even if the enemy counters you with a mobile lane opponent that can break the link, you can try to swap lanes to find the favorable matchup you need.

Early-Game: Use Static Link to dominate your lane – last hit and deny all possible creeps and if possible zone-out your lane opponent. After the laning stage, when you have some basic stat items, rotate to another lane, force fights and try to push towers with your teammates.

Mid & Late Game: You peak in the mid game so ideally, you want to take over the map during this timing window by fighting and pushing. You don’t want to get into a long passive game because even though you scale well into the late game, you are not a fast farmer and you might fall behind in farm.

Authors

Nikolay "CTOMAHEH1" Kalchev
Info & Editing

CTOMAHEH1 started his pro career as a support in Basically Unknown together with Mind Control. Since then he has consistently been playing on the European T2 scene, most recently on Unchained Esports.

His highest placement on the EU ladder is top 100 - he plays all roles (mainly support), which is untypical for high-ranking players and shows his great versatility and understanding of the game.

Martin "BRINGITON" Slavov
Writing & Info

Martin has lots of experience writing about Dota and he is no pushover in the actual game - a Divine III player, Martin plays mid and carry heroes on a very high level.

He has been playing Dota since Guinsoo's Dota Allstars (more than 12 years) and he loves thinking about new builds and strategies.

Kyril "MrNiceGuy" Kotashev
PM, Writing & Editing

Esports and gaming enthusiast since forever and founder of Dotahaven.

Has been playing Dota since 2005 (5.84). An Ancient I player in Dota 2.

I bring the spark of death.

Razor is an active agility carry/semi-carry hero who is able to easily win his lane and start to create space for his teammates. The hero is most famous for being an anti-carry thanks to his Static Link ability that steals damage from an opponent, so he can use it himself. That makes him a nightmare to lane against even for the most dominant laners and an unstoppable force in fights. 

Razor Loadout
Stats
Level 1
Level 15
Level 25
STR
22
Medium
58
High
84
Medium
AGI
22
Very High
47
Medium
65
Medium
INT
21
High
46
Medium
64
Medium
Attack
45-47
Low
70-72
Very Low
88-90
Very Low
Armor
3.4
High
8.44
High
12.04
High
Resistance
26
Medium
28
Medium
30
Medium
HP
596
Medium
1251
Medium
1719
Medium
MP
327
High
627
Medium
843
Medium
MS
288
Low
293
Low
299
Low
STRENGHTS

MAJOR

Anti-carry:
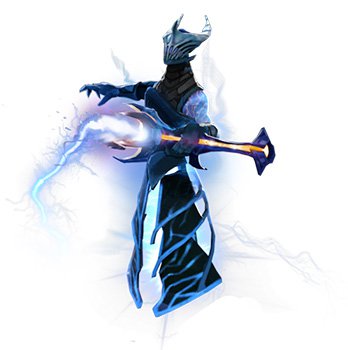
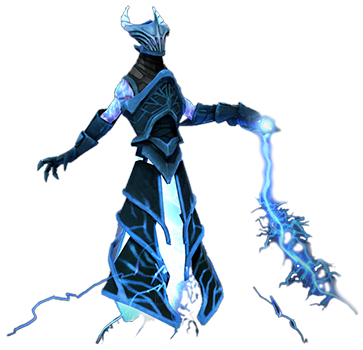
Thanks to his Static Link, Razor is able to rapidly drain the enemy carry’s damage in a fight, rendering him useless if the link is not broken.

Strong laner:
Razor is one of the hardest heroes to lane against. He completely destroys most heroes who are usually lane dominators like TA, Tinker, OD and many more. On the safe lane, he can beat almost any offlaner allowing his supports to go help somewhere else.

MINOR

Durable:
Razor has nice strength gain and thanks to Static Link he doesn’t really need damage items and can afford to go for a stats-heavy tanky build.

Not too item dependent:
Even though Razor scales well with items, he can be useful with just a few cheap items and BKB.  

WEAKNESSES

MAJOR

Can’t carry in the late game:
The hero scales well with items and is still useful in the late game, however, he’s not your typical carry hero – he needs time to build his damage and even then he’s not able to dish out damage like other late game carries such as Terrorblade, Medusa, Luna, etc. This doesn’t make him bad in the later stages of the game, but he wants to have teammates who can also carry.

Slow farmer:
Razor doesn’t have very high damage without his Static Link and even if he spams Plasma Field, it’s not enough to clear out creep waves and neutral camps fast enough. That also makes his chances to come back from a bad game pretty slim.

MINOR

No disables:
The hero lacks deliable, long disables. This makes it harder to stick to your target, which is a problem because you need your Static Link to stay connected for as long as possible.

Needs to be tanky:
The nature of Razor’s abilities require him to be in the center of the fight, so he can continuously drain damage and hit enemies with his ultimate. For that reason, he needs to be very tanky.

Replays

Fnatic vs Execration, DreamLeague season 8

MATCH ID 3734004763
Replay

EternaLEnVy plays a flawless game on Razor against Execration. He goes for a very innovative item build focused on mobility.  He rushes a fast Hood to make himself survivable enough - the only physical damage dealer Execration have is Terrorblade. Afterward, he builds Eul’s + Blink to make himself extremely mobile. This makes him more survivable, but also makes it easier for him to drain damage uninterrupted and chase people down. S&Y tops off his mobility and survivability and chasing potential.

Drafting

Razor is usually picked in lineups that want to be very aggressive and try to decide the game early. He can easily dominate his lane, which allows his teammates to help and eventually win the other lanes as well. Ideally, this will allow your team to snowball into the mid game, take fights, push towers and take map control.

An alternative strategy is to pick him as a space creator for a strong carry that needs more farm in the early game like Terrorblade, Spectre or Medusa, who can carry the game on their own later on. That being said, the two strategies aren’t mutually exclusive (it’s entirely possible to snowball into the mid game with Razor + Terrorblade and some strong fighting utility heroes for example).

Either way, you always want to have another hero who can carry later on – not necessarily a late game carry, but at least some other semi-carry.

Razor is bad in slow and passive games as he can’t farm that fast and quickly falls behind the other cores in the net worth chart. He wants to force fights, which means at least part of his teammates need to be ready to force fights with him. He’s a relatively bad ganker and split-pusher, so his team needs to be adequate in his preferred playstyle – 5-man Dota.

Roles:
  • Position 2 in the mid or safe lane

In both safe and mid lane, Razor relies on draining his lane opponent’s damage and using it to last hit and deny. He’s exceptionally strong even against other lane dominators, so he only needs support in order to take kills.

Viper

Viper is a bit similar to Razor because he is a very strong lane dominator that loves to own his lane and snowball into successful 5-man fights and pushes. He is also a semi-carry and usually needs another semi or hard carry on his team to secure the late game.

  • Offensive lanes

It is possible to play Razer in an offensive dual (or tri) lane against the enemy hard carry. The idea is that with Static Link you will totally be able to stop his development. Against a dual or trilane, however, he will not be able to do this on his own, so it is a great idea to combine him with a strong support(s) that can fight – Tusk, Naga, Undying, etc.

Synergy

Good friends to have are:

Disablers: Bane, Shadow Shaman, Clockwerk, Lion, Tusk

Bane Portrait
Shadow Shaman
Clockwerk
Lion
Tusk

Pretty much any hero who can hold the enemy in one place while you drain damage is a friend of yours both in the lanes and in fights.

Other Static Link synergies: Naga, OD, Shadow Demon

Naga siren
Outworld Devourer
Shadow Demon Portrait

If you manage to cast Static Link before Song of the Siren, Astral Imprisonment, Disruption, it will still drain damage during those abilities.

Early & mid game 5-man heroes: Undying, Underlord, Tusk, Bristleback, Troll, Doom, Abaddon

Undying Portrait
Underlord Portrait
Tusk
Bristle Portrait
Troll Warlord
Doom
Abbadon

After the laning stage, you want to snowball, force fights and take objectives in order to secure map control. Since you are not a great ganker, the best partners for the job are other strong 5-man heroes who love to fight in the mid game.

Counters

Strong Against:

Almost all traditional mid heroes: TA, OD, Tinker, Invoker, Storm, DP

Templar Assassin
Outworld Devourer
Tinker
Invoker
Storm spirit
Death prophet

Razor pretty much destroys the majority of the mid heroes – the damage drain allows him to last hit and deny everything. Everybody hates Razor. 

Strong offlaners: Bristleback, Timber, Tidehunter, Underlord

Bristle Portrait
Timbersaw
Tidehunter Portrait
Underlord Portrait

Razor just doesn’t care how tanky you are. He annihilates anybody who can’t escape the Static Link.

Melee carries who are not very mobile: Lifestealer, Troll, PA, Jugger, Lone Druid (Bear Build)

Lifestealer Portrait
Troll Warlord
Phantom Assassin
Juggernaut
Lone Druid

Heroes who can’t break Static Link have a hard time against Razor in fights as he can just follow them and drain all of their damage, making them useless.

Weak Against:

Can easily break Link: QoP, Puck, Mirana, Zeus

Queen of pain
Puck Portrait
Mirana
Zeus Portrait

Those heroes can do well against Razor as they can instantly break the Static Link, usually because they have a mobility skill. Zeus is on the list because he can last hit with spells and doesn’t care much about his damage. QoP is especially strong against him because she eliminates his Static Link and then harasses him with Shadow Strike. 

High range heroes: Sniper, Clinkz, Arc Warden

Sniper
Clinkz Portrait
Arc warden

Those heroes can just attack from a distance so Razor has to dive very deep in order to drain their damage, which makes him an easy target for ganks.

Heroes with illusions: PL, CK, Terrorblade, Meepo

Phantom Lancer
Chaos Knight
Terrorblade
Meepo

Even if you manage to drain the main hero’s damage, Razor just can’t deal with the illusions (or Meepo clones). Moreover, such heroes are usually good at split-pushing (the exception being CK), which means they can avoid fights relatively easily in the early-mid game and out-carry Razor in the late game.

Repositioning/speed boosting abilities: Centaur, DS, Force, Pike

Centaur
Dark Seer
Force staff
Hurricane Pike

Centaur and Dark Seer can boost the speed of the target you’re chasing and they can out-run you. Force Staffs and Hurricane Pikes are also very annoying to play against as they can also break Static Link if used correctly.

Skills

Razor Plasma Field
Razor Static Link
Razor Unstable Current
Razor Eye of the Storm

Releases a wave of energetic plasma that grows in power as it expands, but also zaps on contraction, slowing and dealing damage to enemy units caught in its path. Damage and slow increases with distance from Razor. The Plasma Field hits each unit twice, once each direction.

STATS

Cast Animation: 0+0

Max Extension Radius: 700

Damage Width: 200

Minimum Damage: 30/50/70/90

Maximum Damage: 160/230/300/370

Min MS Slow: 5%

Max MS Slow: 25%/30%/35%/40%

Slow Duration: 1.5

CD: 14

Mana: 125

Plasma Field

Mechanics:

  • Plasma Field expands and retracts at a speed of 636, taking 1.1 seconds to fully expand.
  • The damage and slow are divided into 2 instances. One instance is applied while expanding, and the other one while retracting. Both instances can hit a unit only once each.
  • Plasma Field's damaging area is actually a 200 radius ring, which is right in front of the actual visible ring. This means that upon cast, it instantly damages units within 200 radius and can hit units up to 900 range away. So upon expanding, the damage hits 200 range before the visible ring hits, and upon retracting, the damage hits after the ring passed the units.
  • Plasma Field is centered on and follows Razor.
  • Plasma Field provides 700 radius flying vision during the 2.2-second effect, following Razor and leaving a trail of vision which lasts 2 seconds – it can be used for scouting.

Uses and tips:

Plasma Field can deal pretty good damage if used correctly. While using it you want to position your hero in a way that will hit the enemy for the maximum damage. Since Razor moves very fast, usually this isn’t too difficult to do. It’s easiest to get the max damage just when you engage on your enemies (as you are moving towards them) or when they are trying to run away from you and are creating some distance.

It’s good for farming as well, but you still need to use it for the maximum damage. You can use it to damage two creep camps at once by pulling the 1st one with an attack and walking towards the second one before you use the spell.

The slow is quite straightforward: it is very useful for chasing down enemies and keeping your Static Link attached.

Creates a charged link between Razor and an enemy Hero, stealing damage from the target and giving it to Razor.

STATS

Cast Animation: 0.3+0

Cast Range: 550

Link Break Distance Buffer: 250

Attack Damage Stolen per Second: 7/14/21/28

Link Duration: 8

Buff Duration: 18

CD: 40/35/30/25

Mana: 65

Static Link

Mechanics:

  • Static Link is broken when either unit dies or the link break distance is exceeded. Nothing else can break the link.
  • Static Link keeps stealing damage even if the target's damage has reached 0.
  • The distance between Razor and the target is checked right before each damage steal interval. If the distance is greater upon check, the link breaks.
  • Static Link provides shared vision over the target while draining, which makes it very useful for chasing targets who are trying to juke.
  • Can steal up to 56/112/168/224 (112/168/224/280 with talent) damage when draining for the full duration.
  • Can be cast on heroes, illusions, and creep-heroes.
  • Multiple casts of Static Link stack with each other, each cast placing its own debuff on the target and buff on Razor (useful only with Refresher).

Uses and tips:

The most iconic ability in Razor’s arsenal. This is the main reason why Razor is so powerful on the lane – not only does it give you damage, but it drains the enemy’s damage as well. That makes the difference between your and your opponent’s damage double, which makes it practically impossible to last hit or trade harass against him when the buff/debuff is active.

Another great feature is that Static Link can never be broken unless the break distance is exceeded. That means it drains damage from hidden enemies (OD/SD), from Brewmaster’s Earth, from magic immune units (Razor doesn’t care if you have BKB or Repel).

Passively increases your movement speed and occasionally hits every unit in the area for some damage.

STATS

Radius: 500

Move Speed Bonus: 4%/8%/12%/16%

Damage: 60/80/100/120

Damage Delay: 0.3

Damage Interval: 6/5/4/3

Unstable Current

Mechanics:

  • Triggers on invisible enemies or enemies inside the fog of war as well
  • When Razor is invisible, it still strikes enemies
  • Strikes enemies even while Razor is disabled

Uses and tips:

The movement speed component is pretty straightforward: the bonus is very useful for chasing down enemies with Static Link.

The AoE damage is relatively low, but on higher levels the intervals are small. This means the spell is great for pushing-out creep waves and farming camps - it requires no mana, which is great.

A powerful lightning storm strikes out at enemy units with the lowest health, dealing damage and reducing their armor.

STATS

Cast Animation: 0+0

Search Radius: 500

Strike Interval: 0.7/0.6/0.5

Damage per Strike: 40/55/70

Armor Reduction per Strike: 1

Duration: 30

CD: 80/70/60

Mana: 100/150/200

Aghanim's Scepter

Causes faster strikes that can damage structures as well. When striking buildings, it will only target towers, barracks, and the Ancient.

Eye of the Storm

Mechanics:

  • Eye of the Storm targets the unit with the lowest current health in range first.
  • The storm prioritizes enemies which have the Static Link Vision modifier on them, striking them over any other unit when within range, regardless of health values.
  • The armor reduction debuff on units lasts as long as the storm, or until Razor dies.
  • The strikes first deal their damage and then apply the armor reduction.
  • The strikes are not regular attacks, so they fully ignore effects such as evasion and Damage Block.
  • Does not affect couriers, Roshan, invisible units and units in the Fog of War.
  • Aghanim's Scepter upgraded Eye of the Storm does not lower the armor of buildings.
  • Aghanim's Scepter upgraded Eye of the Storm always prioritizes units over buildings and fully ignores filler buildings (effigies).
  • When Razor turns invisible, the whole storm and its strike turn invisible as well, but still strike nearby enemies without them seeing or hearing them.
  • Eye of the Storm immediately ends when Razor dies.

Uses and tips:

Eye of the Storm can also be used for farming – it deals some damage and lowers the armor and is pretty good for farming Ancients. The cooldown, of course, limits this use, but if you think you have the time to farm for a minute, it’s a good idea to use it. Razor is not a very ult-dependent hero and in the early-mid game, you can often fight decently well even without Eye of the Storm. Getting an important item faster so that you can pressure the enemy team is usually more important than saving your ult for a fight (unless, of course, you are actively trying to force a fight).

The upgraded Eye of the Storm is pretty strong for pushing and has nice synergy with Refresher Orb. Using 2 (or 3!) upgraded ultimates melts buildings in the blink of an eye because they stack.

    Skill Builds

    Skill builds on Razor are definitely not set in stone - he is one of the heroes who'd love to have all three of his spells on high level, so the choice is usually difficult.

    Static Link is your main lane dominance ability. You usually get one or two levels in it no matter what.

    Unstable Current is your free source of AoE damage (great for farming, decent for fights), as well as a big boost to your MS - very important for fights if you want to keep your Static Link attached.

    Plasma Field gives you more nuke damage, which can be great in early team fights, but it is also useful for accelerating your farm if you can afford the mana to spam it.

    Usually, you get one or two points in Link and decide whether to max Plasma FIeld or Unstable Current based on the game.

    Unstable Current & Link Build
    Plasma Field Build
    Razor Static Link
    1
    Razor Unstable Current
    2
    Razor Static Link
    3
    Razor Unstable Current
    4
    Razor Unstable Current
    5
    Razor Eye of the Storm
    6
    Razor Unstable Current
    7
    Razor Plasma Field
    8
    Razor Static Link
    9
    Talent Icon
    10
    Razor Static Link
    11
    Razor Eye of the Storm
    12
    Razor Plasma Field
    13
    Razor Plasma Field
    14
    Talent Icon
    15
    Razor Plasma Field
    16
    Razor Eye of the Storm
    18
    Talent Icon
    20
    Talent Icon
    25
    Pros: lane dominance; non-mana intensive farming; very high MS;
    Cons: low nuke damage;

    The build gets two points in Static Link to give you a big advantage in the lane. Then it maxes Unstable Current - this helps you chase down heroes with Link, but it also gives you a way to farm fast-enough that is not mana intensive.

    On lvl8 you want one value point in Plasma Field. At this point skirmishes are starting to happen and the AoE slow could be very useful for chasing down enemies or even running away (combined with the Unstable Current MS).

    Razor Static Link
    1
    Razor Unstable Current
    2
    Razor Static Link
    3
    Razor Plasma Field
    4
    Razor Plasma Field
    5
    Razor Eye of the Storm
    6
    Razor Plasma Field
    7
    Razor Plasma Field
    8
    Razor Unstable Current
    9
    Talent Icon
    10
    Razor Unstable Current
    11
    Razor Eye of the Storm
    12
    Razor Unstable Current
    13
    Razor Static Link
    14
    Talent Icon
    15
    Razor Static Link
    16
    Razor Eye of the Storm
    18
    Pros: maximum nuke damage; high farming speed; impact from a distance;
    Cons: mana-intensive; slower MS;

    This build still gets two points in Static Link and one in Current to help you in the lane. Afterward, however, you focus entirely on Plasma Field. This increases your nuke damage, slow, and importantly in some situations - impact in fights from a safe distance.

    You max Current afterward to maximize your AoE potential - this also increases your farming speed further.

    The drawback of the build is that it is more mana-intensive and your attack damage would be lower in fights thanks to the lower levels in Link.

    Talents

    +200 Unstable Current Damage

    25

    +100 Attack Speed

    -0.1 Eye of the Storm Strike Interval

    20

    +10 Armor

    +4% Unstable Current MS

    15

    +7 Static Link Damage Steal

    +15 Agility

    10

    +200 Health

    Lvl10: Razor has a horrible agility gain, so the agility talent feels pretty good at level 10. Moreover, you are usually building survivability items first, so the AGI will help you a bit with the DPS. Of course, the HP is not bad if you feel you need more HP to stay alive against enemy nukes. 

    Lvl15: Both talents are a 25% increase to the effectiveness of the ability. Razor, however, is usually fast enough and doesn’t need more movement speed while the damage steal is always useful.

    Lvl20: The armor is usually the way to go, it’s very useful against physical damage cores. The Eye of the Storm buff, however, synergizes well with Aghanim’s Scepter, making the strike interval 0.3s. If you can combine it with Refresher Orb, it destroys buildings like a wrecking ball. You can pick it if you plan to use the pushing item build.

    Lvl25: +100 attack speed is a great talent, much better than its counterpart considering Razor needs AS to increase his DPS because he already has damage from the link.

    Item Builds

    Razor’s item build is extremely versatile, he can build pretty much anything he wants depending on what he needs in the specific game – to be tankier, to push faster or to deal physical or magical damage.

    Standard Build

    The standard package of Phase, Wand, Bands is no surprise – those cheap early game items provide useful stats, mana regeneration and a decent chunk of damage. The Drums are a nice all-around item that makes you tankier, gives speed (which synergizes well with Unstable Current) and the active ability is useful in early fights – it can still be skipped but it’s so cheap that it won’t hurt you to buy it in any game. Afterward you go for more MS and survivability in the form of S&Y and BKB.

    Starting items
    Tangoes
    Healing_Salve_icon
    Mango
    Circlet
    Early Game
    Boots of Speed
    Wraith Band
    Magic wand
    Phase boots
    Drums
    Mid Game
    Sange_and_Yasha_new
    Black King Bar
    Late Game
    Shiva's_Guard_icon
    Aghanim's_Scepter_icon
    Assault_Cuirass_icon
    Tangoes
    Healing_Salve_icon
    Mango
    Circlet
    Boots of Speed
    Wraith Band
    Magic wand
    Phase boots

    Phase Boots: the MS boost helps you stick to your Static Link target. The AS increases your DPS a lot once you've stolen enough damage.

    Drums

    Drums: Everything Drums offers synergizes with Razor – he needs the cheap stats for early game tankiness to play more aggressively and he uses the MS extremely well (combined with his own high MS) to chase down enemies with Static Link and his ultimate.

    Sange_and_Yasha_new

    S&Y: S&Y is cheap, its components are small and useful. It provides more speed (which, together with PT, Drums and Unstable Current, make you run at the maximum speed), damage, attack speed and some more HP. It gives prowess in the mid game fights – your main fight timing. 

    Black King Bar

    BKB: BKB is a much needed defensive item in the mid game fights – it allows you to run at the opponents, drain damage and hit them unpunished. You will be very fast and with a lot of HP, so very few heroes will be able to take you down with physical damage (and even against someone like Clinkz or Ursa, you will drain their damage). BKB can be delayed if you don’t need it early on, or alternatively, you might need it even right after Drums – it depends on the game. 

    Shiva's_Guard_icon

    Shiva: Shiva is the ultimate physical damage protection – it gives as much armor as AC (combined with the armor talent, you easily reach 35-40 armor) and the attack speed slow aura is very annoying to play against, so get it if the enemies can deal a lot of physical damage. The active slow is sure to hit multiple heroes as you’re usually in the center of the fight and it helps you stick to your Link target. 

    Aghanim's_Scepter_icon

    Aghanim: Aghanim is usually built when you’re winning the early game or you’re just stronger than the enemies and you want to siege the high ground sooner rather than later. It’s not that good for fights, however, so you want to be careful when you build it as you might just throw 4200 gold away (it gives mediocre stats and in a more equal game you want to spend every penny wisely, as you are not the fastest farmer). 

    Assault_Cuirass_icon

    AC: Very similar to Shiva, but with some offensive aspect – it offers less protection but the attack speed is good if you want to deal more physical damage. 

    Blink + Euls Build

    This build is extremely good versus lineups without a lot of control but is worse against lineups with lots of DPS because you will be more mobile but a bit squishier. That’s also the reason why it’s good to build Hood before the Euls + Blink – in the early game most of the DPS comes from magical nuke damage.

    The Euls gives you a lot of mana and mana sustain, which helps you spam your Plasma Field much more often (great for farming).

    After the Blink + Euls + S&Y you usually want to make yourself tankier. With what item’s you want to do this is up to you. In the late game, you go for the usual carry items.

    If you don’t have other good sources of tower damage, you can go for Aghanim’s + Refresher in the late game. 

    Starting Items
    Tangoes
    Healing_Salve_icon
    Circlet
    Slippers of agility
    Early Game
    Wraith Band
    Power treads Strength
    Magic wand
    Hood
    Mid Game
    Euls
    Blink_Dagger_icon
    Sange_and_Yasha_new
    Late Game
    Butterfly
    Skadi
    Tangoes
    Healing_Salve_icon
    Circlet
    Slippers of agility
    Wraith Band
    Power treads Strength

    Treads are inferior for chasing down enemies with Static Link, but the STR gives you great survivability that you might need early on.

    Magic wand
    Hood

    Hood: Hood offers nice protection against magical damage and can be built after or instead of Drums. If most of your opponents’ damage comes from spells (for example you play against Zeus, Pugna, Puck, etc.), feel free to go for it. You can even upgrade it into Pipe to help your team as well.

    Euls

    Eul's Scepter: Eul’s is amazing for chasing down heroes with Static Link. It gives MS, but more importantly it lets you lift your target in the air to ensure you will steal at least some damage (this is incredibly useful versus mobile heroes). The active has defensive utility as well – you can always use it when you are getting focused down or to dispel debuffs like silences. Lastly, the MP and mana regen are not wasted as it allows you to spam your Plasma Field for farming more freely.

    Blink_Dagger_icon

    Blink: Blink is great for repositioning, which can be used to more easily stick to a target with Static Link. Moreover, it is great defensively when combined with Eul’s (you can Blink out after Cyclone to survive bad situations). 

    Sange_and_Yasha_new

    S&Y: S&Y is cheap, its components are small and useful. It provides more speed (which, together with PT, Drums and Unstable Current, make you run at the maximum speed), damage, attack speed and some more HP. It gives prowess in the mid game fights – your main fight timing. 

    Butterfly

    Butterfly: It’s a nice late game item if you want to turn to a physical damage carry and it forces the enemies to buy MKB as well. It synergizes well with the attack speed talent at level 25. 

    Skadi

    Skadi: Skadi is another nice late game durability item. It slows movement AND attack speed – combined with Shiva, you can slow the enemy carry’s attack speed by 90.

    Other Items

    Early & Mid Game
    Helm of the Dominator
    Mask of madness
    Hurricane Pike
    Shadow_Blade_icon
    Heaven's_Halberd_icon
    Linken's Sphere
    Late Game
    Mjollnir_icon
    Lotus Orb
    Heart
    Refresher orb
    Helm of the Dominator

    Helm of the Dominator: HotD is a nice alternative to Drums. It doesn’t give any speed or health, but increases your regen and grants a nice attack speed aura to your teammates. The dominated creeps have a variety of useful abilities, you can get an Alpha Wolf for the damage aura, a Centaur to stun, Bear for attack speed aura or small Satyr to purge and slow.  

    Mask of madness

    Mask of Madness: It sounds bad, but MoM could be really good against heroes without much physical damage. Razor’s abilities synergize well with MoM as you just cast them once at the beginning of a fight so the silence doesn’t bother you afterward. MoM increases your DPS in a fight by a lot and also improves your farming speed which is a huge deal for the hero.

    Hurricane Pike

    Hurricane Pike: Dragon Lance offers nice stats and the Force ability allows you to use Static Link better (it makes it harder for the enemy to run away). Hurricane can be built even as a first major item if you are facing heroes like PA, Ursa, Sven, etc., or you could simply buy a Dragon Lance early and proceed with the usual built.

    Shadow_Blade_icon

    Shadow Blade: A nice optional item, it allows you to drain damage in fights and hit the enemy with Eye of the Storm while being invisible. It can also allow you to scout enemies, to position yourself better before a team-fight, etc. The upgrade to Silver Edge counters the passives of heroes like Tidehunter, Bristleback, Timbersaw and many others. It’s a rare choice, however, because it doesn’t give any raw tankiness.

    Heaven's_Halberd_icon

    Heaven’s Halberd: Halberd is a nice tool to help your team deal with strong physical damage burst heroes like Clinkz, Ursa, TA. It also doesn’t slow your item progression much because you want to build items for durability anyway. On top of that, it can later be disassembled for Butterfly. 

    Linken's Sphere

    Linken's Sphere: Useful against BKB-piercing disables like the ones of Batrider, Beastmaster, Bane, etc.

    Mjollnir_icon

    Mjollnir: Mjollnir is a nice DPS item if the enemies don’t have more than one BKB hero. It offers very nice magical damage and the Static Charge (active) is useful because you’re always in the center of the fight. It’s a must against illusion heroes like PL, but in normal circumstances, you would usually get more stat-heavy options that also give you some tankiness.

    Lotus Orb

    Lotus Orb: Lotus is another nice armor item which also allows you to save teammates (it removes a number of nasty stuff like Corrosive Haze, Track, Frostbite and many more) or just cast it on yourself when you go into a fight.

    Heart

    Heart: A survivability item that in the very late game could be combined with your very high armor to make you incredibly tanky. The passive regeneration also allows you to back off for a few seconds and then go into a fight again on full HP – great for sieging.

    Refresher orb

    Refresher Orb: Usually paired with Aghanim, it allows you to cast 2 Eyes of the Storm to destroy the enemy buildings. The damage is no joke, especially if you pick the Eye of the Storm talent at level 20. If you use it in team-fights, make sure to use all of your abilities before refreshing – you can use double BKB, cast 2 Static Links, etc. Don’t forget about the Refresher Shard Rosh gives – sometimes it might be a better alternative than building your own Refresher).

    Early Game

    Razor 350px

    Razor wants to dominate any lane he goes to, whether mid or safe. He can’t kill his opponents without a support’s help, but he can last hit and deny everything for as long as Static Link lasts. Because of this, the key to his laning stage is quite simple – using Static Link as efficiently as possible.

    Farm
    Deny every creep you can
    Harass & zone-out the enemy if possible
    Farming:

    Last hitting and denying with Razor is simple – you drain the enemy’s damage with Static Link and then use it to farm. You generally want to watch the creep wave while you’re draining damage – you don’t want to miss creeps while you’re chasing the enemy. Also, don’t hit the enemy hero while you’re close to the creep wave as you don’t want to draw the creeps’ agro and disrupt the equilibrium.

    You don’t have to drain damage for the full duration – stealing even 20-30 damage is enough to secure every last hit and deny. Don’t forget that you having 30 damage and the enemy has – 30. This is a 60 damage total difference, which is more than enough to secure every single creep.

    Denying everything while the Static Link buff lasts can give you a huge advantage over the lane enemy. It’s not uncommon for Razor to out-level the lane opponent by 1 or 2 levels without actually zoning or killing him.

    Be careful with your Unstable Current too – hitting creeps by accident can push your wave, but being mindful of its distance and CD can help you secure last hits and harass.

    Jungle

    Razor farms jungle very slowly. If max Plasma Field you will be able to out-push the wave, go into the jungle and hit two camps with it to speed up your farm, but even in this case, most other flash-farming carries will out-farm you. It’s usually a much better strategy to farm the lanes until you have your core items and then move somewhere else to fight and push together with your allies.

    Harassing & Killing:

    As we mentioned, one of the most important things is not to hit the enemy while you’re close to the creep wave, because a good creep equilibrium will help you not only to last hit and deny more easily, but you might even be able to zone-out your opponent while you have the Link damage buff.

    Get Boots as soon as possible and start chasing the enemy with Static Link. If you can get in range for Unstable Current to hit, you’ll be able to deal quite a lot of damage. It’s important to know your limits. Don’t overextend – don’t dive towers, unless your teammates can offer slow or disable to kill the enemy. Otherwise just steal damage and use it to zone out the enemy and take the last hits.

    When playing mid, be careful with the enemy tower – hold ALT to check its attack range and try not to get hit while you chase the enemy. If there are no creeps, just stop chasing on the edge of the tower range and don’t back off – stay there until the enemy breaks the link. If the lane is pushed and the tower is attacking creeps, you can use Static Link and chase the enemy for a while without hitting him – that way the tower won’t focus you and the enemy still loses farm.

    Your kill potential is huge if you have a teammate with stun or slow. Getting kills on your own, however, is possible only after you have Phase Boots and even then it’s risky to dive the enemy under tower as his teammates can help him and kill you – you are not very tanky before you get your core items. 

    Timings and Rotations:

    You usually want to stay on your lane for the first 10-12 minutes – it’s usually enough to get Phase, Aquilla, Wand, Drums. Bully your lane opponent, farm your items and if he leaves the lane undefended – push the tower.

    The philosophy with Razor is that you want to gain as much early advantage as possible because this is when you’re the strongest – the window between 10-20 minute. At this point, you can move to another lane to fight – the best choice is the offlane where you have enough space to chase enemies. Even if you don’t get any kills, you will disrupt the enemy carry’s farm and push his tower with your teammates. No other carry can stand against Razor that early in the game, so unless you run alone into 3-4 heroes you will most probably be successful in your aggression.

    That rotation will also create space for another hero to take over your lane and get levels and farm which is always nice, especially for supports who need some core item like Blink Dagger. 

    Video Example:

    (Pre 7.20)

    In this game, we’re going to observe Sylar’s Razor against team LFY. He gets to play against Ohaiyo’s Brewmaster. He decides to start with Wind Lace which is another alternative starting build – it helps you maintain the link for longer.

    Brew tries to pull the creep wave, but Razor drains his damage and Rubick assists for a first blood. (Ohaiyo probably didn’t expect the Razor to deal that much damage with a level 1 Static Link.)

    He manages to get another kill on the Brewmaster at 4:45 thanks to his supports, finishing him with Plasma Field. Since his lane opponent doesn’t show much on the lane, he got 2 points in Plasma Field by level 5 which gave him the opportunity to snipe the Brewmaster.

    Check how he uses Unstable Current to last hit at 5:25 – this usually looks more impressive when there’s an enemy hero to contest it, but it’s an example of how it’s done.

    Brewmaster tries to pull his wave again at 5:55 but the Razor is already very far ahead and gets a kill on the Brew. Take a note how he doesn’t just auto-attack him while under the Drunken Haze effect, he waits for the effect to wear off before he starts hitting.

    He gets Drums at minute 8 which is perfect (60 cs + 3 kills, you literally can’t get more farm) but he stays on the lane as he can pressure neither QoP nor Weaver, as they are too mobile. Besides, the enemies switched lanes so they can give Brew some farm too.  

    At 14:50 you can see how he uses Eye of the Storm to farm ancients in order to finish his S&Y. Another useful trick to see is how he uses Plasma Field to hit multiple camps. 

    Mid & Late Game


    Razor Immortal 350px

    Razor is a momentum based hero. The fact that he dominates his lane allows you to use this resource advantage to force fights favorably and take objectives. Razor is not a fast farmer and you don’t want to go into a passive game because even though he scales well with items he will likely get out-farmed. Forcing fights and taking objectives will allow you to take control of the map and prevent this from happening.

    Take fights with your team
    Take objectives (towers, Roshan)
    Maintain decent farm
    Timings:

    As we already mentioned, as soon as you get your core items you want to start fighting and eventually pushing tier 1 towers. Be careful, however – it’s important not to die trying to take a fight where the enemy has a number advantage.

    Those early fights should give you an advantage over the enemy and allow you to accumulate enough money for the next round of items – most likely S&Y or Halberd (if you have to deal with a hard-hitting carry/mid hero).

    While you’re able to fight very early on, your teammates could sometimes require 15-20 minutes to get their core items too, so you should consider their needs as well.

    If the game is not going that great you might need to farm BKB earlier before you can start fighting – for example after Drums. Either way, you want to have BKB before you start sieging or taking full 5v5 team fights.

    The peak of Razor’s strength is when he has S&Y and BKB – mainly because those items are fairly cheap and if you have an advantage over the enemy, they will allow you to win fights and take towers afterward in the early-mid game. After that, you’re already on a timer – you want to take objectives and end the game before the enemy cores get strong enough to beat you. As a Razor, you rarely want to go into a late game scenario, even if you have another strong core.

    Comeback Potential:

    If you have a teammate who is good in the late game, for example, Medusa, Luna, Gyro, you will have comeback potential, so don’t panic if you’re unable to push early.

    Nonetheless, playing from behind with Razor is usually very hard as the hero farms really slowly and will quickly fall behind other cores who can flash farm. Your hope is to buy a BKB and find good fights to get back into the game.

    If you’re at a disadvantage, it’s good to use a more defensive build – for example, Heaven’s Halberd is a good pick to deal with burst damage cores like Ursa or TA, Shiva will protect you from physical damage overall, etc. Rely on your Link to give you the majority of your damage.

    Thanks to his talents, Razor is not that bad in the late game. With +10 armor and +100 attack speed, paired with a few items, you can be a strong core even later on. The hard part is not to reach the late game with a big farm disadvantage – you will have to fight for map control even if you are playing from behind. Being stuck in your base with Razor for long is almost certainly going to lose you the game.

    Farming:

    Passively farming with Razor in the mid/late game is rarely very profitable as you don’t have any strong wave-clearing abilities, nor do you deal much damage with attacks without the Link damage.

    For that reason, it’s best if you only farm when you need a specific item – most of the times that would be BKB.

    Spam Plasma Field as much as possible (bring Clarities if you need to, they offer great mana regeneration). Try to pull one camp closer to another and activate Plasma Field to hit both camps at once – this will speed up your farming not only because you damage both camps, but because you hit them at the end of the Plasma Field, which increases its damage.

    If you’ve decided you’re not going to fight soon – you can use Eye of the Storm to help you farm the jungle. It’s especially good against ancient camps. 

    Team Fights:

    Razor needs two things to team fight efficiently – control from his teammates (or/and items in the late game) and tanky items to survive for long enough.

    If you are tanky enough, you want to enter the fight right away - ideally with your initiators that provide control, otherwise, your opponents will easily disengage and break the link. If you are not (e.g. you don’t have BKB yet) you might want to wait for your opponents to their most powerful spells and enter the fight right afterward, but this is not a situation you want to be in so try to avoid it!

    Choosing a target to drain damage from can be very important. You want to pick a hero who deals physical damage but also doesn’t have a way to break the link – it’s pointless to use it on blinking heroes like AM or QoP for example (unless they’ve just used the blink). You should also be careful if the enemies have Force Staff – in that case, you want to hug the enemy so that even Force Staff can’t break the link. Static Link has 800 break distance and Force only pushes heroes away for 600 units.

    Once you have enough damage, focus on heroes with low armor so you can quickly eliminate them from the fight. Most supports won’t be able to stop you when BKB is up and will be defenseless.

    One thing to remember is that you don’t have to be the main damage source in a fight. It’s more important that you do your job to take out an enemy core from the fight when you drain 200 damage and break the enemy’s formations by threatening the squishier heroes. Dealing damage is your secondary role in a team-fight.

    EternalEnvy abuses his mobility in this fight to its fullest potential. He starts the fight in the secret shop area and after killing the Puck Blinks to the mid lane, chases down the TB, finds him in the jungle and stops his TP. Then he immediately blinks uphill and finds Omni, who was trying to help him, securing his team another kill.

    Pushing:

    5-man Pushing:

    Since you have low attack damage, you are quite bad at hitting towers. So, unless you have a core hero who can siege, pushing should only be done after taking a team-fight and there are dead enemies. If you fight close to the enemy objectives (because you are the aggressor), your link damage buff might still be up and you can use it to push down towers extremely quickly.

    With Aghanim’s: Agh’s changes how the hero is played in 5-man pushes because it makes you extremely good at sieging. The idea is to clear the enemy creep wave with Plasma Field and attacks, to activate your ultimate and to go close to the enemy tower. Since you are pushing quite fast, the enemy heroes are likely to try to initiate on you sooner rather than later, so it is very important that you are very quick with your BKB (and ideally you have supports with defensive items that can help you out). If you have Refresher (or Refresher Shard), it is even a good idea to activate your BKB preventively. Two back-to-back BKB activations will give you enough time to take the enemy tower and rax, especially with two active ultimates. This will make initiation almost impossible for your opponents.

    Split-Pushing:

    Razor is one of the worst heroes for split-pushing – not only your tower damage is negligible but you can’t clear creep waves at even half-decent speed. For those reasons, it’s best if you don’t go too far into the enemy territory on your own, even though you are fast. Razor is a 5-man hero and you should play him as such.