Lion Guide by LeBron
Artist: Jeremy Klein
Author:
LeBron & Co.
Date: 11/2018
Tags:
text
Lion
Builds
Tactics
Analysis

Welcome

Welcome to Lebron's Book of Lion, a hero guide part of the Book of Dota series!

Here you will find all the information you need to learn to play Lion on a high level – from drafting and builds to the optimal playstyle in different lanes and situations. We hope you’ll enjoy this guide and find it useful!

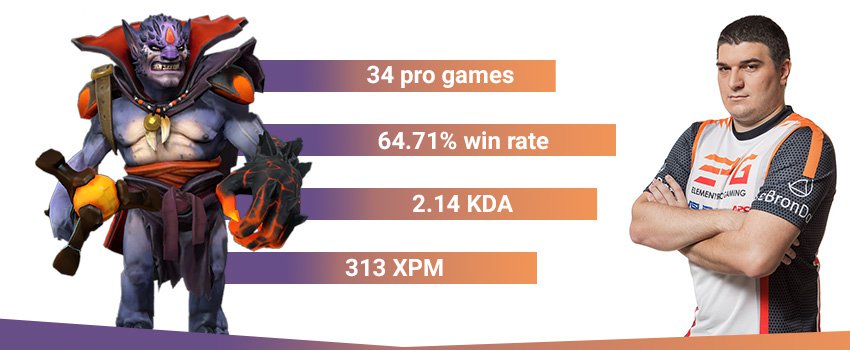
Lebron Lion Stats
TL;DR:

Draft: Picking Lion early on is not a big problem, but ideally you want to do it after you see some elusive cores on the enemy team that you will be able to counter with your disables. Moreover, Lion is relatively weak against 5-man pushing drafts. You also want to combine him with a carry with kill potential that can use your long disables to punish the enemy offlaner(s).

Early Game: Babysit your carry in the first few minutes and attempt kills if possible. Afterward, buy your boots and start roaming – try to set up kills in the other lanes as well. When you get your ultimate ideally you want to use it on a high-value target (one of the two enemy cores), but if not possible any kill will be useful and will propel you forwards towards getting your Blink Dagger.

Mid & Late Game: Get Blink as fast as possible – you can even ask your cores to leave you a free lane for a little while to farm it faster (especially when your ult is on CD) and your other support to take over buying Wards until you get the item. Once you have Blink, stick with your allies with the highest kill potential, try to gank and set up kills for them. The goals are to be aggressive around the map and claim map control, which will allow your cores to out-farm the enemy team and secure the game. Don’t forget about warding and dewarding.

Authors

Nikola "LeBronDota" Popović
Endorsement & Info

LeBron is a professional Dota player currently playing support for EPG.

He rose to fame after finishing first in a season of the Faceit Pro League - a very impressive feat for a support player. Later he found success in various pro teams, including EPG and Na'Vi.

Nikolay "CTOMAHEH1" Kalchev
Info & Editing

CTOMAHEH1 started his pro career as a support in Basically Unknown together with Mind Control. Since then he has consistently been playing on the European T2 scene, most recently on Unchained Esports.

His highest placement on the EU ladder is top 100 - he plays all roles (mainly support), which is untypical for high-ranking players and shows his great versatility and understanding of the game.

Kyril "MrNiceGuy" Kotashev
PM, Writing & Editing

Esports and gaming enthusiast since forever and founder of Dotahaven.

Has been playing Dota since 2005 (5.84). An Ancient I player in Dota 2.

Oh, hell yes!

Lion is one of the strongest nukers in Dota 2. He also has great disables that allow him to initiate, counter-initiate and CC enemies for a long time during engagements. His high control and nuke potential makes him a great ganker right from the early stages of the game and the fact that he is relatively resource independent make him a very well-rounded support hero.

Lion is usually played as a support and very rarely as a solo Mid. As a support, he does quite well against most offlaners when combined with carries with good damage thanks to his great disables. He can also utilize his kill potential through roaming.

Lion Loadout
Stats
Level 1
Level 15
Level 25
STR
18
Low
57
Very Low
83
Very Low
AGI
15
Low
36
Low
51
Low
INT
28
High
60
Very High
90
Very High
Attack
47-53
Medium
89-95
Medium
119-125
Medium
Armor
1.4
Low
4,76
Very Low
7,16
Very Low
Resistance
26
Medium
27
Medium
28
Medium
HP
524
Low
1064
Very Low
1460
Very Low
MP
345
High
975
Very High
1425
Very High
MS
292
Medium
295
Low
297
Low
STRENGTHS

MAJOR

Control:
Lion has two control abilities that make him one of the best disablers in the game. His Hex is a perfect tool for initiation because it has an instant cast time and a long disable duration. Especially when combined with a mobility item like Blink Dagger, Hex makes Lion one of the best single target initiators in the game. The spell has a very long duration right from lvl1, which makes it ideal for early game aggression and kill attempts. The AoE stun of Earth Spike is a valuable CC not only for ganks but also in clustered team fights – if you use it accurately you can hit multiple enemies and set up for the abilities of your allies.

Nuke Damage:
Finger of Death is one of the most potent single target nukes in the game. The spell deals 600 damage at level one, which is an insane amount of burst early on that requires very little on top to secure a kill. This nuke allows Lion to gank and burst heroes on the map quite easily whenever the spell is off CD. Earth Spike also deals decent nuke damage and can help you finish off Finger of Death targets by yourself.  

MINOR

Mana Sustain:
Lion doesn’t need Mana sustain items to afford using his abilities – his Mana Drain spell allows him to very easily restore his Mana from creeps or even enemy heroes. In theory, you might not need to go to base to regenerate throughout the whole game if you get some health sustain items. Thus you can gain valuable time to be active around the map. 

WEAKNESSES

MAJOR

Weak Survivability:
Lion is a very squishy hero. He has low armor, low movement speed, low HP and on top of that has no escape mechanism. His only saving grace are his disables, however, sometimes they are not enough – especially in team fights with multiple heroes that can focus you and kill you. This is a big problem because the hero is an initiator. If your opponents counter-initiate you are likely to pay with your life.

Low Mobility:
Being an initiator, the relatively low MS doesn’t allow Lion to get in range of heroes in order to cast his spells. Therefore, he needs to buy mobility items like Blink or Force Staff to help him close the distance. If the early game doesn’t go well for him, he will have a lot of trouble getting good initiations because he will lack the farm to get his needed items.

MINOR

No Anti-Push/Low AoE damage:
The only AoE spell that Lion has is Earth Spike, which doesn’t have high range and deals a moderate amount of damage. Therefore, Lion can hardly anti-push or deal with heroes that have multiple summons (like Nature’s Prophet, Broodmother). 

Replays

COL vs Optic Gaming, CHINA DOTA2 SUPER MAJOR

Match ID: 3847936146
Replay

Saksa plays a hard support Lion against Optic Gaming and contributes to the victory of his team. He roams a lot in the early game (which is possible because his cores are relatively independent heroes that don’t need too much support). He helps his NP win the mid lane, provides a lot of vision and controls the runes efficiently. Most importantly, even though he is very active he dies twice for the whole game (which is, of course, helped by the fact that his team is ahead and isn’t losing team fights).

It is worth mentioning that COL picks Lion after they know they are playing against TB – Mana Drain + Hex are extremely useful for instantly destroying illusions.

Drafting

When picking Lion you want to provide good setup and control for heroes that need to deal damage but can’t get close to their targets because they lack lockdown. Lion’s good initiation and burst potential are very powerful, especially against elusive targets.

Usually, you want to get Lion as a ganker/initiator to counter specific heroes (typically mobile/elusive enemies) that would otherwise be very hard to gank and shut down. Lion is great at ganking early on and starting fights in the mid and late game when he gets a mobility item like Blink Dagger. When you draft the hero, you want to have good support and core partners for him that can benefit from his great control spells and deal high amounts of damage.

When it comes to substituting Lion in a strategy, you need to decide which aspect of Lion you need to search for in your substitute. If you want to pick Lion for his disables, you should look towards picking another hero that provides a lot of control and initiation (e.g. Rhasta). If your idea for drafting Lion is his burst, you can get a hero with a lot of nukes but fewer disables (Lina).

Support Lion

Lion is good at dealing with the enemy offlaner early on. If you combine Lion with partners that have good damage burst but need lockdown (Gyro, Ursa, Jugg), the enemy offlaner will have a hard time getting close to EXP/farm range. If the opponent gets out of position, your disables will usually give enough time to your carry and ideally the other support to get close to kill the offlaner.

With Lion, you can also roam from early on and set up ganks all over the map. You can combine the hero with another strong early ganking support to increase the pressure on the lanes. Lion doesn’t need a lot of levels to start roaming. In fact, you can be very effective even at level one and two, but you are pretty slow so you usually want your boots before you start roaming.

Lion has relatively bad stats and deals low damage, which means he is not great in offensive dual and triplanes and he prefers to be a safe lane support when he can zone out, pull,  and roam later in the laning stage.

Mid Lane Lion

The idea of Lion mid is to secure level 6 and a first mobility item (usually Blink Dagger) much faster than you could in a support position. Once he reaches those objectives, Lion can start ganking and setting up kills around the map very efficiently. In contrast, a support Lion will need a lot more time to get the required gold and XP and will miss a valuable ganking timing.

This, however, is very unusual nowadays because you want your mid to be a much better farmer with much greater carry potential. That being said, if both of your side lane cores are farming carries, then a mid Lion to rotate and create space is not terrible and could work.

Synergy

Good friends to have are:

Heroes that need set up to land their spells in the early game: Chen, Enchantress, Slardar, Centaur, Kunkka, Mirana

Chen
Enchantress
Slardar Portrait
Centaur
Kunkka
Mirana
Combining Lion with heroes that need set up for their spells can create a potent combo with a high kill potential.

Lion has two disables that can control a target for a very long duration (at level 2, you can disable a target for more than 3 seconds with Hex and Earth Spike). Heroes that need to get very close in order to use their abilities (almost melee range) but can’t close the gap between themselves and the target benefit a lot from such disables early on. Moreover, heroes who have difficult-to-land skill shots can also benefit greatly from your long single target disable. Enchantress and Chen are on this list because the long disables allow their creeps to get in range and use their spells and attacks, which is quite powerful for early game ganks.

Right-clickers who need lockdown to be able to stick to their target: Ursa, Gyro, Jugg, Anti-Mage, Sven

Ursa Portrait
Gyro
Juggernaut
Anti mage
Sven
Lion is a very good partner for strong physical damage dealers that lack the control to latch onto their targets.

Many physical damage dealers have very high damage potential but get easily kited and can’t stick to or get close to their targets. Lion provides the lockdown that such heroes need. Heroes with high damage output but no control in the early game (Ursa, Gyro, Jugg) are probably the best examples.

Counters

Strong Against:

Squishy but mobile heroes: Slark, Weaver, Puck, Windranger, Queen of Pain, Ember Spirit, Storm Spirit

Slark Portrait
Weaver
Puck Portrait
Windranger
Queen of pain
Ember Portrait
Storm spirit
You can pick Lion to be able to latch onto and burst mobile but squishy enemies.

The control that Lion provides (Hex plus stun) in combination with his nuke (Finger of Death) is a great counter to squishy but elusive enemies. The instant disable doesn’t allow them to use their escape mechanisms in time, while the Burst finishes them off quickly before the disable ends. Slark deserves a special mention, as Hex is the only disable type that he cannot dispel with his

Easy to kite cores: WK, Sven, Jugg, Legion, Troll

Wraith King
Sven
Juggernaut
Legion commander
Troll Warlord
Picking supports with good disables like Lion is a great idea if the enemy team relies on easy to kite melee carries.

Melee carries that have trouble sticking to their target have a very difficult time playing against both of your disables. Hex is also instant, which allows you to use it before they have a chance to click BKB.

Heroes that depend on their Mana: Wraith King, Abaddon, Void, Storm, Morph

Wraith King
Abbadon
Faceless Void Portrait
Storm spirit
Morph
It is a good idea to pick Lion to counter heroes that are mana dependent but have a limited Mana pool.

Lion’s Mana drain ability can cripple heroes that rely on their spells in fights. Heroes with a low mana pool are particularly vulnerable to the drain – in a few seconds their Mana will be completely gone and their impact in fights will be reduced greatly. Heroes with large mana pools are much less susceptible because Mana Drain steals a fixed amount of mana per second. 

Strong but few illusions: CK, Terrorblade, Naga

Chaos Knight
Terrorblade
Naga siren
Hex and mana drain help lion deal with illusions.

Hex and mana drain instantly kills illusions, which makes Lion a decent support counter against illusion carries. Heroes that use a few high-CD illusions are most vulnerable.

Weak Against:

Dominant laners: Bane, Chen, Broodmother, Nature’s Prophet

Bane Portrait
Chen
Broodmother Portrait
Nature's Prophet Portrait
Against strong laners and laning combinations, Lion can struggle because he doesn’t provide enough damage before getting his ultimate and a high level of Earth Spike.

Lion is relatively weak in the lane – he provides great disables, but very little damage early on and he is slow and squishy. If your allies don’t have enough damage to compensate for your lack of such, your lane will suffer. You will have good disables but no real follow-up in terms of damage to harass or get a kill on your opponents. Lion is especially weak against heroes that have summoned units early on (for example Broodmother, Nature’s Prophet) – he has no good AoE damage to deal with them effectively and his low stats make him a great target to harass and even kill.

Hero Hunters: Clinkz, Nyx Assassin, Clockwerk, Bat Rider, Tiny

Clinkz Portrait
Nyx
Clockwerk
Batrider
Tiny
If the enemy team has very strong pick-off potential, you will have to play very defensively and stay further back behind your teammates in order to prevent enemies from initiating on you.

Being a squishy INT hero without escape mechanisms, you can easily be brought down if you get caught on your own. Moreover, heroes that can easily jump on you from afar and get you killed before the fight starts will prevent you from using your powerful disables and nuke during the engagement.

Pushers: Death Prophet, Chen, Enchantress, Nature’s Prophet, Dragon Knight

Death prophet
Chen
Enchantress
Nature's Prophet Portrait
Dragon knight
Lion can struggle against a 5-man pushing lineup since he has no good anti-push and most of his skills are single target.

Having no good anti-push to clear out creep waves/summoned units or to harass the pushing heroes, Lion can hardly deal with pushes. He struggles greatly against tanky pushing line-ups since his burst won’t be enough to bring a target down. If enemies group up, his ganking/pick-off potential is also reduced – if he initiates on a target, he can be easily brought down by other enemies that are close and can easily counter-initiate on him. 

Skills

Lion Earth Spike
Lion Hex
Lion Mana Drain
Lion Finger of Death

Rock spikes burst from the earth along a straight path. Enemy units are hurled into the air, then are stunned and take damage when they fall.

STATS

Cast Animation: 0.3+0


Cast Range: 500


Spikes Travel Distance: 825


Damage: 80/140/200/260


Stun Duration: 1.4/1.8/2.2/2.6


CD: 12


Mana: 70/100/130/160

Earth Spike

Mechanics:

The skill can only be targeted at a range of 500 units on enemies or the ground, but it hits units up to 950 range away. This is because the Earth Spikes travel for a length of 825 units but hit in a radius of 125 (hence a range of 825 + 125 = 950). 

The wave of spikes moves at 1600 units per second – this means that the units at the end of the Earth Spike (825 length) will be hit after 0.52 seconds. The closer you stay to a target, the sooner the Earth Spikes will stun it. In that sense melee range, Earth Spike are the easiest ones to hit reliably and almost instantly.

Earth Spike can hit and stun invisible units. You can actually tell if you have hit or missed by the damage animation on the spell. If the animation triggers, then you have successfully landed the blind Spikes. This information can be very useful to your allies that can cast some follow-up AoE spells and secure a kill.

Aiming:

If you are too far away from a target to cast the ability on it (the target is outside 500 range), you can target the ground in the direction of the enemy – the spikes will hit him even if he is 950 units away. This tactic is very useful for hitting escaping heroes – if you target such a hero directly and he moves beyond 500 range, your own hero will uselessly run after the target instead of casting the spell.

When targeting heroes very close to you it is a good idea to click on the actual hero – this way even if he tries to dodge, Lion will cast the Spikes in the right direction (the close range stun is almost instant). When there is some distance between you and your target, however, it is better to predict his movement and target the Spikes on the ground where the target will be when the projectile reaches him. If you click on the target, the mentioned long range delay of the stun might cause you to miss. 

Strategic use:

Earth spike scales well with levels – both the stun duration and the damage get increased. Therefore it is worth maxing Earth Spike as fast as possible. The ability is both your AoE disable in fights and a farming/harassing tool.

In team engagements, you should try to get multiple targets disabled. To do this you must position yourself in such a way that you and your targets are standing in a straight line (of course, this is much easier with a Dagger). Afterward you need to target the ground on that “line” rather than a specific hero unless you value the disable on him more than the disable on the other target(s). This way even if one of the targets moves, your hero will still cast the spell in the right direction.

Even though Lion isn’t a hero with tremendous team fight presence if you learn to consistently land multiple-hero Earth Spikes you can be a great team-fight initiator (or counter-initiator). 

In ganks, it is best to use the spell as a follow-up disable to your Hex. The reason is that the Hex is instant, it is much more reliable and it serves as a set-up for the Spikes (it is impossible to dodge the Earth Spike with 100 MS). If you don’t overlap the stuns you can disable a single target for more than 6 seconds. If for some reason the Hex is not available, you can use a mobility item to get in close range to the target and cast Spikes immediately afterward – melee Spikes are also almost impossible to dodge unless your target has some instant escape mechanism.

When it comes to farming, you can use the spell on CD because you have Mana Drain that can sustain your mana.

Transforms an enemy unit into a harmless beast, with all special abilities disabled.

STATS

Cast Animation: 0+0.53


Cast Range: 500


Set Movement Speed: 140


Duration: 2.5/3/3.5/4


CD: 30/24/18/12


Mana: 125/150/175/200

Hex

Mechanics:

Hex is a very good early game disable because it lasts for 2.5 seconds even at level 1. The spell doesn’t scale too well with levels – the duration increases only by 0.5 seconds per level. The CD, however, decreases significantly (from 30 to 12 at level 4). Leveling up Hex means that you will be able to use it multiple times during a long engagement. Nevertheless, most of the time 1 level in Hex would be sufficient especially in the early game. 

Likely the most valuable quality of the spell is that it has instant casting animation which makes it a great initiation tool (enemies can’t dodge it), especially when combined with a mobility item to get you within 500 range.Hex instantly destroys illusions, a useful ability to check if a target is a hero or an illusion or simply to get rid of a single problematic illusion.

Uses and Tips:

The use of Hex is fairly straightforward – the ability is your primary initiation spell to be cast on an enemy before he/she can escape or use BKB. Keep in mind that Hex has instant cast and is hence a better initiation tool than Earth Spike which does not instantly stun targets. You should, therefore, cast Hex first and then follow up with Earth Spike every time you are ganking or when you want to save a teammate.

Absorbs the magical energies of a target enemy unit by taking mana from it every second.

STATS

Cast Animation: 0.3+0


Cast Range: 850


Max Channel Time: 5


Link Break Distance: 1200


Mana Drain per Second: 20/40/60/120


Move Speed Slow: 20/24/28/32%


CD: 16/12/8/4


Mana: 10

Mana Drain

Mechanics:

The spell can be cast from 850 range but has a longer, 1200 break range. This means that you can cast it on an enemy when he is just at the 850 range line and keep draining his Mana until he reaches the 1200 range breakpoint.

The ability destroys illusions after 0.25 seconds. This makes Lion a good hero to deal with illusions, especially once Mana Drain is at level 4 – you will be able to destroy one illusion every 5 seconds.

After using your full control combo you usually want to cast Mana Drain for the 20% slow to allow your allies to chase and finish the kill.

Uses and Tips:

Mana Drain can cripple the presence of some mana-dependent heroes with low mana pool (e.g. Chaos Knight, Wraith King). The drain will leave them without Mana in just a few seconds. You should ideally choose to drain the mana of enemies that have important spells to cast but have a small Mana pool to be drained away quickly. In addition, if you face heroes with illusions like Naga Siren, you can use Mana Drain to destroy hero illusions and lower her effectiveness in fights.

Outside of fights, Mana Drain is a very important utility spell. You can use it on the ranged lane creep or neutrals that have mana to recover a big portion of your own mana. This way you will be able to always keep yourself at maximum mana and use your Spikes and Hex very often – for harassing, farming or attempting kills.

Rips at an enemy unit, trying to turn it inside-out. Deals massive damage and grows stronger with each life it consumes.

STATS

Cast Animation: 0.3+0.5


Cast Range: 900


Effect Delay: 0.25


Damage: 600/725/850


CD: 160/100/40


Mana: 200/420/650


Damage per Kill: 50


Aghanim's Scepter

Increases damage. Decreases cooldown. Finger of Death hits all units in a small area.

Finger of Death

Mechanics:

The spell has fairly simple mechanics - it deals a high amount of burst damage to a single target. It has a high range for a nuke spell (900), which allows Lion to use it from a safe distance as well as to secure the kill on a fleeing enemy.

At level 1 the spell deals more direct nuke damage than any skill in Dota, which makes Lion a very good ganking hero – getting solo kills is quite easy on targets without a high HP pool. Finger of Death also scales very well with levels – the CD decreases greatly and the damage is slightly increased. The CD reduction allows Lion to gank and burst targets much more often.

Finger of Death has 0.25 seconds delay after casting before the damage is applied– this means that enemies can dodge it using certain abilities like Phase Shift or BKB. When you are targeting a hero that has a mechanism with which to dodge the spell, it is better to use it while the enemy is disabled by one of your lockdown abilities.

Uses and Tips:

Finger of Death’s use in the game is quite one dimensional – it provides damage to secure kills. You should utilize the spell immediately once you get to level 6. The longer you wait, the tankier enemies will become and the less effective your Finger of Death will be.

Since the spell has a quite long CD at level 1, make sure that you use it only when a kill is more than likely to happen. Starting with a Finger before locking down your target might allow him/her to run away. Search for good initiation first and only then use your spell to secure the kill (bear in mind that the long range allows you to use it once the target is outside of attack range).

Each successful kill increases the spell's damage. This is a great reason to try to use Finger as often as possible to secure kills.

The higher the level of your Finger of Death, the lower the cooldown becomes (40s on lvl 3, 20s with Agh's). This means that in the later stages of the game you can afford to use it more freely in fights as a source of damage – don’t try to always save it for the perfect target and the perfect situation. Even if your target ends up surviving, the spell will most likely be off CD for the next gank/engagement.

Skill Builds

Lion’s skill builds aren’t very versatile. You always skill up Earth Spike with priority because the spell scales better than the hero’s other skills. Getting 1 point in Hex is also very common since the spell disables for 2.5 seconds on lvl 1. After getting one point in Hex and 4 points in Earth Spike you would usually want to max your Mana Drain to slow targets and counter mana-dependent heroes in fights and to be able to restore your Mana quickly without going back to base. The variation in Lion skill builds is usually when to get the first point in each spell. Earth Spike on lvl1, Hex on lvl2 and Mana Drain on lvl4 is the standard build, but depending on the situation it is possible to e.g. get Mana Drain earlier.

Standard Build
Hex Build
Lion Earth Spike
1
Lion Hex
2
Lion Earth Spike
3
Lion Mana Drain
4
Lion Earth Spike
5
Lion Finger of Death
6
Lion Earth Spike
7
Lion Mana Drain
8
Lion Mana Drain
9
Talent Icon
10
Lion Mana Drain
11
Lion Finger of Death
12
Lion Hex
13
Lion Hex
14
Talent Icon
15
Lion Hex
16
Lion Finger of Death
18
Talent Icon
20
Talent Icon
25
Pros: max nuke damage; decent control; mana sustain;
Cons: high CD on Hex;

This is the most standard build for Lion. It prioritizes Earth Spike 1st as your main source of damage and a decent source of control, Mana Drain second for mana sustain and Hex third, but invests 1 point in Hex early on to benefit from the long disable from the spell ASAP.

It is possible to get mana drain on lvl2 and Hex on 4 if you think the Mana Drain harass would be more useful in the lane (i.e. you don’t have kill potential and you need to focus on harassing and zoning out).

Lion Earth Spike
1
Lion Hex
2
Lion Earth Spike
3
Lion Hex
4
Lion Earth Spike
5
Lion Finger of Death
6
Lion Earth Spike
7
Lion Hex
8
Lion Hex
9
Talent Icon
10
Lion Mana Drain
11
Lion Finger of Death
12
Lion Mana Drain
13
Lion Mana Drain
14
Talent Icon
15
Lion Mana Drain
16
Lion Finger of Death
18
Talent Icon
20
Talent Icon
25
Pros: max nuke damage; max control;
Cons: 0 mana sustain;

This build focuses entirely on maximizing your disable duration as fast as possible in order to increase your kill potential. This is especially valuable if you have allies with good damage output but low DPS. The obvious problem of the build is that you don’t have the mana sustain from Mana Drain, but you can work around this by buying a magic wand and using Clarities often.

Talents

+325 AoE Hex

25

+1000 Earth Spike Range

+2 Mana Drain multi targets

20

+500 Health

+120 Gold Per Minute

15

+200 Finger of Death damage

+75 Cast Range

10

+90 Damage

Lvl10: If you are building an Aether Lens you should definitely take the Cast range talent, but there are some cases in which +90 damage is better. I.e. if you have a really good early game and you have early lvl10 or maybe if you have some damage Aura cores Drow, Venge, Luna and you want to contribute to kills with right-clicks. Bear in mind that your usual play style in fights doesn’t allow you to right click enough to justify the talent.

Lvl15: Finger of Death can increase your burst potential and help you get some kills. If your nuke damage is not that important in the game to secure kills, however, you can go for the slight GPM boost to help you buy the support consumables.

Lvl20: Generally speaking, health is almost always the best choice. The mana drain talent is most useful against illusions, because you will be able to destroy three at a time.

Lvl25: Hex can be very useful against illusions, and can one-shot them. You can also take it when you have DS or Magnus on your team to increase your AoE potential or when you are playing versus multiple melee heroes that tend to commit to the same target (it will be easier to Hex them simultaneously). Otherwise, the Earth spike talent is the safer choice – it will allow you to cast the spell from a safe distance without needing to jump into the fight until you are certain you want to.

Item Builds

Lion is a hero for whom mobility is critical because it allows him to get within range of his targets and to disable them. Therefore, the core of his item choices aims at providing enough mobility to give the hero the needed initiation potential. Since Lion isn’t a carry, the rest of his choices are standard support and utility items.

Pos 5 Support Lion

The proposed build fits a support, Lion. You start with Tranquil Boots that help you regen HP and move faster around the map so you can gank and help out struggling lanes. The wand gives you some cheap stats and helps out with your mana problems. You rush your Blink Dagger right after in order to initiate ganks and fights. You decide to go for a Force Staff for more mobility and the ability to save your teammates and in the late game, you invest in Lotus Orb.

Starting items
Animal Courier
Tangoes
Clarity
Wards Icon
Early Game
Tranquil Boots
Magic wand
Wind lace
Mid Game
Blink_Dagger_icon
Force staff
Late Game
Lotus Orb
Animal Courier
Tangoes
Clarity

Clarities: Although Lion has Mana Drain which helps him sustain his Mana, you will usually not skill it up until level 4. Therefore, you will need Clarities to regenerate your Mana in order to roam and gank more often around the map.

Wards Icon
Tranquil Boots

Tranquil Boots: Lion is a slow hero and benefits a lot from the high MS that these boots give him. Moreover, he doesn’t need Arcane Boots because he has an ability that allows him to sustain his mana very easily. The mana sustain from Mana Drain and the HP sustain from the Tranquils could mean that you never need to go back to base. 

Magic wand

Magic Wand: Gives you extra Mana/HP boost that helps you survive longer in fights and cast more abilities.

Wind lace

Wind Lace: The high-MS combination of Wind Lace and Tranquils helps you reach heroes and initiate with your disables before you get your Blink Dagger.

Blink_Dagger_icon

Blink Dagger: Blink is perhaps the most important item for Lion because it allows you to Hex-initiate on targets from afar. This mobility is incredibly empowering for him – the hero is slow and his Hex range is relatively small (500). Blink helps him close the distance between himself and his targets and initiate in an instant, making him one of the strongest single target initiators in the game.

Force staff

Force Staff: You have no escape mechanism and if you get focused you are likely to die; Force solves that problem to a certain extent. You would often get Force Staff even if you already have Blink Dagger - when you Blink in you want to have a way of getting to a safer position. Force can help you move away from danger after the Blink initiation.

Lotus Orb

Lotus Orb: can be very useful in situations where your frontline cores need some protection.

Pos 4 Support Lion

You start with Lace to be able to latch onto opponents with Hex easier. The idea is to roam and gank in the early game and set up kills for your team. In the early game, you buy the regular support items if you need to but you try to save up for your Blink Dagger and get it ASAP. If you are successful in your ganks and you make use of pulls you should do so in a decent timing. After getting the Blink you finish Arcanes and immediately disassemble them to finish your Aether Lens. Afterward you get a Glimmer Cape to make your allies more survivable. In the late game, you get an Aghanim’s for the AoE damage.

Starting items
Wind lace
Tangoes
Clarity
Early Game
Boots of Speed
Blink_Dagger_icon
Mid Game
Arcane Boots
Aether Lens
Glimmer Cape
Late Game
Aghanim's_Scepter_icon
Wind lace

Wind Lace: The high-MS combination of Wind Lace and Tranquils helps you reach heroes and initiate with your disables before you get your Blink Dagger.

Tangoes
Clarity

Clarities: Although Lion has Mana Drain which helps him sustain his Mana, you will usually not skill it up until level 4. Therefore, you will need Clarities to regenerate your Mana in order to roam and gank more often around the map.

Boots of Speed
Blink_Dagger_icon

Blink Dagger: Blink is perhaps the most important item for Lion because it allows you to Hex-initiate on targets from afar. This mobility is incredibly empowering for him – the hero is slow and his Hex range is relatively small (500). Blink helps him close the distance between himself and his targets and initiate in an instant, making him one of the strongest single target initiators in the game.

Arcane Boots

Arcane Boots: Arcanes are not the best boots for Lion since you already have 3rd spell to restore your mana, but can be useful for your team and if you can disassemble them later for Aether Lens.

Aether Lens

Aether Lens: Lion uses very well the range of the item with Hex and Earth Spike – it makes it easier to use the spells in fights from a safer distance. The mana pool of Aether Lens allows you to use your spells in fights more freely – Finger of Death is incredibly mana intensive and without any mana pool items you might have mana problems in the middle of fights.

Glimmer Cape

Glimmer Cape: A cheap support item which is good in various situations. You mainly use it to save your allies when they are getting focused, but you can use the invisibility to initiate fights if you don’t have Blink or to disengage safely after Blinking in and using your abilities.

Aghanim's_Scepter_icon

Aghanim’s Scepter: Aghanim’s is the arguably the late game core item for Lion. The problem is that as a support you rarely have enough resources to get it. The Aghanim’s upgrade not only reduces the CD and increases the damage of Finger of Death, but also causes your ultimate to hit units within 200 AoE of the primary target. The AoE effect and low CD are not only useful in fights – in the very late game Lion can use his ultimate on CD to farm up jungle camps/stacks and lane creeps. If your opponents tend to clutter together or your teammates can set up for your ult (Vacuum or RP), then trying to get the Aghanim’s as fast as possible might be a smart choice.

Other Items

Early Game
Infused Raindrop
urnn
Mid & Late Game
Euls
Ghost Scepter
Drums
Shadow_Blade_icon
Ethereal Blade
Infused Raindrop

Raindrop: you are very squishy so if you are playing against strong nukes Raindrop are a great solution.

urnn

Urn of Shadows: It is preferable to always have one Urn in a team; if nobody else builds it, you should. The extra HP helps alleviate the very low HP gain of Lion.

Euls

Eul’s Scepter of Divinity: Eul provides good stats for you - INT, mana regen, and MS.  Lion is a slow hero and the extra MS helps him move faster around the map and is quite useful for repositioning yourself in team fights or running away from danger.

Ghost Scepter

Ghost Scepter: This is an item to deal with physical damage dealers. Since Lion doesn’t have any natural escape, Ghost can help him survive if he gets focused by heroes, especially once they have BKB and Lion’s disables are of no help. 

Drums

Drum of Endurance: If you are having a good game you can buy Drums and combine them with your lvl10 damage talent do increase your kill potential. 

Shadow_Blade_icon

Shadow Blade: makes finding pick-offs and initiating ganks much easier, but it is quite expensive and you should try to buy it only if you are having a great game.

Ethereal Blade

Ethereal Blade: Ethereal synergizes well with the high burst damage of Finger of Death. Moreover, the CDs of E-blade and level 3 Finger of Death are almost the same. Therefore, you can have your combo ready nearly at any time.

Early Game

Lion 350px

As a support, in the laning stage, your primary focus will be to set up kills for your teammates. You can start rotating effectively even as early as level 1, but usually, you want to spend the first few minutes of the game zoning out the enemy offlaner and helping your carry.


In the ideal situation you will be able to set up one or two kills on the enemy offlaner for your carry and when the first night comes you will start rotating between the lanes with your other support.

Farming:

Earth Spike allows you to last hit multiple creeps and in the same time mess up the last hitting of your lane opponents (by stunning them and denying creeps while they are disabled). The Mana sustain coming from Mana Drain helps you keep spamming your abilities. You will be doing this only when your core has left you alone in the lane e.g. in order to get your Blink Dagger faster.

Harassing:

Passive Harass:

You have a decent attack animation, good damage, and high range –against melee heroes or ranged heroes with a lower range, you should be able to use your attacks to harass quite easily by kiting.

Against most ranged heroes you need to be careful - you are a slow hero with relatively low armor. If you get in trouble you should use your disable to disengage.

Active Harass: 

You have two abilities that allow you to harass the enemy. 

First, Earth Spike is a spammable spell that both stuns and damages the opponents. As we mentioned above, the stunning aspect of the spell is quite important in the laning stage – you can mess up the last hitting of the enemy hero. When you Earth Spike reaches level 2-3 you should focus even more on harassing with it as the spell will deal significant damage. Before that, use Earth Spike only to disrupt the last hits of the enemy hero – it is not worth it to cast it on the opponent just to deal 60 damage and achieve nothing else.

Second, Mana Drain, although it does no damage, is a great harassing tool – by draining enemies’ mana you prevent them from using their spells offensively or defensively. To make sure that you drain a lot of the opponent’s Mana, you should first cast stun and immediately cast the Mana Drain.

Bear in mind that even if you don’t use Hex or Earth Spike it might be worth it to cast Mana Drain on your lane opponent in some situations. This way you will force him/her to move back to break the link and thus zone him out of last hit range. Don’t forget that the break range is longer than the Mana Drain cast range.

Kill Potential:

Before you reach level 6 you have no real kill potential on your own. Nonetheless, you have a very good latching potential. You can set up kills for your allies – go in, use Hex on a target and start auto-attacking. Just as the duration of the Hex wears off (2.5 seconds), use Earth Spike to follow up – try to use it before the Hex ends because enemies can use an escape mechanism in between the two spells and get away.

Once you hit level 6, the damage burst coming from your ultimate allows you to solo kill most heroes on your own. You can initiate with Hex, start auto-attacking, then follow up with Earth Spike and finish the target with Finger of Death. It is better to cast your ult at the end for two reasons: first, the spell has a very high casting range (900) and you can use it on the enemy from afar (when it starts running away and exits your attack range). Second, you don’t want to waste your ultimate firs. Instead, check if a kill is likely to happen. For example, if you use the ult right away, an enemy support might come and save his teammate and your ultimate will be wasted.

Mind your mana pool. All your spells are mana intensive and it might be the case that you don’t have enough mana for Finger of Death after you cast Hex and Spike. If you don’t have enough mana for all three spells but you think you can still get a kill you can use some of the disable duration for draining mana instead of auto-attacking until you have enough for your ultimate.

Pushing:

During pushes, you can cast Earth Spike to help to clear out the creep wave. Use Mana Drain on a ranged creep to sustain your Mana. Try to stay as further behind as possible – you are a very squishy hero without escape and if you get initiated upon you will die very fast. Stay in a safe position behind your teammates and be ready to counter initiate with your disables if a fight starts.  

Timings:

In the laning stage there are two important timings for you:

The first one is when you get your brown Boots or Tranquils. The faster MS will allow you to initiate on targets easier and so set up more kills/ganks around the map.z6ZGb

The second timing is when you get your ultimate. You should try to get a successful gank right away either on your own or together with a teammate and use the ult to burst down a target. The ultimate has a long cooldown which means that you need to make each use count. This doesn’t mean saving it – on the contrary, if you can you should use it on cooldown. The important thing is not to waste it and to gank in a safe way which will secure you the kill (with a ganking partner, using smoke, etc.).

For a core Lion, if you manage to get your mobility item during the laning phase this is your third timing – it will make roaming to get kills even easier.

Early Game Rotations:

Ganking:

Lion is a very good ganker early on – he provides a lot of disables. You will need, however, someone else to deal the damage because Lion has almost no damage output early on. When you are ganking, you usually have to be the initiator because you have one of the most reliable disables in the game – Hex. Your allies should follow up your Hex initiation. The only case this isn’t true is when your ally has a reliable disable with higher range (e.g. Earthshaker’s stun), given that you need to get close to use Hex (500 range).

Counter Ganking:

Lion is a good hero for counter-ganking mainly because of his strong disables early on. For example, if an enemy dives your ally under the tower, you can teleport, instant Hex him and then follow up with your stun – in combination, both spells will provide a very long disable that will allow your ally to either run away or turn around to get a kill on the CC-ed target.

Support Lion

Lion usually starts the laning stage as a babysitter for the safe lane carry (that ideally has kill potential) and later on transitions to a roamer.

Zone out and harass the offlaner.
Initiate on the offlaner if he overextends.
Rotate to other lanes to gank or pull.
Check runes and ward.
Playstyle:

You are good at harassing - you can use both your high range auto-attacks and Mana Drain to keep the enemy out of farm/experience range. Moreover, the threat of getting disabled by you forces enemies to play very defensively. The setup potential that Lion has at early levels is very high – at level three you can keep a target disabled for more than 4 seconds. Almost as much as a maximum range Mirana Arrow and far more reliable.

When it comes to types of offlaners there are two possible situations:

Against a melee offlaner, passive harass is quite useful. You have a very high range – you can kite the enemy hero and not allow him to get close to exchange attacks. Against a ranged offlaner, passive harass might not work in your favor. Lion has low armor and low MS – you will likely be forced to back-off against most ranged offlaners. You can use Mana Drain against both ranged and melee offlaners. When the enemy gets close to you, you can Hex him and start draining his Mana.

Mana Drain can be a reliable way to force mana dependent opponents to run back.

After your carry has a big enough advantage in the lane and after you get boots you can leave him/her alone and start roaming. This usually means ganking the mid lane with the help of your other support.

Hard Support or Semi-Support:

Either one goes well with Lion. You are a good babysitter because you can deal with most offlaners thanks to your initiation potential and the harassment coming from your high range auto-attacks, Mana Drain and Earth Spike. You are also a good semi-support because you can pull to get your ultimate faster (and become a very strong ganker) and because you have great disables at early levels and you can efficiently rotate between lanes constantly and attempt ganks.

Lane Combos:

Lion is a good lane partner for carries that have a good damage output early on and can use the control that Lion provides to get kills. If your partner lacks damage, your dual lane will be quite underwhelming – you will have good control but no kill potential. As a result, enemies can play much more aggressively knowing that their positioning can’t be punished. 

Carries with kill potential: Gyro, Ursa, Jugg, Slark

Video Example:

Lion goes to an offensive lane with Doom and Lycan in an attempt to shut down Tiny. Lion starts with all supporting items and has only 3 Tangoes and a Clarity, but with good positioning and good usage of his spells, his teammates and him manage to kill the Jakiro and pressure the enemy Tiny. Because he is the squishiest hero and the easiest target to kill, he makes sure he stays behind his tankier allies. This helps him to stay alive during multiple excahanges.

Notice how at min 2 Lion body blocks the small camp before taking the rune so Radiant can`t pull to disrupt the creep equilibrium even though they managed to deward.

Pulling the creeps like Lion does at 4:30 is always important when you go for agro lanes because when the creep wave is near their tower. This way you will either deny a lot of resources to them, or they will be forced to fight for the wave as it happens and this example, which costs Jakiro his life.

At 05:50 he TPs to the mid lane because he notices the enemy team is tower diving his Tinker. This results in an easy counter kill and an additional kill when Tinker TPs back to lane.

Finally, after getting lvl6 he immediately finds an opportunity to use his ultimate for a kill. Notice that he even brings himself a Smoke to try to gank with Finger, but because a fight breaks out near him he doesn’t use it right away.

Mid Lion

Lion is a very unconventional mid as he is not a strong laner, he is a slow farmer and he doesn’t scale with farm as much as most other traditional mid laners. Nonetheless, if you have greedy cores in the safe and offlane you can play Lion mid, get lvl6 and Blink as fast as possible and rotate for ganks to create space for your allies.

Your focus in the lane should be to get to level 6 as fast as possible, ideally before the enemy mid laner. Once you get your ultimate, you will be able to zone the opponent out of the lane - the threat of a kill will force him to play very defensively. Therefore, you should focus on last hitting and using your Earth Spike to mess up the enemy last-hitting. Ideally, you will have roaming supports that can help you get kills in the lane with your long disables.

Last-hit & deny as much as possible with the help of your spells.
Harass with Earth Spike and Mana Drain to mess up the development of your opponent.
Surviving:

Lion is very squishy and has no escape – when playing him mid you are an easy gank target. Take advantage of your high attack range and try to stay in a safe position on the high ground when you are last hitting. If you are getting ganked, you have two good spells to disengage. Try to immediately use Earth Spike from afar to stun incoming enemy heroes (if you target the ground, you can disable opponents from 950 range). If enemies are slower than you (which will be usually the case when they have no boots) it might be better not to waste time stunning the heroes but to simply run away. If an opponent somehow gets within 500 range before you can react, it will be better to use Hex on him because it is instant – if you use Earth Spike you can give him enough time to cast his spells on you. Of course, the enemy initiator is your main disable priority but bear in mind that you can disable multiple heroes even only with your Spike if they are close to each other.

Farming and Controlling Runes:

As we mentioned, your focus mid should be on last-hitting/denying and getting level 6 before the enemy hero does. With Mana Drain, you should be able to use Spike almost on cooldown. Ideally, you want to both last hit with your Earth Spike and prevent the enemy from getting a last hit (and at the same time harass, of course). Therefore, use it on the mid hero when an enemy and an ally creep (that your opponent wants to last hit) are both on low Health.

When it comes to Rune Control, Lion is usually at a disadvantage. He is a slow hero and has no mobility spell. Moreover, his Earth Spike doesn’t deal a lot of damage to clear out the creep wave fast enough (even at level 3, the spell deals only 200 AoE damage). Nevertheless, you can still use it to push out the wave and then go for the rune. Since you are a slow hero without escape, going for the rune when you don’t have vision on enemy supports can be dangerous – you will likely die if you get initiated upon. To your advantage though, you have some decent disengaging abilities - you can cast your stun from afar (remember that Earth Spike hits units up to 950 range) and prevent them from getting close enough to initiate. Your Hex is also a good disengaging tool.

Zoning & Harassing:

Your only option is to try to zone out with Mana Drain and force your opponents to run out of last hit range in order to break the link. In some cases, however, this might prove to be ineffective (if your opponent already has no mana or has a Bottle to recharge it). Because of this, you would usually want to focus on last-hitting/denying. Once you get your ult, however, you can zone out the enemy much more efficiently – the threat of a kill once you have Finger of Death will force the enemy to stay away from your initiation range. If the enemy mid laner isn’t very survivable but still gets too close to you, you should attempt to punish his positioning and get a kill. To more survivable enemies you might need help to deal sufficient damage.

Timings & Rotations::

When you are playing Mid your two important timings are when you get your ultimate at level 6 and your mobility item (usually Blink Dagger). With Finger of Death you can easily gank other lanes and even get solo pick-offs on the enemy mid.  Once you get your Blink, your initiation potential increases greatly.

Because your first important timing is leveling up your ult, your first rotation is also around this time point. Keep in mind that Lion doesn’t have a mobility spell to help him rotate faster or move around enemy Observer Wards (for example, heroes with Blink like QoP can use their spell to go around places where enemies have vision and so make her movement more unpredictable). Therefore, the rotations of Lion are quite predictable as is his movement around the map. Most likely you will need to Smoke either alone or together with a support to attempt a gank. The other option is to use a TP scroll to get in position as fast as possible.

Mid & Late Game


lion immortal 350px

In the mid and late game, besides the normal support warding duties, you have two main priorities:


First, you initiate ganks and fights for your team thanks to your good disables. Second, you try to get your mobility items as quickly as possible to increase your initiation potential – this could even become first priority in certain situations. For example, against very mobile heroes, the only way to catch them off guard would be to blink and Hex them instantly. The third priority would be to stick to your teammates, use your spells defensively to help them disengage or follow up an allies’ initiation with your abilities.

Initiate ganks and fights for your team
Get your mobility item (usually Blink)
Stick to your team, help allies disengage or follow up an initiation
Comeback Potential:

If the Laning Stage went poorly for you and you are very under-leveled (having not even reached lvl 6) you should try to get your ultimate as fast as possible and get some kills out of it. You can either occupy a lane, get resources with pulls or use your ganking potential to get kills on enemies around the map and so recover from the bad laning stage. If there are free lanes and you are not in position to pressure your opponents it would be better to farm up and get your ultimate (and possibly mobility item). More often than not, however, you cannot afford to be passive after a laning stage. You likely wouldn’t have the map control to farm not only your carries but also yourself. Because of this, it is worth it to Smoke up and be active around your map with other strong gankers in your team. 

If the Laning stage went very well for you and you managed to get your levels and even a mobility item, you should use this opportunity to pressure your opponents and gank/initiate team fights more frequently. By using your ganking potential fully you will create a lot of space on the map for your allies to farm up and get gold and XP advantage over the enemy team.

Pushing:

5-man Pushing

When pushing together with your team, your positioning should usually be on the back lines of your team. You are quite squishy and an easy target to burst down quickly. Make sure, however, to be close enough to your allies so that you can counter-initiate with your stun and Hex. 

Only in rare circumstances, when the enemy team is at a great disadvantage and doesn’t have good initiators, can you stay up front and initiate on the heroes that get close to try to defend the tower. This will be more effective if you are staying hidden on the sides of your team, rather than when standing in plain sight in front of the tower. Your team can then quickly follow up and get kills if you manage to latch.

No matter the situation, you have very insignificant physical damage output and it isn’t worth it to take a risky position, stay in front and hit the tower. 

Split-Pushing

You are a weak split-pusher because you have no escape mechanism and little AoE damage to push out waves fast. You are a good hero, however, when it comes to punishing Split-pushers – you can initiate on them with your Hex and burst them down together with an ally or even on your own (especially if the Split-pushers are squishy or on low HP).

Anti-Pushing

 In terms of anti-pushing, you have only Earth Spike, which has decent cast range but damages units only in a straight line. The 25th level Earth Spike range also helps out a lot in this regard as it allows you to use it from a very safe distance.

Your anti pushing potential rises greatly if you build Aghanims since your Ultimate will start dealing AoE damage and you will be able to use it to clear the whole creep wave + damage all pushing heroes a great deal.

Ganking:

Lion is a very good ganker and initiating will be one of your top priorities in the mid and late game. As an initiator, you have to make the choice of whom to disable first. When you are ganking more than one hero, it is generally better to Hex the BKB-carrier since he won’t be able to use the item while disabled and stun the other heroes. Alternatively, you can focus everything on the BKB-carrier and nuke him down with both Earth Spike and ultimate.

Ideally, you want to stun more than 1 hero with your Earth Spike when ganking - this will make it hard for the enemy heroes to counter-initiate and potentially save the target you are focusing (for example their carry). To do this you need to use your mobility item and position yourself in a straight line with at least two enemies. Follow up by Hexing the more dangerous (or more elusive) target that you want to disable for longer.

When Saksa gets his Blink Dagger, he immediately smokes up with his teammate (Naga) and enters the enemy jungle in an attempt to find and kill the enemy farming carry – Terrorblade. In this example this move costs him his life, but wins his team a good fight, which is always a worthwhile trade for a pos. 5 support.

Map Control and Vision:

As a support, it is your task to win the Ward wars against the enemy supports. However, since you need to get your mobility item as soon a possible to initiate better, you might leave the warding/dewarding task for your second support. This is the case only if your other support is resource independent, of course. 

When you initiate fights or ganks, make sure to check out the positioning of enemy heroes. If you jump on 1 enemy and the rest of his team are very close, they can reinitiate on you and turn the fight around. You are very vulnerable to counter-initiations because you are very squishy and without an escape mechanism.

Teamfights:

Who to initiate on:

There are two types of enemies that you want to initiate on: BKB-carriers (usually the enemy core heroes) and very mobile but squishy enemies like Weaver, QoP, Storm, Ember Spirit, etc. If your team has enough burst damage output to bring down the enemy BKB-carrier while he is disabled and can’t use BKB, then you should initiate on him. Most of the time he will be the important core hero for the enemy team and if you manage to kill him at the start of the fight, the opponents will likely lose the engagement. If, on the other hand, he is quite tanky and you cannot kill him during the disable, it would be better to Hex a mobile enemy that will also be impactful in the fight.

In most situations, Hex will be the first spell you use when  - especially if you want to disable a target before it pops BKB. Yet sometimes, if enemies are grouped up, it will be better to jump in and stun multiple opponents. Nonetheless, if one of those heroes that you initiate on with Earth Spike has quick reflexes, he can use BKB and dodge the stun. If he is a good initiator/team fight controller like Brewmaster or Magnus, he might turn around the fight. It would be better in that scenario to Hex that hero first, use Earth Spike second and burst him down because without him the enemy team would have lower chances to win the engagement. 

Spells to use after the initiation and hero movement:

After your Hex initiation, you should follow up with Earth Spike. If your Hex-target gets killed quickly, it would be better to use your stun on other enemies - try to disable as many heroes as possible. Usually, you want to use your Finger of Death on the Hex-target to make sure that it dies as quickly as possible. If your allies have a lot of burst and can kill the enemy hero fast enough without your ultimate, you can use it on someone else, of course. Keep in mind that a high-level finger combined with another nuke is usually enough to kill a squishy support. If you manage to eliminate such a target before it has any impact in the fight you are up to a good start.

After you have used your Hex, Earth Spike and Ultimate, try to disengage – move to a safer spot and try to make enemies lose sight of you (hide in the fog of war so that they can’t burst you down quickly). Your CD’s in the late game is relatively low and you will be able to use them again soon after the initial jump. After you back off a bit, you can cast Mana Drain on a mana-dependent hero – the break range is quite long. You will slow the target and allow your team to deal more damage. Don’t do this if you don’t want to reveal your positioning, of course.

If you have an Aghanim’s, try to use your ult on clumped-up opponents. If you have a front line tank and your opponents gather up to damage him you can use the opportunity to Spike and Finger multiple targets (of course, there are many other scenarios in which your opponents clump up, e.g. in chokes). Don’t wait too long for such an opportunity, however, unless you have heroes like Mag or Dark Seer that can set up for an AoE finger. The value of your ult comes from the nuke damage, which means that bursting down and killing one target can be more important than damaging multiple targets.

Farming:

When it comes to farming, your primary tool is Earth Spike. You can use it on a creep wave or on neutrals and then cast Mana Drain on a ranged creep or on a neutral to recover your Mana. You can then back a bit and wait for Earth Spike to get off CD in order to repeat the procedure (of course, you should damage creeps with attacks as much as possible, bringing them to low HP so that you can clear them with Earth Spike faster).

You should try to farm up your mobility item (most likely Blink) by killing neutrals or farming in the lane. After you get that item, you won’t need a lot more items to be effective. It will usually be better to stick with your team and attempt fight initiation/ganks.