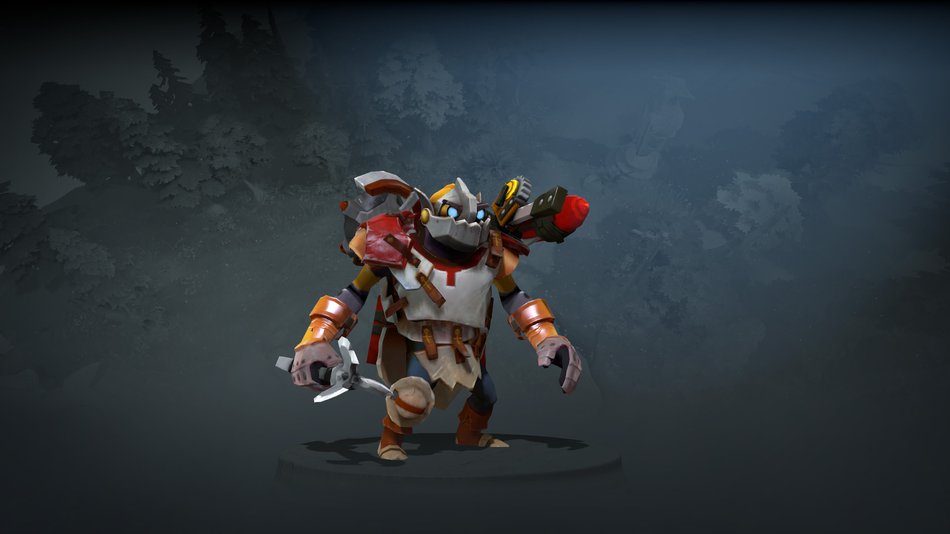
Clockwerk Guide by bOne7
Artist: DrySocket
Author:
bOne7 & Co.
Date: 01/2019
Tags:
text
Clockwerk
Analysis
Builds
Tactics

Welcome

Welcome to bOne7's Book of the Clockwerk, a hero guide part of the Book of Dota series!

Here you will find all the information you need to learn to play Clockwerk on a high level – from drafting and builds to the optimal playstyle in different lanes and situations. We hope you’ll enjoy this guide and find it useful!

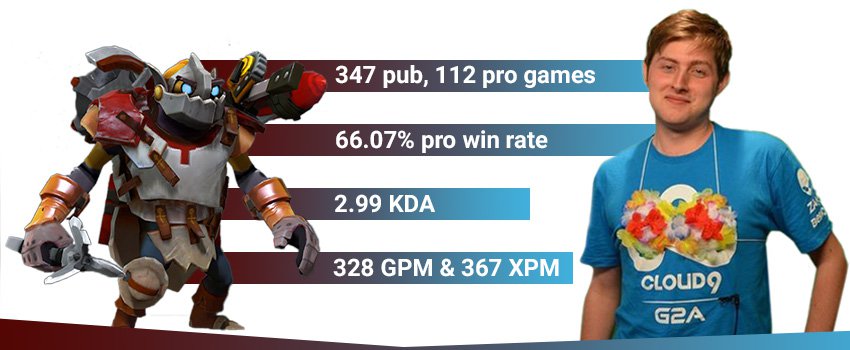
Bone7 Clock Stats
TL;DR:

Draft: Pick Clock as a counter to squishy and slow backline heroes and avoid picking him against heroes that can easily escape his Cogs. Make sure you combine him with follow-up damage for his initiation.

Early Game: Use Cogs to manipulate the creep equilibrium and get experience. Get a few early levels and start applying pressure on your lane opponents – you have high kill potential after a few levels and Boots and it’s a good idea to try to use it, especially if you have allies that can help you. Control runes, and after level 6 – rotate for ganks. Try to get some cheap core items like Urn, Blade Mail, etc.

Mid & Late Game: Continue applying pressure by initiating ganks, especially on split-pushing or passively-farming enemies. Provide vision with Rocket Flare. If enemies are moving as 5, stick to your teammates and provide vision, initiation and control in fights.

Authors

Pittner "bOne7" Armand
Endorsement & Info

bOne7 is a professional Dota 2 player playing primarily in the offlane position.

He rose to fame by being part of the legendary C9 lineup that made the most 2nd place tournament runs in premier events in the history of Dota. A TI veteran, bOne7 is without a doubt one of the most creative players out there and a great guy to learn from.

Nikolay "CTOMAHEH1" Kalchev
Info & Editing

CTOMAHEH1 started his pro career as a support in Basically Unknown together with Mind Control. Since then he has consistently been playing on the European T2 scene, most recently on Unchained Esports. 

His highest placement on the EU ladder is top 100 - he plays all roles (mainly support), which is untypical for high-ranking players and shows his great versatility and understanding of the game.

Kyril "MrNiceGuy" Kotashev
PM, Writing & Editing

Esports and gaming enthusiast since forever and founder of Dotahaven.

Has been playing Dota since 2005 (5.84). An Ancient I player in Dota 2.

I run like a clock!

Clockwerk is one of the most powerful initiators and gankers in Dota. He is able to jump on targets from as much as 3000 range away and can easily get solo kills early in the game.

Clock is not only a naturally tanky STR hero but has a variety of tools which help him to control enemies and if needed – to escape engagements. This allows the hero to be played very aggressively, creating space for your team and taking it away from your opponents.

Clock is usually played as a pos. 4 support or a pos. 3 offlaner.

Clock Loadout
Stats
Level 1
Level 15
Level 25
STR
26
Very High
71
High
102,8
Very High
AGI
13
Very Low
45
Medium
68
High
INT
17
Low
35
Very Low
48
Very Low
Attack
54-56
High
99-101
High
131-133
Very High
Armor
1.08
Very Low
6.232
Medium
9.912
Medium
Resistance
26
Medium
30
Medium
32
Medium
HP
785
Very High
1793
Very High
2513
Very High
MP
279
Low
495
Very Low
651
Very Low
MS
312
Very High
317
Very High
320
Very High
STRENGHTS

MAJOR

Survivable:
Many skills in Clock’s arsenal could be used defensively. Power Cogs can push back enemies that want to initiate on you and form a physical barrier between you and your opponents. Hookshot could be used as an escape mechanism on any units (allies included) who are far away from the fight. Rocket Flare can be used to scout out gank attempts. Last but not least, he is a STR hero. This makes him a very hero to kill, which is a valuable tool considering his aggressive playstyle.

Initiator:
Hookshot is one of the best (if not the best) initiation spells in the game. It has a ridiculous range, and it stuns targets in a small AoE radius on impact.
The long range is perfect for ganking targets that would be out of reach for most heroes. This is, for example, quite strong versus split-pushers because it allows Clock to easily get in position to punish them.

Control:
Rattletrap has a variety of tools to control enemies - very valuable as a follow-up on his Hookshot initiation. First of all, his Hookshot stun goes through magic immunity, which is always useful. Secondly, he can use Power Cogs to trap units with himself or push them around the battlefield. It’s worth noting that he can use Cogs to control lane creeps as well, manipulating the creep equilibrium. Finally, the very frequent ministuns Battery Assault gives are very powerful for controlling an isolated target.

Solo Kill Potential:
His initiation and control coupled with the good sustained damage of Battery Assault and the nuke of Rocket Flare make Clock a very powerful ganker that can easily get solo kills, especially in the early stages of the game.

MINOR

Movement Speed:
Clock has above average movement speed. Coupled with Battery Assault, this makes him very deadly because he is able to catch up to and stick to his targets, dealing Assault damage.

Vision:
Rocket Flare is a global spell which gives vision in an AoE around its projectile, and for a few more seconds, on the place of impact. This is a very valuable tool not only for the team but also for Clock himself as it helps him find targets for ganks.

WEAKNESSES

MAJOR

Less impactful the later the game goes:
Even though Clock is a good ganker and a good initiator no matter at what stage of the game, his kill potential doesn’t scale a lot with levels and items in the long run. This means that the more items and levels his opponents get, the harder it will be for him to get kills. In the later stages of the game, the focus of the hero is more on the initiation and the control he gives, while the actual killing of opponents is left to his allies.

Level Dependent in the early game:
As any hero hunter, Clock needs to get early levels as quickly as possible to have an impact and to be able to get solo kills. He needs his Hookshot, max level of Battery Assault and at least one level in Power Cogs to be able to get kills easily, and if he gets shut down in the lane, he will reach this point late. If his opponents out-level him heavily, he will struggle to dictate the tempo of the game. This is a problem for a pos. 3 or 4 hero, who isn’t guaranteed to get levels.

MINOR

Slow Farmer:
Clockwerk has very slow attack speed and his spells don’t kill off groups of creeps particularly quickly. This means that if he doesn’t find his farm through ganks, he will have problems keeping up with the item progression of his enemies. He is also bad at out-pushing the waves effectively (Rocket Flare helps, but it’s very slow).

Hard to use abilities:
Clockwerk’s spells require good timing, and you need a lot of practice in order to use them properly. He doesn’t have directly targeted spells - you need to aim all your skills. In addition, it is actually possible to harm your own team with Power Cogs (your allies could also get stuck because of them)

Replays

Winstrike vs Newbee, TI8 Main Event

MATCH ID: 4070746269
Replay

Nongrata plays a great pos. 3 Clockwerk in a BO1 elimination match against Newbee at TI8. He contributes a great deal towards the upset victory his team achieves. In his exit interview, Kpii mentions that Nongrata’s Clock made the game extremely difficult for them.

This can easily be seen right from the laning stage when Clock participates in a couple of kills on the enemy support Bane and carry Gyro.

Na’Vi vs SG e-sports, StarLadder ImbaTV Invitational Season 5

MATCH ID: 3832355063
Replay

MSS- plays a flawless game on a pos. 4 roaming Clock and showcases the strength of the hero in the early game by getting 5 kills before the end of the laning stage. He proceeds to participate in 25 kills without dying even once, which is extremely impressive on an aggressive initiator. This replay is perfect to watch if you want to learn to play roaming Clock.

Secret vs Newbee, ESL One Genting

MATCH ID: 3701923243
Replay

YapzOr plays roaming Clockwerk against team Newbee. In this game, he manages to deal the most hero damage out of his whole team – a very impressive feat for a pos. 4 in general, but even more impressive for a pos. 4 Clockwerk. Because of this, it is very worthwhile to watch his play despite the fact that Secret loses the game.

Drafting

Clock is a fairly versatile hero and could fit different lineups, but the smartest way to use him is to exploit his initiation and ganking potential.

Clockwerk provides a lot of benefits to the team without requiring anything in particular invested in him:

  • First of all, he is a relatively strong laner and can usually get the resources he needs even in the offlane by controlling the creep waves.
  • When he gets some levels, he can start ganking and pressuring the enemies, which gives map control. Because of this, more often than not, he has a significant impact in the early-mid stages of the game.
  • Lastly, he is a very good fight initiator that can control engagements.

Picking Clockwerk to counter passive farmers or split pushers is also a great idea because of his amazing ability to find his targets with the vision of Flare and to initiate on them and lock them in place with the rest of his skills. Sometimes this is enough for a solo kill, other times this might be enough to buy his cores time to join him and secure the pick-off.

Offlane Clockwerk

The major reason why Clock usually gets resources out of the hard-to-stay-in offlane is because of his ability to manage the creep equilibrium. By blocking allied creeps with his Cogs, he is able to force the equilibrium towards his tower.

Once the creeps are near his tower, he might not get all last hits, but he could get close to solo XP, which is a great help in rotating to gank from earlier.

Because of this unique ability, it is actually quite hard to zone out Clock and deny experience to him even with dominant laners in the offlane. As all good offlaners, Clock is quite hard to kill. He can use Cogs to block the path of opponents trying to initiate on him, or to push them backward, creating not only distance between himself and the aggressors, but also an obstacle that they have to walk around.

He also has decent kill potential in the lane. If he manages to catch a support by himself/herself, with the help of Battery Assault and Cogs, he could get a solo kill. When combined with heroes with decent ranged damage in the offlane, he can be extremely dangerous.

Roaming Clockwerk

Generally speaking, you can easily pick Clock early in the game and decide later how to play him (as pos. 3 or 4).

Clock as pos. 4 can be very good for a couple of reasons. First, he has very good solo kill potential even early on. After getting lvl3 and 2 points in Battery Assault, if you manage to get closer to squishier heroes you can easily secure a kill. Second, Clock is very good at helping lanes with cogs to disrupt the creep equilibrium. Finally, Clock  is very good for rune control. He can always push out enemies with Cogs if they try to contest the rune and they are not in time. Moreover, a 1v1 engagement with Clock near the rune spot is very dangerous for other heroes because Clock can run them down with Battery Assault.

Synergy

Clockwerk works best with heroes which benefit from his aggressive play style.

Mobile gankers: Queen of Pain, Storm Spirit, Puck, Naix, Io+1, Mirana

Queen of pain
Storm spirit
Puck Portrait
Lifestealer Portrait
IO Wisp
Mirana
Clock’s long-range initiation + mobile damage dealers = devastating ganks

Any hero that can help Clock in his ganks is a good partner. Usually, such heroes are other mobile gankers who can cover big distances very quickly, following up on the long Hook initiation and providing extra damage to kill the target off as quickly as possible.

A special mention should go to Naix who can Infest Clockwerk for a powerful Naix Bomb gank. When doing this, you might want to delay using your Power Cogs after the initiation. Usually, the Hook stun into Naix Slow is enough for the two of you to finish the gank.

Combo follow-up: Invoker, Mirana, Kunkka, Jakiro, Gyrocopter 

Invoker
Mirana
Kunkka
Jakiro Portrait
Gyro
Creating kill combos with Clock is a good idea as it will make your team’s ganking and fighting potential even more substantial.

Clock could hold targets in one place for a fairly long time, which makes hitting certain hard-to-land spells much easier. For example, while the target is trapped in the Power Cogs, an Exort Invoker could easily land a Sunstrike from anywhere on the map and assist in the kill, or a Chaos Meteor in fights to kill off the target very quickly. The control could also be used to set up for spells like Kunkka’s ultimate and Torrent, Mirana’s Arrow, or even Jakiro’s Macro Pyre in team fights.

 Ranged carries: Clinkz, SF, Windranger, Lina, Drow Ranger, Weaver

Clinkz
Shadow Fiend Portrait
Windranger
Lina
Drow Ranger
Weaver
Ranged farmers benefit a lot from the space created by Clockwerk - both in terms of map control and fight control.

Such heroes work with Rattletrap on two levels:

Firstly, being one of the most powerful gankers in Dota, he is a natural space creator. When your enemies are afraid of getting ganked, it is much harder for them to be aggressive themselves and shut down your farmers since they are afraid of overextending and dying to the Clock initiation.

Secondly, in fights Clock keeps enemy heroes in one place, which allows allied carries to right click freely. This is especially powerful with ranged carries since they could hit targets trapped in the Power Cogs - something melee heroes can’t do.

Shadow Fiend deserves a special mention. He is a ranged damage dealer, which means he has synergy with Clock in fights. More importantly, however, SF and Clock can deny Clock’s Cogs at the beginning of the game (before the laning stage). Getin the last hit on the Cog gives SF Necromastery souls and buffs his initial damage, making him a much stronger laner in the first few minutes of the game.

Counters

Strong Against:

Squishy, not mobile heroes: Leshrac, Lina, Drow Ranger, Sniper, SF, Tinker, Luna, Pugna, Sky, NP, WR

Leshrac
Lina
Drow Ranger
Sniper
Shadow Fiend Portrait
Tinker
Luna
Pugna
Skywrath Mage Portrait
Nature's Prophet Portrait
Windranger
Clock can punish squishy heroes without escape mechanisms - they are the easiest targets to gank with Hookshot, Cogs and Battery Assault.

Slow heroes without escape mechanisms have a couple of problems against Clockwerk. The lack of an escape mechanism means that they cannot get out of the Cogs easily. If the hero is with a low HP pool, it could even die to Battery Assault and hits before the Cogs end. If the hero is slower than Clock, it’s very easy to chase down with Battery Assault.

Clock makes it almost impossible for heroes like those to split-push alone because he can easily find them and gank them. Just with his presence, he can force them to stick to their team more often than they would like to.

Slow Casting Animation and Channeling Spells: Earthshaker, Leshrac, Bane Elemental, Pudge, Natures Prophet, Shadow Fiend, Underword, Spirit Breaker, Tinker

Earthshaker Portrait
Leshrac
Bane Portrait
Pudge
Nature's Prophet Portrait
Shadow Fiend Portrait
Underlord Portrait
Spirit breaker
Tinker
Clockwerk effectively counters heroes with slow casting animation or channeling spells.

Heroes with slow casting animation might not be even able to cast a spell when focused by the ministuns of Battery Assault. Even if they have a disable, e.g. Earthshaker and Leshrac, they will not be able to use their stuns to protect themselves since their casting animation will be continuously canceled.
For the same reason channeling a spell in a fight near Clockwerk is almost impossible without a BKB, and even with a BKB, there is always the possibility to get stunned by Hookshot.

Low-range cores with no easy way to escape Cogs: Templar Assassin, Sven, Luna, Slardar, Troll, Gyro

Templar Assassin
Sven
Luna
Slardar Portrait
Troll Warlord
Gyro
Low-ranged cores could get blocked from reaching their targets with Cogs.

Melee/low-range carries need to get close to their targets in order to deal damage. However, Clock’s Cogs can either trap such heroes inside or be placed defensively in a way that will not allow the carry to get close to hit Clock’s allies. The hero is also great against BKB, immobile carries since Hookshot goes through magic immunity, and Cogs affect magic immune units too (trap them inside, don’t push them back). 

Blink Dagger Initiators: ES, Axe, Slardar, Magnus, Sand King, Puck

Earthshaker Portrait
Axe Portrait
Slardar Portrait
Magnus Portrait
Sand King
Clockwerk could make taking position outside of vision for the opponent’s initiators much harder thanks to his Rocket Flare.

With the help of Rocket Flare, Clock could reveal enemy heroes. This is exceptionally strong before team fights. Clock can check if an enemy initiator is hiding in a spot near the fight in order to initiate at the right moment. If you reveal such a hero, this will allow your team to reposition and will make the initiation less of a threat. This causes big problems, especially to Blink Dagger initiators since the damage from the rocket could disable the Blink in a crucial moment, besides revealing the positioning of the hero. Hookshot can also be used to reach them and trap them outside of the fight.

Weak Against:

Summons and Illusions: Brood, Phantom Lancer, Visage, Lycan, Meepo, Spectre, CK, Chen, Terror

Broodmother Portrait
Phantom Lancer
Visage
Lycan
Meepo
Spectre Portrait
Chaos Knight
Chen
Terrorblade
Multiple units mess up Hook and Battery Assault.

Heroes who have multiple units are usually a big problem for Clock in fights. First, the units block potential Hookshots, and consequently, make initiation much harder for Rattletrap. Second, when Clock is inside the fight, the Battery Assault hits are distributed among the multiple units. This makes controlling a single target an almost impossible task. Worst of all, Clock has no answer to such units as his AoE potential is fairly limited.

Heroes that can Escape Power Cogs: AM, Phoenix, Storm, Spectre, QoP, Mirana, Riki, Ember, Timber, Bat

Anti mage
Phoenix
Storm spirit
Spectre Portrait
Queen of pain
Mirana
Riki
Ember Portrait
Timbersaw
Batrider
Mobile heroes that can “jump” over impassible terrain are hard to gank targets for Clock.

Clockwerk’s Power Cogs are detrimental for his kill potential as they hold the target in place and isolate it from other units. What is specific about them is that they don’t disable the target itself, but create barriers around it. Because of this, heroes that can “jump” over impassible terrain could easily escape the Cogs, and as a result, are very difficult to gank. After initiating on such a hero, it might be a good idea to use the knockback effect rather than trap them inside (unless their escape mechanism is on CD). This will give you a far longer disable, and if you knock them back towards your allies, you could possibly set up a kill (allow your allies to follow up with further disables and damage).

Huskar Portrait

Huskar can dominate Clock in the lane and even if he gets caught in the Cogs he can man-fight him. He is not too bother by Blade Mail, unlike other man-fight heroes.

Undying Portrait
Undying can use Decay and Tombstone to win the laning phase against Clock. Making him squishier with Decay and his ult is a big problem for Clock, who needs to play aggressively. Last but not least, Zombies block Hookshot.

Juggernaut

Jugg can use Blade Fury to avoid the Battery Assault hits and deal damage. Moreover, he can attack Cogs while spinning (even without getting pushed back).

Lifestealer Portrait

LS can man-fight with Rage and Wounds or use Rage to quickly kill the Cogs and get away.

Skills

Battery Assault
Power Cogs
Rocket Flare
Hookshot

Discharges high-powered shrapnel at random nearby enemy units, dealing minor magical damage and ministun.

STATS

Cast Animation: 0+0

Search Radius: 275

Shrapnel Interval: 0.7 ( 0.4)

Damage per Shrapnel: 20/45/70/95

Stun Duration: 0.1

Assault Duration: 10.5

CD: 32/28/24/20

Mana: 100

Battery Assault

Positioning:

The most important thing to keep in mind for Battery Assault is that it hits a random enemy unit which is near Clock. This means that if you are surrounded by more than one unit, you might not be able to hit the target you want consistently (if at all). Therefore, you need to think about your positioning. Try to use the spell when the hero is isolated from other enemy units, or isolate it yourself using Power Cogs. In fights, especially when you want to cancel a channeling ability, you might want to position yourself a bit to the side of the enemy so that you are in range to mini-stun your target, but too far away to hit other enemy units. 

When you are chasing with Battery Assault on, unless you are a lot faster than your target, you should not attack it as the attack animation will make you fall behind, and your target will exit the Battery Assault range.

Damage: 

Battery Assault is your primary source of single-target DPS. With a few right clicks and the damage from your other spells, it is usually more than enough to finish off even a relatively tanky target. The damage scales gradually, so getting a higher level as early as possible is preferable if you want to try to get solo kills.

Control:

The control from the spell, however, is not to be underestimated - this is why it is often a good idea to use it in fights even if it is not possible to isolate a single target. The ministun will interrupt channeled spells, and even slow casting and attack animations. This means that trying to get closer to heroes with such skills is generally a good idea.

If you manage to isolate a single target, the constant ministuns will also make it move more slowly (as instead of walking, it is stuttering), which might allow your allies to catch up and secure the kill.

Also, if Clock gets disabled, the ability remains active - you will continue mini-stunning and damaging nearby opponents. This is quite useful against skills like Dismember and Fiend’s Grip if you are close to the caster.

Battery Assault does not affect invisible units.

Forms a barrier of energized cogs around Clockwerk, trapping any units that are near. Enemies outside the trap that touch a cog are knocked back, losing health and mana. Once a cog has delivered a shock, it will power down. Cogs can be destroyed by enemy attacks, but Clockwerk can destroy them with just one.

STATS

Cast Animation: 0.2+0.5

Cogs Spawn Radius: 215

Number of Cogs: 8

Attacks to Destroy: 2

Shock Search Radius: 160

Shock Damage: 50/125/200/275

Mana Burn: 50/80/110/140

Shock Knockback Distance: 300

Shock Knock Back Duration: 1

Cogs Duration: 5/6/7/8

CD: 15

Mana: 80

Power Cogs

Power Cogs is your main control spell. Without an escape mechanism, the enemy hero will have to hit a Cog twice in order to break it and run away.  Two times might sound quite little; however, attacking fast enough might be difficult when you are getting mini-stunned from Battery Assault.

To trap heroes:

The most straightforward use of the spell is to trap a target with you and prevent it from running away. You can use this when you want to get a kill on the target if you want to set up for some spells of your allies, or let an ally auto attack the target.

To make sure the target ends up inside the Cogs you need to be standing right next to it when you use the spell (melee range). Otherwise, the spell might push the hero away and let it escape. Cogs have good Synergy with both Battery Assault and Hook Shot. The latter allows you to initiate on a target from a long range and use Cogs right after that. The former helps you mini-stun and slow down the target when you are chasing – this will allow you to get right next to the target to cast your Cogs.

You could trap multiple enemies in the Cogs with you. Nevertheless, this is rather difficult because you need to stand in melee range to all of them to get them inside.

To push away targets:

The second common use of the spell is to push targets away.

You can actually use this as a tool to harass in the lane. When your opponent is moving in for the last hit, you can cast Power Cogs in such a way that your opponent gets pushed away from the creep wave. This will not only give you time to deny but will burn away mana from your lane opponent and do some damage and is extremely useful to deny and secure ranged creeps.

Deny your cogs: Cogs take two hits, so if an enemy hits your Cog you can choose to deny it. This is useful in the laning stage to deny the Cog last-hit gold from your opponent.

The pushing-away mechanism is also useful to separate a target from his/her teammates. Bear in mind that the push disables for 0.85 seconds, so hitting multiple heroes with it in team fights is actually quite powerful. You should be mindful of the direction you are pushing heroes, however. You want to push your target towards your allies while keeping your other opponents on the other end of the Cogs. It’s imperative that the Cogs are a barrier for your opponents, not your allies.

When you initiate with Hookshot, you can choose to run in front of your target and push it back towards your allies instead of trapping the target with yourself. This is good not only when you want to get it closer to your allies, but when you have melee heroes that need to get to the target (if you trap it inside the Cogs, you will have to break one to allow the melee hero to get to the enemy), or if you are afraid to trap yourself with the enemy. Being isolated with a farmed carry could easily lead to your death, so pushing it away might be smarter.

Finally, pushing back a hero with an escape mechanism is almost always better - you at least get the disable. Moreover, pushing it towards your allies might allow them to follow-up with another disable.

Keep in mind that you can push away invisible units, for example, Templar Assassin in her Meld.

To disengage:

Putting the Cogs as physical barriers between your teammates and the enemy heroes might allow you to disengage an unwanted fight. This is most efficient in chokepoints because enemies wouldn’t be able to walk around the Cogs, but even in wider areas, the Cogs could slow them down.

Fires a global range flare that explodes over a given area, damaging enemies and providing vision for 10 seconds.

STATS

Cast Animation: 0.3+0

Cast Range: Global

Radius: 600

Damage: 80/120/160/200

Vision Duration: 10

CD: 20/18/16/14

Mana: 35/40/45/50

Rocket Flare

Rocket Flare is a very straightforward AoE nuke spell. What is special about it, though, is the global range coupled with the fact that it gives vision around the projectile. This means that besides for some extra magic nuke damage in fights, it has some alternate usefulness:

Scouting:

Scouting is what you will be doing with the Rocket most of the time. Because of the global range and low mana, it might be a good idea to spam it often over areas where you suspect the presence of enemy heroes. The information you get could help you gank an isolated target, or assist you in avoiding ganks yourself. You can also scout areas of interest like the Runes, Ancients or Roshan, or even the enemy fountain. Bear in mind that besides the vision it gives on impact for 10 seconds, it gives vision while it is traveling. You should shoot it in such a way that it flies over a place where your opponents are likely to be, but lands in the primary area of interest.

Last hits:

Rocket Flare is a very useful spell to secure last-hits in the lane. You can use it from afar to e.g. secure the ranged creep. Alternatively, when you are harassing, try to also time your Rocket so that you get a last hit or two with its damage.

Pushing out Lanes:

Pushing out waves is also possible with Rocket Flare. Whenever you hit the enemy creeps in the same lane twice, this will give some momentum to your own creeps, and if there is no enemy hero to reverse this effect, the creep will push in the direction of your opponent’s base.

Sniping Escaping Heroes:

Sniping enemy heroes who are running away at low HP with the Rocket is possible, but quite hard since the projectile flies somewhat slowly. Nevertheless, trying to guess where the enemy will be might allow you to successfully hit. Aiming for chokepoints is always a good tactic. Because of the low success rate of these attempts, it is best to use the Rocket for the additional damage in the fight itself rather than save it for the long-range KS.

Fires a grappling device rapidly at the target location. If the hook hits a unit, Clockwerk launches himself into the target, stunning and dealing damage. Any enemies Clockwerk collides with along the way are damaged and stunned.

STATS

Cast Animation: 0.3+0

Cast Range: 2000/2500/3000

Max Travel Distance: 2000/2500/3000

Hook Latch Radius: 125

Stun & Damage Radius: 175

Damage: 75/175/275

Stun Duration: 1/1.5/2

CD: 70/55/40

Mana: 150

Aghanim's Scepter

Decreases cooldown.

Hookshot

Aiming:

Hookshot is your initiation tool - both for fights and for ganks.

You need to aim the spell and target the point on the ground which it will hit. The projectile speed, however, is very fast; hence, it is relatively easy to land an accurate Hookshot. From short range, you should aim directly at the target because it will not have enough time to move out of the way. At long range, you usually need to aim it a bit to the front of a moving target ~ 200 range. Bear in mind that you have some margin for error - the Hook will latch in 125 radius, so if you are a bit off-target, you will still hit. The projectile travels at 4000/5000/6000 range per second. At lvl1 this means that if you are shooting at 2k range, it will take the spell about 0.8 (0.5 travel time and 0.3 casting time) to hit. With a normal movement speed of 350 for your target, you need to aim at about 250 range to the front of it. With higher levels, you will need to aim a bit closer because of the higher projectile travel speed.

It is important to consider if there are units along the way which are going to block your initiation. Avoiding creeps and heroes which are close to your target is relatively easy - you see them when you are aiming. What you don’t see are units that are close in front of your hero – sometimes an ally or creep moves in the last second and blocks your initiation. For very long range Hookshots it might be a good practice to step aside from your allies before shooting to make sure nobody moves and blocks your way. Just before you hit the button you can glance at the minimap to see if a unit is blocking you.

If you are uncertain what you are going to hit, you can cancel the animation by hitting the Stop button. For short-range Hooks, you can cancel that way to see how your enemy is going to move to dodge your Hook and afterward – to aim accordingly.

Control:

The stun from the Hook is AoE, which means that you can disable multiple units which are very close to each other. This could help you trap multiple people in your Cogs against melee lineups.

Furthermore, the stun goes through magic immunity. Because of this, you can use it to stop channeled abilities even when the caster has BKB or simply to control a BKB carry. Stunning a melee carry and trapping it inside the Cogs might prevent it from having any impact in a fight, which could help your team win even unfavorable engagements.

Escape:

 You can use your Hookshot on allied units to escape gank attempts. E.g. you can use it on a neutral creep camp which is far away from your opponents – thanks to the big Hook range, it will be very difficult to reach you. Make sure your hook doesn’t get body-blocked, however.

Skill Builds

The choice is usually between maxing Battery Assault and Rocket Flare:

  • Maxing Battery Assault will give you the maximum possible solo kill potential.
  • Maxing Rocket Flare will give you the most scouting, harassing and farming from a safe distance. It can also be useful if your teammates don’t have enough anti-push.

You usually start with one level in Cogs as the spell gives the most utility at lvl one - a very long disable for kill attempts, the possibility to disengage and save yourself if you need to and most importantly – the ability to control the creep equilibrium by locking in creeps.

Standard Battery Assault Build
Rocket Flare Build
Mixed Build
Power Cogs
1
Battery Assault
2
Battery Assault
3
Rocket Flare
4
Battery Assault
5
Hookshot
6
Battery Assault
7
Rocket Flare
8
Rocket Flare
9
Talent Icon
10
Rocket Flare
11
Hookshot
12
Power Cogs
13
Power Cogs
14
Talent Icon
15
Power Cogs
16
Hookshot
18
Talent Icon
20
Talent Icon
25
Pros: highest possible ganking and solo kill potential;
Cons: less last-hitting and active harass;

You go for this build if you want to focus on ganking, getting kills and pressuring the enemy team as much as possible. The high levels of Battery Assault make you dangerous even in the laning stage. Since you usually pick Clock for his ganking and solo kill potential, this is the most common build.

You max Rocket Flare second for the bonus damage which can help you secure kills. Also, the Rocket is a great skill to have in team fights as it deals good AoE damage. A value point in Cogs is usually enough to trap heroes during fights and pick-offs.

Power Cogs
1
Battery Assault
2
Rocket Flare
3
Rocket Flare
4
Rocket Flare
5
Hookshot
6
Rocket Flare
7
Battery Assault
8
Battery Assault
9
Talent Icon
10
Battery Assault
11
Hookshot
12
Power Cogs
13
Power Cogs
14
Talent Icon
15
Power Cogs
16
Hookshot
18
Talent Icon
20
Talent Icon
25
Pros: long-range last-hitting & harassing; AoE nuke damage for anti-push;
Pros: low solo kill potential in the laning stage;

This is the safest build as it allows you to have an impact from a safe distance. If the enemy lane is very strong, and committing to a kill is dangerous, it might be a better alternative to increase the potency of your Rocket spam. With it, you will be able to get farm and harass the enemy heroes from a safe distance.

Moreover, if the enemy heroes, especially supports (since they are your usual gank target), are naturally tanky and hard to kill (Earth Spirit, Sand King, Mirana), getting solo kills will not be an option throughout the early game. Therefore, you should get more levels in Rocket Flare to help your team in fights.

Furthermore, provided you have had a bad laning stage and you are under-leveled, maxing Rocket Flare will also make you more useful for your team. You might not be able to get solo kills, but you will give important scouting info, and you will harass the enemy team constantly. Rocket Flare harass is much more powerful when the enemy supports don’t have levels and farm, so having it maxed when you are lvl7 might actually prove to be a problem for them.

Lastly, Rocket Flare can be very useful against early push strats. Battery assault is hard to use in 5 on 5 fights, while Rocket Flare is great for anti-pushing and deals decent AoE damage in early fights.

Power Cogs
1
Rocket Flare
2
Battery Assault
3
Battery Assault
4
Rocket Flare
5
Hookshot
6
Rocket Flare
7
Rocket Flare
8
Battery Assault
9
Talent Icon
10
Battery Assault
11
Hookshot
12
Power Cogs
13
Power Cogs
14
Talent Icon
15
Power Cogs
16
Hookshot
18
Talent Icon
20
Talent Icon
25
Pros: good harassing and last-hitting potential; decent early-game kill potential;
Cons: not maximized kill potential around lvl6-7;

This is a very balanced build giving you the best of both worlds – kill potential with Battery Assault and harassing and last-hitting with Rocket Flare. You get Cogs on lvl1 as usual and afterward you have a choice to make: if you are having a hard time in the lane it is best to invest 1 point in Rocket Flare on lvl2 to secure some farm. If not you can go straight for two points in Battery Assault to threaten your opponents. In either case after the two points of Battery Assault, you max the Rocket Flare and come back to finish leveling Battery Assault afterward. As usual, you level Cogs last.

This build gives you very good tools in the early laning stage to both secure farm and threaten kills. The drawback is that around lvl6 your kill potential will be weaker than with the Battery Assault build, but often this is a price you need to pay in order to secure a good laning stage for yourself and set yourself up for success later on. The Rocket can be used not only to secure last hits but also to steal the creep wave more easily from behind the enemy tower if the lane is too hard to directly contest. You need to be within aggro range when you do this to pull the wave towards you.

Talents

-0,3s Battery Assault Interval

25

+50% Magic Resistance

+125 Rocket Flare Damage

20

Rocket Flare True Sight

+30 Battery Assault Damage

15

+15 Strenght

+25 MS

10

+5 Armor

Lvl10: If you have high physical DPS heroes against you, you should go for the armor. Otherwise, the MS is better for chasing down opponents.

Lvl15: Battery Assault can increase your kill potential and is actually decent for farming. The 15 strength is the safer choice, however, because you are in the middle of fights all the time.

Lvl20: If you are playing against any invis heroes, get the True Sight. You can also use it for cheap and easy dewarding. In other cases, get the damage.

Lvl25: The Battery Assault intervals are the offensive choice - they are extremely powerful if you can isolate a single target in fights because the BA hits come so often that the spell serves as a powerful disable. The Magic Resistance is the defensive choice - great against magic damage lineups.

Item Builds

Core Clock Build:

The build focuses on getting your core items as fast as possible.

After boots you go for Bottle since after the laning stage you will roam the map a lot with good access to runes and you will need something to sustain your mana and HP.

The fast Blade Mail is ideal versus heroes that deal a lot of AOE damage in fights (Gyro, Leshrac, Luna, etc.) or heroes that want to fight you inside the Cogs (usually melee carries). Agh’s right afterward will provide a huge CD boost to your Hookshot, allowing you to use it multiple times in a fight.

BKB is common in case enemies are controlling you and nuking you down after your initiation. You already have a high HP pool and magic damage defense from BKB, so Shiva’s is the best way to increase your EHP against physical damage (and makes your Hook initiation stronger because of the Ice Blast). Lastly, Octarine will make you tankier, decrease your spells CD and will allow you to use Hookshots even more often.

Starting items
Stout Shield
Tangoes
Healing_Salve_icon
Mango
Early game
Boots of Speed
Bracer
Phase boots
Magic wand
Bottle
Blade Mail
Mid game
Aghanim's_Scepter_icon
Black King Bar
Late game
Shiva's_Guard_icon
Octarine_Core_icon
Stout Shield
Tangoes
Healing_Salve_icon
Mango
Boots of Speed
Bracer
Phase boots

Phase Boots: extra survivability from the armor and chase potential from the MS burst.

Magic wand

Magic Wand: You will be fighting a lot, and the burst heal will often end up saving your life. Since you are in the middle of the fight most of the time, there will be no shortage of charges even if your opponents aren’t the greatest spammers.

Bottle

Bottle: you need a source of HP and mana sustain, and since you are roaming a lot you can afford to pick up most runes.

Blade Mail

Blade Mail:  You are a very aggressive hero and an initiator. Not only that, but you hold heroes next to yourself in the Cogs. This means that you will find a lot of opportunities to use the active of Blade Mail.

Having Blade might force the target locked in Cogs to decide to either deal damage to himself/herself, or not hit you at all - both outcomes are positive for you. This is especially powerful versus right-click carries.

Furthermore, when you jump into mass engagements, you will often be able to return a lot of the AoE damage of heroes like Gyro, Luna, Leshrac, etc.

Aghanim's_Scepter_icon

Aghanim’s Scepter: The item lowers the cooldown of your ult very significantly. It allows you to use it much more freely, even more than once in a single fight - not only as an initiation tool but for control and mobility inside the fight. Aghanim is a great snowballing item since it allows you to initiate on targets and get kills much more often.  The stats the item gives are also not wasted. The bonus HP makes you a harder target to kill, and the mana is useful since Hookshot is your most mana intensive spell. Having the extra mana will allow you to use Hookshot more often without worrying too much about the mana cost.

Black King Bar

BKB: Against teams with heavy magical DMG, BKB will be a lifesaver since you are often the easiest hero to focus. It could also buy you the freedom to move in the fight and use your spells more efficiently.

Shiva's_Guard_icon

Shiva’s Guard: If you want to make your initiation stronger in the late game, Shiva’s Guard is probably the best way to do it. The AoE slow, in addition to your control, is a great way to start a fight. Remember that you can click the Shiva active skill and jump with Hook afterward. As a result, the AoE when you enter the fight will be already big and will hit more heroes.
The very high INT the item gives might be redundant on Clock, however, the armor increases your EHP by a great margin, and the aura decreases the DPS output of the enemy team, so overall, the item is worth the high price.

Octarine_Core_icon

Octarine Core: Your spells are extremely disruptive in the late game - two or three Hooks and two or three Cogs in a single fight can disrupt enemy cores very easily. The stats are also nice.

Support Clock Build:

In this example you get only Stout and one set of Tangoes as starting items – the idea is to save some gold and buy Boots as soon as possible after the runes.

You get Force Staff instead of Blade Mail – it allows you to disengage after trapping someone inside your Cogs and it allows you to chase after enemies (especially if they have Force Staff themselves to get away from your Cogs). Force Staff is a core item in case you are under-leveled and under-farmed (which happens often for a pos. 4 Clock) because without it locking yourself in your Cogs with an enemy core could easily cause your death. If you have a good game and you are playing against a lot of AoE damage, however, you can still go for Blade Mail first.

Spirit Vessel is an ideal item for Clock – the HP sustain is amazing not only for him but for his allies as well, and the stats fit him perfectly. The negative Urn charge increases his kill potential against tanky opponents.

In the late game, you go for Lotus Orb – this way you can make yourself an unfavorable target to focus down after you initiate. Alternatively, if you don’t want to enter fights right-away you can use it on your front line tank.

Starting items
Stout Shield
Tangoes
Early Game
Boots of Speed
Magic wand
Tranquil Boots
urnn
Mid Game
Force staff
Spirit Vessel
Late game
Lotus Orb
Aghanim's_Scepter_icon
Stout Shield
Tangoes
Boots of Speed

Boots of Speed: Boots are absolutely crucial for Clock to get in range and use his Cogs and Battery Assault.

Magic wand

Magic Wand: You will be fighting a lot, and the burst heal will often end up saving your life. Since you are in the middle of the fight most of the time, there will be no shortage of charges even if your opponents aren’t the greatest spammers.

Tranquil Boots

Tranquil Boots: The great movement speed allows you to catch up to enemies and use your Cogs to trap them in the early game. Even more importantly, Tranquils is a great source of HP sustain.

urnn

Urn of Shadows: Urn is ideal for you because you will find charges more often than other heroes - you spend most of your time searching for kills. In addition, the stats are quite useful in the early game.

Force staff

Force Staff: The active ability is incredibly useful to Clock since it allows you to push yourself out of your own Cogs. This might sound redundant because you want to be inside and deal Battery Assault damage. However, versus powerful carries, staying inside the Cogs might turn out to be a suicide. By using Force Staff, you can initiate, disable the hero and disengage safely. 

Spirit Vessel

Spirit Vessel: Upgrading your Urn sooner rather than later is usually the right thing to do because the stats are amazing on Clock – you need the bonus HP to survive and the bonus MS to chase enemies down. Most importantly, the DOT is very strong for securing kills on tankier targets and is a great source of HP sustain for your team.

Lotus Orb

Lotus Orb: The active of the item is a powerful tool on Clock – if you use it on yourself when you initiate, you will make it very hard for enemy heroes to focus you with spells. Alternatively, you can save it in order to use it on your carries when they are getting focused down.

Aghanim's_Scepter_icon

Aghanim’s Scepter: The item lowers the cooldown of your ult very significantly. It allows you to use it much more freely, even more than once in a single fight - not only as an initiation tool but for control and mobility inside the fight. Aghanim is a great snowballing item since it allows you to initiate on targets and get kills much more often.  The stats the item gives are also not wasted. The bonus HP makes you a harder target to kill, and the mana is useful since Hookshot is your most mana intensive spell. Having the extra mana will allow you to use Hookshot more often without worrying too much about the mana cost.

Other Items

Early & Mid game
Drums
Meteor Hammer
Crimson Guard
Pipe
Heaven's_Halberd_icon
Orchid
Late game
Heart
Scythe of Vyse
Aeon Disk
Ethereal Blade
Drums

Drums: great stats for Clock - gives you mana regen, more HP and allows you to chase/catch people easier. Usually bought when you are ahead in the lane.

Meteor Hammer

Meteor Hammer: it gives decent stats, but most importantly – you have an amazing setup for it with Cogs. Hook into Cogs into Meteor will hold an enemy in place for a long time which will allow you to deal a lot of Battery Assault damage.

Crimson Guard

Crimson: If you are snowballing, a quick Vanguard might make you almost impossible to kill, and allow you to be even more aggressive. The very cost efficient EHP boost is amazing for a hero that jumps into the enemy team head first. If you are not farming amazingly, however, you might want to skip it – in case you get it too late, the damage block is not that great. Upgrading it to Crimson gives great utility to your teammates.

Pipe

Pipe of Insight: Pipe is a smart item choice if you are facing a team with high levels of magic damage (e.g. Zeus, Sky, etc.). It will not only provide utility to your team, but it will also make you tankier and allow you to play more aggressively.

Heaven's_Halberd_icon

Heaven’s Halberd: The very high EHP gain, in addition to decent damage for a very good price shouldn’t be underestimated. Furthermore, the Disarm is a great counter to fed carries. Generally, if you want to stay in the Cogs with a farmed carry, and don’t want to get a Force Staff to escape, a Heaven’s Halberd is a good investment.

Orchid

Orchid: Orchid is an ambitious item to build – you need an amazing early game to afford it. It is, however, the best counter to mobile heroes that can escape your Cogs like QoP, Storm, AM, Mirana, etc.

Heart

Heart of Tarrasque: If you are very rich and have the core items you need, you might want to get a Heart. The item will basically allow you to jump in the middle of the enemy team without worrying that you will die instantly if you get focused. This will simultaneously allow you to tank a lot of attacks and spells for your team, and survive to use your spells and have an impact.
It is best to get the item when you have something that gives armor for maximum EHP gain.

Scythe of Vyse

Scythe of Vise: if your team lacks control, Hex might be the answer. Hook into Hex provides a long single target disable.

Aeon Disk

Aeon Disk:  not a very common item pick for Clock, but can be really useful in the late game against enemies with high burst damage. Aeon Disk is very likely to save your life while you are in the middle of the fight and the damage you lose for the duration is irrelevant for Clock in the late game.

Ethereal Blade

Ethereal Blade: late game you have really high STR, so you could deal a lot of damage with E-blade. More importantly, however, it’s a great counter to enemy right-clickers for yourself or for your allies.

Early Game

Clock 350px

Clock is a versatile laner but because of his resource independence is always played as a pos. 3 or pos. 4. He is one of the very few heroes that can easily manipulate the creep equilibrium by blocking his own creeps with Cogs, which makes him an ideal hero for the offlane (either as a farmer or as a support). Moreover, his kill potential on low levels makes him a good roamer, especially if you are playing against slow and squishy heroes.

Farming:

Creep Equilibrium:

Clock’s biggest tool for securing farm for himself (or his lane partner) is his ability to repeatedly block the creep wave with his Cogs.

You can block the creeps a bit with the hero and when they are around you (as close to you as possible), you use Power Cogs. It is possible to get all creeps inside, which will prevent them from moving for 5 seconds.

In case your opponents aren’t blocking very well, this might make the waves meet under the tower, which is not ideal as your wave will gain momentum and push forward. If you want to be safe, you could choose to let one creep through and catch the other 3 in the cogs. The creep which is furthest behind (the ranged creep) is the best target since it will have to walk around the Cogs and will lose a second or two. This way the creep waves will meet close to their default equilibrium, but the creep you let through will die much faster and will give momentum to the enemy wave, bringing the equilibrium closer to your tower and allowing you to get last hits easily.

You can do this not only on the first wave but every time the equilibrium is not in your favor. This is why it is very hard for your lane opponents to control the lane, and zone you out of XP and farm range.

Power Cogs:

 Cogs are also useful for farming - not so much for getting the actual last hits, but for preventing your opponent from contesting the hits. If you hit the Power Cogs so that they push the enemy hero away and create a physical barrier between the creep waves and your opponent, it will be hard for him/her to get back to the wave in time to get the creeps. This will give you time to last hit and deny uncontested for a few seconds, which is great for getting the ranged creeps. Because of this, the timing of using power Cogs is actually important - it is best to use it when creeps are on low HP.

This technique is most useful against melee heroes as it is much easier hitting them with the Cogs before they try to last hit. Positioning yourself between the creep waves and a ranged opponent when you use Power Cogs could have a similar effect, but be careful not to take too much harass.

Rocket Flare:

 The long-range nuke can help you snatch last hits which you are not in range of getting. This is very useful if you are getting zoned out. You need to be careful, though, as the AoE damage from the Rocket Flare can push out your wave, which is sometimes undesirable.

Harassing:

As Clock you have trouble passively harassing like most melee heroes; however, to compensate, you have two ways to harass actively.

Rocket Flare is spammable and could be used to take last hits and harass at the same time. The problem with the spell is that on low level it deals very low damage, so if you are not going for a Rocket Flare build it’s better to preserve your mana for your other spells.

Power Cogs are your second source of active harass and your most common one since you don’t need a high level of the spell to use it for harassing effectively. The pushback from the Cogs burns the mana of enemy heroes and damages them slightly.

Kill Potential:

Your main source of kill potential is Battery Assault. Provided you manage to catch a hero relatively far from the creep wave with a high-level Battery Assault, you could, in theory, get a solo kill from full HP. The spell deals very serious damage, and if you combo it with Power Cogs, it is very hard to get away from it. The problem with getting kills with Battery Assault is that it is very easy for your opponent to stick close to the creep wave, and if there are enemy creeps close to your target, Battery Assault will be relatively useless. For this reason, the most important thing to think about is positioning. You can try to catch your opponent when he/she is away from the creep wave for some reason, deal some Battery Assault damage, and when he/she is coming close to the wave, you can use Cogs to isolate the target. Remember that even if the creeps are around the Cogs if only the target is inside, all the Battery Assault damage will go to your target and the Cogs will give you time to auto attack as well.

Before Hookshot, allies with good slows and disables can increase your kill potential in the lane a great deal because they will make it much easier for you to reach your target and use your spells. CM, SD, Bane, etc. are all great in this regard.

Of course, you become most dangerous at lvl6, when you get the Hook Shot as now you have your whole Combo. Hook into Battery Assault and Cogs could actually outright kill squishier targets, and if your lane opponent doesn’t fit this description, it is best to try and search for kills somewhere else.

If you don’t have a high level in Battery Assault, however, you will not be able to get solo kills as easily, and you need to think about where your allies will be able to help you finish a target off. The Hook initiation is still a formidable tool, and if you have an ally at your side that does good damage, getting kills is still definitely an option. After Hookshot, reaching the target is no longer a problem, but dealing enough damage might be when enemies become tankier. Heroes with good follow-up damage like Invoker, Sky, Lina, etc. shine in this regard.

Rotations & Timings:

  1. Clock is absolutely great at controlling the runes. Cogs allow you to push back enemies and secure the rune, but more importantly, the rune spots are far away from the lanes. This means that if you catch a slow and squishy hero there you can easily chase him/her down and secure a kill with Battery Assault. It will be very difficult for enemies to contest the runes, so make sure to abuse this as much as possible (moreover, a haste rune gives you huge kill potential).
  2. Lvl3 with two levels in Battery Assault and one level in Cogs in addition to Boots is a big timing for Clock. You have the speed, damage and control to threaten kills. You usually want to do this in your own lane, but rotation to another lane to gank is also not a bad choice if you know there are vulnerable heroes there.
  3. Lvl6 is an obvious rotation timing – use your Ult to set up an important kill for your allies.

Offlane Clock

Your top priority, much more important than anything else, is to get enough experience. Getting lvl6 as quickly as possible is your number one goal because it allows you to turn into q playmaker for your team.

After you succeed in doing this, you can try to get more out of the lane - e.g. cause problems for the enemy supports, harass, attempt kills, etc.

Control the creep Equilibrium with Cogs, get experience.
Harass back supports if possible and threaten kills.
Get last hits, especially when equilibrium is close to your tower.
Playstyle:

When the enemy supports are trying to zone you out, you generally want to fight back. You have decent armor and high HP, and if you manage to exchange hits, you might get the better end of the trade.

Clockwerk’s strength, however, doesn’t come from his attacks, but rather from his spells. If you see that the enemy support is overextending, this is when you can try to punish this mistake and get a solo kill. Try to get close to it, and activate Battery Assault. Start chasing, stick to your target, and when he runs towards his allies, activate Power Cogs and trap the target inside. This might prevent your other lane opponents from helping their ally, and allow you to get a solo kill. If you have Boots of Speed your chasing potential with Battery Assault makes you quite dangerous, and slow and squishy supports might not be able to harass you without help as they will put their lives at danger.

Surviving in the lane:

Initially, until you get your spells, you want to play more defensively. Prioritize blocking the camp and controlling the equilibrium, and if possible, try getting farm under your tower, but don’t go too far forward as you might die. Afterward, when you get more levels, you will become more dangerous, and trading harass, or even going for kill attempts is possible.

If you have a lane ally, of course, you can afford to play aggressively from earlier.

The strength of Clock in controlling the creep equilibrium means that unlike most offlane heroes, you rarely need to go in risky positions, yet you’ll still get resources.

If you are in risky positions for some reason, your Cogs could allow you to survive an initiation. What you must do is create a bit of space between you and your opponents and cast Cogs, ideally pushing them away. Then break the Cog which is in the opposite direction from them and run away. Not only will the Cogs disable them if they hit, but they will create a physical barrier between you and your opponents, which will make chasing very difficult for them. The most important thing is to try not to get your attackers inside the Cogs - this will most probably lead to your death.
Video Example:

He secures the rune with and afterward he immediately goes to his creep wave to block it. He manages to get the whole wave inside Cogs twice, which ensures an amazing creep equilibrium for him and gives him access to farm.

Once he has lvl3 and Boots, he dives Gyro with his creep wave under the tower and manages to secure a kill. Notice how he uses Cogs only when he's right next to him to ensure he doesn't accidentally push him away.

At minute 04:45 (game time) Venge stuns Bane and allows Clock to finish him off (Venge dies from this exchange). Importantly, however, Nongrata manages to take both 5-min bounties after the exchange - it would be too dangerous for Gyro to challenge him and even if he does he'll lose a lot of farm on the lane.

At minute 08:00 Nongrata gets jumped by Bane and Gyro. He demonstrates the strength of Cogs - he isolates Bane inside the Cogs with himself (and kills him with Battery Assault) while keeping Gyro out, disallowing him from dealing damage with Rocket Barrage.

Support Clock

You want to spend the first few minutes in the lane – this is important because, in order to reach your kill potential, you need lvl2 or ideally lvl3 and Boots. Once you have this, you can start rotating and attempting kills with Cogs and Battery Assault. Try to evaluate which lanes are most vulnerable to your pressure – slow, squishy heroes are your easiest targets. These are usually either the supports in the safe lane or a ranged farming cores.

Get experience. Control the creep equilibrium if needed.
Harass, mess up the last hits of the enemy cores and get denies with the help of Cogs.
Start rotating for kills once you have lvl2 or 3 and Boots.
Video Example

The first thing MSS does is to let his SF deny his Cogs in base to get bonus Necromastery damage - this makes SF much stronger in the first few minutes of the laning stage. Moreover, notice how MSS uses Cogs to control the creep equilibrium in the offlane despite not being the offlaner of his team. By doing these Cog tricks he secures a good start for his offlane and mid lane even before the creeps meet.

On the 00:30 minute game time he TPs to the mid lane to help his SF who is getting ganked. He manages to catch Rubick in his Cogs just on the edge of the tower range, which secures him a solo kill. He decides to stay mid to help his SF, who would otherwise have huge trouble laning against Huskar and Rubick. Simply staying there to deny creeps and tank Spear harass would make things much easier for the SF. Moreover, this way he soaks some XP from the mid lane and reaches a fast lvl2.

Once he gets his Boots (03:00), he immediately decides to rotate bottom where Axe is getting a lot of farm undisturbed. MSS finds him in the jungle and with the help of Mirana's Arrow (which is much easier to land when Axe is in the Cogs), they secure the kill.

On minute 03:40 (game time) he kills the enemy Naga. Notice how he waits for her on the high ground where she cannot see him. If he tried to make the move earlier, she might have simply run away. He hides outside vision for the Visage kill as well - he waits besides the secret shop because he knows Visage will try to take the 5-minute bounty rune. Notice how after Visage breaks the Cog, MSS blocks him with his illusion so that his hero can keep up with Battery Assault.

On minute 07:15 he knows that someone from Dire will teleport to defend the top tower. Because of this, he decides to enter the trees behind the tower to search for a target. Once he sees the Naga illusions, he understands he was right and manages to find and chase down the Naga.

Mid & Late Game

Clock Effigy

In the mid game, your goal is to be a tempo controller. Ganking is what you are most comfortable at; however, if your enemies stick together, then you should stick with your team and initiate favorable fights. In the late game, this initiation will be your main purpose, although you will need to counter split-pushers occasionally by scouting them out with Flare and ganking them with Hookshot.


Your priorities after the laning stage are the following:


Rotate for ganks and pressure the enemy farmers.
Scout with Rocket Flare to find good and avoid bad engagements.
Stick with your team if the enemy team is 5-manning and initiate fights favorably (this usually means Hooking the backline damage dealers or supports).
Comeback Potential:

If you get a lot out of the lane, probably you will be in a position to get solo kills. This will allow you to take more risky plays and be more aggressive. A bad laning outcome, on the other hand, will force you to gank only with help or to stick to your team. Be that as it may, your goal will be the same. You want to find pickoffs and initiate fights in order to win map control and create space for your team.

Team fights:

Before the fight starts, try to use Rocket Flare smartly. If there are initiators, think about where they might be hiding, and try to reveal them. Provided you manage to hit a Blink Dagger initiator with Rocket while it is away from the rest of the team, this will disable blinking, and will give you a valuable timing window to jump in.

In case you see all enemy heroes, and scouting is not required, the Rocket Damage is still not to be underestimated, especially on supports - you should use it as often as possible on enemy heroes. This will help you kill them off faster, once the actual fight starts.

Initiation:

The first important aspect of team fights for you is the initiation. The ideal start of a team fight is if you manage to get multiple heroes in your Cogs as this will allow your team to follow up with AoE abilities. The actual Hookshot stun is also important - when you stun multiple enemies at once, you give your team time to get in position and deal damage. Getting one target inside, however, is still a good start as you will be able to focus it down with Battery Assault.

Try to think if it is sensible to initiate from a big distance - will your allies have enough time to come and help you? If you manage to make a great initiation, but your allies are too far away, you might just feed.

You need to consider which target to try to get:

  • Your highest priority targets are black-line damage dealers like e.g. Tinker or Sniper. You have a huge initiation range and it relatively easy for you to get to them if you initiate from a good angle. Preventing them to freely deal damage to your teammates can easily win you the fight.
  • Hitting melee carries is also good if you have Blade Mail to man-fight of Force Staff to disengage  - while they are inside the Cogs, they will not be able to hit your allies, and your team will have time to bring them down. It is also possible to push them back with the Cogs towards your allies while separating them from their teammates. When doing this you will put yourself in danger, so try to disengage with Force.
  • Getting a support is also not bad since you will be able to kill the hero off quite quickly before it has had the time to have an impact on the fight.
  • Sticking close to targets with slow cast animations wit Battery Assault is also a smart move because it will make it almost impossible for them to cast their spells and contribute to the fight.

Video Example:

Nongrata initiates on the enemy Gyro as soon as he sees him in order to prevent him from entering the pit to contest Roshan. He activates Blade Mail and BKB and man-fights him inside the Cogs. Once the Gyro is dead he sees that his teammates don't need further help inside the pit (thanks to Agh's his Hookshot is up and he could jump in if needed) and chases down the enemy Mirana, finishing her off with Hookshot and the upgraded Battery Assault.

Pushing:

Split-Pushing:

Clock is a terrible split-pusher – he kills creep waves slowly and kills towers even slower. If you want to push-out a wave instead of going there yourself, you can use Rocket Flare to hit the enemy waves and give your own waves some momentum.

You can, however, easily punish enemy split-pushers by ganking them. You have a huge initiation range (one of the biggest in the game), so you can get in position for a gank quite easily. Moreover, you can even find them with Rocket Flare if they try to hide in the trees.

5-man Pushing:

While 5-man pushing you need to be positioned a bit away from your team (so that you don’t get caught before you initiate), ideally at an angle from which you will have a clear Hookshot. You want to counter initiate as your opponents are going for the defense. Initiating with a Hookshot behind the tower is also possible if you see an opportunity to jump on an ideal target, but be sure that your allies are in a position to follow up.

Before the actual fight, you need to try and use Rocket Flare as much as possible to reveal the enemy initiators. Throwing Rockets behind the tower is also a good idea since this is where most of your opponents will be gathered when they want to defend.
Ganking:

Mechanically, ganking for Clock is pretty straightforward: you use Rocket to scout or find the target if you need to, and then, you jump in with Hookshot. You activate your Battery Assault and catch the target in Power Cogs. While the target is blocked, you use the opportunity to auto attack (and cast Rocket if off CD) to deal additional damage. When the Cogs are over (or the target breaks them), you try to follow with Battery Assault to finish the kill.

Ideally, you will find initiation on heroes which are far away from their allies. If the target is tanky, you would want to jump in only if you have an ally able to follow up on your initiation. Otherwise, you wouldn’t be able to finish the kill fast enough. Remember that you are a great initiator, but you don’t deal too much damage. Battery Assault is quite considerable in the early and mid-game; however, the later the game goes, the harder it will be for you to finish off targets. Provided you are unable to kill a hero quickly enough, you risk being counter-initiated and dying. You are durable and hard to kill, but if you have used your Hookshot and Cogs for the gank, you will not have your defensive escape mechanisms off CD.

The most important thing to consider when jumping in is the positioning of other enemies. Whenever you see a lone hero, but you don’t see any of his/her teammates, you risk jumping into multiple enemies at once and throwing away your life for nothing. This is why vision is also central to the success of your ganks (you can use Rocket to scout if there are enemies behind your target).

Bear in mind that if you see your target it’s usually better NOT to use Rocket before initiating, otherwise you risk revealing your intentions to your target.
Map Control:

Clock gives map control in two ways. The first one is through vision, because of Rocket Flare. It is generally a good idea to use the spell very often to get the most vision out of it. Scout areas of interest (like the Rosh pit or Ancients), but also throw Rockets over the enemy jungle or lanes as often as possible - this way you will get the most information about the positioning of your opponents.

Since vision is vital for your ability to gank, Observer wards are crucial. You are not that item dependent - the success of a gank is more important to you than getting an item a bit quicker. You gain more from buying them than you lose. In addition, sometimes your squishy supports are not in position to go as deep into the enemy territory as you are and the most useful wards for ganking are exactly in such positions (Offensive wards).

The second way you provide map control is by forcing your opponents to position themselves more defensively because of your ganking potential. If they are constantly afraid of getting initiated upon, they will stick together.  Staying out of vision even when you are not ganking is helpful since it will make your enemies think that you are in position to attack. For instance, you can farm up jungle camps instead of a lane if another hero can take the creeps in the lane. This will give your team more space on the map, and your carries will be able to flash farm and split push more effectively.

Farming:

Farming with Clock is very straightforward. You use your Rocket Flare for some AoE damage, and you finish creeps off with auto attacks. You can use Battery Assault to kill off tanky jungle creeps faster. Spamming Rocket Flare on the lane creeps (while you are not there) is not likely to get you a lot of last hits. It is a good idea to do this only when you intentionally want to push out the lane. Otherwise, it is smarter to use the Flare for scouting.

In general, you shouldn’t farm passively. You always have something more productive to do and you don’t scale that well with items. The only time when farming is a good idea is when you are relatively close to finishing an important item (e.g. Aghanim’s Scepter), and you don’t want to take risks before you have it. In such situations, it is best to head into the jungle, finish the item and go back to ganking or sticking with your team.

If your opponents are walking together, you could farm as you will not be able to find ganking opportunities anyway. Nevertheless, if your opponents are walking as five, they are likely to try to push, or take Roshan. Whenever this is the case, you need to be with your team to initiate fights, so even if your enemy team is gathered, you might not get the chance to farm for long.