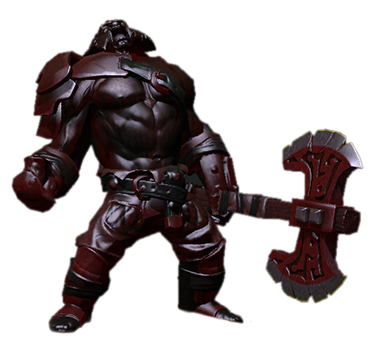
Axe Guide by bOne7
Artist: GunJunkie
Author:
bOne7 & Co.
Date: 01/2019
Tags:
text
Axe
Tactics
Analysis
Builds

Welcome

Welcome to bOne7's Book of the Axe, a hero guide part of the Book of Dota series!

Here you will find all the information you need to learn to play Axe on a high level – from drafting and builds to the optimal playstyle in different lanes and situations. We hope you’ll enjoy this guide and find it useful!

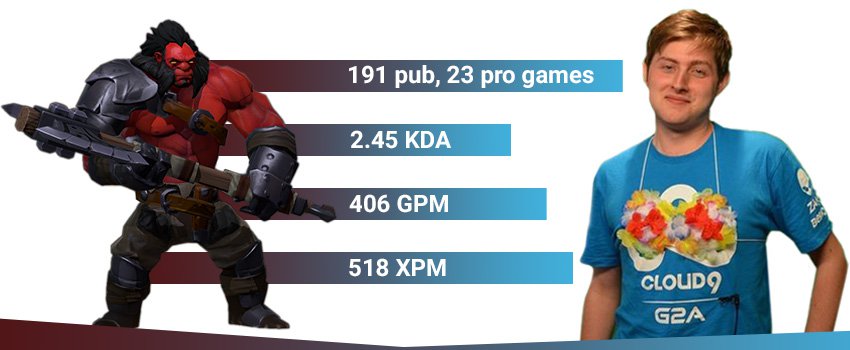
bone axe stats
TL;DR:

Draft: Try to pick Axe in drafts where you will be able to face mostly melee heroes – ranged heroes are hard to deal with in the lane and hard to catch in multiple-hero Berserker Calls later on.

Early Game: Axe is a flexible laner, so try to find the best lane matchup for him. Don’t simply automatically send him to the offlane – Axe is a relatively resource dependent hero and doesn’t like playing from behind, so a good laning stage is vital. If you have trouble in the lane focus on stacking and farming jungle camps.

Mid & Late Game: Keep farming – you need to be tanky to be efficient in fights. Try to find pick-offs together with your teammates. If the enemy team is moving as 5, stick close to your teammates but stay outside vision. Be patient and find good counter-initiation opportunities for multiple-hero Berserker Calls.

Authors

Pittner "bOne7" Armand
Endorsement & Info

bOne7 is a professional Dota 2 player playing primarily in the offlane position.

He rose to fame by being part of the legendary C9 lineup that made the most 2nd place tournament runs in premier events in the history of Dota. A TI veteran, bOne7 is without a doubt one of the most creative players out there and a great guy to learn from.

Nikolay "CTOMAHEH1" Kalchev
Info & Editing

CTOMAHEH1 started his pro career as a support in Basically Unknown together with Mind Control. Since then he has consistently been playing on the European T2 scene, most recently on Unchained Esports. 

His highest placement on the EU ladder is top 100 - he plays all roles (mainly support), which is untypical for high-ranking players and shows his great versatility and understanding of the game.

Kyril "MrNiceGuy" Kotashev
PM, Writing & Editing

Esports and gaming enthusiast since forever and founder of Dotahaven.

Has been playing Dota since 2005 (5.84). An Ancient I player in Dota 2.

Enemies need killing!

Axe is THE tank in Dota 2 – not only is he a survivable STR hero, but he has the rare ability to force enemies to attack him. He is one of the best initiators and a fun character to play because of his characteristic aggressive play style throughout the game and the flashiness of his ultimate.

Axe plays the role of a frontline tank and initiator in whatever position he is used. Even though he is a fully flexible laner, most often he is played as a solo offlaner or a solo safe laner. It is possible to run him at some offensive dual lanes or rarely - mid.

Axe loadout
Stats
Level 1
Level 15
Level 25
STR
25
Very High
64
High
92
High
AGI
20
High
51
High
73
High
INT
18
Medium
40
Low
56
Low
Attack
49-53
Low
88-92
Low
116-120
Medium
Armor
1.2
Very Low
6.1
Low
9.6
Medium
Resistance
26
Medium
29
High
32
Very High
HP
762
Very High
1640
High
2270
High
MP
291
Medium
555
Low
747
Low
MS
287
Low
292
Low
295
Low
STRENGHTS

MAJOR

Tank: Axe is a STR hero with high HP and a low CD self-buff that grants him loads of armor for a short period of time. This makes him very hard to take down especially with physical damage. Moreover, Counter Helix increases his damage output when enemies are attacking him, making him an unfavorable target to focus in fights.

Initiator: Berserker’s Call is a great tool for starting fights: it is a decently long AoE disable, it has a low CD (could be used multiple times in a fight) and it is great in the late game because it pierces spell immunity.

MINOR

Flexible Laner: Axe could adapt to different lane setups – he could go in any lane. Moreover, he could be a solo or a part of dual lanes. 

Culling Blade Team Utility: The MS and AS buff from a successful Culling Blade help your team catch up to enemies and secure the fight (or if needed disengage).

WEAKNESSES

MAJOR

Resource Dependent: First, in the early game, Axe needs his Dagger to initiate reliably and be active on the map. Second, when initiating Axe forces the enemy team to focus him. This is fine if he is an unfavorable target to focus, but if he doesn’t have enough tankiness from items and levels such initiations become suicidal, which prevents the hero from having a significant impact. This makes Axe a snowball hero – if you fall off in terms of resources at some point it becomes very hard to do your job.

MINOR

Low Mobility:  Axe has a lower than average MS and no mobility spell. This is a problem because in order to have an impact in fights he has to be in melee range. That’s why getting a Blink Dagger on the hero is extremely important. Moreover, Battle Hunger and a successful Culling Blade help mitigate the problem a bit.

Vulnerable to Magic and Pure DMG: Axe is very survivable against physical damage but not so much against magical. Moreover, because of his aggressive positioning in fights, he is an easy target to focus down with nukes.

Replays

Winstrike vs OG, TI8

MATCH ID: 4066688247
Replay:

Nongrata plays Axe against OG and finishes the game with a stat of 15-1-9 and the second highest hero damage in the game behind his Gyro (and ahead of his TA). He has 86 last hits (!) on the 10th minute (lane and jungle creeps) and together with his aggressive cores he snowballs extremely hard and secures a 24-minute victory. Notice that because of his good start and his team's lineup he decides to rush the Blink. He is his team's only source of reliable initiation and having the Blink is crucial to be able to start ganks and fights.

The other two cores on Axe's team (TA and Gyro) are heroes who can provide a lot of follow-up damage to his initiation. Moreover, they also love fighting after a good start (especially TA), which means they can match Axe's tempo and help him secure an early win.

Vega Squadron vs Gambit Esports, Dota 2 Asia Championships 2018

MATCH ID: 3727546662
Replay:

Chshrct plays Axe versus Vega squadron. Thanks to his roamers who help out in the lane every once in a while and his ability to jungle he has a great start – at the 10th minute mark he has 60 creeps, which gives him net worth equal to his carry Lycan. He manages to snowball, pressure a great deal the enemy team and win the game before the 30th-minute mark.

Thanks to his reliable initiation his OD manages to deal a lot of damage in team fights, while Axe can always counter the Shallow Grave from the enemy Dazzle when he tries to save his teammates.

The replay is a great example of how to find farm with Axe in the laning stage – Chshrct spends most of his time in the offlane, but he also finds a lot of farm in the jungles.

Drafting

Axe Effigy 1

Axe is reliable ganker and fight initiator and because of this is almost always useful to have in a game. His most notable interaction with other heroes is that he does very well against teams with multiple melee characters and that he works very well with nukers on his team.


In competitive Dota Axe is picked for two major reasons – his ability to do very well in the laning stage and his ability to initiate ganks and fights during the whole game.


A great plus Axe has compared to other utility initiator heroes (Magnus, Tide, BM, etc.) is that his initiation tool has a very low CD. This allows him to be much more active on the map than said initiators from early on. If successful, he could easily snowball out of control.

Moreover, he becomes very tanky as he initiates (because of the Call armor buff). This means that he has a larger margin of error than most other initiators. E.g. if Mag attempts a gank and messes up his RP this is a huge loss – not only does he lose the CD but he is very exposed to danger. Axe, however, has 40 armor to work with even if he misses the disable – he becomes a very hard target to bring down and an unfavorable hero to focus.

Equally importantly, Axe does fall off a bit in the late game in terms of kill potential and damage output, however, his usefulness as an initiator is always there – his disable goes through BKB, which is invaluable later on.

Last but not least, it is a great idea to pick an Axe against a team of melee heroes that tend to clump together or/and against masses of units.

Offlane Axe

Axe is a good offlaner for three main reasons:

  • He is a tanky and hard to kill target - STR hero with a defensive armor buff (Berserker’s Call).
  • He could easily fight back with the help of Counter Helix – if you manage to aggro the creep wave you could deal a high amount of damage to the enemy heroes nearby.
  • If he gets a favorable matchup (against melee heroes), he can easily stomp the lane and find a lot of farm.

Axe works significantly better in the offlane against melee heroes. For example, if he is facing a melee carry and a melee support in the enemy safe lane he could dominate the lane 1v2. If he is facing a ranged carry and two ranged supports that are good at harassing, however, he could struggle getting anything out of the lane at all. Axe has trouble controlling the creep equilibrium – if he wants to use Counter Helix he needs to draw the creep aggro, which pushes out the lane. This amplifies his problems against ranged heroes.

Bear in mind that if he is struggling in the lane he has the option leave it and rotate into the jungle to get farm. This “insurance” in case the laning phase doesn’t turn out very well adds to the reliability of the hero in this position.

Offensive Lanes

Axe is a dominant laner against melee heroes and because of this reason, it is possible to use him to shut down the development of your opponent’s melee farmers and supports. Combining him with supports that have high harass or kill potential is a great way to do this.

Even if you cannot directly pressure the enemy heroes (e.g. they are using the safety of their tower) with Axe you have the option to creep skip, which would ensure you get all the farm in the lane and would force the enemy farmer to last hit under the tower. This is easier to do with a lane partner because if your opponents decide to focus you, you can fight back instead of having to run all the way back to your tower.

Safe Lane Axe

There are three main reasons why you would want to put Axe solo in the safe lane:

  • He dominates melee heroes and most offlaners are melee. This means that you could rely on the Axe to win his lane without lots of help from your supports.
  • In the safe lane, he could farm the lane and the jungle at the same time – he pushes out the wave with Helix and goes into the jungle to stack/farm the closest camps.
  • He needs resources early on. Getting a fast Vanguard makes him very hard to deal with and increases his farming speed further (e.g. he could farm Ancients). Getting a fast Blink Dagger allows him to rotate and be active on the map. In most lanes, you would have to choose one of the two routes. In the safe lane, because of having access to a lot of farm in the laning stage you can get both items very fast and snowball out of the laning stage.

Even though it is rarer to put Axe mid, it could be done and it follows the same logic as the solo safe lane Axe. If he has a good lane matchup (against a melee hero, Broodmother for example) he will be able to dominate the lane, push out the wave and stack/farm the nearby jungle camps to get both a mobility and a tankiness item.

Synergy

Good friends to have are:

Nukers: Lion, Lina, TA, SF, Luna, PA

Lion
Lina
Templar Assassin
Shadow Fiend Portrait
Luna
Phantom Assassin
Culling Blade has great synergy with heroes that burst down enemies quickly.

Culling Blade requires your target to be below a certain HP threshold. You can disable the target for 3 seconds – ideally, you want the enemy hero to reach the HP threshold before the disable expires. The best heroes to help you achieve this are heroes that deal high amounts of damage for a short period of time. With such characters in your team, you are also less reliant on taunting creeps and other units for Helix damage – Calling even only one target could be enough if your teammates with nuke damage are close enough to set up for the Culling Blade kill.

Heroes with saves: Dazzle, Omni, Abaddon, Shadow Demon, Oracle

Dazzle Portrait
Omniknight portrait
Abbadon
Shadow Demon Portrait
Oracle Portrait
Axe plus a defensive hero with protective spells is a great combo.

Combining Axe with a hero that can keep him alive is a good tactic, especially in the early game. The reason is that because of his fighting style Axe is constantly tanking damage and such partners can allow him to be even more aggressive than usual and pressure his opponents even more. Moreover, Berserker’s Call allows Axe to keep his targets in melee range, which is extremely useful for Dazzle and Omni’s heal (it guarantees it’s going to damage the enemy hero) and for Abaddon’s Shield (enemies attacking Axe are likely to break the Shield and take the damage).

Medusa

Medusa deserves a special mention since she has synergy with Axe on many levels. First, she is an auto-attack hero without a reliable disable – Axe provides her with great control, which allows Medusa to attack her enemies freely (this applies to any carries that need space to attack in the fight). Second, by using Berserker’s Call on enemies Axe forces them to look towards him. This could be used to force enemies to look towards Medusa while she is casting her ultimate behind Axe. The Call disable is long enough to ensure enemies are going to turn into stone.

Counters

Strong Against:

Melee Heroes: Bristleback, Lycan, Riki, PA, Jugg, Slark, TA

Bristle Portrait
Lycan
Riki
Phantom Assassin
Juggernaut
Slark Portrait
Templar Assassin
Axe shines against teams with multiple melee heroes in all stages of the game.

Axe is good against melee heroes at all stages of the game: In the laning stage, Counter Helix could dominate heroes that need to go close to the creep wave. Later on, melee heroes tend to clump up, which makes counter-initiating and hitting multiple-hero Berserker Calls much easier.

High damage melee cores (like Jugg or PA) are extremely vulnerable to Call + Blade Mail. In addition, if you hit a melee hero with Berserker’s Call you can run towards your team or use Force Staff – when you do this the enemy hero will follow you and get out of position (this doesn’t work for ranged targets since they can still reach you with attacks while you are running away).

Axe is good against all melee heroes, but the squishier the better – easier to get the hero inside Culling Blade range. Bristleback is not squishy by any means, but he is in this group because with Call you force him to look towards you (and your team), which is a great counter to his passive.

Mass units (illusions or summons): PL, Naga, Meepo, Brood, Prophet

Phantom Lancer
Naga siren
Meepo
Broodmother Portrait
Nature's Prophet Portrait
Axe is very efficient against mass units because of his AoE disable and Counter Helix.

Here the reason is quite simple – calling multiple units increases the chance of Counter Helix procs which increases Axe’s overall damage output. Against such targets, you are less reliant on the follow-up of your team when you initiate ganks because often the Helix damage would be enough to bring the target in Culling Blade HP range.

Dazzle Portrait

Dazzle deserves a special mention because he has an interesting interaction with Axe – Culling Blade is the only spell in the game that directly counters Shallow Grave. You can kill a target with Culling Blade even after Shallow Grave is used on it. This makes Axe a very useful hero to have against Dazzle, especially in the later stages of the game. It is worth mentioning, however, that in the early game Dazzle works well against Axe. His slow is useful for kiting him and even more importantly – Axe tends to be surrounded by many units (he wants Helix procs), which makes him extremely exposed to the Healing Wave damage.
Even though Dazzle is a good hero against Axe early on, Culling Blade is the only direct counter to Shallow Grave in the game. 

Weak Against:

Heroes with high magical/pure damage output: OD, Timber, Silencer, Lina, QoP, Leshrac

Outworld Devourer
Timbersaw
Silencer
Lina
Queen of pain
Leshrac
Axe is much less survivable against heavy magical damage dealers.

Axe’s survivability comes from high HP pool combined with very high armor from Call. Magical and pure damage doesn’t get reduced by armor – this means that even when he initiates with Call, magic damage dealers could focus Axe and kill him.

Heroes that cancel Blink Daggers: Zeus, Venomancer, Sniper, Clock

Zeus Portrait
Venomancer
Sniper
Clockwerk
Waiting for the perfect time to counter-initiate could be very hard against heroes with good vision and tools to break the Dagger.

As all initiators/counter-initiators, Axe has trouble playing against heroes that could mess up the Blink initiation by breaking the Dagger with some long ranged damage.

OD & SD

Outworld Devourer
Shadow Demon Portrait

Disruption and Astral Imprisonment are two of the greatest spells against Axe. You can use them to hide Axe or even better - hide your teammate and allow everyone to hit Axe while your teammate is safe.

Skills

Axe Berserker's Call
Axe Battle Hunger
Axe Counter Helix
Axe Culling Blade

Axe taunts nearby enemy units, forcing them to attack him, while he gains bonus armor during the duration.

STATS

Cast Animation: 0.4+0.5

Radius: 300

Armor Bonus: 30

Duration: 2/2.4/2.8/3.2

CD: 16/14/12/10

Mana: 80/90/100/110

Berserker's Call

Mechanics:

  • Affects units through invisibility and spell immunity;
  • Affected units are issued an attack command on Axe and cannot undertake any new actions for the duration (items, movement, abilities, etc.);
  • If Axe cannot be attacked (e.g. Ghost Scepter) the affected units will simply face his direction and wait until he becomes attackable;
  • The effect stops if Axe dies;

Offensive Use:

Offensively Berserker’s Call is quite straightforward. You want to use it on enemy heroes for the disable in order to set up kills.

Use Call on multiple units: You usually want to cast it in range of as many units as possible for more Counter Helix procs. This will increase your DPS output and usually isn’t more dangerous than Calling one hero: The bonus armor + Stout is enough to deal with multiple physical attacks. Moreover, in most games, the major physical damage dealers on the enemy team are one or two heroes. Most other units deal minor damage with attacks and Calling them wouldn’t noticeably increase the damage you take. On the contrary – most supports and utility heroes deal damage with spells. Calling them will disable them and wouldn’t allow them to use said abilities – in that sense taunting the whole enemy team could actually be much safer than Calling only one or two heroes.

While the enemy is disabled you have two main options:

The first option is to start attacking your target in order to increase your DPS and to bring the hero inside the Culling Blade HP threshold.

The second one is to walk towards your team (or use a mobility item) – the enemy hero would be forced to follow and could get out of position, allowing your team to secure the kill. This is much easier to do on melee heroes because ranged heroes could continue attacking you even as you walk away. The obvious drawback of this tactic is that you will deal much less spin damage and the kill relies entirely on the follow-up of your allies.

Defensive Use:

Call gives you a very significant armor buff, which makes it a great defensive spell.

Use Call when disengaging: The 40 bonus armor would make you very hard to kill with physical attacks. If possible you want to cast call in range of your attackers. This way they wouldn’t be able to use spells to control you or damage you, which could buy you valuable time.

Use Call when tanking creeps: Creeps (and towers) deal physical damage, which means that you can significantly decrease the damage you take by using Call. This is extremely useful when farming stacked camps, especially large or Ancient camps.

Enrages an enemy unit, causing it to be slowed and take damage over time until it kills another unit or the duration ends. Axe gains movement speed for each unit affected with Battle Hunger.

STATS

Cast Animation: 0.3+0.5

Cast Range: 750

Damage per Second: 16/24/32/40

Move Speed Slow: 12%

Self Move Speed Bonus: 12%

Duration: 12

CD: 20/15/10/5

Mana: 50/60/70/80

Battle Hunger

Mechanics:

  • Axe gains 12% MS for EVERY enemy with the debuff – the effect stacks; because of the CD and duration the maximum number of stacks is 2;
  • Denying friendly targets also removes the debuff, however, killing illusions does not;
  • The affected unit has to take the last hit itself – kills with illusions or other units do not remove the debuff on the hero;
  • Deals damage in 10 instances – 1 each second;
  • Deals a total of 160/240/320/400 damage before reduction;
  • A high level (low CD) Battle Hunger is a great counter to Linken’s Sphere (important because your ultimate is blocked by Linken’s);

Use for utility:

More often than not the most valuable aspect of Battle Hunger is the slow/MS increase. You can use it to chase a hero down, to run away or simply to increase your MS in fights. Always try to apply the spell on a unit that would have trouble removing the debuff – ideally one that doesn’t want to get slowed.

Use for damage:

Battle Hunger’s damage is significant in the early game. Consequently, you should use it during the laning stage to harass your opponent. If you are laning against a melee hero, you can easily zone him out by using Battle Hunger and Counter Helix. To do this you need to apply the debuff and position yourself between the enemy hero and the creep wave. If he comes close to take the last hit and remove Hunger you can issue an attack command on the hero to draw the enemy creep aggro and start spinning to deal even more damage and make removing the debuff very costly. Combined with Berserker’s Call this could even result in a kill.

Since Battle Hunger has a long casting range, it is a good idea to apply the debuff on heroes that are running away on low HP. If they don’t find a target to last hit they could possibly die to the DoT. In such cases combining a Battle Hunger with a negative Urn charge is a great idea.

When attacked, Axe performs a helix counter attack, dealing pure damage to all nearby enemies.

STATS

Radius: 275

Proc Chance: 20%

Damage: 60/100/140/180

CD: 0.45/0.4/0.35/0.3

Counter Helix

Mechanics:

  • Triggers when the attacking unit deals the attack damage – missed or canceled attacks cannot trigger Helix;
  • Does not trigger from extra/bouncing attacks like from Split Shot, Sleight of Fist, Moment of Courage, Moon Glaive, Flak Cannon and Death Ward;
  • It deals pure damage;

Uses and tips:

Counter Helix is your primary source of damage in the game and the main reason you want to get focused on as many units as possible. The more units are hitting you, the higher the chances of a Counter Helix proc and the higher your overall DPS.

For that reason if you manage to Call multiple units Counter Helix gives you a lot of kill potential – it could be enough to bring your primary target down to Culling Blade HP threshold.

Use attack command on enemy heroes to draw creep aggro: Since you want creeps to focus you in order to spin more often, it is a great idea to draw the creep aggro. The easiest way to do this is to issue an attack command on an enemy hero. The hero doesn’t have to be nearby – you can click attack on a hero in another lane and the enemy creeps near you will still attack you.

Don’t attack your target while chasing: If you are chasing a target down and enemy units are hitting you (ranged creeps, etc.) the best thing to do is to keep close to the enemy hero without attacking. If you attack, the attack animation will help your opponent get out of Counter Helix range because your hero will stop moving. If you don’t, a couple of lucky spins could help you secure the kill. A great benefit of this trick is that if you keep up with your target for long enough you will be in range for Berserker’s Call when it becomes available.

Of course, if you are faster than your target (it is slowed from something or you have the MS boost from Hunger or Culling Blade) you can afford to attack a couple of times since you can attack and keep up at the same time. Issuing attack commands when you are outside of attack range (you wouldn’t immediately start the attack animation) is a good idea since it will help you keep the creep aggro.

Axe spots a weakness and strikes, instantly killing an enemy unit with low health, or dealing moderate damage otherwise. When an enemy hero is killed with Culling Blade, its cooldown is reset, and Axe and nearby allied units gain bonus movement speed.

STATS

Cast Animation: 0.3+0.5

Cast Range: 150

Kill Speed Bonus Radius: 900

Damage: 150/250/300

Kill Health Threshold: 250/325/400

Kill Move Speed Bonus: 30%

Kill Attack Speed Bonus: 30

Kill Bonus Duration: 6

CD: 75/65/55

Mana: 60/120/180

Aghanim's Scepter

Applies Battle Hunger on nearby enemies after a successful Culling Blade.

Culling Blade

Mechanics:

  • Doesn’t go into CD when successfully killing a hero – this allows you to use it multiple times in a fight;
  • The damage of the spell is applied only if the target is above the HP threshold;
  • The killing blow kills the target by dealing the HP threshold as HP removal damage. Because of this if the target gains more health than the killing blow deals for some reason (e.g. Bloodrage, Flesh Golem) at the exact time Culling Blade is cast, the target could survive;
  • Culling Blade removes all buffs and status effect from the target before killing it. This is the reason why it works through Shallow Grave;
  • It pierces through spell immunity – it could also be cast on the enemy courier but doesn’t refresh the cooldown.

Uses and tips:

Perfect Timing: Using Culling Blade for its regular damage is a big waste – you trigger the long CD of the spell and you don’t get any of the utility. Because of this, the most important thing about Culling Blade is to watch if your target is within the HP threshold. When it enters the threshold it is always a good idea to use the spell in order to get the MS and AS – even if you are not fighting but ganking, the MS would help you in a possible counter-gank.

Click the enemy hero:  The surest way to time your Culling Blade right is to click on the enemy hero. I.e. you jump in with Berserker’s Call, click attack on the hero and if you want you cast Battle Hunger – from this point on you don’t need to micro your hero. Because of this, you can afford to click on your target and start observing its HP. Once below the threshold you select your hero (easiest with F1 or any other custom “select hero” key) and use Culling Blade right away. If you do this you will ensure you never miss-time your ultimate, which is one of the most important aspects of fighting with Axe.

Use the overhead health bar lines: If you cannot afford to select your target because you are issuing other commands on your hero/there are many units you need to check/you don’t have time; you can use the overhead health bar lines to determine if your target is within the HP threshold. By default the thin lines represent 250HP. This means that with a lvl1 Culling Blade if you don’t see any lines the target is within the threshold. For lvl2 and 3 if you see only one line, the target is within the threshold (for lvl2 the actual HP needs to be close to the line). With an Aghanim’s, the target is within the threshold if you see two lines and the actual HP is extremely close to the second one.

Be mindful of instant heals: Magic Wand, Mekansm or other healing tools/spells could mess up your Culling Blade by taking the unit outside of the HP threshold just as you cast your spell. This will not only save the target but will trigger the CD of your ultimate, decreasing your impact in the fight. A good player would almost always wait until he is within the threshold and heal as he sees you trying to cast the spell. Because of this while selecting the enemy hero to check its HP it is a great idea to take a look at the inventory and see if he has a healing tool.

Skill Builds

Axe has a relatively straightforward build philosophy:

Counter Helix is your main DPS tool, it is very useful for harassing, kill attempts or farming and because of this you usually want to prioritize it.

Berserker’s Call is your main initiation tool and you want to have as many levels in it as possible especially when you get Blink.

Battle Hunger gives you a lot of utility on lvl1 and because of this you usually want one value point. Investing more points, however, will help you bully your lane opponent.

You get Culling Blade whenever it is available.

On level one you usually want to save your skill point – Counter Helix is the usual choice because it is most useful in the jungle or the lane, but in case a fight breaks out you could get a kill with an early level in Call for the disable or Hunger for the slow.

Standard Build
Lane Dominance Build
Axe Counter Helix
1
Axe Berserker's Call
2
Axe Counter Helix
3
Axe Battle Hunger
4
Axe Counter Helix
5
Axe Culling Blade
6
Axe Counter Helix
7
Axe Berserker's Call
8
Axe Berserker's Call
9
Talent Icon
10
Axe Berserker's Call
11
Axe Culling Blade
12
Axe Battle Hunger
13
Axe Battle Hunger
14
Talent Icon
15
Axe Battle Hunger
16
Axe Culling Blade
18
Talent Icon
20
Talent Icon
25
Pros: high farming potential; good control early on;
Cons: low chase potential & low DOT;

This is the standard build for a reason – you have maximum levels in Counter Helix, which means you can push out the lane really fast and you can also farm in the jungle. The early levels of Berserker’s call give you kill potential, especially if you need to disable targets for your allies. Lastly, the point in Hunger gives you utility in case you need to chase/run away. It is a viable option to get faster levels in Berserker’s Call if you feel you need a longer disable – in case your allies have good DPS output and you want to get kills from early on. Moreover, if you are getting a very fast Dagger having max Call when you have it is quite important. 

Axe Counter Helix
1
Axe Battle Hunger
2
Axe Battle Hunger
3
Axe Counter Helix
4
Axe Berserker's Call
5
Axe Culling Blade
6
Axe Battle Hunger
7
Axe Counter Helix
8
Axe Counter Helix
9
Talent Icon
10
Axe Battle Hunger
11
Axe Culling Blade
12
Axe Berserker's Call
13
Axe Berserker's Call
14
Talent Icon
15
Axe Berserker's Call
16
Axe Culling Blade
18
Talent Icon
20
Talent Icon
25
Pros: maximum harassing and damage against melee heroes; high kill potential;
Cons: lower level of Counter Helix mean slower farming; lower level of Call – short disable and lower survivability;

Choosing to go for extra levels in Battle Hunger is a good idea if you aim to dominate your lane 1v1. With the help of Counter Helix, you can zone out your opponent and constantly harass with Hunger. The main decision you need to make is how much points to put in Battle Hunger. Higher levels let you dominate your lane harder, but slow down your farming speed and even more importantly – reduce your initiation potential. Moreover, with the lower levels of Call, you gain less armor, making you a bit easier to kill.

Talents

+120 Battle Hunger DPS
25
+100 Berserker`s Call Axe AoE
Attacking Procs Counter Helix
20
+20 Health Regen

+40 MS

15

+3 Mana Regen

+40 Attack Speed
10
+8 Strength

Level 10: Most of the games, where you are a true position 3 initiator and your DPS output doesn’t matter as much, you will go for the Strenght talent. Nonetheless, taking the attack speed one with Power Treads early on and with the level 20 talent about Counter Helix attack procs will increase your overall DPS greatly. The AS talent allows you to pub-stomp harder.

Level15: It`s up for you to decide, 3 Mana regen is very useful for Axe since you don’t have much mana and allows you to spam your spells much often, but 40 MS combined with Tranquil or Travels can be very good too.

Level 20: almost every time you would like to take attacking procs Counter Helix for some extra DPS. Your regen problem should be solved by items by now. Nonetheless, in some games where tanking a lot of damage is the priority and you have a lot of HP items, going for the Regen is absolutely viable.

Level25: This talent totally depends on the game. If you see that AoE call might win you a fight go for it, but 120 Battle Hunger damage is a lot. Still, if your main job is to initiate fights, the Call AoE is the safer choice.

Offlane Axe Build

As offlane Axe, you need to buy as much regen as possible in your starting items to stay in the lane. In the early game you want Tranquils to help you regenning without constantly buying consumables and you want to get yoru Blink as fast as possible to start ganking.

If you have a good laning phase you can decide to go for Vanguard before Blink – this will make you much more survivable and will allow you to be aggressive. If you are going for Vanguard, you can skip the Tranquils because the Ring will give you the needed regen.

After Blink your options are open. In this example we recommedn Blade Mail to counter physical damage dealers and Shadow Blade to make finding pick-offs and initiating easier.

In the late game you go for BKB to counter magical damage and disables and Heart to make yourself almost unkillable.

Starting items
Stout Shield
Tangoes
Healing_Salve_icon
Mango
Early game
Tranquil Boots
Bracer
Magic wand
Blink_Dagger_icon
Mid game
Blade Mail
Shadow_Blade_icon
Late game
Black King Bar
Heart
Stout Shield
Tangoes
Healing_Salve_icon
Mango
Tranquil Boots

Tranquil Boots: Tranquils give you a lot of HP regen, which is extremely useful because with Axe you tend to tank a lot of damage. If you get it early it will help you farm the jungle faster – a great trick is to drop the boots before you engage a creep camp. This way the Tranquils will not break and you will be able to start regenerating life immediately when you pick them up.

Bracer
Magic wand

Magic Wand: The burst heal is extremely useful for surviving in the middle of the fight and the burst mana gain could give you the needed mana to use your ultimate multiple times. Additional HP sustain is always useful since you tank the creeps very often in the lane.

Blink_Dagger_icon

Blink Dagger: Dagger is your only true core item because it is extremely important for your initiation potential. It allows you to blink next to enemies and immediately cast your Call, disabling them for 3.2 seconds and allowing your allies to follow up your initiation. Without Dagger, it is much more difficult to get in range for Berserker’s Call.

Blade Mail

Blade Mail: Blade Mail is a natural item choice because you can force enemy heroes to hit you. It shines against carries that deal heavy physical DPS. Moreover, casting Blade Mail when you initiate will discourage enemies who are outside your Berserker’s call range to focus you down with spells.

Shadow_Blade_icon

Shadow Blade: the invisibility is great for finding pick-off opportunities or to position yourself for a better initiation in fights. You can also use it to disengage after initiating if you need to.

Black King Bar

BKB: If you are getting nuked down with magical damage in fights or you are getting kited and disabled, BKB is the best option. Moreover, the stats it gives are largely not wasted on the hero.

Heart

Heart Of Tarrasque: The synergy with the hero is quite obvious – the item makes Axe extremely tanky and gives him absurd HP sustain to keep himself on max HP between fights.

Core Axe Build

Your starting items are a standard melee farmer build that gives you enough sustain in the lane.

In the early game, you rush your Vanguard. This speeds up your farm and allows you to be aggressive against your lane opponents. If you need more sustain faster you can opt to go for Tranquil Boots, but in a 1v1 situation this is usually not necessary and you can choose more aggressive boots - Phase.

After Vanguard you immediately rush your Dagger in order to be able to initiate ganks and fights around the map. Your goal is to complete a fast Blade Mail to make your ganks even deadlier and you upgrade your Vanguard to make yourself and your teammates even more survivable.

Since you have a good HP pool (from the Vanguard/Crimson) you decide to increase your EHP even further by getting a Shiva’s Guard. This is a great choice if the enemy team deals primarily physical DPS. In the super late game, you choose to go for Octarine Core to further increase your tankiness and impact in fights – the lower CD on your items and on Call is great for multiple Blink Calls in a single engagement.

Starting items
Stout Shield
Tangoes
Healing_Salve_icon
Mango
Early Game
Quelling Blade
Ring of health
Magic wand
Phase boots
Vanguard
Mid Game
Blink_Dagger_icon
Blade Mail
Crimson Guard
Late Game
Aghanim's_Scepter_icon
Shiva's_Guard_icon
Octarine_Core_icon
Stout Shield
Tangoes
Healing_Salve_icon
Mango
Quelling Blade
Ring of health
Magic wand

Magic Wand: The burst heal is extremely useful for surviving in the middle of the fight and the burst mana gain could give you the needed mana to use your ultimate multiple times. Additional HP sustain is always useful since you tank the creeps very often in the lane.

Phase boots

Phase Boots: the armor is useful when you're not protected from Call and the burst MS is great for catching up to enemies before Dagger.

Vanguard

Vanguard: Since you force enemy creeps and heroes to focus you with attacks each time you initiate, Vanguard is a great item to reduce the incoming damage and to keep you alive in fights. If you get the item fast enough you could afford to play very aggressively and put pressure on the enemy team. Moreover, it helps you take less damage when farming creeps and gives you additional HP sustain, which increases your farming speed.

Blink_Dagger_icon

Blink Dagger: Dagger is your only true core item because it is extremely important for your initiation potential. It allows you to blink next to enemies and immediately cast your Call, disabling them for 3.2 seconds and allowing your allies to follow up your initiation. Without Dagger, it is much more difficult to get in range for Berserker’s Call.

Blade Mail

Blade Mail: Blade Mail is a natural item choice because you can force enemy heroes to hit you. It shines against carries that deal heavy physical DPS. Moreover, casting Blade Mail when you initiate will discourage enemies who are outside your Berserker’s call range to focus you down with spells.

Crimson Guard

Crimson Guard: If you are going for Vanguard you would usually want to upgrade it to Crimson at some point to make your slot more cost efficient for the late game. If your team needs the item, however, you can opt to buy it ASAP to make everybody tankier to physical damage.

Aghanim's_Scepter_icon

Aghanim’s Scepter: The item makes you tankier and gives you a bigger mana pool, which is useful. Most importantly, it makes your ultimate easier to use (and more powerful). The rule of thumb is to get Aghanim’s if you are having a very good game because it could allow you to snowball even harder. Otherwise you can skip it.

Shiva's_Guard_icon

Shiva’s Guard: Shiva’s active ability makes your initiation more powerful and the aura counters the physical damage dealers on the enemy team. Moreover, the big armor buff makes you even tankier against physical damage.

Octarine_Core_icon

Octarine Core: Great late game item to increase your impact in fights, mainly because of the CD reduction on your Blink and Berserker`s Call. The spell life steal from your Helix is also decent. The big mana pool increase makes it possible to buy a Refresher in the super late game if you need to keep your enemies disabled for longer.

Other Items

Early/Mid Game
Arcane Boots
urnn
Spirit Vessel
Force staff
Euls
Hood
Guardian Greaves
Late Game
Boots_of_Travel_1_icon
Linken's Sphere
Lotus Orb
Mjollnir_icon
Assault_Cuirass_icon
Refresher orb
Arcane Boots

Arcane Boots: Arcanes solve all your mana issues, but don’t have the benefits of the other boot choices. Because of this, it is a good idea to go for Arcanes only if you are going for an unconventional Guardian Greaves build, which is also not a bad option if your team needs it.

urnn

Urn of Shadows: All of the stats Urn gives are very useful on Axe – the STR for tankiness, some mana sustain and most importantly the active skill could help you finish off kills or sustain yourself or your allies. Usually, you skip Urn in order to get your core items faster, but if your team doesn’t have another hero to carry Urn it is not a problem to pick it up. Also if you need, you can upgrade it to Spirit Vessel.

Spirit Vessel

Spirit Vessel: Situational Item for Axe, but synergizes very well since it gives him more HP and MS.

Force staff

Force Staff: Force is very useful both for initiating and disengaging. Usually, you want to build it after Blink Dagger since Blink is a much superior item for initiation. You can even opt to get Force in the late game if you have trouble surviving after you initiate with your Blink into Call. You can wait for the armor buff duration to end and disengage with Force, which will allow you to re-initiate when your skills are off CD.  A trick you can do against melee opponents is to Call them and afterward use Force Staff on yourself towards your teammates. This way the melee opponents in the Berserker’s Call will walk after you for 3 seconds and get out of position.

Euls

Eul’s Scepter: The bonus MS is useful for catching up to targets or disengaging and the disable could be used as a setup for your Berserker’s Call (you need to time the spell very carefully to hit exactly when Cyclone ends). The mana regen is useful for farming with Berserker’s Call. The obvious drawback is that you are investing a considerable amount of money that doesn’t give you any tankiness.

Hood

Hood: Berserker’s Call gives you a lot of armor, which means you are not vulnerable to physical damage. If you have Hood, you are quite tanky to magical damage as well. In that sense getting the item even only for yourself is not a bad idea, and if your team needs it you can upgrade to Pipe.

Guardian Greaves

Guardian Greaves: The Guardian Aura is very powerful on Axe because it makes him hard to finish with attacks inside fights even when he doesn’t have Call. The HP regen is also very useful. The obvious problem is that Axe is an unconventional Mek carrier mainly because he doesn’t have the mana and needs to rush his Dagger first. Nonetheless, the Arcane Boots solve this problem to a degree, which enables the hero to go for Greaves if the game allows it.

Boots_of_Travel_1_icon

Boots of Travel: Allows you to split-push and join fights easily, which increases your farm a lot. It also has synergy with the MS talent as you become extremely fast. 

Linken's Sphere

Linken’s Sphere: A good item to counter powerful single target nukes or disables. The HP and Mana sustain are useful outside fights and the stats make you a bit tankier.

Lotus Orb

Lotus Orb: The active Echo Shell ability is extremely powerful on Axe – the reason is that when you cast it on yourself and initiate, it would be extremely difficult for enemies to focus you with any kind of skills. This is a huge problem because you are the first hero in the fight and the first target that is available to focus down. Moreover, the stats aren’t bad on Axe – the HP and mana sustain are useful outside fights, while the armor makes you even tankier to physical damage.

Mjollnir_icon

Mjollnir: Mjollnir’s active buff is extremely powerful on Axe because he can force multiple units to hit him, which means more Static Charge procs and more AoE DPS. Moreover, if you go for the AS talent and the attacks proc Helix tallet, Mjollnir means even more Counter Helix procs which increases your DPS a great deal. 

Assault_Cuirass_icon

Assault Cuirass: If you are facing a team of physical damage dealers and you want to buy something useful for your own carries, getting Assault is a good choice. The minus armor and AS aura will make your right-clickers more powerful, while the huge armor buff will make Axe even tankier against physical damage. The AS is useful if you have the attacks proc Counter Helix talent.

Refresher orb

Refresher Orb: Since Berserker’s call is an AoE disable that goes through magic immunity, in the very late game doubling its duration could simply win you the fight – 6 seconds of disable are usually more than enough for your carries to kill of the whole enemy team. The drawback of the item is that it is very expensive and the stats that it gives are rather minimal. Because of this you usually want to build Refresher in the super late game.

Early Game

Axe 350px

Axe is a dominant laner and more often than not you want to use his qualities to achieve an early game lead and possibly shut down some opponent heroes. Nonetheless, playing more passively to get your core Dagger ASAP is not a bad strategy as well, because it will increase your ganking potential. 


Very generally speaking, if you are facing melee lane opponents it is better to play Axe in the lane and pressure them with Counter Helix. If you are facing strong ranged heroes, however, it might be a better idea to get your Dagger first and apply pressure afterward.

Farming:

Axe has an average attack animation and damage for a melee hero. His strength in last-hitting, however, comes from Counter Helix. Even on very low levels you can take the creep aggro and nuke down the creep wave by spinning. You even have the option to creep-skip (back-creep) if you have enough sustain.

In order to activate as many Counter Helix procs as possible, you need to aggro the whole enemy creep wave. The best way to do it is to give an attack command on an enemy hero while within 500 range of the creeps. The hero doesn’t have to be nearby – if there is no enemy in the lane you can click an attack on an enemy hero in another lane.

One thing you need to take into account is that with Counter Helix you will constantly be pushing the creep wave. This is not necessarily a bad thing – you will force the enemy hero to last hit under the tower and you will give yourself the free time that you can use to farm the jungle, to control runes, etc. If you want to preserve the equilibrium you need to last hit only with attacks.

Harassing:

Helix:

Your main tool for harassing is Counter Helix. All you need to do is to give an attack order on the enemy hero when it is nearby. This way you will aggro the creep wave and while your opponent is in range you will deal spin damage to him. Obviously, this is much easier to do on melee heroes because they need to get close to the creep wave in order to take last hits and you can harass with Counter Helix every time they do that. Ranged heroes are harder to reach, however, it is not impossible to harass them with Helix. For example, if a ranged opponent walks towards you to harass you with attacks you can take the creep aggro and chase after them (without attacking if they are running away in order not to fall behind because of the attack animation). While the ranged creep and possibly the melee creeps are hitting you, there is a chance you will spin and deal damage; don’t overdo this because you can easily get out of position.

Berserker’s Call is another way to ensure your enemy gets hit by Counter Helix spins (the most reliable way if you manage to Call the opponent and all of the creeps). The problem with this is that it is mana intensive. It is ok to do it from time to time, but you need to make sure you have enough mana for your spells when you actually want to attempt a kill.

Hunger:

Your other main tool for harassing is Battle Hunger (if you choose to level it up during the laning stage). It deals considerable damage, but the big problem is preventing your opponent from getting a last hit – if he/she manages to get one soon after you have used Battle Hunger this means you have done nothing but wasted your mana.

One way to prevent your opponent from getting last hits is by zoning him out of last hit range. If the creep equilibrium is close to your tower you can simply stay between him and the creep waves. If he comes close you can start fighting him – the damage from Counter Helix, your attacks, and Battle Hunger is likely to push him backward, otherwise, he risks dying. If the enemy reaches the creep wave you can use Berserker’s Call just before he is about the take a last hit – while disabled you can pressure him with damage or you can even simply deny the creep.

Another way to prevent your opponents from dispelling Battle Hunger is to time your spells in-between creep waves. If your opponent has nuked your creep wave down, there is a gap of time until the new creep wave arrives, and you can use it to cast Battle Hunger.

Surviving:

Your main defensive mechanism is Berserker’s Call. You could simply use it as an armor Buff to prevent the damage your opponents deal to you with attacks, or you can use it as a disable to buy yourself time to get to the safety of the tower.

Another useful trick is to cast Berserker’s Call and use a TP scroll. If the heroes attacking you don’t have a disable (or have already used it), they are unlikely to kill you during the TP duration only with attacks because of the bonus armor.

Another skill you can use defensively is Battle Hunger. Even at lvl1, it gives you a 12% MS boost and it slows down the enemy hero by 12%. Because it has a decently long cast range you can use Battle Hunger before the enemy hero is in range to initiate on you with a disable. The MS boost will help you to get out of danger.

You are a very tanky hero and you are very hard to focus down thanks to Counter Helix and Berserker’s Call, however, you shouldn’t forget that you don’t have any mobility spell or escape mechanism. If you overextend you are very likely going to pay with your life. This means you shouldn’t be over-aggressive if you don’t see dangerous heroes on the map.

Kill Potential:

There are two aspects to Axe’s kill potential – damage and control:

Damage:

Axe has a rather high kill potential during the early game, but it is very dependent on dealing damage with Counter Helix spins. This means that your kill potential is highest when there are multiple units hitting you and very low when you are fighting a single unit.

Since Counter Helix is based on chance, you cannot reliably get kills. However, if you attempt kills often when you have the opportunity to do so, you will increase your chances to get lucky – with a few fast consecutive spins you can surprise your lane opponent and get a solo kill.

To get the most damage possible you need to get a Berserker’s Call on your target and the whole creep wave (if possible even on multiple heroes – the more units the more spins). During the disable you need to right click your target for additional damage and you need to apply Battle Hunger for the additional damage and slow. It will allow you to chase - if your target is relatively fast, you shouldn’t attack in order not to fall behind. Simply chasing while the creeps are hitting you will likely result in a few spins that can secure the kill. If the target is significantly slower, however (e.g. you have Boots + Battle Hunger, while the enemy hero has no boots), you can auto attack for additional DPS.

The final portion of your damage comes at lvl 6 – Culling Blade increases your kill potential a great deal because it allows you to finish off targets you have damaged with Spins during the Call.

Control:

Unlike your damage, your disable is very reliable if you can get in range to cast it. This opens opportunities to get kills even if the enemy hero is not standing exactly next to his creep wave. You can initiate with Call and Battle Hunger and your allies can follow up to deal damage and secure the kill.

Because of this, the main problem is getting next to your target to cast Call. The best way to reliably do so is by getting Blink Dagger. Hence, the Dagger is your most important timing during the laning stage and it might be a good idea to focus on farming before you get the item.

Without Blink Dagger you need to get next to your target by walking. You should initiate from the fog of war and most likely you need to be faster than your opponent in order to catch up to him/her. This is usually the case when you have your Boots (Tranquils give a lot of MS if they are not broken) and you cast Battle Hunger on your target. Alternatively, you can follow up the initiation of an ally with a long ranged disable.

Timings and Rotations:

Boots: Boots are your first important timing because with higher MS you could catch up to targets and use Call. This means that after you get Boots (ideally upgraded for the bonus MS) you have the option to attempt ganks. Ideally, you would want to gank with boots when you have at least 1 level in Hunger, Helix and Call (lvl3 or 4). This way with the slow from Hunger and the disable from Call you can be sure you will be able to reach your target and disable it. Helix, of course, gives you damage.

Blink Dagger: Blink is by far your most important timing – when you get the item you can initiate very reliably. You need to use this to get pick offs and to start favorable fights. It is a great idea to buy yourself a smoke and attempt a gank right after getting your Dagger. The sooner you hit this timing, the less prepared your opponents would be.

Rotating for kills: The main factor here is what heroes you are playing against. If your opponents are slow and squishy and cannot kite you, you can rotate from early on and use your kill potential to pressure the lanes. Opponents with escape mechanism or strong control spells that can kite you, however, are much harder to gank without Blink Dagger. Because of this, you need to carefully choose which lane you are ganking – unsuccessful attempts delay your Blink Dagger, but in the same time you want to use your laning potential to help out your team win the laning stage even before you have your mobility item.

Safe Lane Axe

Get as much farm and XP as possible;
Use your and harass potential to pressure your lane opponent;
Consider rotations;
Playstyle:

You have two goals in the safe lane – to get your Vanguard + Boots + Blink Dagger ASAP and to pressure the enemy offlaner.

The first one is simple – try to get every last hit. When you have HP sustain you can aggro all creeps on you and flash farm them with spins. This will buy you time to move into the jungle and farm the closest camp. It is even possible to stack camps to increase your farm rate or even better – ask your supports to do it for you.

Harassing depends heavily on what hero(es) is playing against you. Since most offlaners are melee heroes, you will effectively be able to harass and zone out with Helix. Don’t forget that Berserker’s Call + Helix + Battle Hunger also gives you good kill potential. Aggro the creep, wait for your supports to initiate and then follow up with call and Hunger. The spin damage should be more than enough if the creep wave is hitting you.

If your team needs you to start rotating and helping the other lanes out get your Dagger ASAP. Otherwise, start with the Vanguard – it will give you sustain early on, you will be able to pressure your opponent much more and it will increase your farming speed. This means that your Dagger would not be delayed much. Moreover, having Vanguard gives you lots of EHP and when you initiate with Dagger it is much harder for the enemy team to kill you.

Offlane Axe

Use your early game potential to create problems for the enemy safe laners;
Get as much farm and XP as possible;
If struggling, rotate into the jungle to get your core items;
Playstyle:

The reason to put Axe solo offlane is to use his early game potential in order to slow down the development of the enemy carry and to occupy the enemy supports. This means that your play style in the lane is very dependent on who the enemy heroes against you are. In a lane against multiple melee heroes, you should have an easy time harassing and finding farm, while against powerful ranged heroes you could have difficulty reaching the creep wave. Because of this against heroes who are able to zone you out, you will need to transition to the jungle fast.

If your lane opponents have trouble zoning you out, you should try to harass with Counter Helix. Aggro the creep wave and chase after your opponents for Helix damage. By doing this you will not only harass but also take last hits, XP and will make it more difficult for your opponents to farm. Try to manage your HP - if you take too much damage you will not be able to play aggressively at all. Sustain yourself with consumables and your passive regen and don’t over-commit. If multiple heroes are man-fighting you and you don’t have Call it is better to back out. You should also back off if your opponents manage to get out of Helix range because they will start kiting you.

If you manage to get your sustain item (usually Tranquils) fast, you will be able to remain in the lane for longer. This doesn’t necessarily mean that you will get more farm and XP than in the jungle, in fact, you usually won’t. The reason to stay for as long as possible in the lane is to slow down the development of the enemy carry and to occupy the enemy supports. By doing this you are creating space for your teammates. If you rotate into the jungle the carry will get free farm and the supports will be free to pressure your other lanes or to get resources from their jungle.

If you are not in position to play aggressively, try to leech as much XP as possible. Fight back the enemy support trying to zone you out to stay in XP range. When you get some levels in Call and Helix you might be able to play more aggressively. If not, you can simply transition into the jungle because you are not achieving much in the lane anyway.

1 vs 1 in the Offlane

If you find yourself in a 1vs1 situation you have basically two choices. The first one is to play normally, the same way as in the safe lane – aggro the creep wave, harass your opponent, try to zone him out. Even take an early level in Battle Hunger if you think it will help you zone out and win the 1v1 match up. This way of playing is especially efficient versus melee heroes and you should be able to win such a 1v1 situation.

If you are in an unfavorable matchup (vs strong ranged laners), the most efficient way to deal with such a situation is to start cutting the creep wave – intercept the enemy creep wave behind the enemy T1 tower. This has two benefits: First, you will get 100% of all last hits. Second, you will force the enemy hero to last hit under the tower. This could be a big problem for your opponent because ranged heroes don’t go for Stout Shield and they tend to buy less regen – tanking the creep wave under the tower would be very costly for them.

The drawback of this tactic is that it is risky – any rotation from a support might get you cornered. You don’t have an escape mechanism, which means that you will have to fight and you are unlikely to survive (it is a very long way from the safety of your own tower). Because of this, when creep skipping make sure you have good vision in the enemy jungle. If you see an enemy hero rotating (or TP-ing), you can simply run away from danger before he/she reaches you.

Video Example:

Axe and Sky is a great combo because they can pressure very hard the enemy safe lane and at the same time they have great ganking synergy after the laning stage – Blink > Call > Mystic Flare > Culling Blade is pretty much a guaranteed kill even on tanky heroes.

To counter this, however, the enemy team puts Venomancer + Undying against them in the lane. This is a nightmare lane for Axe: Veno is ranged, has great magic harass and a lot of slows, which makes it very difficult for Axe to fight back with Helix. On top of that, Undying’s Decay spam will gradually make Axe squishier.

Notice how Chshrct plays the lane:

Sky and Axe start playing aggressively on lvl1 – Undying and Veno need a couple of levels to harass more effectively, so pressuring them on lvl1 is the best way for Axe and Sky to get some sort of advantage in the lane.

As Veno and Undying become stronger, Axe starts playing much more passively. He stops trying to harass them and focuses solely on getting farm. Notice how he messes up the creep equilibrium of his opponents on minute 6 to ensure a big creep wave pushes into his tower, giving him a source of safe farm. 

By the end of the laning stage, he even starts stacking and farming the jungle camps, which gives him a further boost in farm and allows him to finish the laning stage at about the same net worth as the enemy safe lane farming Veno.

Mid & Late Game

Axe Effugy 2

In the mid and late game, Axe is all about pressure. He doesn’t scale amazingly into the late game (although his disable and his ultimate provide good utility), so your priority shouldn’t be farming. Instead, you should search for ganks and if your opponents are moving as 5 – initiate favorable team fights.


Focus on farming only if you are not in a position to be aggressive – don’t fall behind in terms of farm because you need survivability items to properly serve the role of a tank.

Find gank opportunities together with some allies;
Initiate team fights;
Farm luxury items;
Timings:

Besides Blink Dagger, which is your most important timing (and hopefully it comes before the mid and late game), Axe doesn’t have timings that change his play style.

During the whole game, you are an initiator of ganks and fights. Each bonus level or luxury item simply makes you tankier and harder to deal with, which allows you to initiate more aggressively.

Comeback Potential:

After a very bad laning stage, your first priority should be to somehow finish your Blink Dagger. Without it, you cannot serve your role in the game as an initiator. Try to find space to farm it and join fights afterward.

After you get it you can initiate reliably and you need to help your team regain map control. Try to find pick-offs. When you are under-farmed, however, you wouldn’t be as hard to kill and you wouldn’t be able to do as much damage. This means that you need to be careful how you initiate. Don’t jump into the whole enemy team – you are not going to survive such an initiation. Moreover, you will not be able to find solo kills – you need your allies to provide the needed damage. Don’t be over-aggressive – find fast pick-offs together with the best gankers on your team and retreat.

Team Fights:

Counter-initiation:

Since you are the initiator, your major concern is how to start the fight. Ideally, you want to disable multiple units with your Berserker’s Call. The easiest way to do this is to counter-initiate when the enemy team is collapsing on an ally. Even though you are likely to be the tankiest hero on the team, sometimes the best decision is to be patient and to enter the fight at the right moment rather than to be at the front lines from the start.

Single target initiation:

The other alternative you have is to try to find an important pick-off at the start of the fight. If your team has good nuke damage you can simply initiate even on one target, allow your allies to follow-up and nuke the enemy hero down with the help of Culling Blade. If you are successful you will be able to fight 5v4 and even more importantly – the MS buff from Culling Blade will make it harder for your opponents to disengage.

Of course, the risk of doing this kind of fight initiation is that you open yourself to the counter-initiation of the enemy team. Even if they cannot reach your teammates, you could get nuked down with magic and pure damage. If you have good farm, however, (most importantly for this case BKB) it will be very hard for the enemy team to focus you down because of your tankiness.
Make sure not to over-extend, however.  If you drag your allies too deep into the fight the enemy team would be able to ignore you and focus them instead.

Focusing the right target is also extremely important. For example, if you jump on the enemy initiator and nuke him down your teammates wouldn’t have to be afraid of the counter-initiation. Alternatively, if you have Blade Mail and you jump on a hard-hitting enemy carry you could, in theory, nuke it down very fast and eliminate the biggest damage dealer.

Bringing targets out of position:

Remember that with Call you can make targets chase after you, especially if they are melee heroes. This is extremely efficient if you have Force Staff. This gives you the option to Call the front line hero from the enemy lineup and to make it overextend so that your teammates can focus it down while the enemy team is too far to help right away. This is still a risky move, though. You are disabling a single hero, which means that the rest of the team is free to focus you down after your initiation. Because of this, the best opportunity to make this move is when you know the positioning of your opponents and you know the rest of the enemy team wouldn’t be able to easily counter initiate (in other words you are catching heroes out of position).

Disengaging:

Your Call has quite a short CD (10 sec call, 12sec Blink Dagger). This means that after your initial initiation you can disengage (easier with Force Staff), wait for your abilities to cool down and re-initiate.

Utility:

Besides initiating as best as you can, the second thing you need to make sure is that you land correctly your first Culling Blade. If you miss, it will go into CD and your team wouldn’t be able to benefit from big AS and MS boost, which is very important for team fights.

Last, cast Battle Hunger on a target which would have trouble getting a last hit in order to gain the MS boost. When chasing after your opponents cast it on the target you want to catch

Pushing:

5-man pushing:

In 5-man pushes, you have two possible ways to play.

The first option is to stand at a safe distance and be ready to counter initiate – this is the best alternative if you have other good front line tanks because it will maximize your initiation potential.

The second option is to play the role of the front line tank, hitting the tower. The idea is that it is unfavorable for the enemy team to focus you because you are very hard to bring down (Call makes you extremely tanky to physical DPS). This is a good alternative if you have another good counter initiator.

Either way, Axe is not a great pusher and ideally, you should only do it when you have some kind of obvious advantage (numbers advantage, big resource lead, etc.).

Split-Pushing:

Axe can push out waves relatively fast thanks to Counter Helix. The problem is that he deals very low damage to buildings and he cannot disengage if caught. With Axe, you usually push out the creep wave and move into the jungle rather than continue split-pushing. A trick you could do to make your push faster is to use Culling Blade on an enemy creep – this will buff your own units. Doing this will activate the Culling Blade CD, so it is best to do it when you have Aghanim’s.

In the late game with Axe, you want to stay close to your teammates rather than to split-push by yourself in order to be in a position to initiate or counter-initiate fights.

Ganking:

Ganking with Axe is very straightforward – you initiate with Blink + Call if possible near multiple units for more Counter Helix spins. Your allies follow-up and you finish the kill with Culling Blade. You get a MS boost which helps you chase further targets or quickly disengage to avoid any counter-ganking.

Solo ganking with Axe is generally a bad idea because your damage output is quite unreliable even if you are decently farmed. This means that you are reliant on your teammates. Since you want to be as active as possible, it is a good idea to try to organize your teammates. Take the initiative and urge some of your allies to gank together with you, don’t simply wait for an obvious opportunity.

Your most important job is to make your opponents constantly fear your initiation. You can achieve this by always staying out of vision, placing wards in the enemy jungle while you rotate for ganks and smoke ganking the enemy every chance you get.

A well-executed gank by Axe:

  • He uses Shadow Blade to avoid being scouted by wards and initiates on the enemy Ember, preventing him from using his escape mechanism.
  • Doing the gank together with his DK means they have enough damage to secure the kill very fast. 
  • Axe sees that Veno is teleporting to help his Ember and uses Shiva’s Guard just in time to cancel Veno’s Blink Dagger. This secures them another kill.

Map Control:

Your main task is to create space for your teammates that need it in order to farm. You cannot provide vision with your skills, so you rely heavily on wards to find good gank opportunities and to initiate fights favorably. Try to stay out of vision as much as possible so your enemies feel threatened.

Farming:

Your main tool for farming remains Counter Helix – tank creep waves and creep camps to proc Counter Helix more often. You deal AoE damage, so stacking will increase your farming speed.

If you are taking too much damage you can use Call to gain additional armor.

If you fail to intercept the creep waves you can aggro them by using Call or by issuing an attack command on an enemy hero somewhere on the map.

The most important thing to remember while farming is to try to stay out of vision most of the time. You are the initiator on your team and when you are visible the enemy team will feel safer and farm more aggressively. Consequently, it is a good idea to farm mostly in the jungle. If you are very hard to kill you can even farm the enemy jungle to free yours for your allies. For example, if you have BKB and your enemies don’t have disables piercing spell immunity you can easily avoid dying with BKB + Call + TP.